Before you enable front-end paid submission, decide which submission model you want to use:
- Per Listing = users pay for each listing they submit
- Membership = users buy a package that includes a number of listings for a set period
Choose the submission model
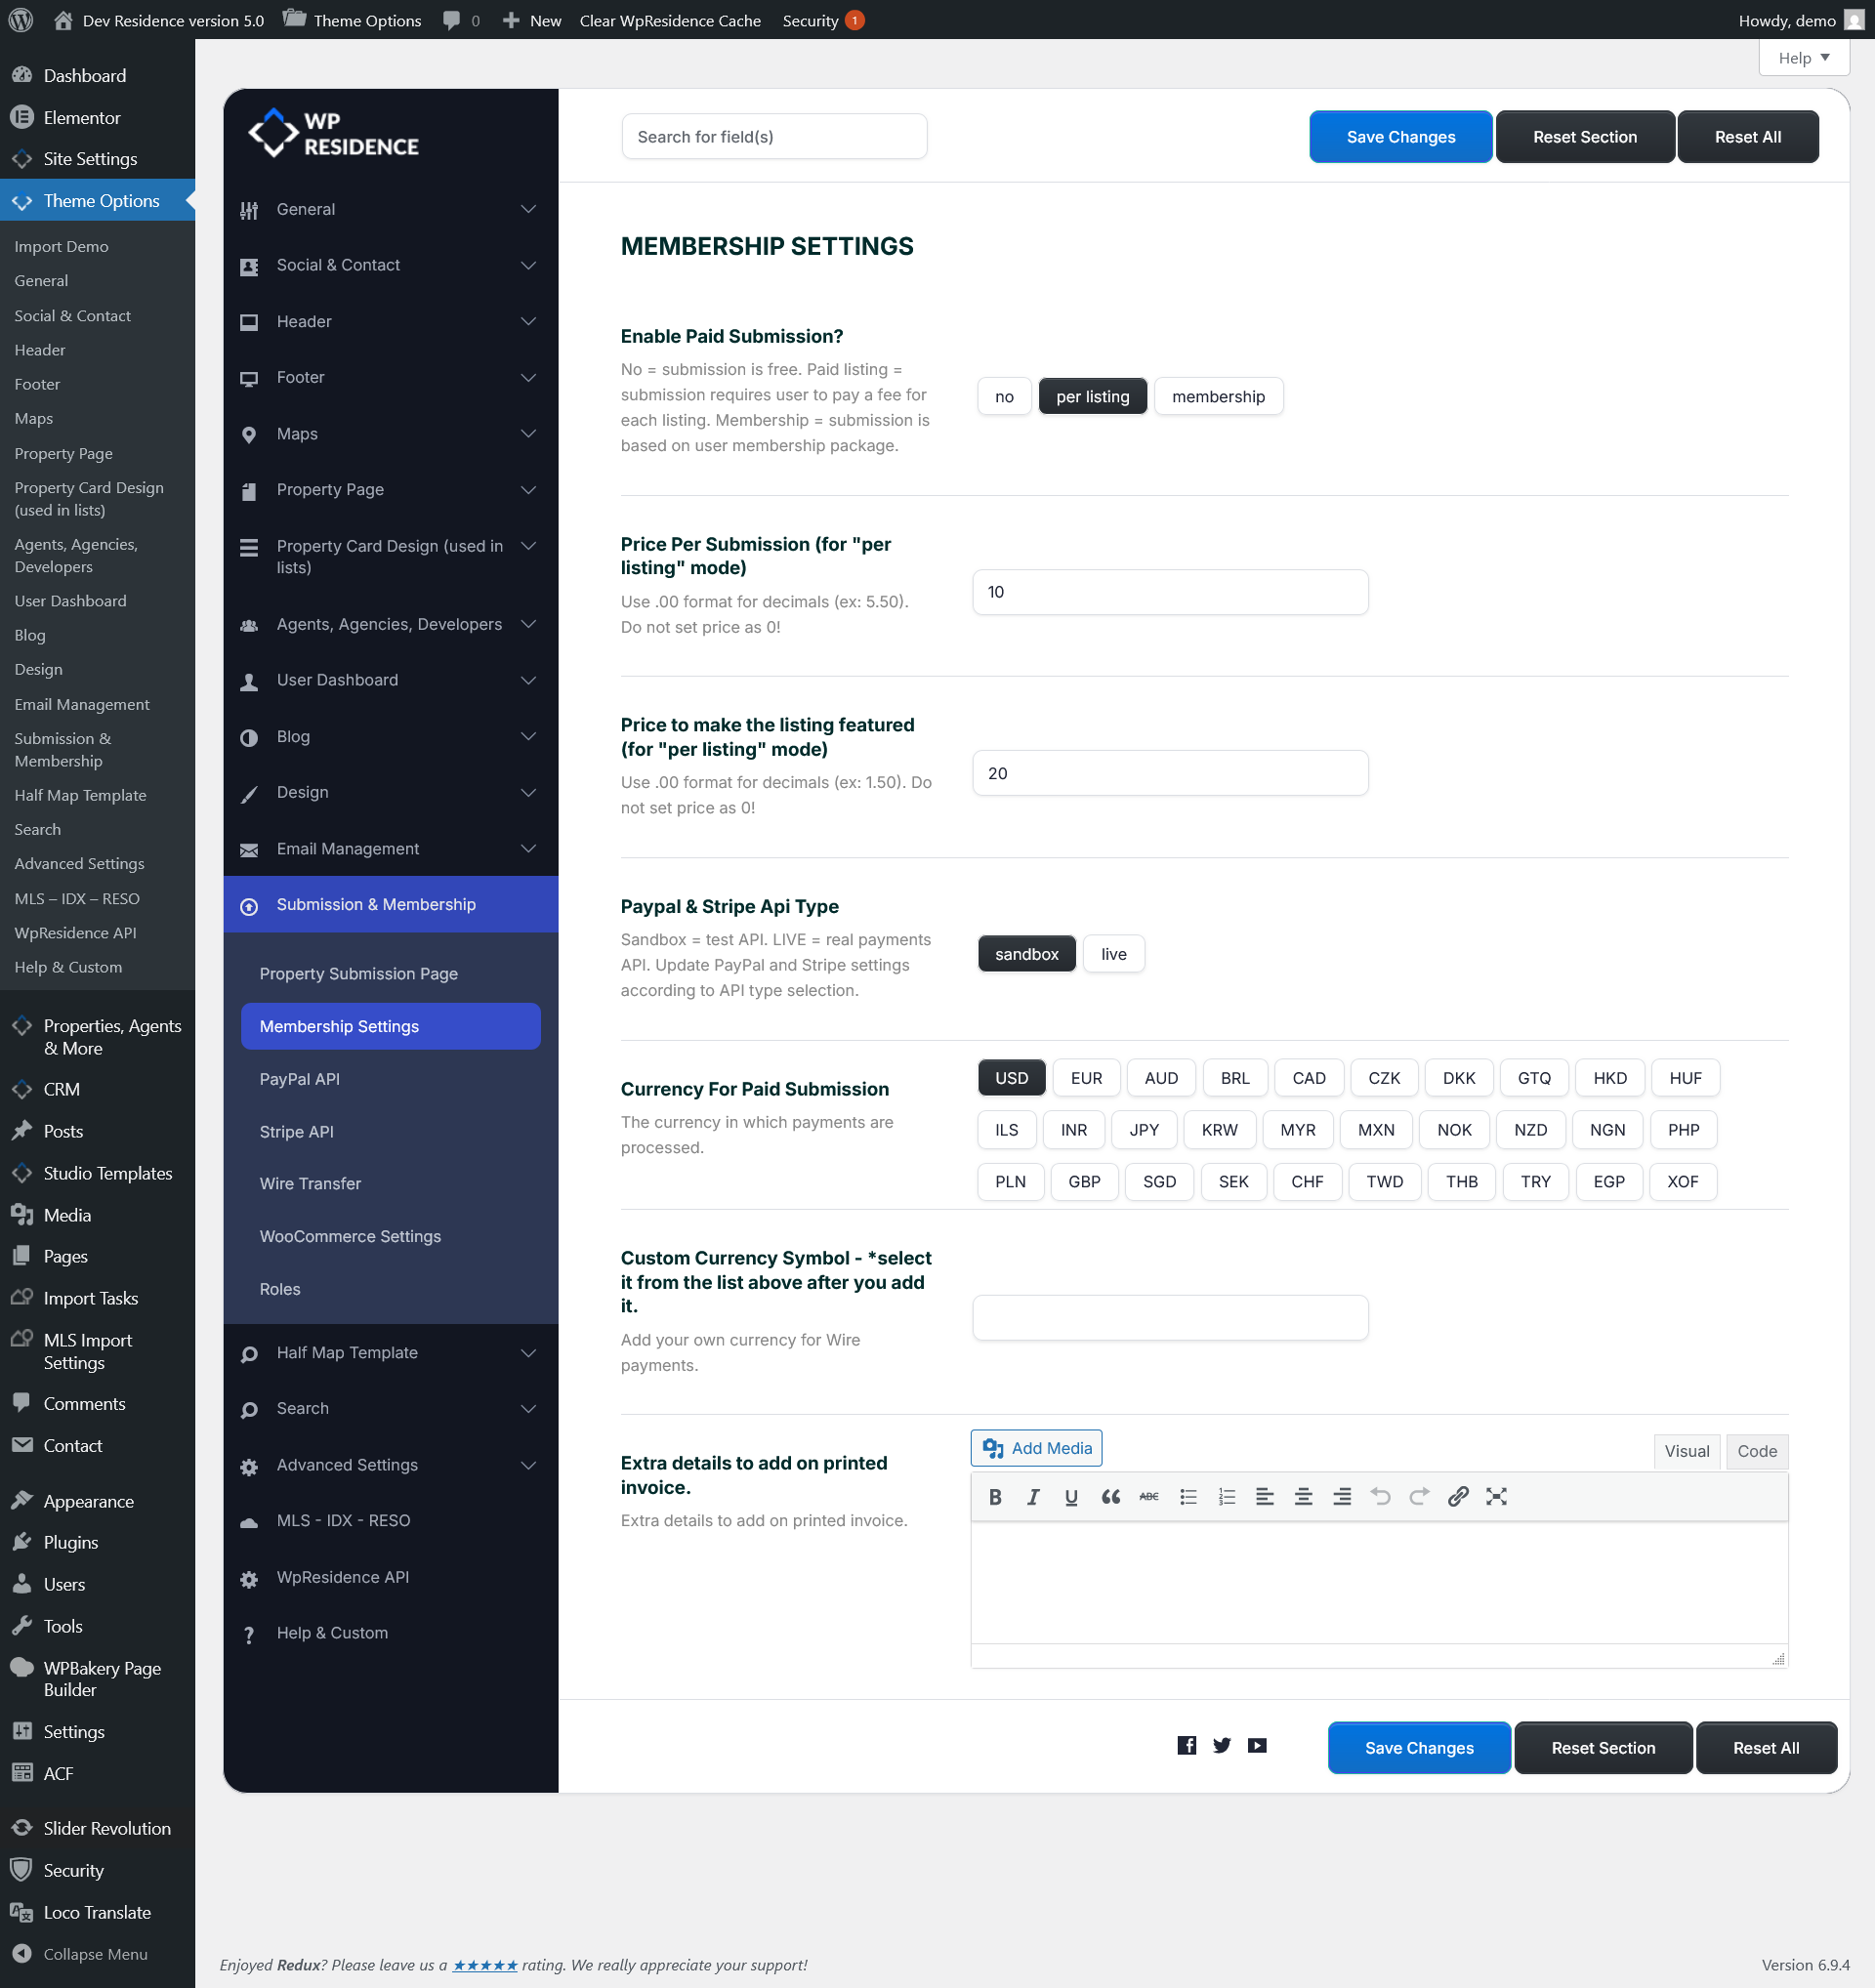
WPResidence supports 3 modes in Theme Options → Submission & Membership → Membership Settings:
- No = submission is free
- Per Listing = users must pay for each submitted listing
- Membership = users submit properties based on an active membership package
This help article explains how to configure the Per Listing option.
Step 1: Enable paid submission
Go to Theme Options → Submission & Membership → Membership Settings.
Find the option Enable Paid Submission? and select Per Listing.
In the current interface, you will see 3 choices:
- no
- per listing
- membership
To enable paid submission for each property, select per listing.
Step 2: Set submission prices
After selecting Per Listing, you must complete the pricing fields:
- Price Per Submission (for “per listing” mode)
- Price to make the listing featured (for “per listing” mode)
Both values are required.
Use decimal format if needed, for example 5.50.
The Price Per Submission is the amount the user pays to publish a listing.
The Price to make the listing featured is the additional amount the user pays if they want that listing marked as featured.
Step 3: Configure payment settings
In the same Membership Settings section, you can also configure the basic payment options:
- Paypal & Stripe Api Type = choose sandbox for testing or live for real payments
- Currency For Paid Submission = choose the currency used for payment processing
- Custom Currency Symbol = optional custom symbol, especially useful for wire transfer or custom currency display
- Extra details to add on printed invoice = optional invoice text shown on printed invoices
After these basic settings are saved, configure the actual payment gateway you want to use.
WPResidence supports:
These settings are available under:
- Theme Options → Submission & Membership → PayPal API
- Theme Options → Submission & Membership → Stripe API
- Theme Options → Submission & Membership → Wire Transfer
- Theme Options → Submission & Membership → WooCommerce Settings
Step 4: Configure submission form options
Paid submission controls the payment model, but you may also want to configure how the front-end submission form works.
Go to Theme Options → Submission & Membership → Property Submission Page.
From there you can configure:
- Which fields show in the submission form
- Which fields are mandatory
- Maximum number of images
- Whether submitted listings require admin approval or publish automatically
Related help:
- How to approve properties manually or automatically
- How to limit the number of images uploaded in submission
What users see in the dashboard
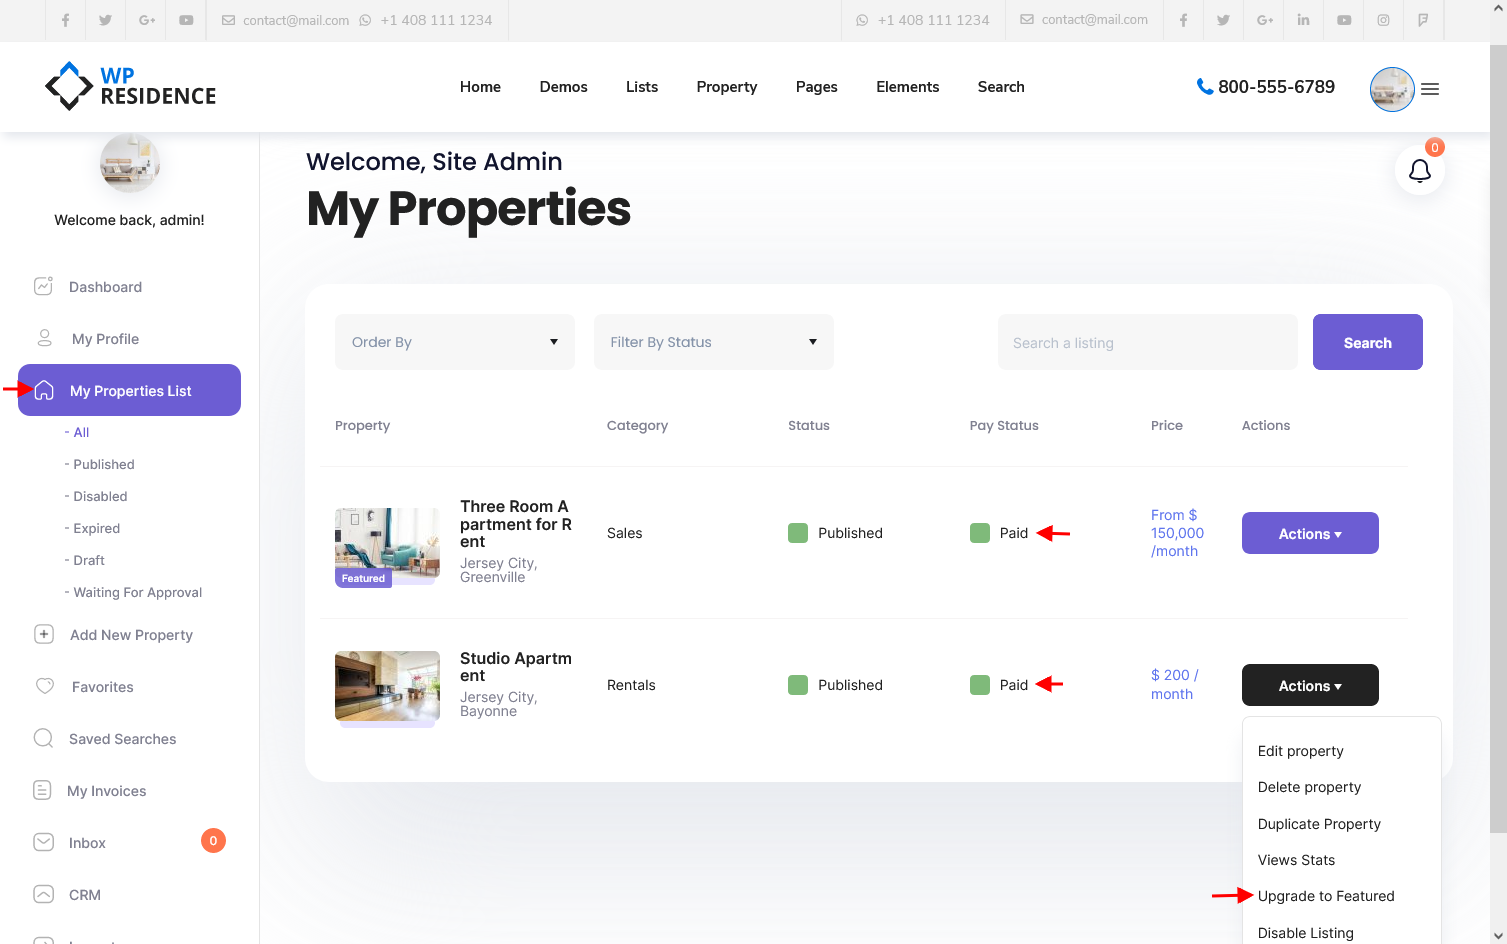
After paid submission is enabled, users will see the listing prices and payment options in their User Dashboard → My Properties section.
From there, they can:
- Pay to publish a listing
- Pay to make a listing featured
- See the payment status for their submitted properties
Important notes
- Make sure you choose the correct submission model before launching the site to users.
- Do not switch from free submission to paid submission, or from membership to per listing, after users already have live listings unless you are prepared to manually review the existing accounts and listings.
- Always set a value for both submission price fields.
- Use sandbox mode first if you want to test payments before going live.
- Remember that payment setup is not complete until the merchant settings are configured in PayPal, Stripe, Wire Transfer, or WooCommerce.