WooCommerce payments can be used in WPResidence for these payment flows:
- Paid Submission – users pay to publish a listing and can also pay separately to make a listing featured.
- Membership Submission – users pay for a membership package that includes a number of listings for a specific period.
WooCommerce payments overview
WPResidence integrates with WooCommerce so you can use WooCommerce payment gateways for theme payments.
WooCommerce can be used for:
- Paying for a listing in Per Listing paid submission mode.
- Paying to make a listing Featured.
- Buying a Membership Package.
WooCommerce is used only for processing the payment. The submission mode, package limits, listing limits, featured listing limits, and property submission rules are still controlled by WPResidence Theme Options.
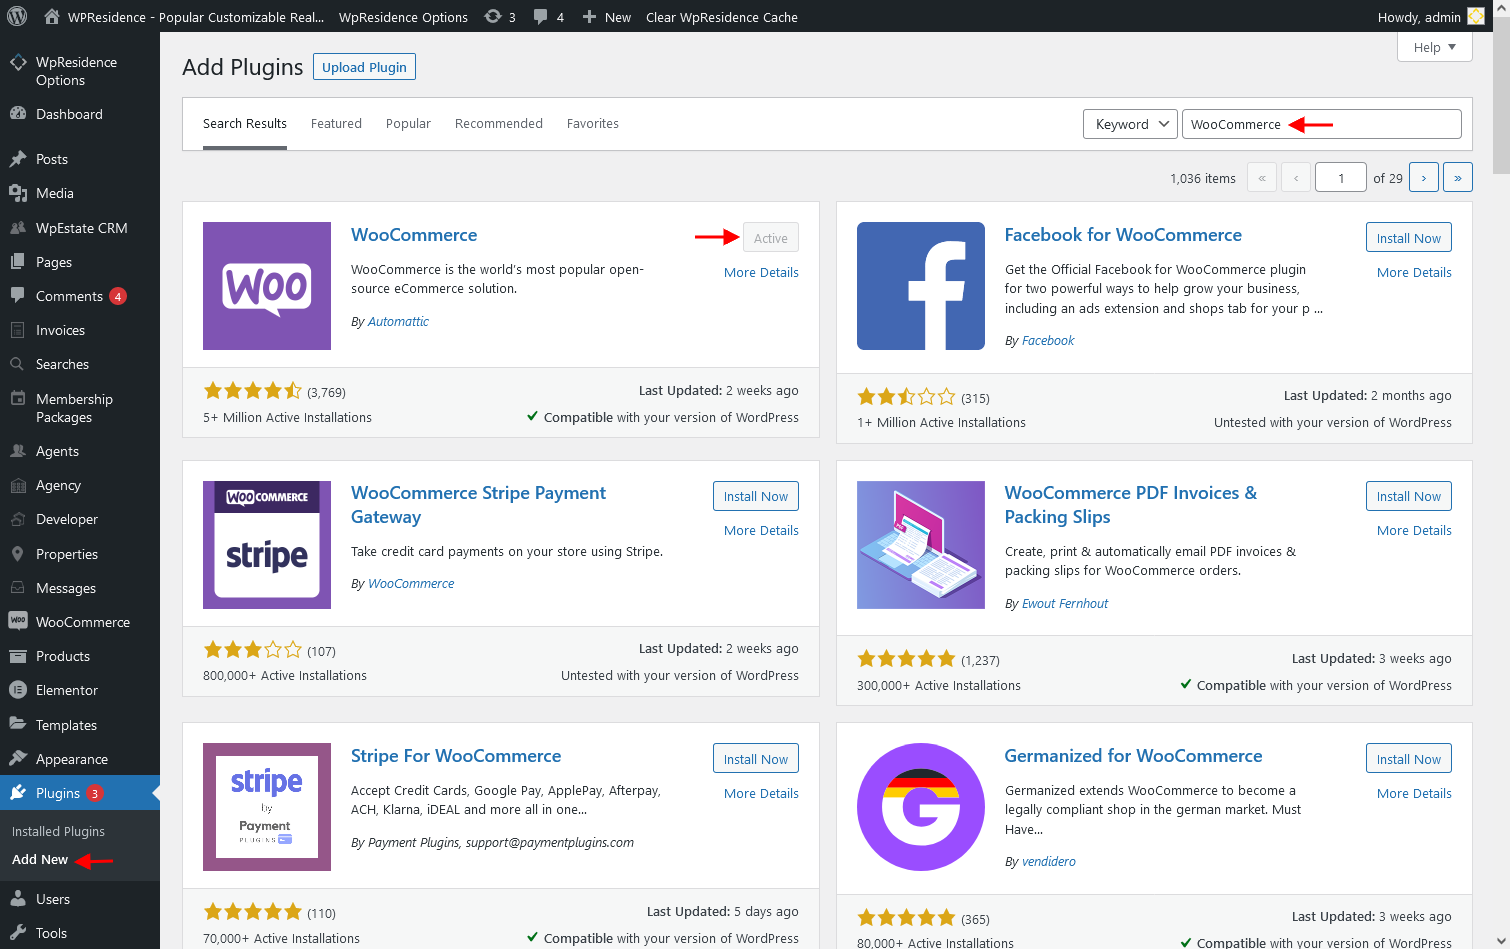
Step 1: Install WooCommerce
Go to Plugins → Add New.
Search for WooCommerce, then click Install and Activate.
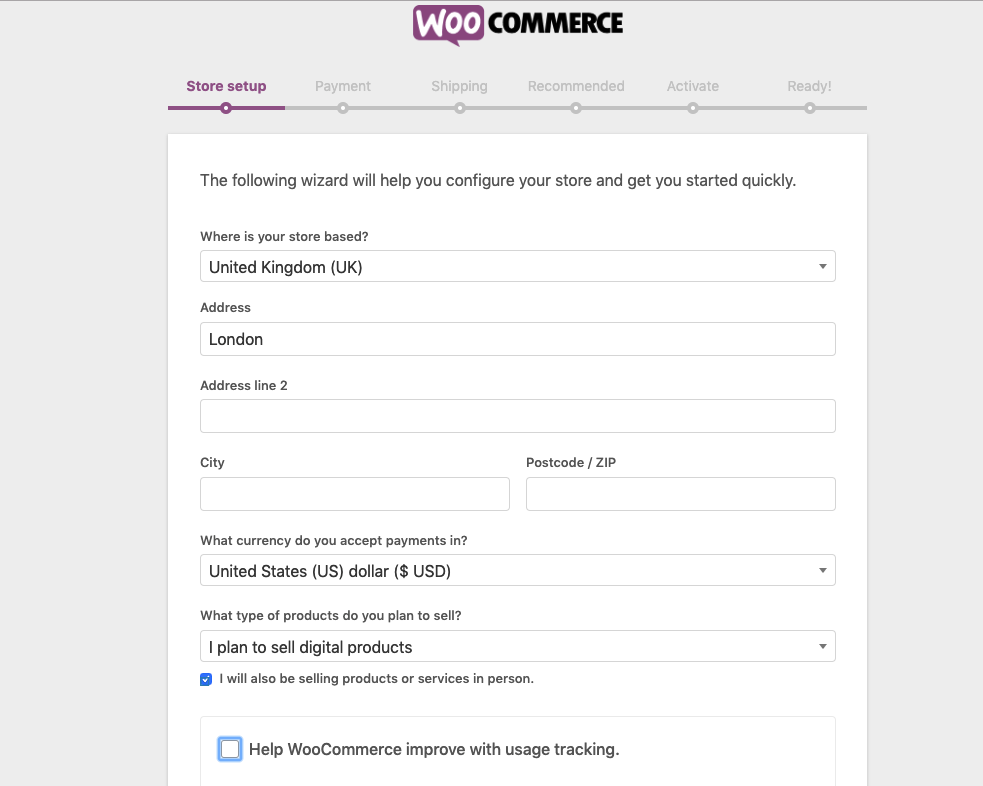
Step 2: Complete the WooCommerce setup
After activating WooCommerce, the plugin may ask you to complete a quick setup wizard.
Follow the WooCommerce setup steps and configure the basic store details, currency, and payment options.
WooCommerce pages
WooCommerce creates the required shop pages automatically, such as Cart, Checkout, My Account, and Shop.
You can find these pages in WP Admin → Pages.

You can edit these pages and set a custom header or sidebar if needed.

Step 3: Set the WooCommerce payment merchants
WooCommerce supports many payment gateways. Some are free, and others require paid extensions.
You can review available WooCommerce payment gateway extensions here:
WooCommerce Payment Gateways
From the WPResidence side, WooCommerce is integrated so the theme can send the payment request to WooCommerce. The actual payment gateway setup must be completed from WooCommerce, based on the gateway you choose.
Follow the WooCommerce documentation for the merchant you plan to use.
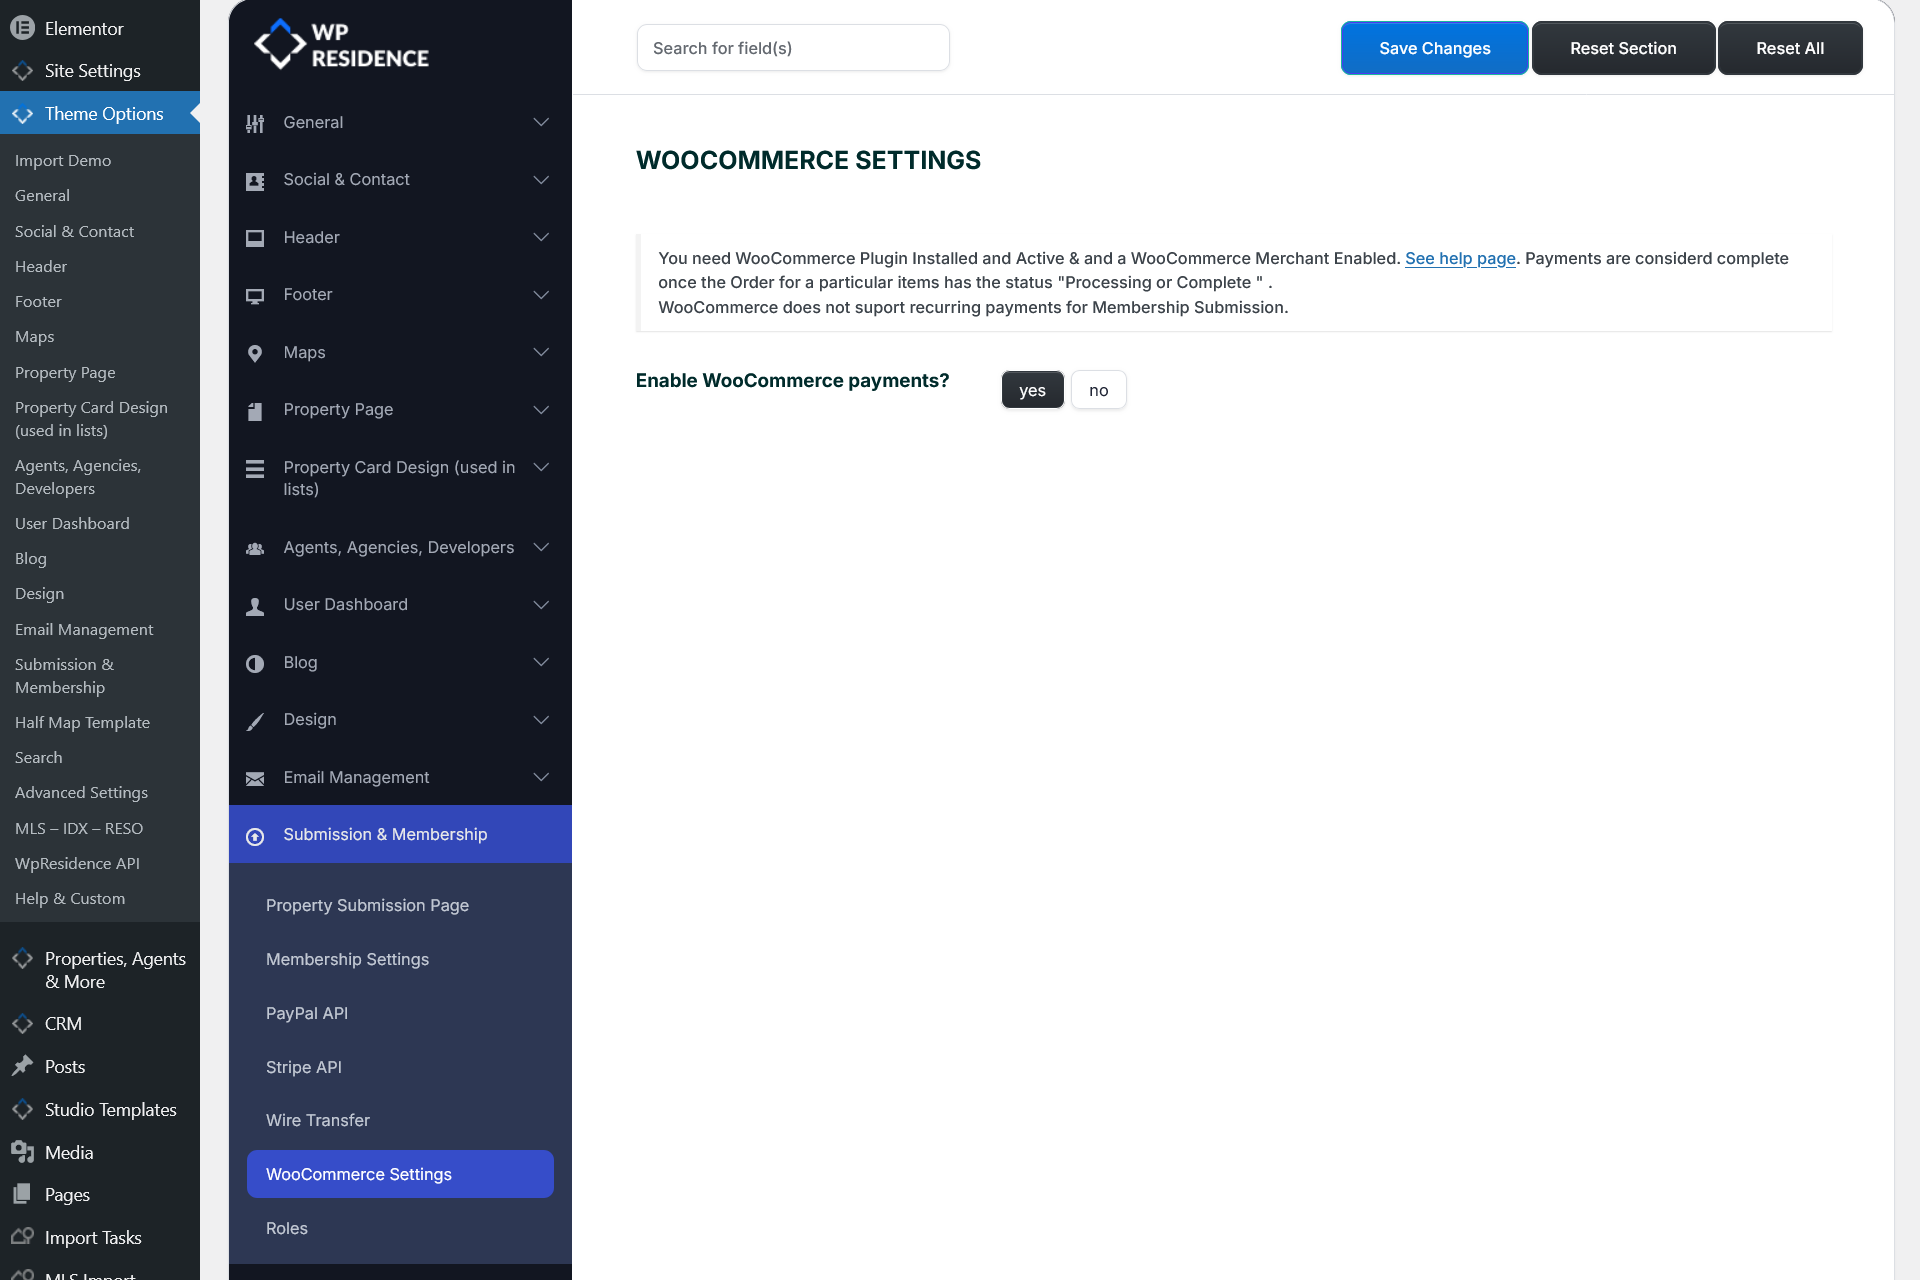
Step 4: Enable WooCommerce payments in WPResidence
After WooCommerce and the payment gateway are configured, enable WooCommerce payments from the theme options.
Go to Theme Options → Submission & Membership → WooCommerce Settings.
Set Enable WooCommerce payments? to Yes, then click Save Changes.
In older theme versions, this section may appear under Theme Options → Membership → WooCommerce Settings.
How WooCommerce payments work in WPResidence
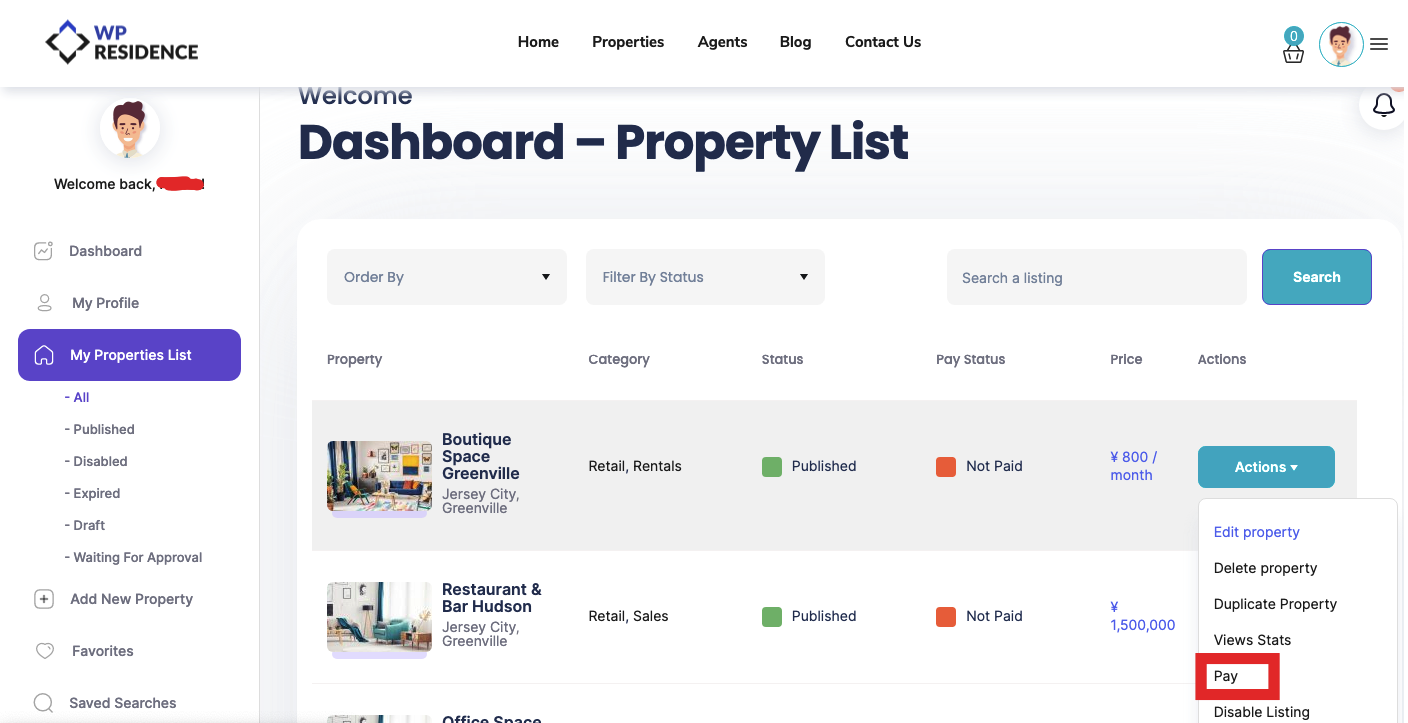
When WooCommerce payments are enabled, the theme will show a WooCommerce payment option when users need to pay for a supported action.
This applies to:
- Buying a membership package.
- Paying the submission fee for a listing.
- Paying the extra fee to make a listing featured.
When the user clicks Pay Now, they are redirected to the WooCommerce checkout page.
The payment is then processed by the WooCommerce payment gateways you configured in WooCommerce.
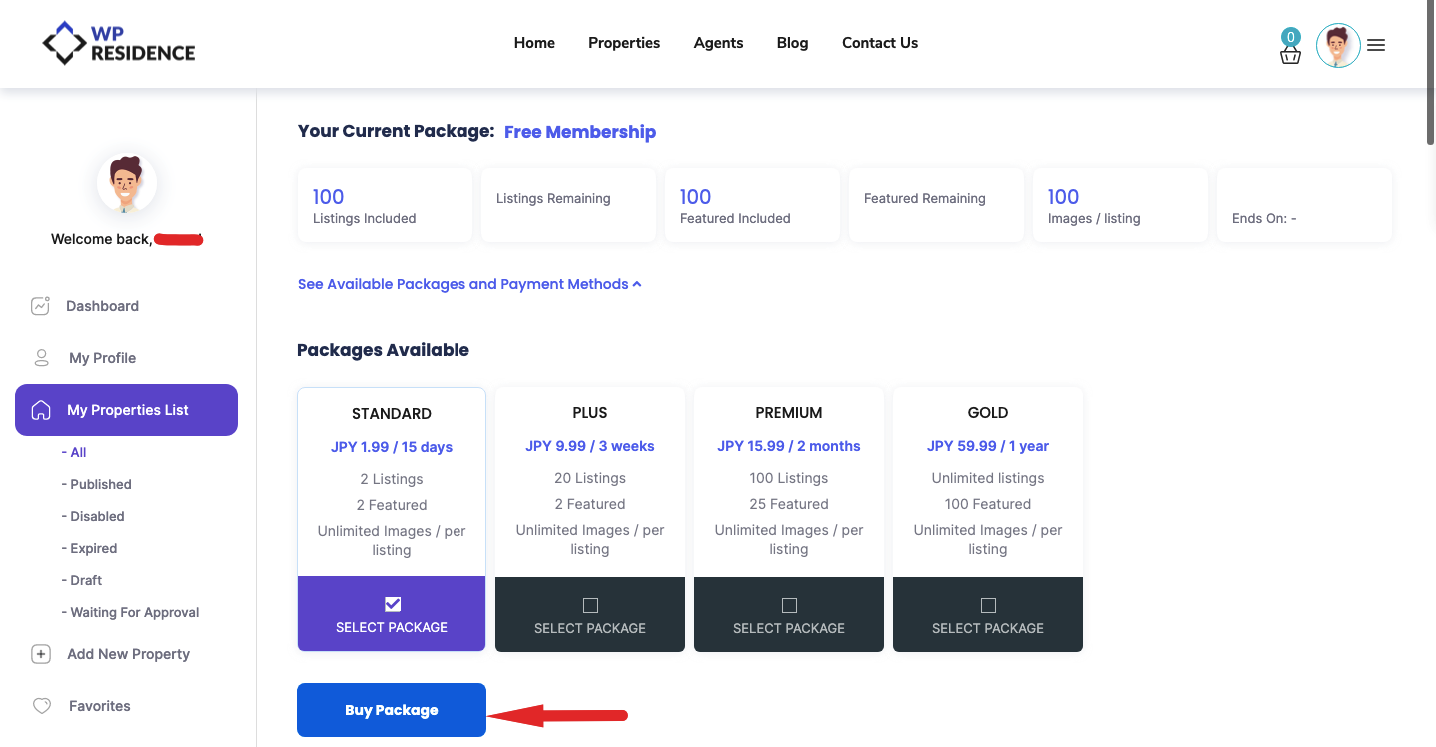
WooCommerce payments for membership packages
If you use Membership Submission, users can buy membership packages through WooCommerce.
The membership package limits are still controlled by WPResidence. WooCommerce only processes the payment.
Read more about how to enable membership submission here:
Membership Submission
WooCommerce payments for paid submission
If you use Paid Submission in Per Listing mode, users can pay through WooCommerce to publish a listing.
They can also pay the featured listing fee if they want to mark the listing as featured.
Read more about how to enable paid submission here:
Paid Submission
WooCommerce checkout page
After the user clicks Pay Now, WooCommerce opens the checkout page.
The checkout page can include payment fields, billing details, terms and conditions, privacy information, and any other checkout fields added by WooCommerce or WooCommerce extensions.
You can read more about WooCommerce checkout optimization here:
WooCommerce checkout optimization
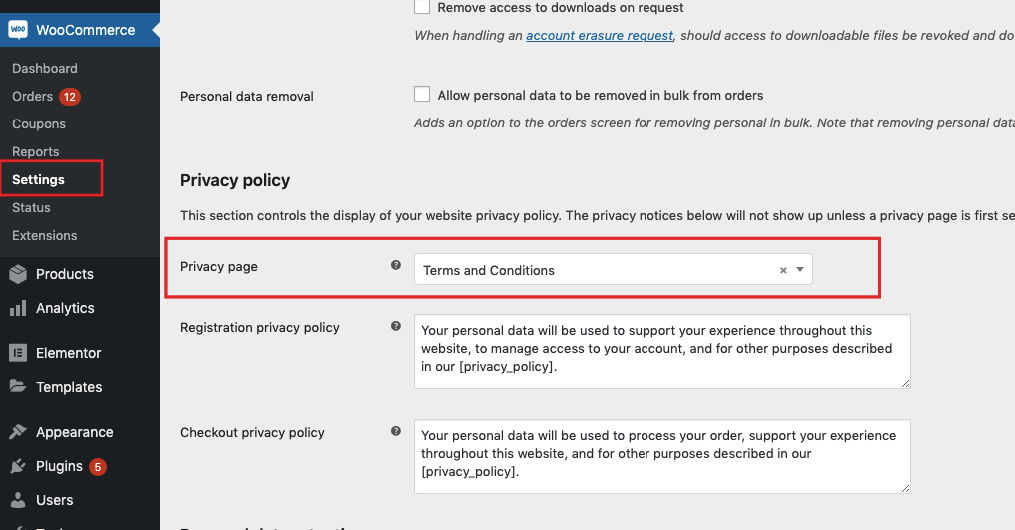
Enable terms and conditions on checkout
You can enable terms and conditions or privacy information from the WooCommerce settings.
Depending on your WooCommerce version, these settings may be available under:
- WooCommerce → Settings → Accounts & Privacy
- WooCommerce → Settings → Advanced
- WordPress Settings → Privacy
Select the page you want to use for your Privacy Policy or Terms and Conditions, then save the WooCommerce settings.
How to manage checkout fields
WPResidence uses the standard WooCommerce checkout process. Checkout fields are managed by WooCommerce or by WooCommerce checkout field plugins.
If you need to change which checkout fields are required, optional, hidden, or displayed, you can use a WooCommerce checkout field editor plugin.
Example resource:
How to manage WooCommerce checkout required fields