How to use PayPal as a payment method
PayPal allows users to pay online for paid listings, featured listings, upgrades, or membership packages, depending on the paid submission mode you use in WPResidence.
To use PayPal, you must have a PayPal Business account and valid PayPal API credentials.
- You must have a PayPal Business account.
- For live transactions, your website must use SSL / HTTPS.
- Your server must support TLS 1.2 or higher for PayPal HTTPS connections.
- If you use PayPal, use a currency supported by PayPal and by your PayPal account.
- For recurring payments, you must add the IPN URL in your PayPal account as explained below.
PayPal security guidelines:
https://developer.paypal.com/api/rest/reference/info-security-guidelines/
PayPal supported currency codes:
https://developer.paypal.com/api/nvp-soap/currency-codes/
Before you start
Before configuring PayPal in WPResidence, you need:
- A PayPal Business account.
- PayPal Client ID and Secret from your PayPal Developer account.
- A PayPal Processor page created in WordPress.
- Paid Submission enabled in WPResidence.
- A payment currency supported by your PayPal Business account.
- SSL / HTTPS enabled on your website for live payments.
To enable Paid Submission, go to:
Theme Options > Membership > Membership Settings
In older versions, this section may appear as:
Theme Options > Submission & Membership > Membership Settings
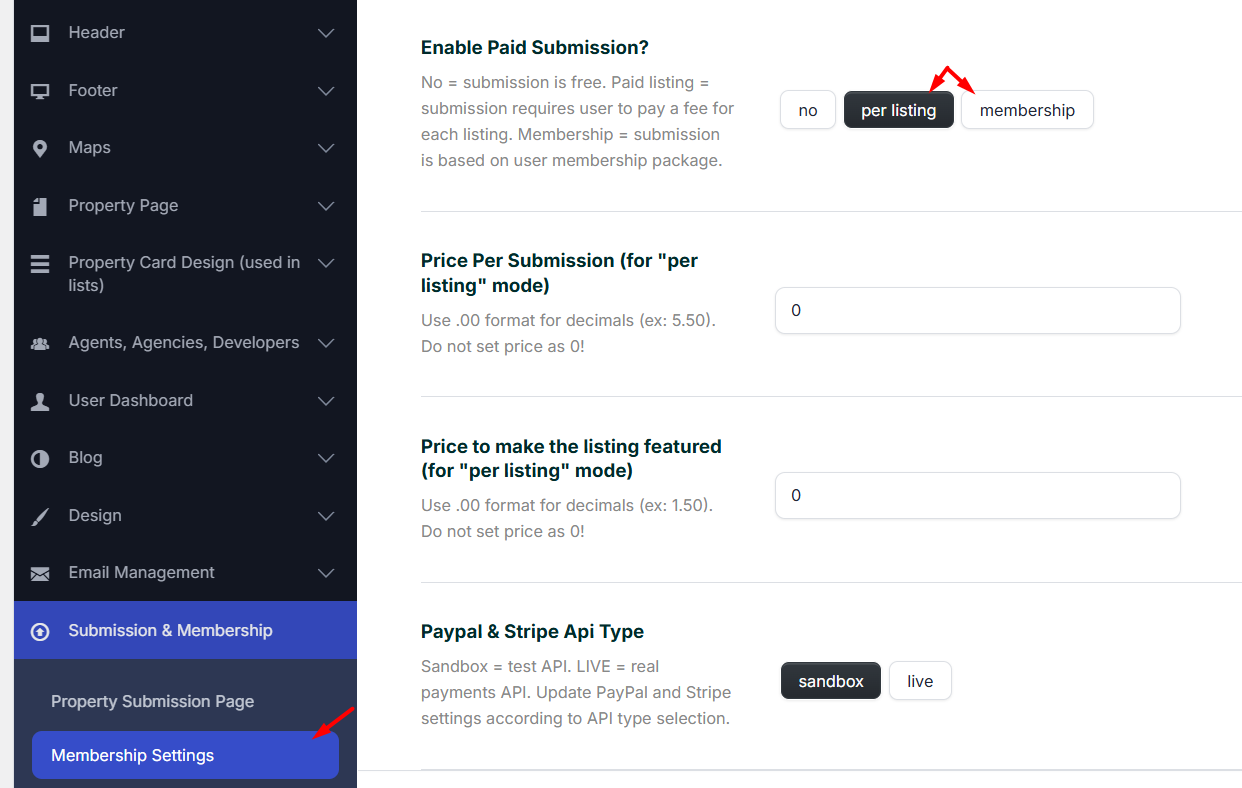
Select one of the paid submission options:
- Per Listing, if users pay for each submitted listing.
- Membership, if users buy membership packages.
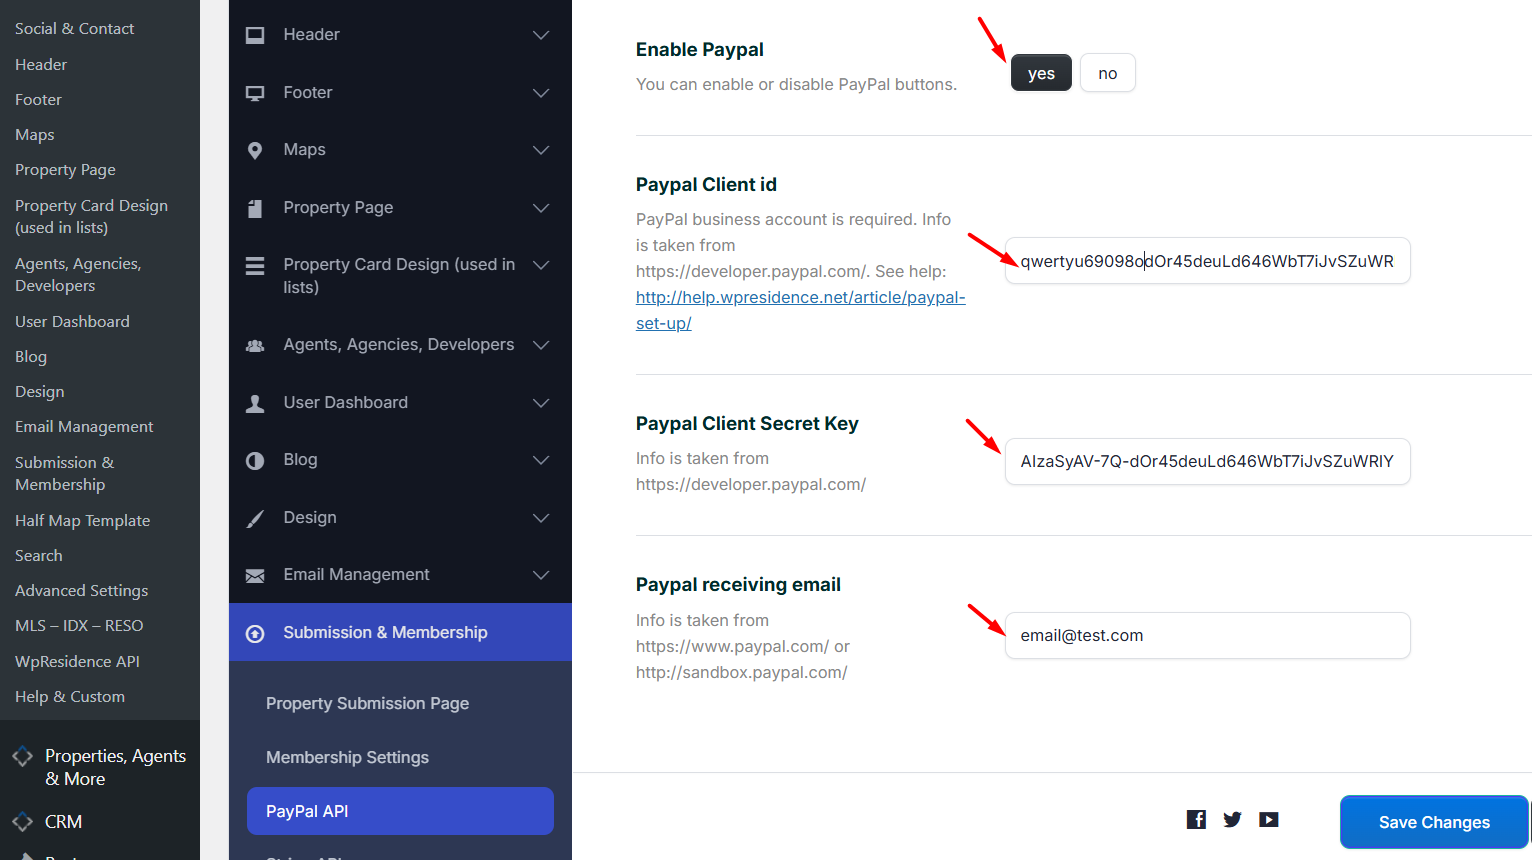
PayPal settings in WPResidence
The PayPal settings are managed from:
Theme Options > Membership > PayPal Settings
To choose between Sandbox and Live mode, go to:
Theme Options > Membership > Membership Settings
Select the mode you want to use:
- Sandbox for test payments.
- Live for real payments.
If you switch from Sandbox to Live, or from Live to Sandbox, make sure you also update the PayPal API credentials with the correct credentials for that mode.

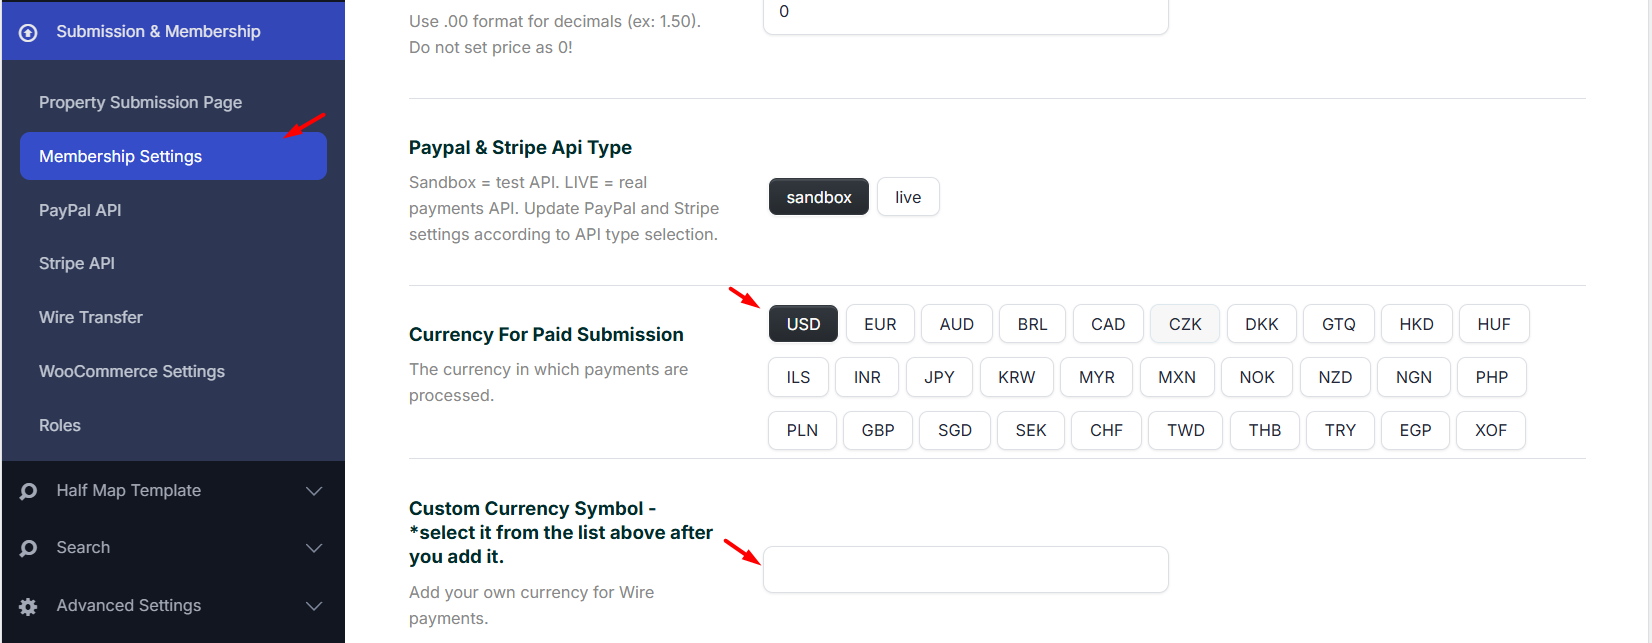
How to set the PayPal payment currency
PayPal uses the currency selected for paid submissions or membership payments.
Go to:
Theme Options > Membership > Membership Settings
In the currency section, select the currency you want to use for paid submissions.
If the currency you want to use is not already available in the Currency For Paid Submission list, follow these steps:
- Add the new currency.
- Save the options.
- Refresh the page.
- Select the new currency from the list of currencies for paid submission.
- Save the options again.
The currency selected in WPResidence must also be supported by the PayPal Business account owner account. If the currency is not supported by PayPal, by the account country, or by the account setup, PayPal may reject the payment or the payment may not work correctly.
You can check PayPal supported currency codes here:
https://developer.paypal.com/api/nvp-soap/currency-codes/
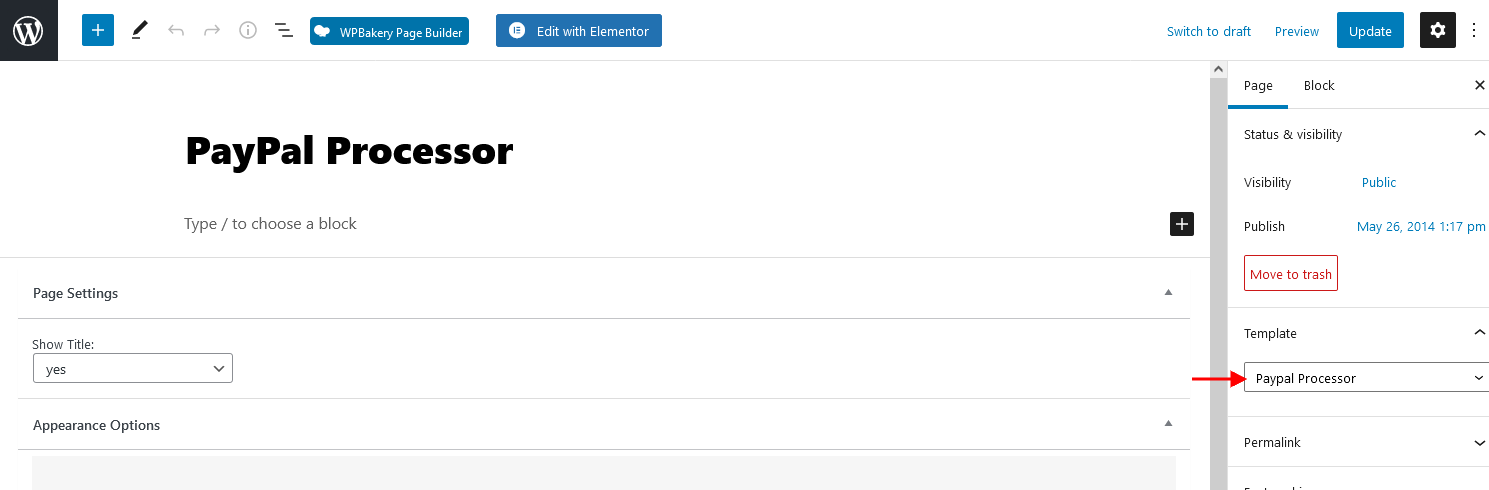
PayPal Processor page
Make sure you have a page created in WordPress with the PayPal Processor template.
Go to:
Pages > Add New
Create a page and assign the PayPal Processor template.
- If you imported a WPResidence demo, this page is usually created automatically during demo import.
- If you use a clean theme installation without demo content, you must create this page manually.
- This page is not meant to be opened directly by users. The API uses it to communicate with the theme and PayPal.
- If you open the page URL directly in the browser, you may see a generic message. This is normal.
- There must be only 1 page with the PayPal Processor template.
- If duplicate PayPal Processor pages exist, delete the duplicates permanently.
How to create PayPal Sandbox or Live credentials
Step 1: Log in to PayPal Developer
Go to:
https://developer.paypal.com/
Use your PayPal account to log in.
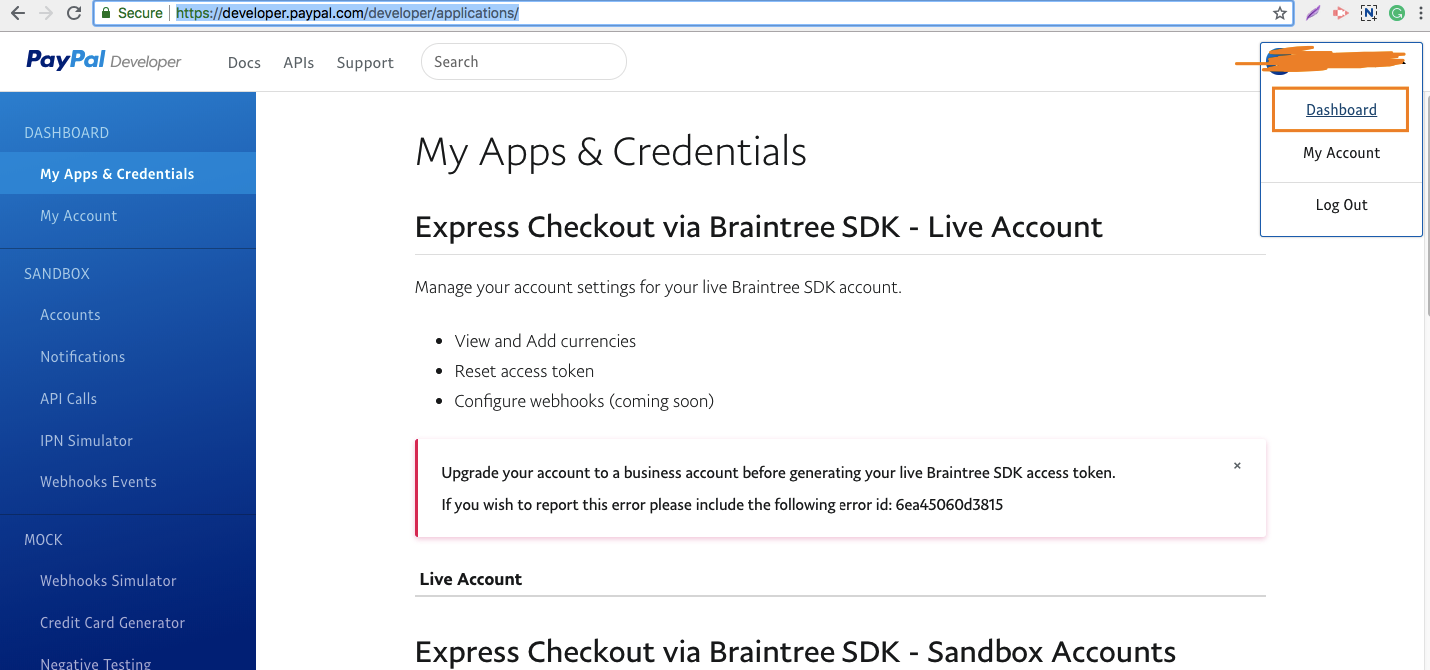
Step 2: Go to Dashboard
Open the PayPal Developer dashboard.
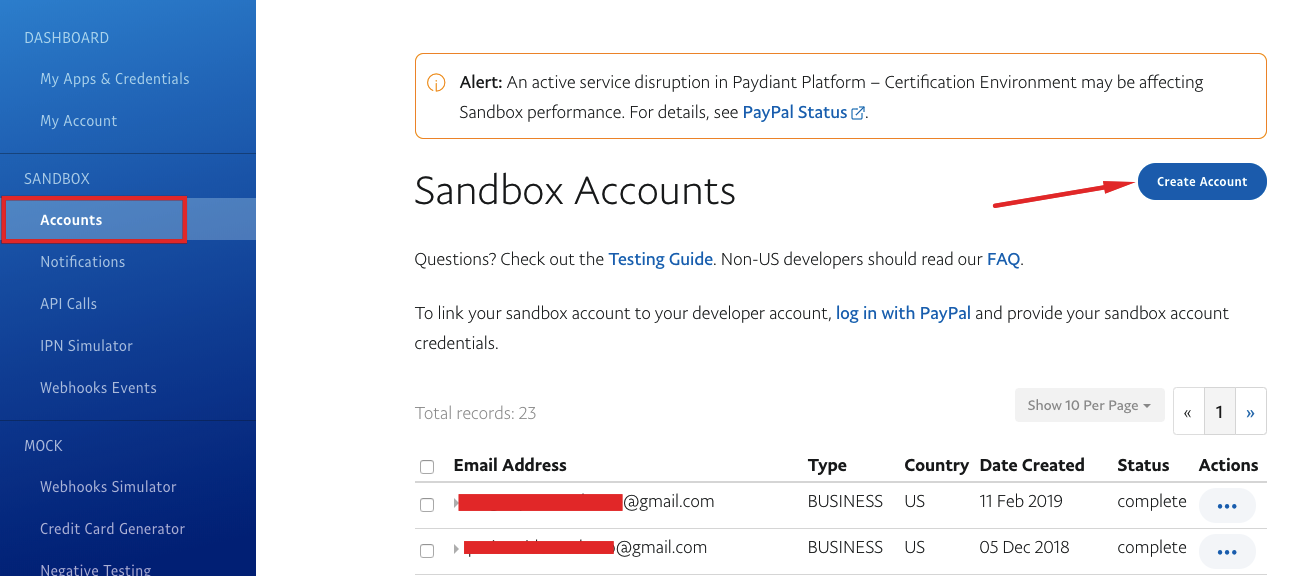
Step 3: Optional, create a Sandbox account
If you want to test with Sandbox mode, create a PayPal Sandbox Business account.
Sandbox transactions are test transactions only. No real payment is processed.
Go to:
Sandbox > Accounts
Create or select the sandbox business account that will be used when creating the app.
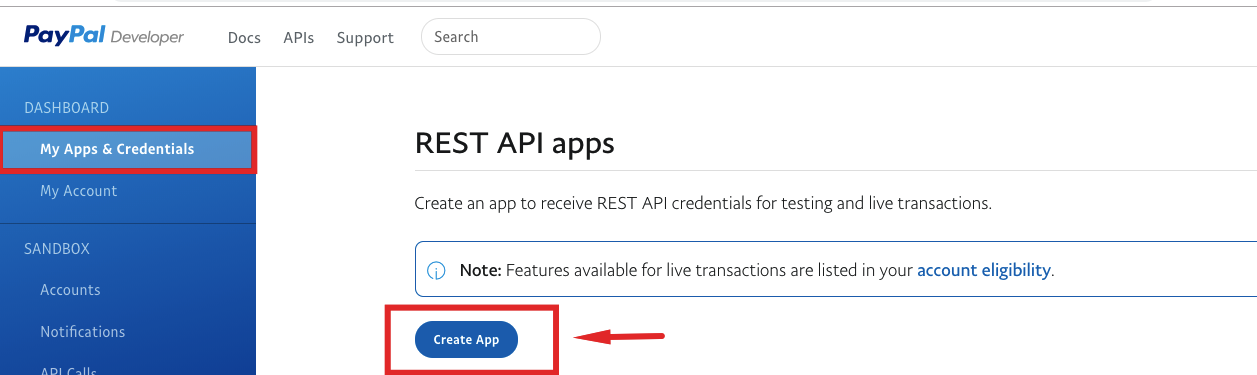
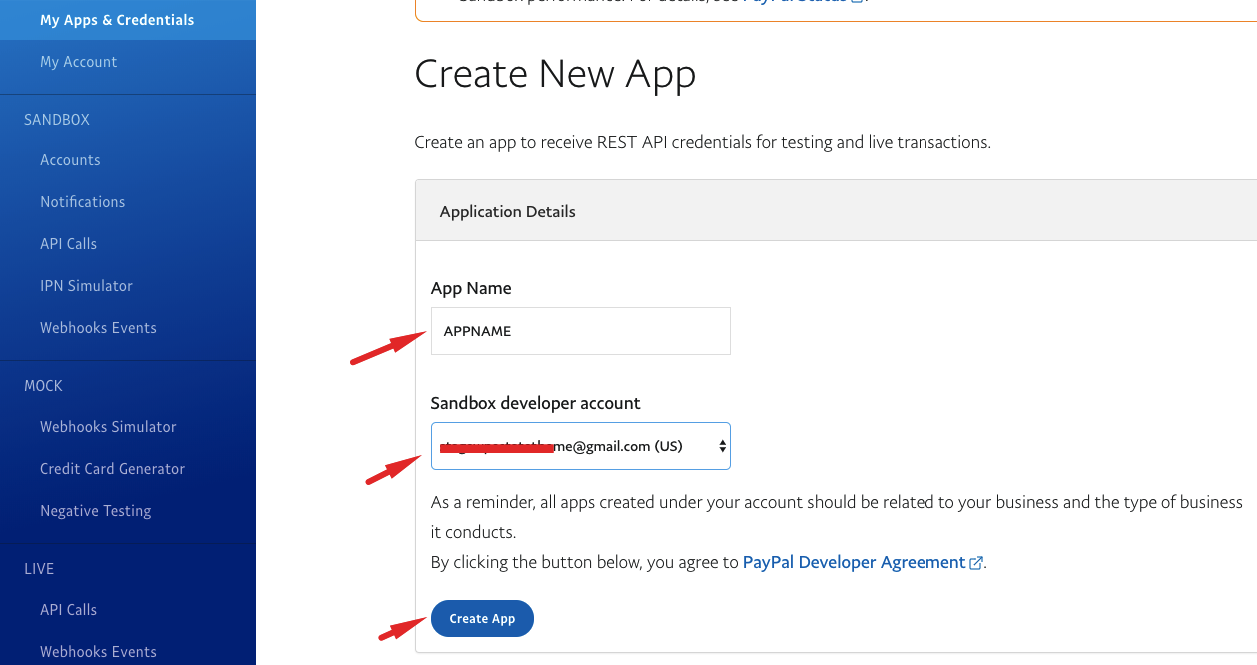
Step 4: Create a new app
Go to:
My Apps & Credentials
Create a new app.
Step 5: Add the app name and select the account
Add the app name and select the Sandbox business email if you are creating Sandbox credentials.
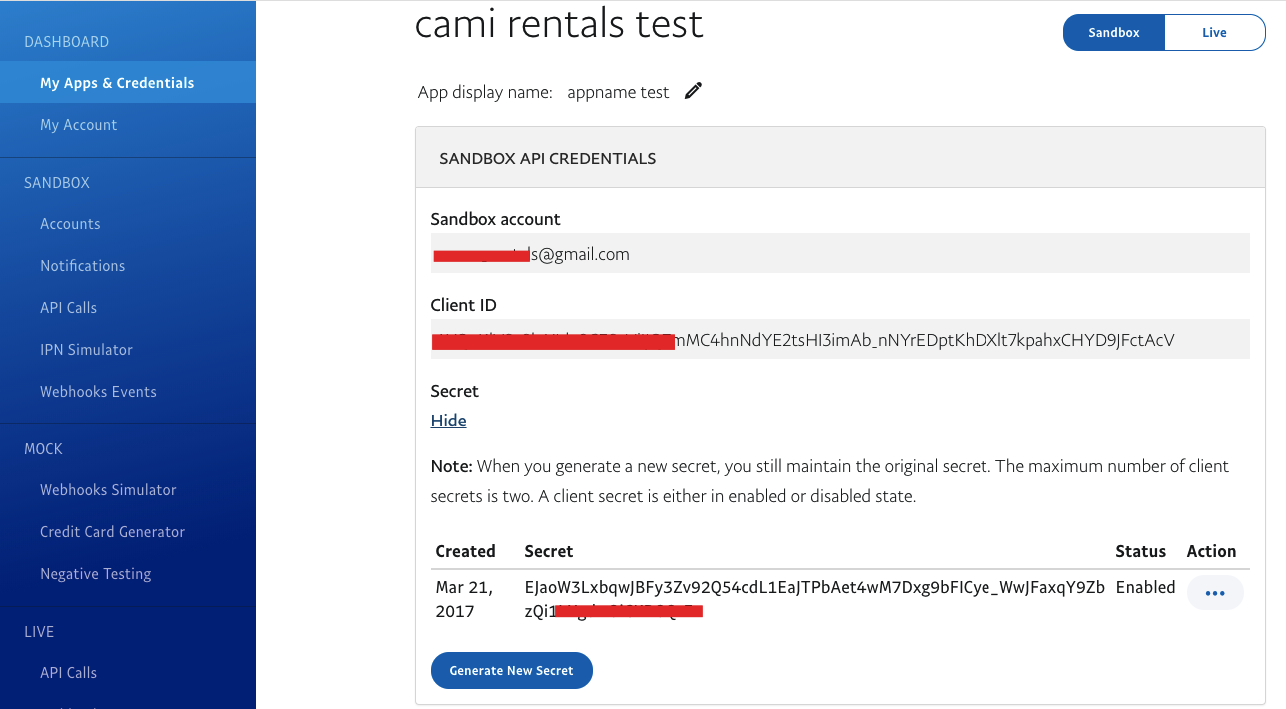
Step 6: Copy the Client ID and Secret
Copy the Client ID and Secret from the PayPal app.
Be careful to copy the correct credentials. Sandbox credentials must be used with Sandbox mode. Live credentials must be used with Live mode.

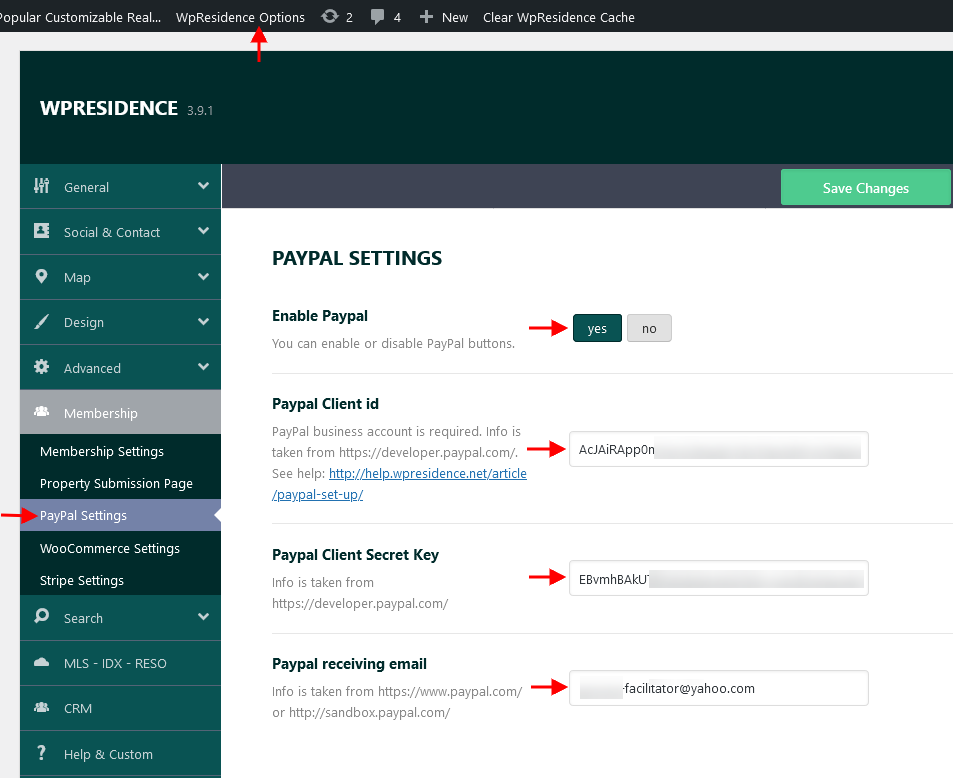
Step 7: Add the credentials in WPResidence
Go to:
Theme Options > Membership > PayPal Settings
Paste the PayPal Client ID and Secret in the correct fields and save the settings.
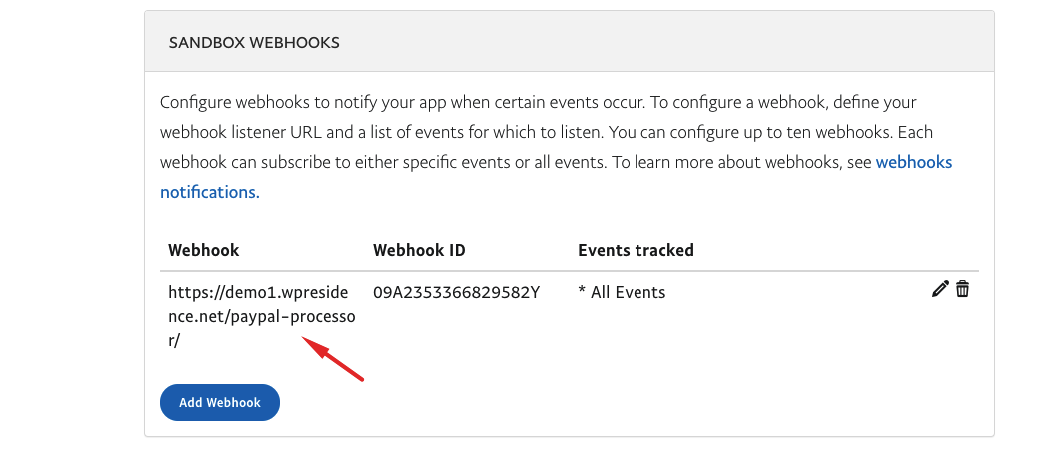
How to add the PayPal webhook
The webhook allows PayPal to communicate payment events back to your website.
In the PayPal app, add a webhook using the PayPal Processor page URL from your website.
Add webhook
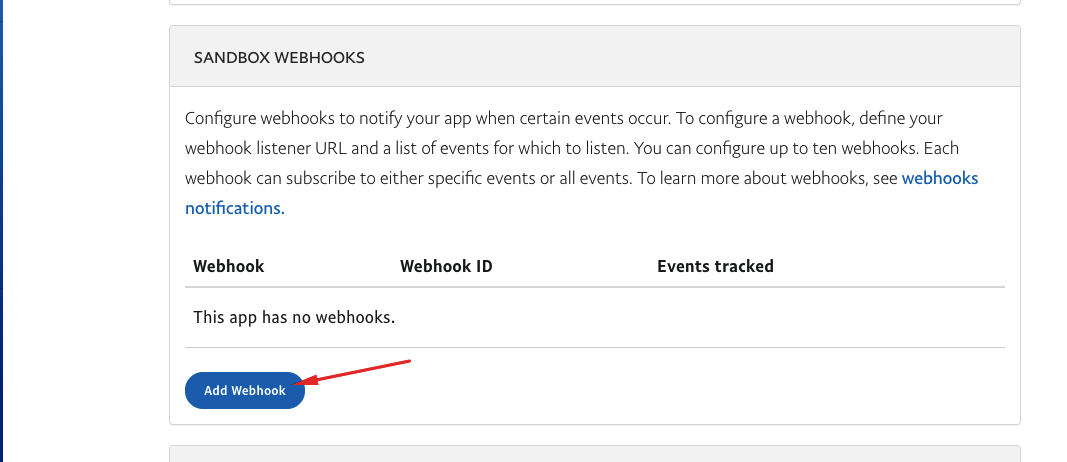
Add the webhook URL. This URL must be the PayPal Processor page URL from your own domain.

Select the events needed for the integration.
Recurring payments and PayPal IPN
For recurring payments, you must add the PayPal Processor URL as the IPN URL in your PayPal account.
For Sandbox tests, go to:
https://www.sandbox.paypal.com/
For Live payments, go to:
https://www.paypal.com
Then go to:
Profile Account Settings > Notifications > Instant payment notifications
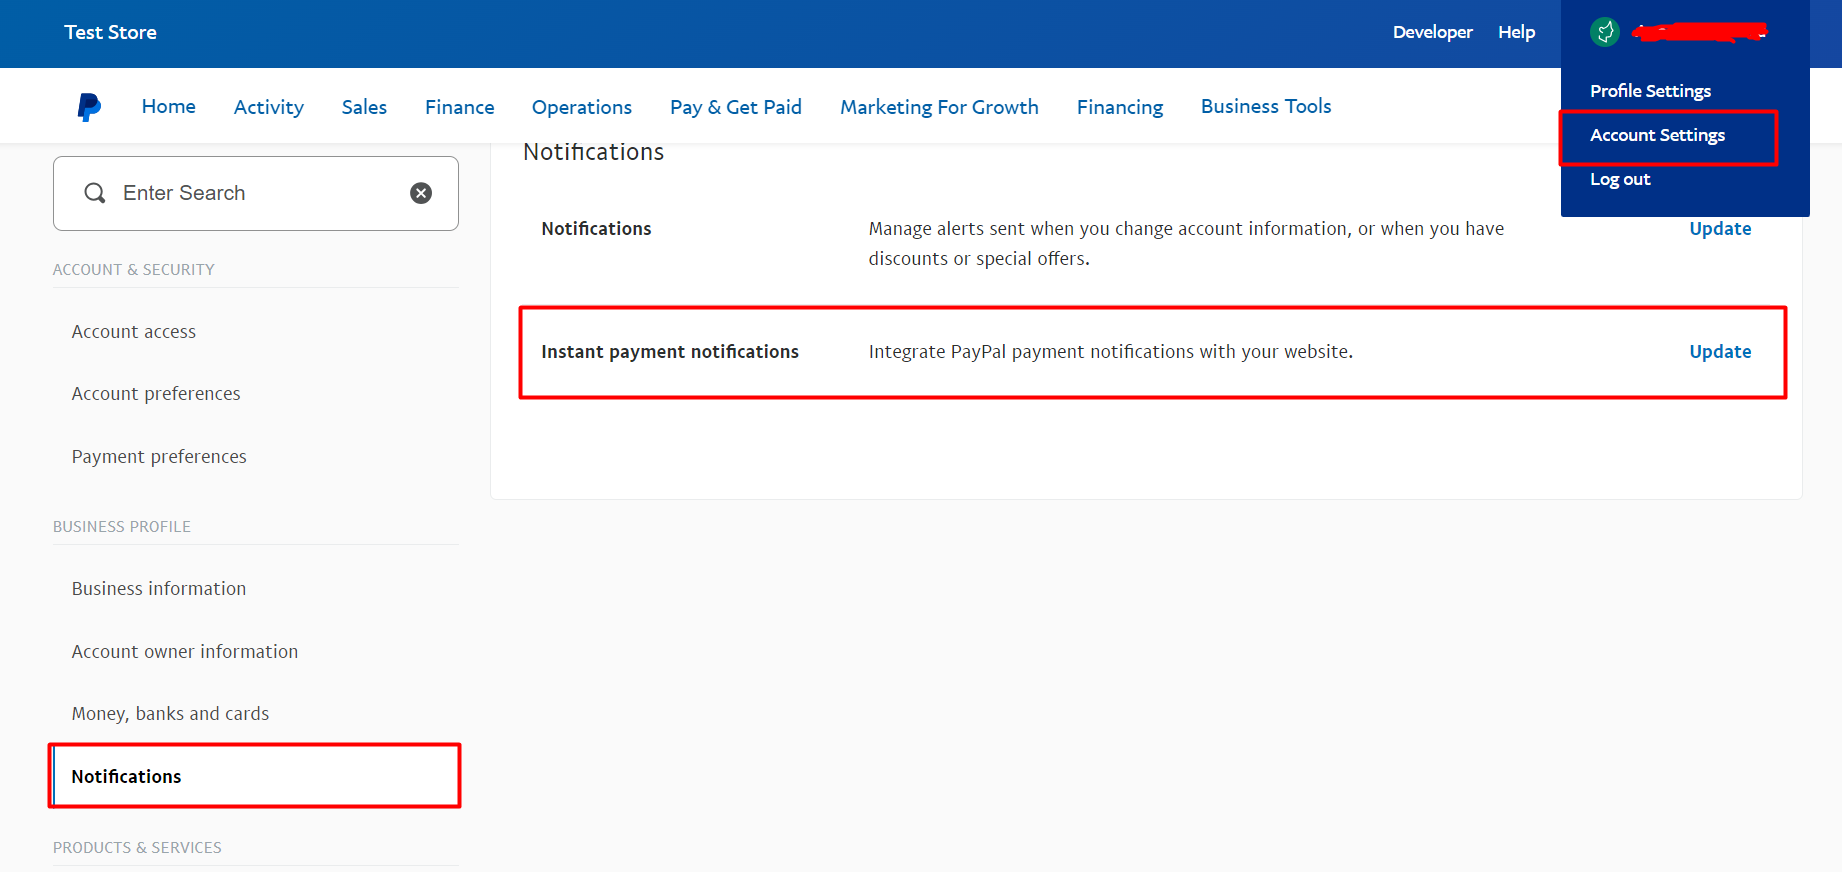
Click Update, then add your site IPN URL.
The IPN URL is the PayPal Processor page URL from your domain.
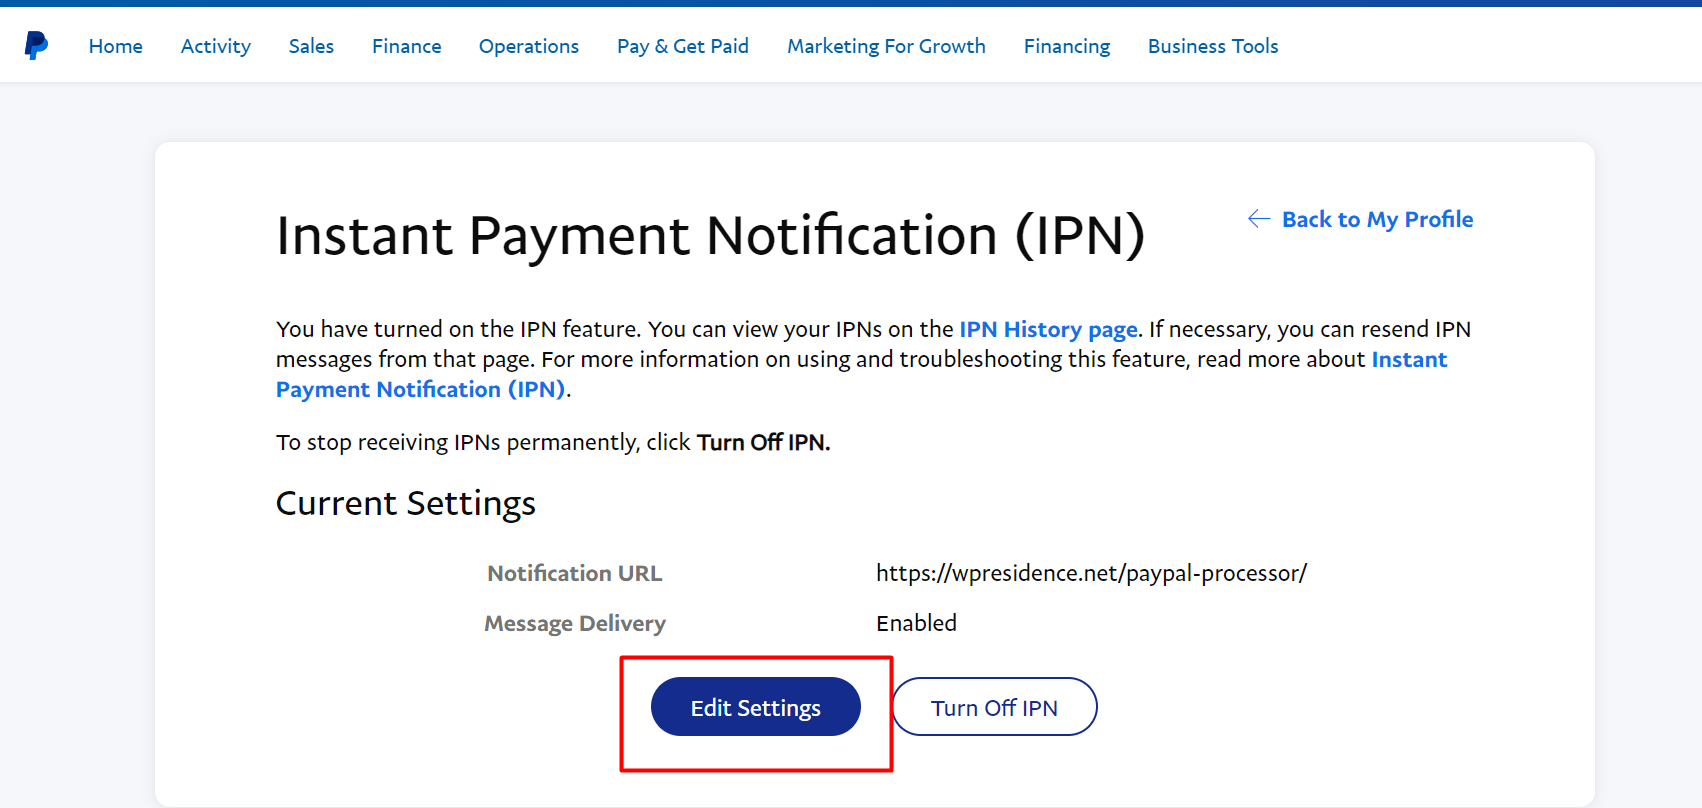
Make sure IPN is enabled.

When PayPal does not work
If PayPal does not work, check the following:
- Make sure there is only one page using the PayPal Processor template.
- If duplicate PayPal Processor pages exist, delete the duplicates permanently.
- Make sure Sandbox mode uses Sandbox credentials.
- Make sure Live mode uses Live credentials.
- Make sure there are no blank spaces copied before or after the Client ID or Secret.
- Make sure SSL / HTTPS is enabled for live payments.
- Make sure the currency selected in WPResidence is supported by PayPal and by your PayPal Business account.
- If Per Listing mode is enabled, make sure Price Per Submission and Price to make the listing featured are greater than 0.
- Do not use punctuation in membership package titles. PayPal may reject payment requests when package titles contain punctuation.
PayPal errors and solutions
Error: Value too long
Example error:
Received error: 400
Raw response:
{
  "name": "VALIDATION_ERROR",
  "message": "Invalid request - see details",
  "details": [
    {
      "field": "name",
      "issue": "Value too long (max length 50)"
    }
  ]
}
This error usually means that the website tagline or payment name sent to PayPal is too long.
Solution:
Make the website tagline shorter from:
Theme Options > General Settings
Error: invalid_client
Example error:
Received error: 401
Raw response:
{
  "error": "invalid_client",
  "error_description": "Client Authentication failed"
}
This error means the API credentials are wrong or do not match the selected mode.
Solution:
- Check that the Client ID and Secret are copied correctly.
- Make sure you did not copy an empty space before or after the credentials.
- Use Sandbox credentials only with Sandbox mode.
- Use Live credentials only with Live mode.
Error: SSL handshake failure
Example error:
14077410:SSL routines:SSL23_GET_SERVER_HELLO:sslv3 alert handshake failure
This is usually a server SSL/TLS compatibility issue.
Solution:
Contact your hosting provider and ask them to check that the server supports the PayPal security requirements, including TLS 1.2 or higher and the required SSL certificate standards.
PayPal security guidelines:
https://developer.paypal.com/api/rest/reference/info-security-guidelines/
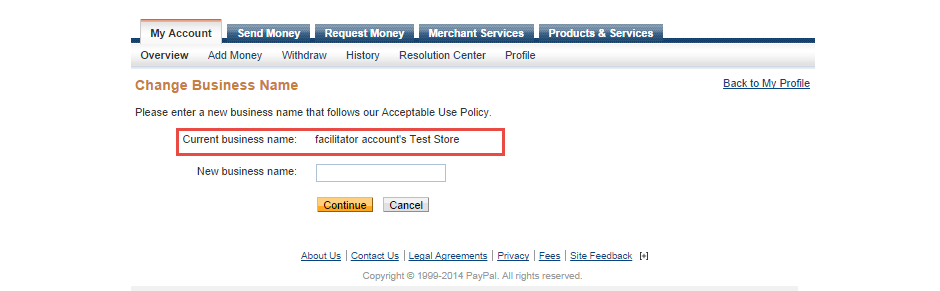
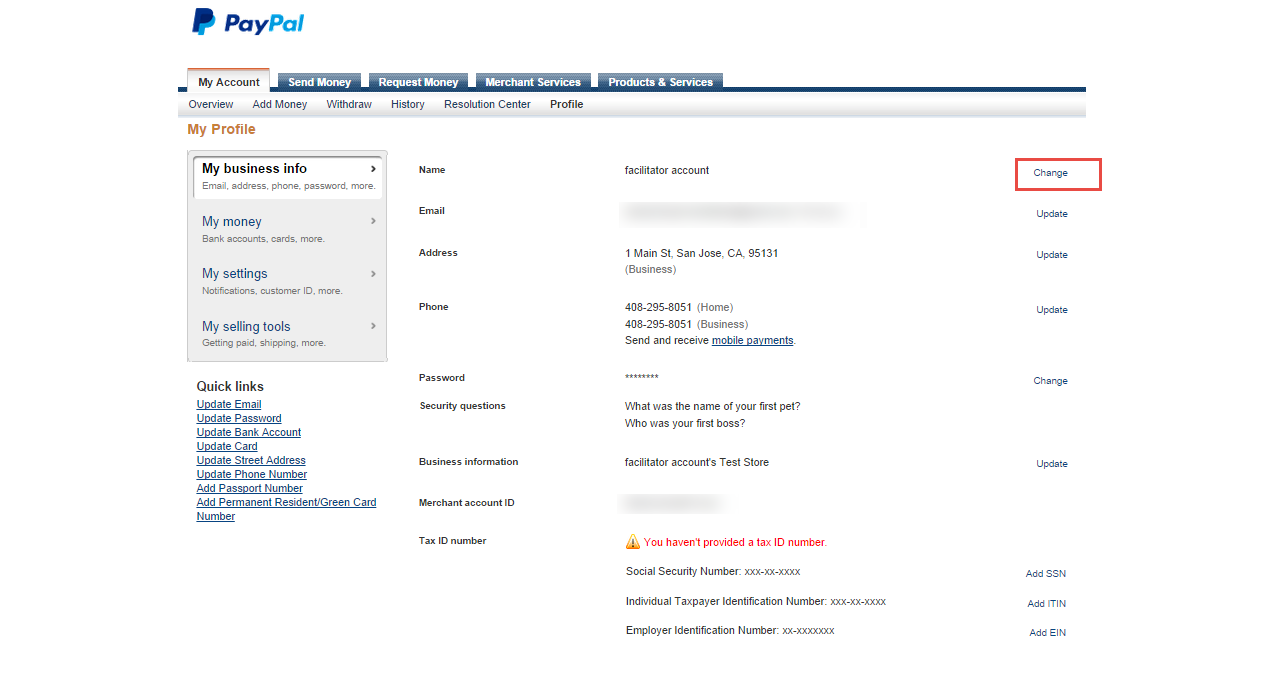
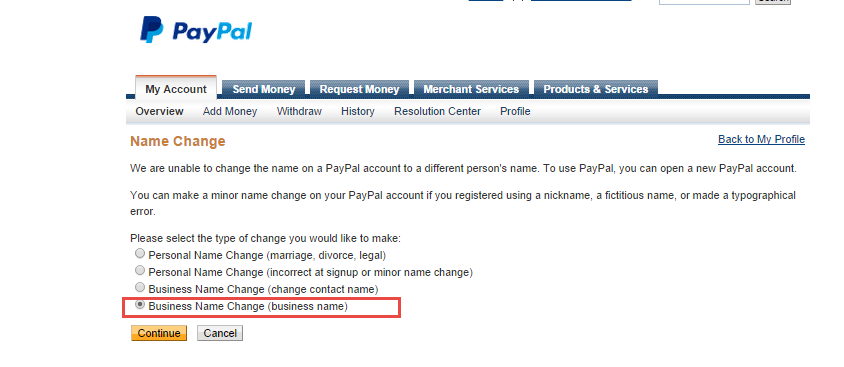
How to change the Sandbox store name
If you see text like test facilitator’s Test Store in Sandbox mode, this comes from the default Sandbox business account name.
To change it, log in to the Sandbox account and update the business name.
Go to:
Profile > My Business Info > Business Name Change
Step 1:
Step 2:
Step 3: