The Logos & Favicon settings control the main branding images used across your WPResidence website. From this section you can upload the favicon, standard header logo, sticky header logo, transparent header logo, mobile/tablet logo, and print page logo.
Use this panel when you want to replace the default WPResidence branding with your own company logo and make sure the correct logo version appears in each website area.
Where to find Logos & Favicon
To upload your own logos and favicon, go to:
Theme Options > General > Logos & Favicon
From this panel you can manage the main logo images used by the theme.

Favicon
The Favicon is the small icon displayed in the browser tab.
Upload your favicon from:
Theme Options > General > Logos & Favicon
Standard Logo
The Standard Logo is used in the regular website header menu.
This is the main logo visitors see when the normal header is displayed.

Sticky Logo
The Sticky Logo is used in the sticky menu.
The sticky menu appears when the visitor scrolls down the page, if the sticky header option is enabled on the site.
Transparent Header Logo
The Transparent Header Logo is used when the transparent header is enabled.
This logo appears over the hero area, usually above an image, video, or slider background.
Related help:
How to manage Transparent Header
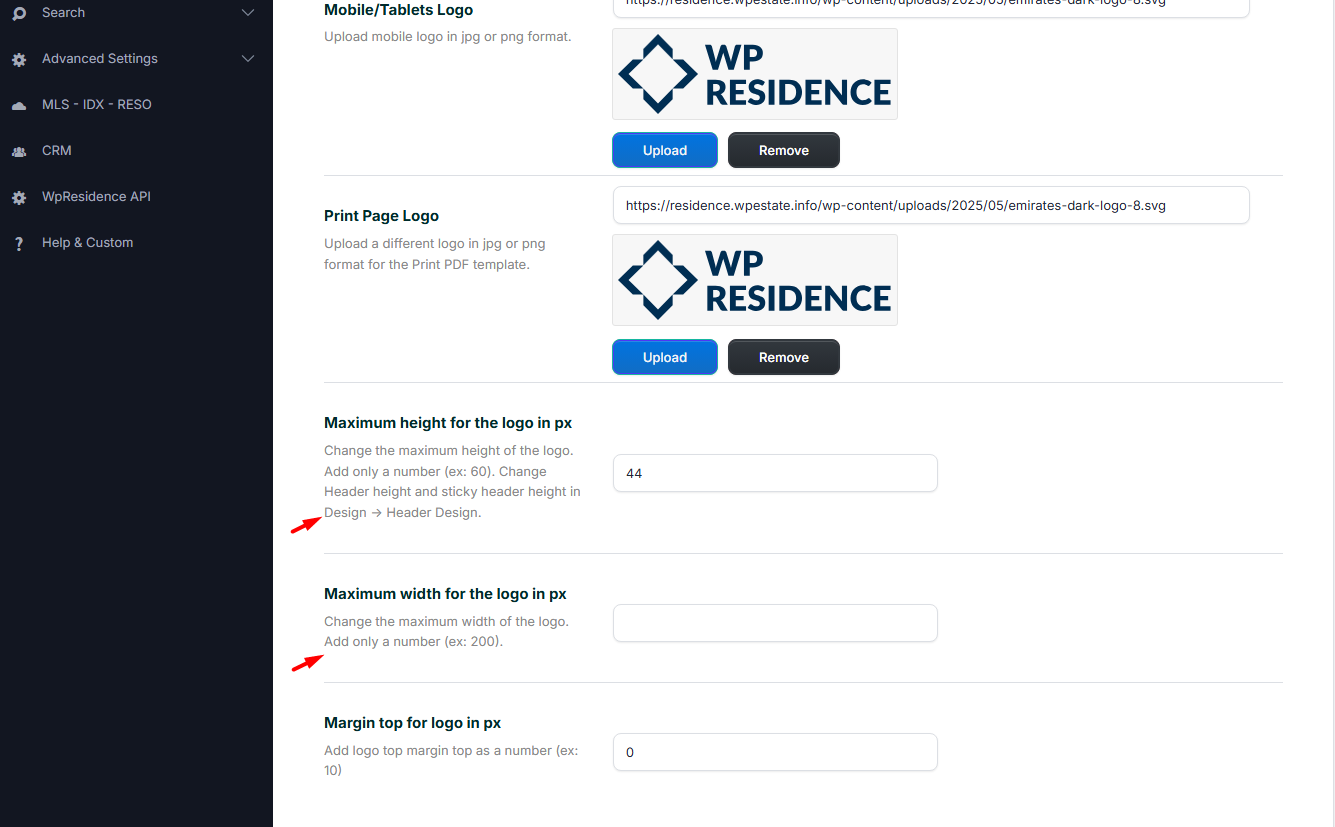
Mobile / Tablet Logo
The Mobile / Tablet Logo is used in the mobile header.
Upload a mobile logo if your desktop logo is too wide, too tall, or hard to read on small screens.
![]()
Related help:
Working with the Mobile Header in WPResidence
Print Logo
The Print Logo is used on the print/PDF version of the property page.
This is the logo visitors see when they use the print or PDF option from a property page.
Related help:
Theme Options – Property Page – Print Page Design
Retina logo versions
Retina logos are higher-resolution versions of the same logo. They are used on high-density screens, such as many modern phones, tablets, and laptops.
A retina logo keeps the logo sharp instead of blurry on these devices.
How retina logo files must be named
The retina logo file must have the same name as the standard logo file, with _2x, _3x, or _4x added before the file extension.
Example:
- logo.png – standard logo
- logo_2x.png – retina version for 2x screens
- logo_3x.png – retina version for 3x screens
- logo_4x.png – retina version for 4x screens
The same rule applies to the standard logo, sticky logo, transparent header logo, and mobile/tablet logo.
How to upload retina logos correctly
- Create the standard logo file, for example logo.png.
- Create the retina versions using the same file name and the correct suffix, for example logo_2x.png, logo_3x.png, and logo_4x.png.
- Upload the standard logo in Theme Options > General > Logos & Favicon.
- Upload the retina versions in the WordPress Media Library.
- Make sure the retina versions are uploaded in the same month as the standard logo, so WordPress saves them in the same uploads folder.
- Save Theme Options.
- Clear cache and reload the website.
Related help:
How to add the retina logos version correctly
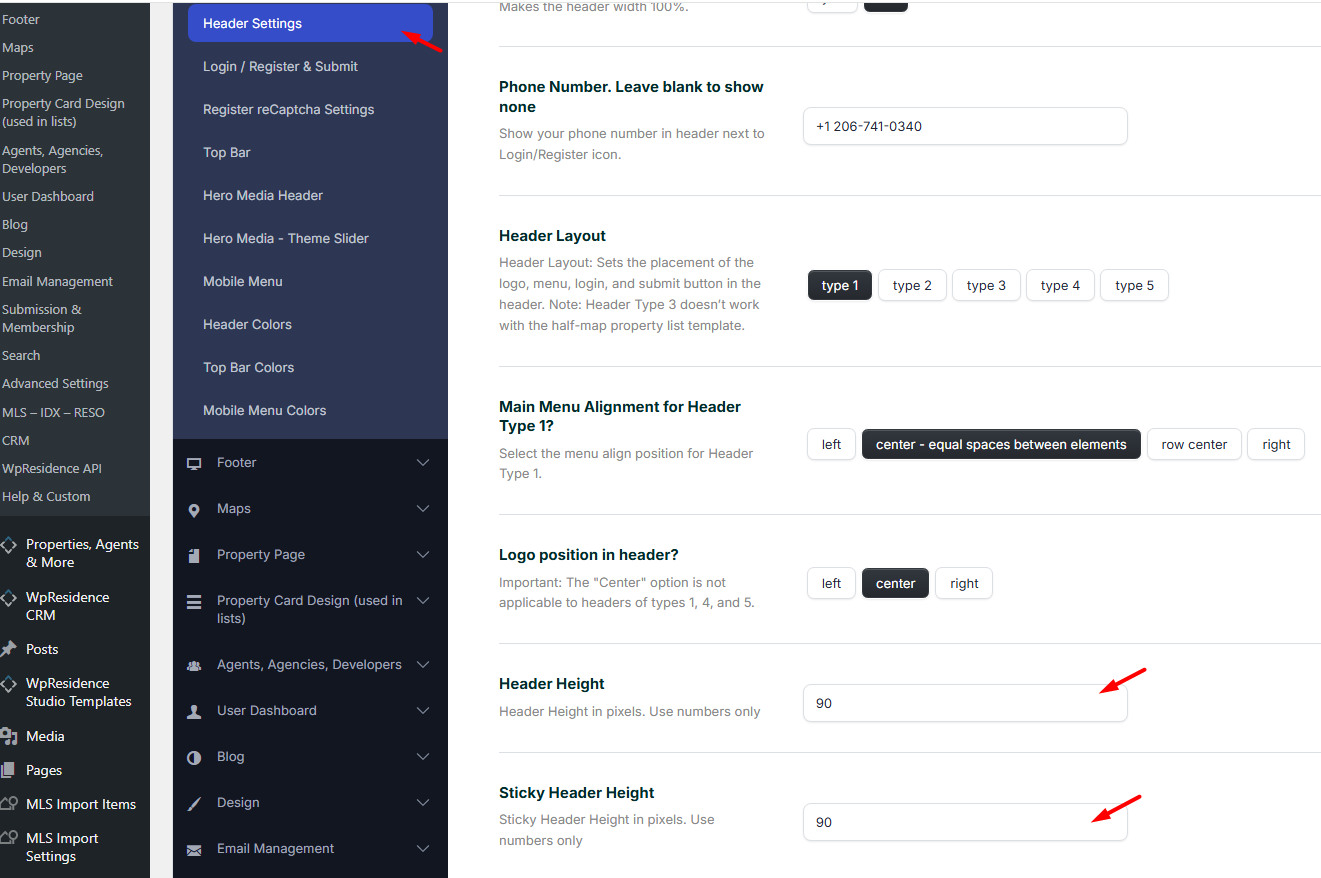
Increase logo size from Theme Options
By default, the header menu area has a height of 90px. This means the logo must fit inside this available header height.
You can control the logo height from:
Theme Options > General > Logos & Favicon
If your logo is taller than the header or sticky header area, increase the header height as well.
Go to:
Theme Options > Header > Header Settings
SVG logo troubleshooting
You can use an SVG file as a logo, but the SVG file must include proper dimensions.
When an SVG logo does not appear or looks invisible
Sometimes an SVG logo is uploaded correctly, but it does not show on the website. This can happen when the SVG file does not include explicit width and height attributes inside the SVG code.
Without these dimensions, some browsers or theme layouts may render the logo at zero size, so it appears invisible.
Why this happens
SVG files are scalable by design. Some SVG files include only a viewBox, without fixed width and height values.
If the theme or browser does not receive a clear width and height from the file, the logo area can collapse and the logo may not display.
How to fix the SVG file
- Open the SVG file in a vector editor such as Figma, Adobe Illustrator, or Inkscape. You can also use a plain text editor.
- Make sure the document or artboard is sized to the desired default logo size.
- Export the SVG with width and height attributes included in the <svg> tag.
Example:
<svg width="200" height="60" viewBox="0 0 200 60" xmlns="http://www.w3.org/2000/svg">
Save the file and upload the updated SVG again in WordPress.
Increase logo size with custom CSS
You can also adjust the logo size with custom CSS.
Add custom CSS in:
Theme Options > Design > Custom CSS
To change the normal logo height, use:
.logo img {
    max-height: 54px;
}
Change 54px to your preferred value.
To change the sticky menu logo size separately, use:
.customnav .logo img {
    max-height: 65px !important;
}
Change 65px to your preferred value.
Related help:
How to add custom CSS
Clear cache after changing logos
After uploading or replacing logos, clear cache if the new image does not appear immediately.
If WPResidence theme cache is enabled, clear it from the admin top bar using the Clear WPResidence Cache option.
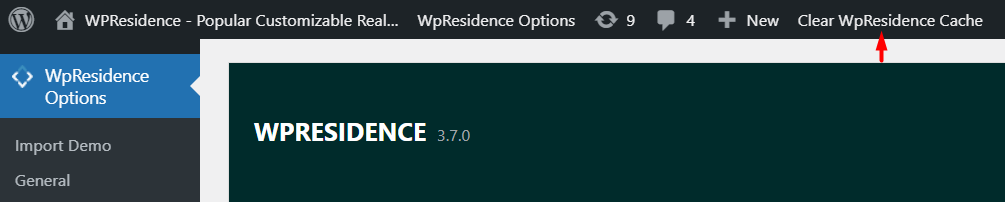
You should also clear any active cache plugin, server cache, or CDN cache if used.
Related help:
How to Enable / Disable WPResidence Cache
Related help articles
- How to add the retina logos version correctly
- How to manage Transparent Header
- Working with the Mobile Header in WPResidence
- How to change mobile header height and logo size
- How to change Header Type. How to change Logo / Menu position
- Customizing the WPResidence Logo Display
- Theme Options – Property Page – Print Page Design
- How to add custom CSS
- How to Enable / Disable WPResidence Cache