Overview
WPResidence includes multiple pre-made demos. Each demo is built with the same WPResidence theme.
The difference between demos is the imported setup:
- Theme Options configuration
- Pages and page layouts
- Menus
- Widgets
- Demo properties and demo content
- Demo media files
50 pre-made demos are available. Each demo has a dedicated video tutorial:
https://help.wpresidence.net/article/demo-import-video-tutorials/
Current WPResidence demos use Elementor. If you import an Elementor demo, make sure Elementor, WPResidence Elementor Widgets, and WPResidence Elementor Design Studio are installed and active.WPBakery is optional and is not used as the default builder for the current demos.
The demo content is provided for demonstration purposes only. Images, videos, and other media files included in the demo are placeholders and may be subject to copyright.They are not licensed for use on live websites. Replace all demo images and media files with your own licensed assets before using the website live.
Before you import a demo
Demo import should be done on a clean WordPress installation.
- Import only one demo on a clean WordPress installation.
- Do not import multiple demos on top of each other.
- Importing a demo replaces the current Theme Options with the demo settings.
- Importing several demos on the same website can duplicate menus, widgets, pages, demo properties, and demo content.
- The homepage will not replace itself correctly if another demo already exists on the site.
If you want pages or sections from another demo, do not import another full demo. Use WPResidence Studio to import pre-built Elementor demo pages or sections instead.
How to use WPResidence Design Studio templates to import pre-built Elementor demo pages or sections
Demo import video tutorials
You can find all demo import video tutorials here:
https://help.wpresidence.net/article/demo-import-video-tutorials/
Check server requirements
Before installing the theme and importing demo content, make sure your hosting meets the minimum requirements.
Theme WordPress Server Requirements
Demo import needs enough server resources to download, process, and save demo content. If the server limits are too low, the import can fail, stop before completion, or return server errors.
Install and activate WPResidence
Install the WPResidence theme from the WordPress admin area:
- Go to Appearance > Themes.
- Click Add New.
- Click Upload Theme.
- Upload the installable WPResidence theme ZIP file.
- Click Install Now.
- Activate the theme after installation.


Upload the installable WordPress theme ZIP file. If you downloaded the full ThemeForest package, unzip it first and use the theme ZIP file from inside that package.
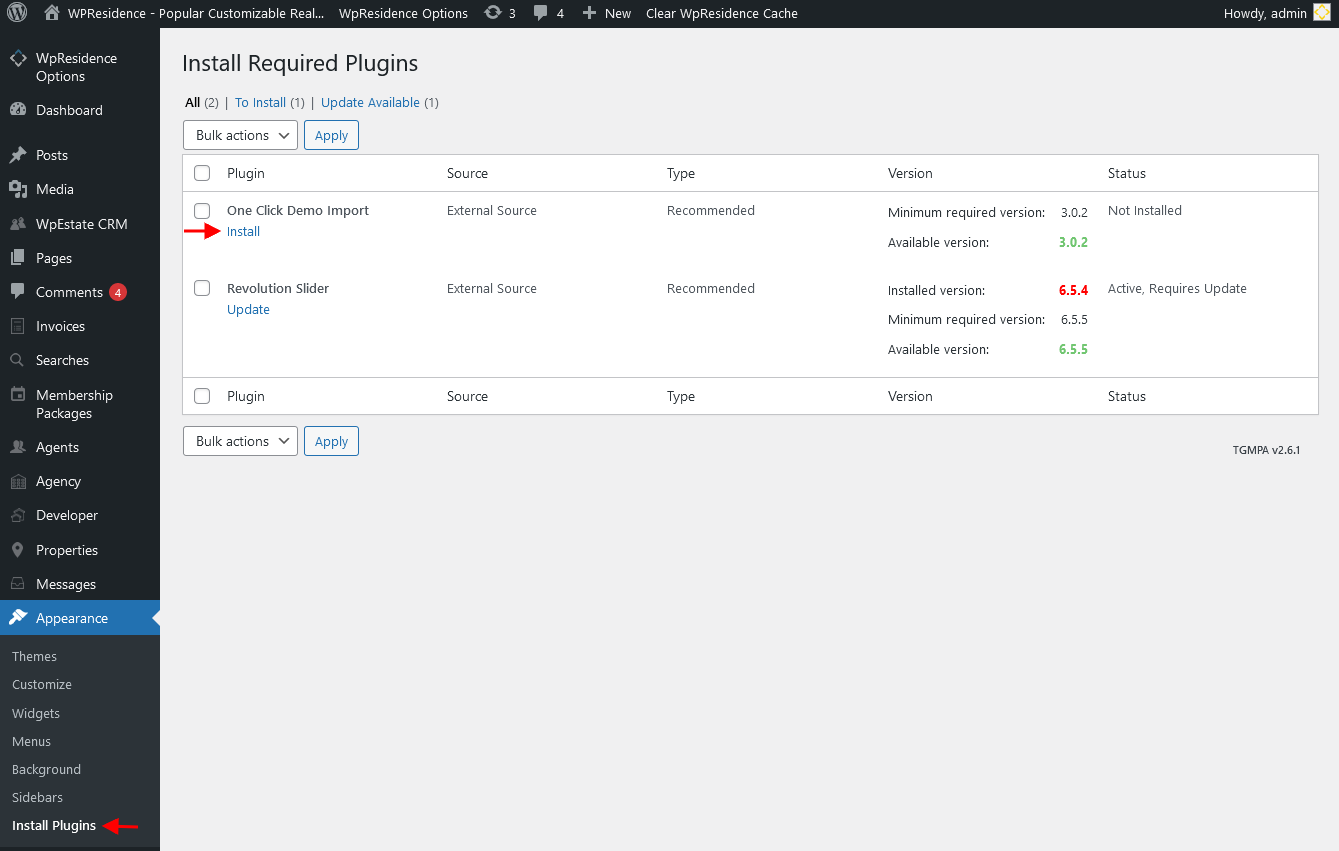
Install the required plugins
After the theme is active, install the required plugins from:
Appearance > Install Plugins
One Click Demo Import
Install and activate the One Click Demo Import plugin.
This plugin is required only for importing demo content. After the demo import is finished, it can be deleted.
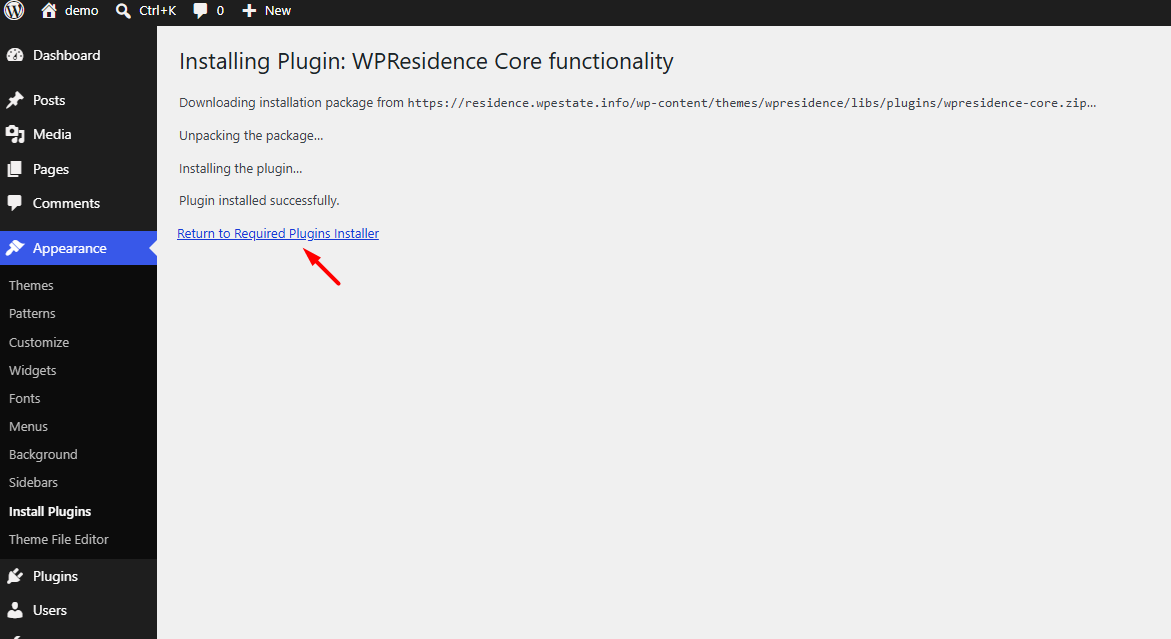
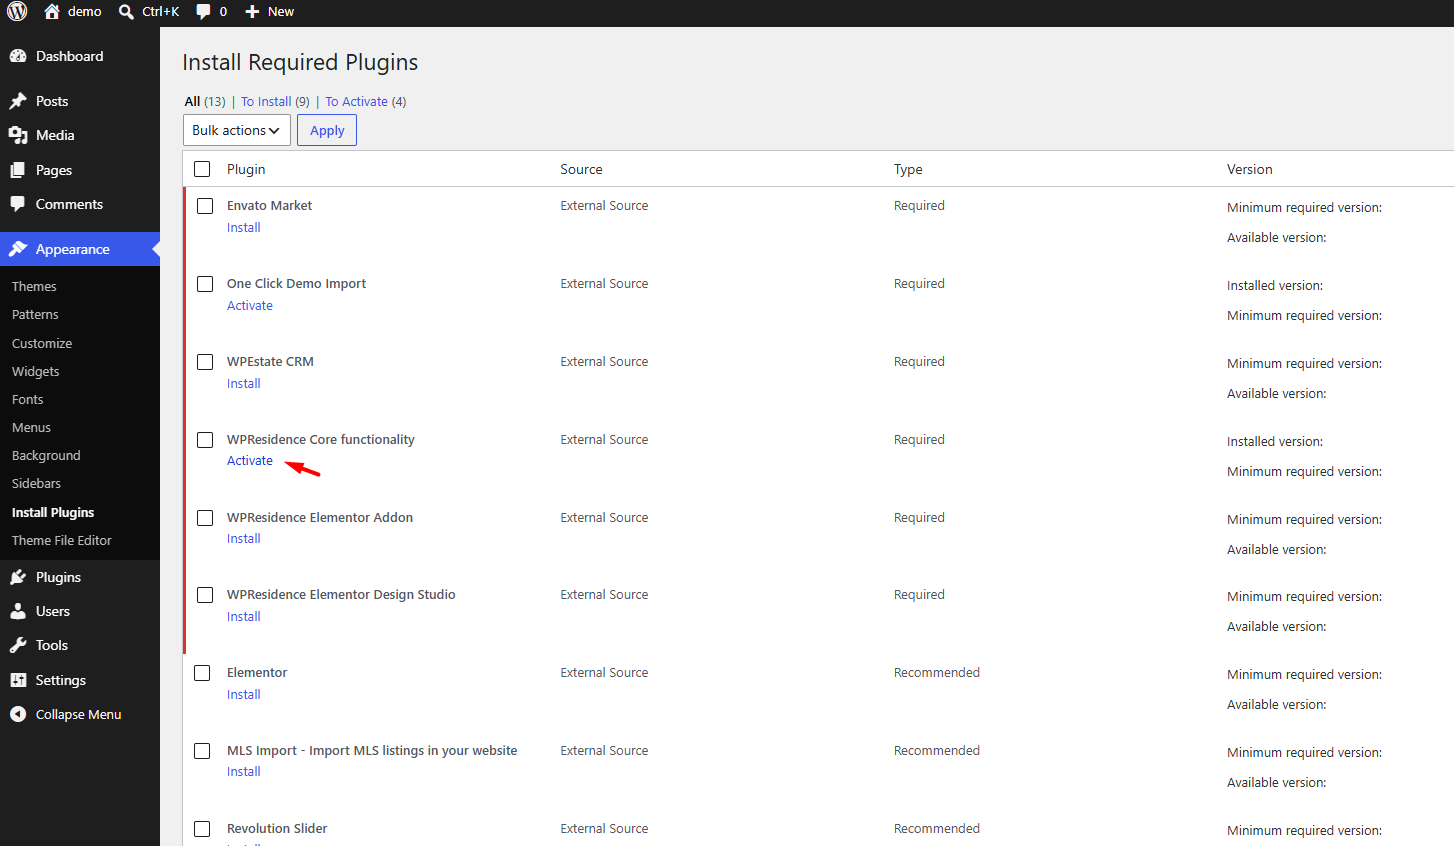
WPResidence Core Functionality
Install and activate the WPResidence Core Functionality plugin.
This plugin is required for WPResidence theme features and for the demo setup.
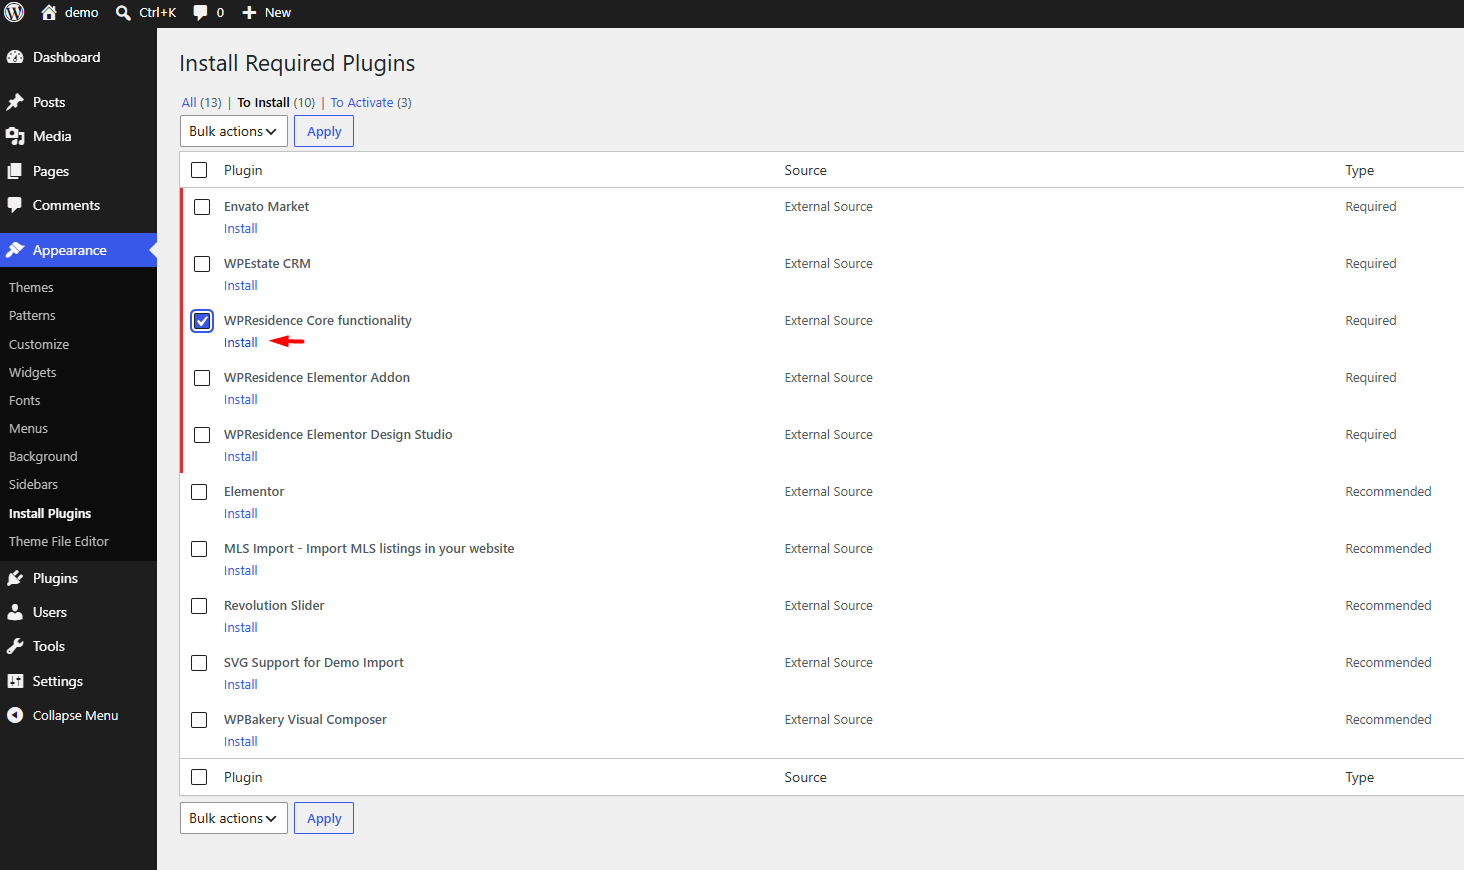
Elementor demos
Current WPResidence demos are built with Elementor.
For Elementor demos, install and activate:
- Elementor
- WPResidence Elementor Widgets
- WPResidence Elementor Design Studio
If required plugins are missing or inactive, the demo may import, but pages, widgets, layouts, or design sections may not display correctly.
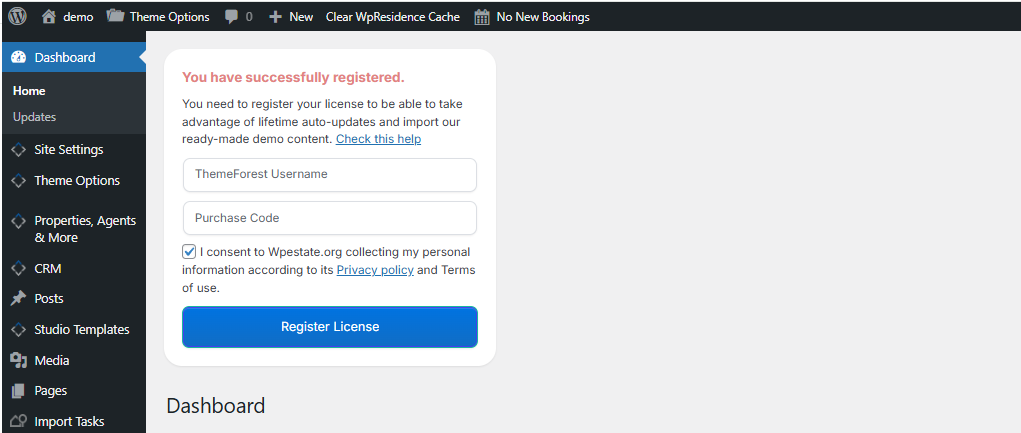
Register the theme license
Demo import requires valid theme activation.
Register the theme with:
- Your ThemeForest username
- Your ThemeForest purchase code
If you are not sure where to find your purchase code, check this guide:
https://help.wpresidence.net/article/where-is-my-purchase-code/
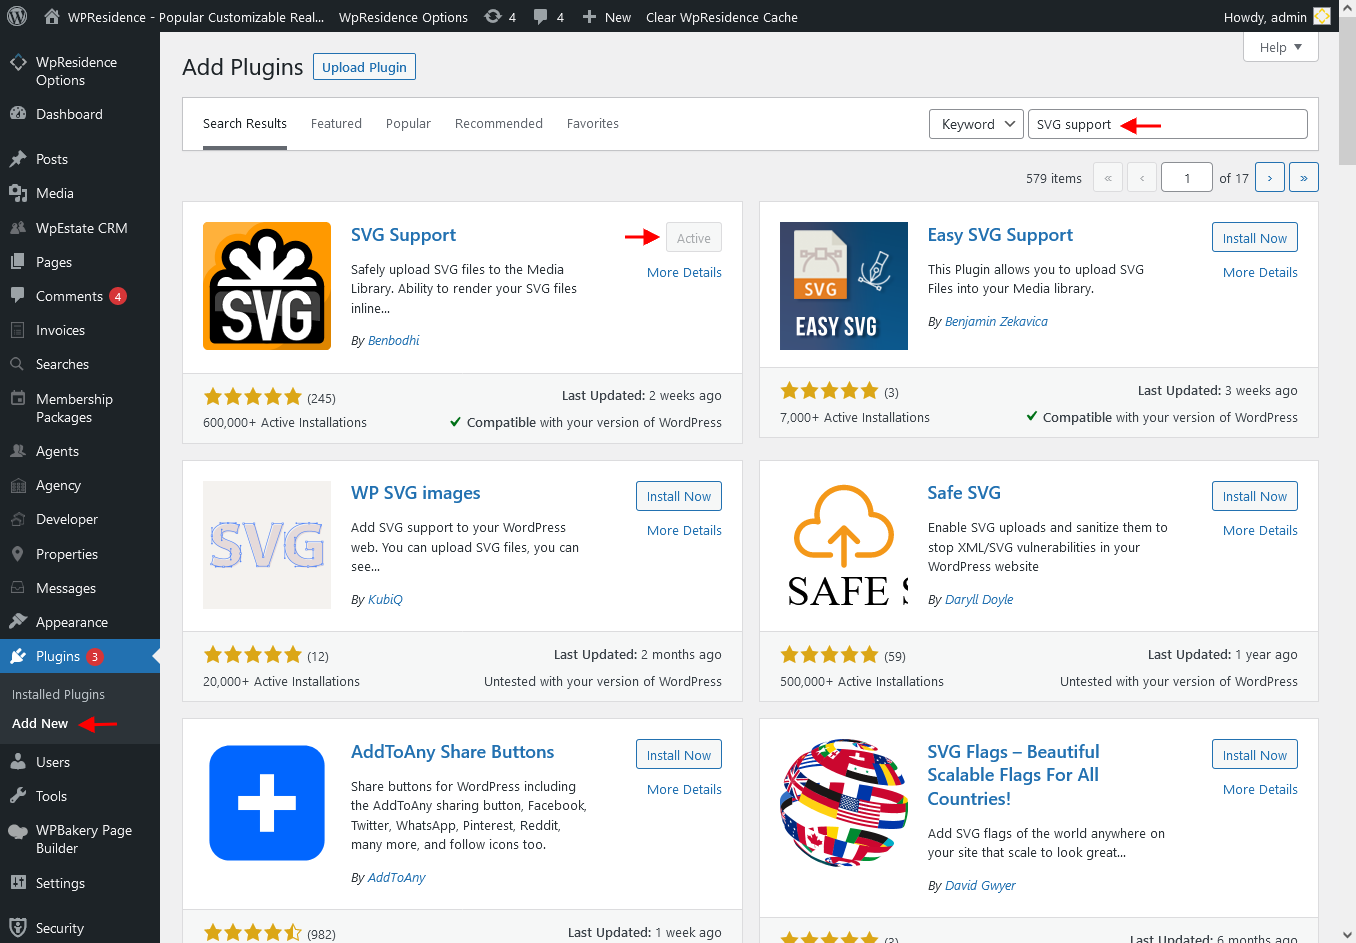
Allow SVG icons before demo import
SVG icons are disabled by default in WordPress.
Some demos use SVG icons. Enable SVG support before importing the demo, otherwise some demo icons may not import or display correctly.
The easiest method is to install this plugin:
After installing the plugin, enable SVG upload for administrators only.
Import the demo
Before starting the import, confirm that:
- WPResidence is installed and active.
- The theme license is registered.
- WPResidence Core Functionality is active.
- One Click Demo Import is active.
- For Elementor demos, Elementor, WPResidence Elementor Widgets, and WPResidence Elementor Design Studio are active.
- SVG support is enabled if the selected demo uses SVG icons.
- Cache and optimization plugins are disabled during import.
To import the demo:
- Go to Import Demo Data.
- Choose the demo you want to import.
- Click the import button.
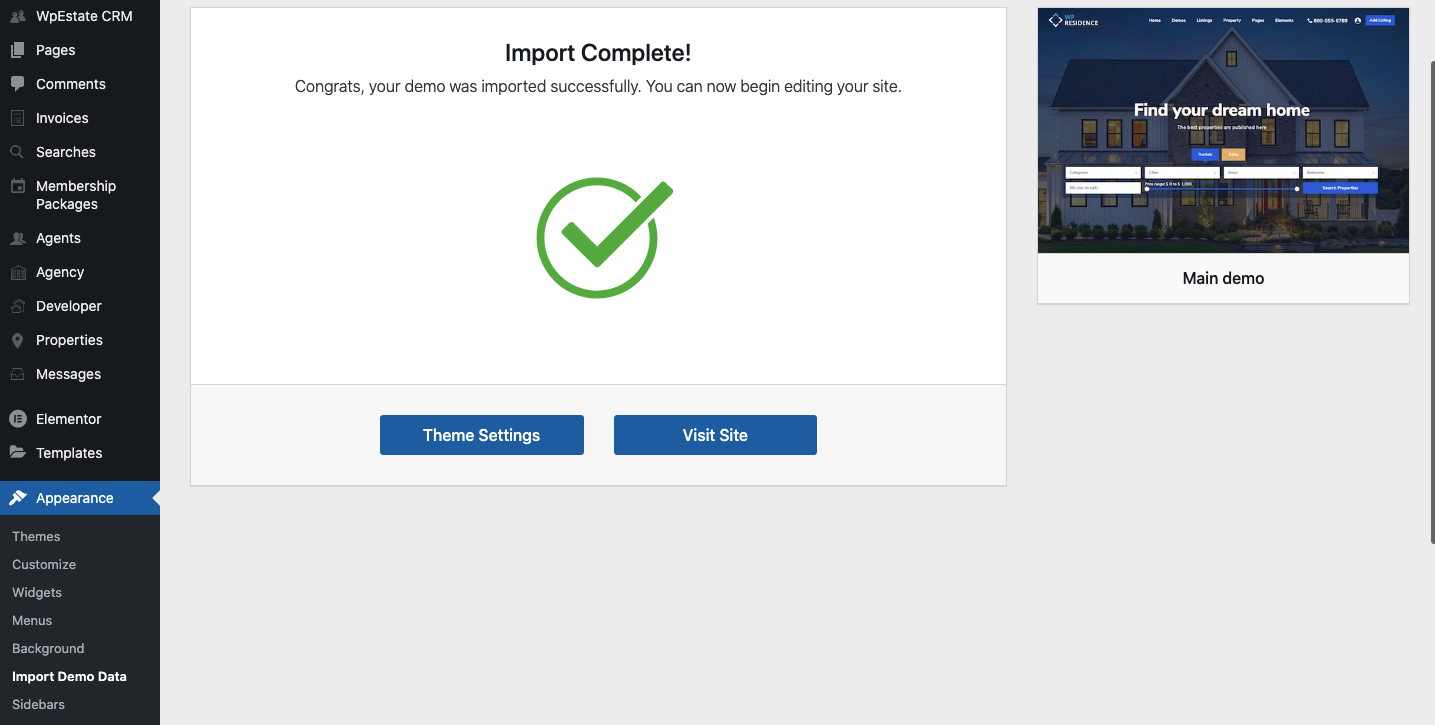
- Wait until the process finishes. Do not refresh the page and do not close the browser tab.
- When the import is completed, the import complete message will show.

If demos are not listed
If the demos are not listed on the Import Demo Data page, do not continue with the import.
This usually means there is an installation issue, a missing required plugin, a license activation issue, or a server-side restriction that prevents the demo list from loading.
Check these items first:
- Go to Appearance > Themes and confirm that WPResidence is installed and active.
- Confirm that the correct installable WPResidence theme ZIP was uploaded, not the full ThemeForest package.
- Confirm that the theme is registered with your ThemeForest username and purchase code.
- Go to Appearance > Install Plugins and confirm that WPResidence Core Functionality is installed and active.
- Confirm that One Click Demo Import is installed and active.
- Temporarily disable cache, optimization, firewall, and security plugins, then refresh the Import Demo Data page.
- Confirm that your server meets the WPResidence server requirements.
Theme WordPress Server Requirements
If the demos are still not listed after these checks, please open a support ticket so we can investigate the installation and server response directly.
Open a ticket here:
Please include:
- Your website URL or temporary URL.
- Temporary WordPress admin access.
- A screenshot of the Import Demo Data page where the demos are missing.
When demos are not listed, the cause is usually related to an incorrect installation or a server-side restriction. We need temporary site access to check the installation, required plugins, theme activation, server limits, and blocked requests.
After demo import
After the demo import is completed:
- Delete the One Click Demo Import plugin. It is no longer needed.
- Check that the homepage is assigned correctly.
- Check that menus are assigned correctly.
- Check that widgets are in the correct widget areas.
- Check that Theme Options match the imported demo.
- Open the imported Elementor pages and confirm they display correctly.
- Replace all demo images, demo text, and placeholder content with your own content.
- Clear cache after making changes.
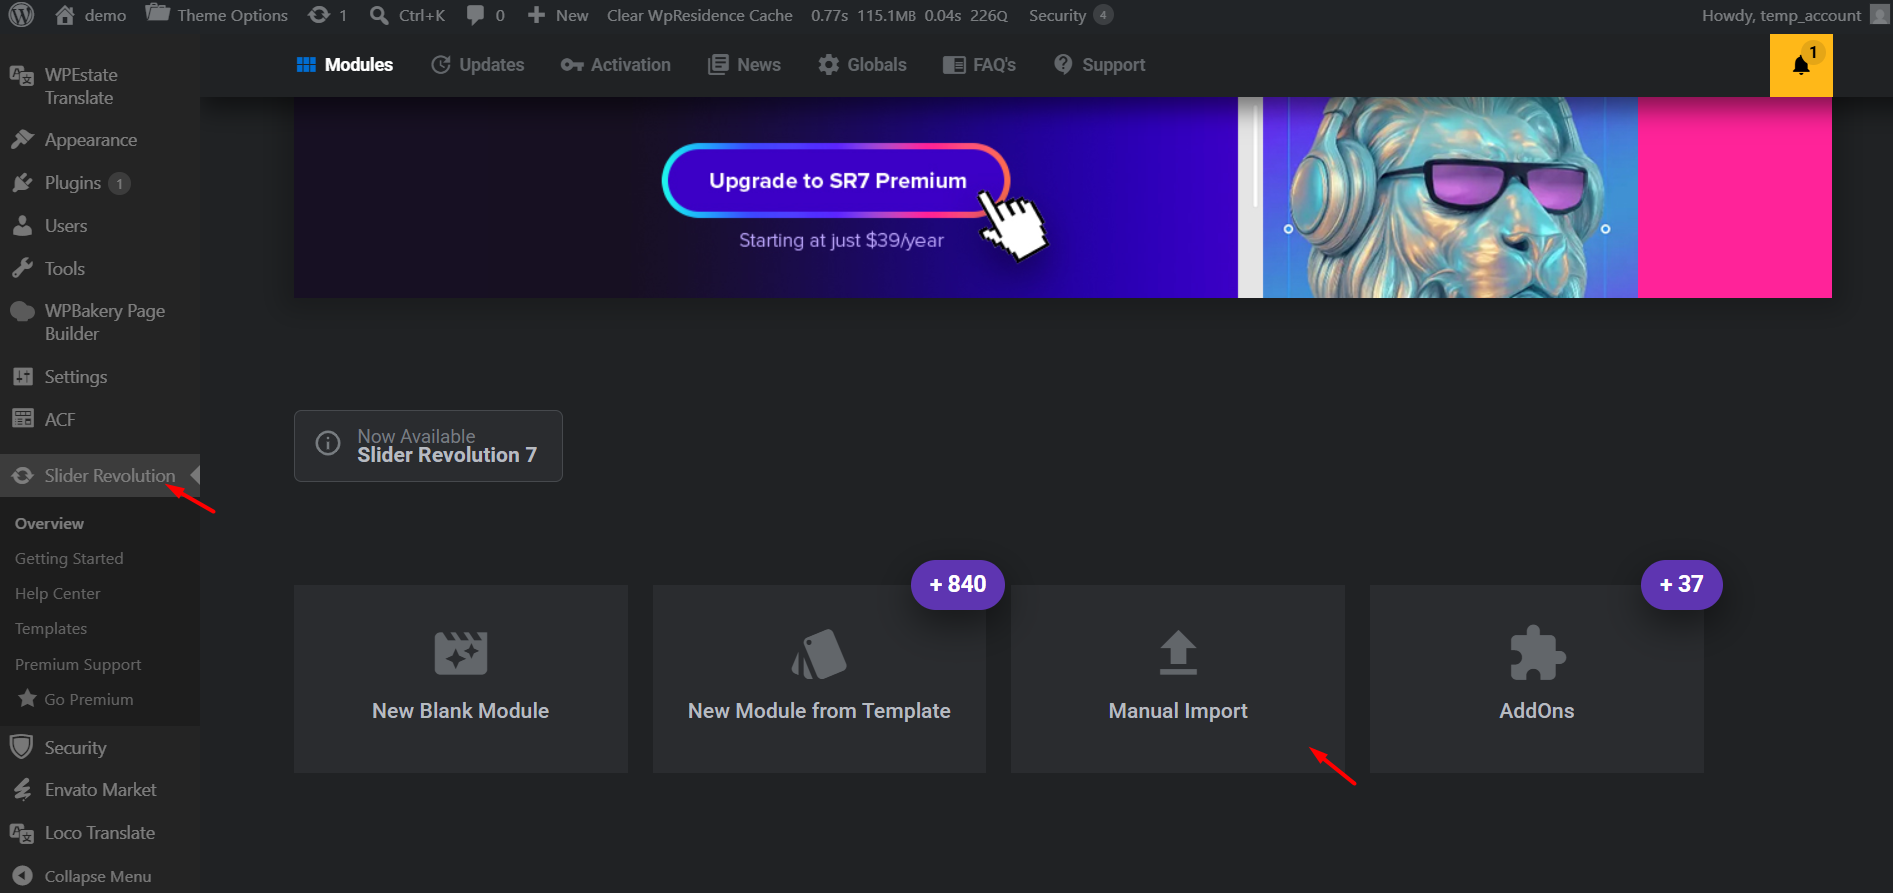
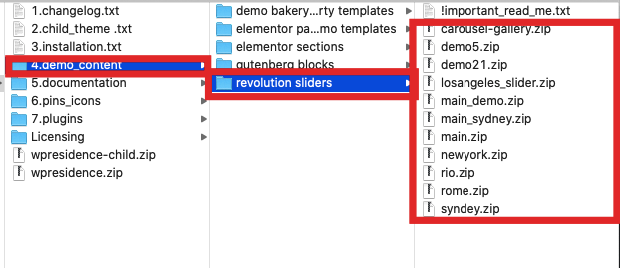
Import Revolution Slider demos
If the selected demo uses Revolution Slider, import the slider demo manually.
To import Revolution Slider demos:
- Unzip the Full theme and documentation package downloaded from ThemeForest.
- Open the demo_content/revolution sliders folder.
- Go to Revolution Slider > Import.
- Select the slider ZIP file.
- Click Import.
If Elementor does not load
If the demo import is successful, but Edit with Elementor opens a Page Not Found page, shows a critical error, or the Elementor editor does not load, the issue is usually related to server configuration, cache, security rules, or Elementor loading settings.
First, enable this Elementor option:
Elementor > Settings > Advanced > Switch Editor Loader Method > Enable
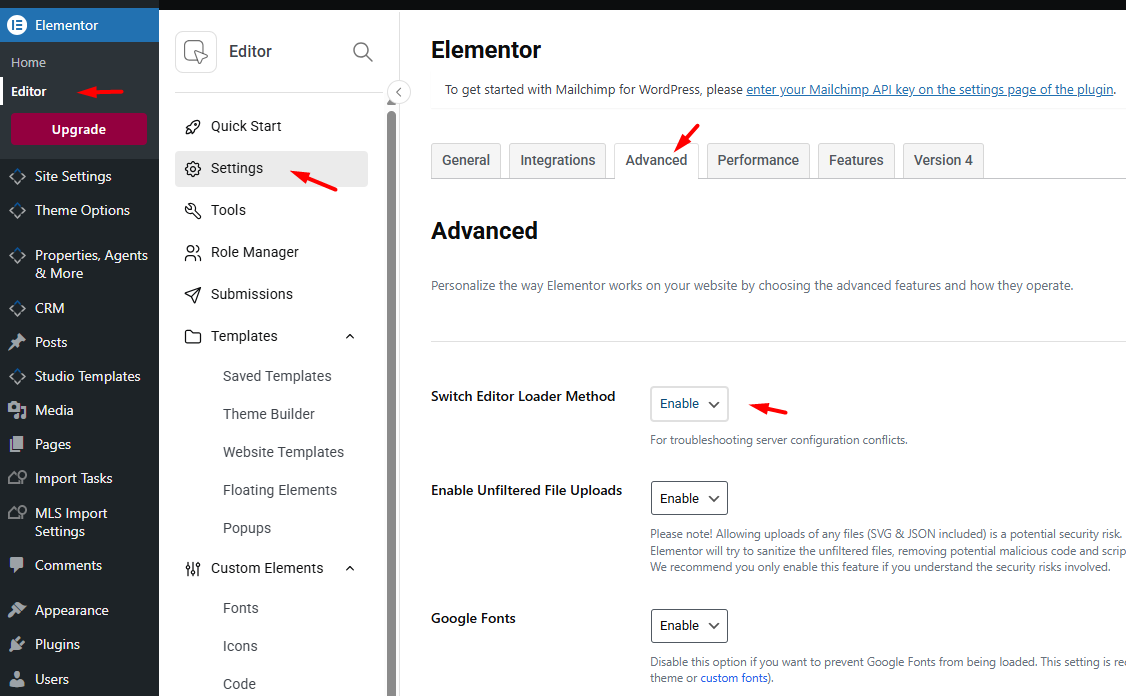
After enabling this option, save the settings and test Edit with Elementor again.
If the issue continues, check:
- Elementor and WPResidence Elementor Widgets are updated.
- Settings > Permalinks were saved again.
- Plugin cache, server cache, CDN cache, and browser cache were cleared.
- Security, optimization, redirect, or firewall plugins are not blocking Elementor.
- Your hosting provider checked ModSecurity, firewall rules, and server restrictions for blocked Elementor requests.
If Elementor loads correctly after enabling Switch Editor Loader Method, do not re-import the demo.
If demo import fails
If you see errors such as:
- Import Failed
- Whoops, there was a problem importing your content
- 500 error
- 503 error
These errors are usually caused by server limits, hosting restrictions, cache, or blocked external requests.
Recommended minimum PHP limits
- max_execution_time: 180
- memory_limit: 96M, with 128M recommended
- post_max_size: 32M
- upload_max_filesize: 48M
How to verify your current PHP limits
What to check before retrying the import
- Disable all caching and optimization plugins before importing.
- Disable LiteSpeed Cache before importing if your host auto-installs it.
- Purge all caches before retrying the import.
- Ask your hosting provider to confirm that cURL is enabled.
- Ask your hosting provider to confirm that outbound HTTPS on port 443 is allowed.
- Ask your hosting provider to check server error logs for the exact cause of the 500, 503, or timeout error.
503 errors are usually related to server timeouts, blocked requests, or insufficient server resources.
Reset WordPress before importing another demo
To switch to another demo, reset the existing demo content first.
Do not import another demo on top of an existing demo.
Resetting WordPress removes existing content, settings, menus, widgets, and demo data. Use this only on a new setup or staging website, and make a full backup before resetting.