This help explains how to install WPResidence, install the included plugins, activate the license, and prepare the site for demo import.
Before You Install WPResidence
Before installing WPResidence, make sure you already have:
- A hosting account
- A domain name
- WordPress installed on your domain
If WordPress is not installed yet, ask your hosting provider to install it for you, or follow the official WordPress installation guide.
Server Requirements and PHP Limits
Before installing the theme or importing a demo, check that your hosting meets the recommended server requirements.
WPResidence server requirements
Recommended minimum values:
- max_execution_time: 600
- memory_limit: 512M
- post_max_size: 64M
- upload_max_filesize: 64M
Recommended PHP modules:
- XMLReader
- cURL
Download WPResidence From ThemeForest
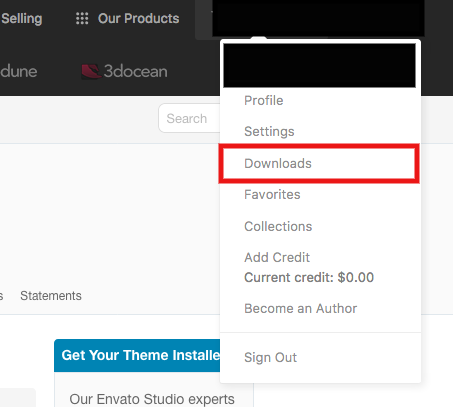
Log in to ThemeForest with the account used to buy WPResidence.
Go to your Downloads page:
https://themeforest.net/downloads
You will see two download options:
- Installable WordPress file only – use this if you want to install the theme directly from WordPress.
- All files & documentation – use this if you also need the child theme, documentation, or extra package files.

Install WPResidence via WordPress
- Go to Appearance → Themes.
- Click Add New.
- Click Upload Theme.
- Select wpresidence.zip.
- Click Install Now.
- Click Activate.


Install WPResidence via FTP
Use FTP only if the WordPress upload method does not work on your hosting.
- Download All files & documentation from ThemeForest.
- Unzip the downloaded package.
- Locate the wpresidence theme folder.
- Upload the wpresidence folder to wp-content/themes/.
- Go to Appearance → Themes.
- Activate WPResidence.
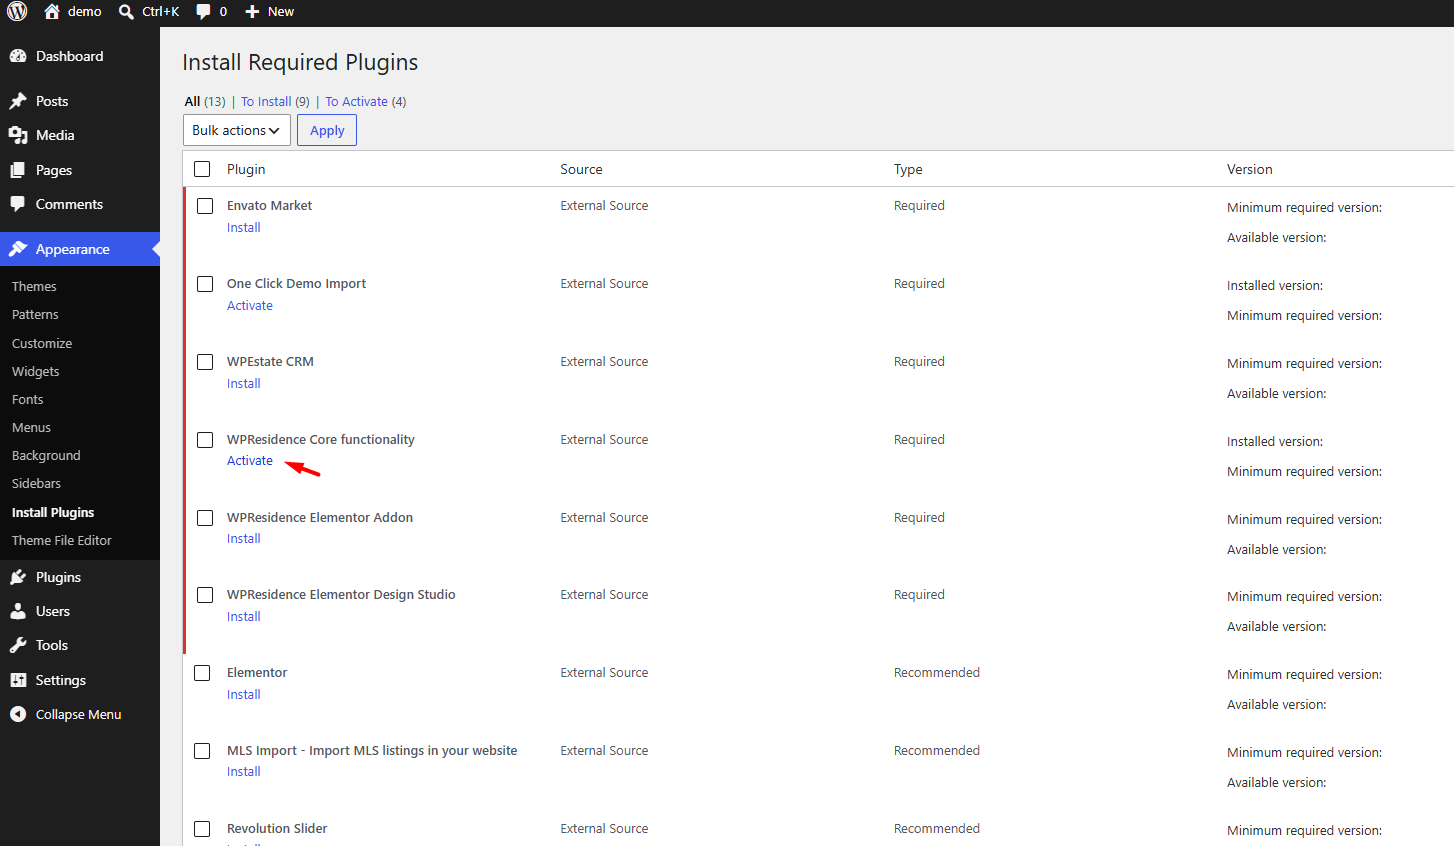
Install Required and Optional Plugins
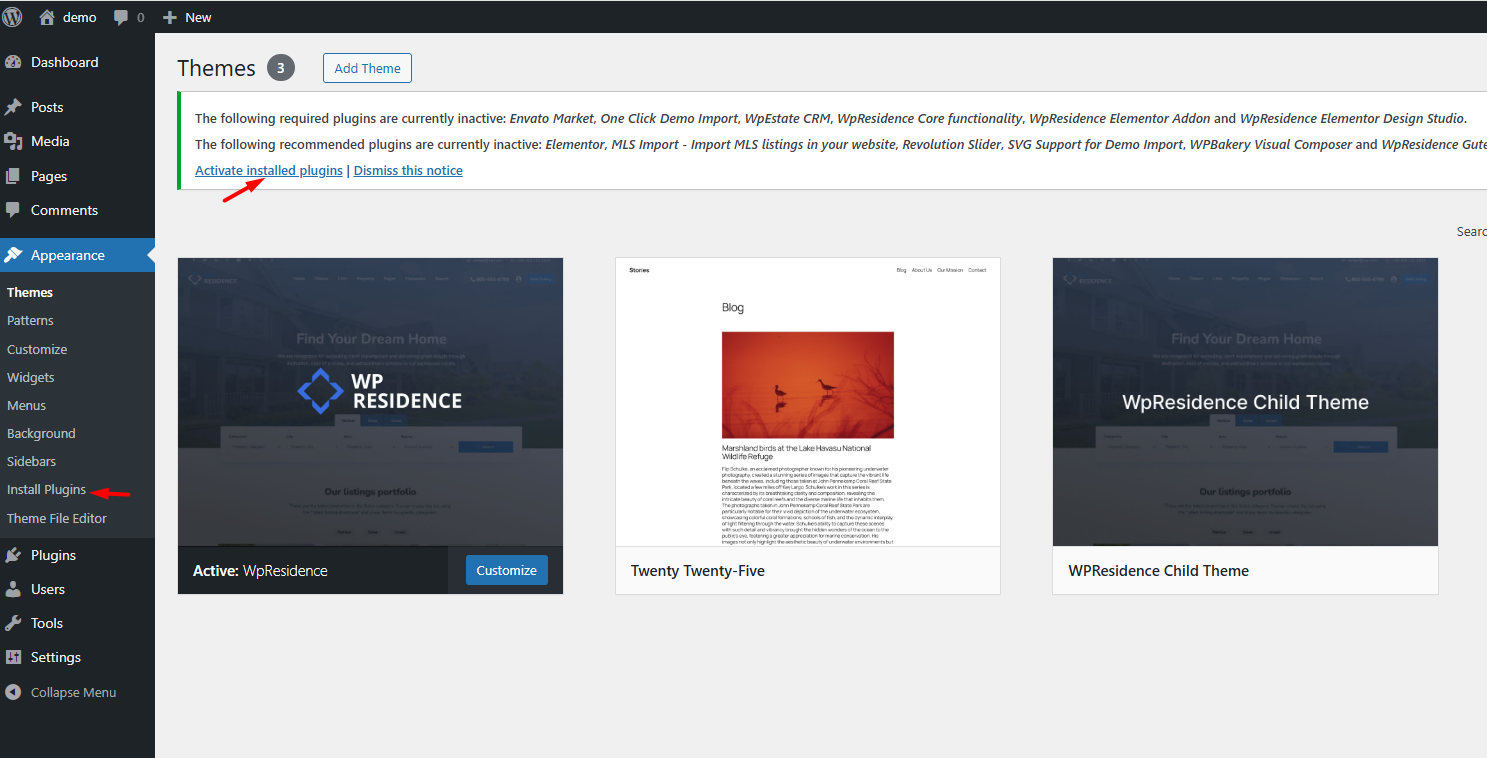
After you activate WPResidence, WordPress will show a notice to install the included plugins.
Go to:
Appearance → Install Plugins
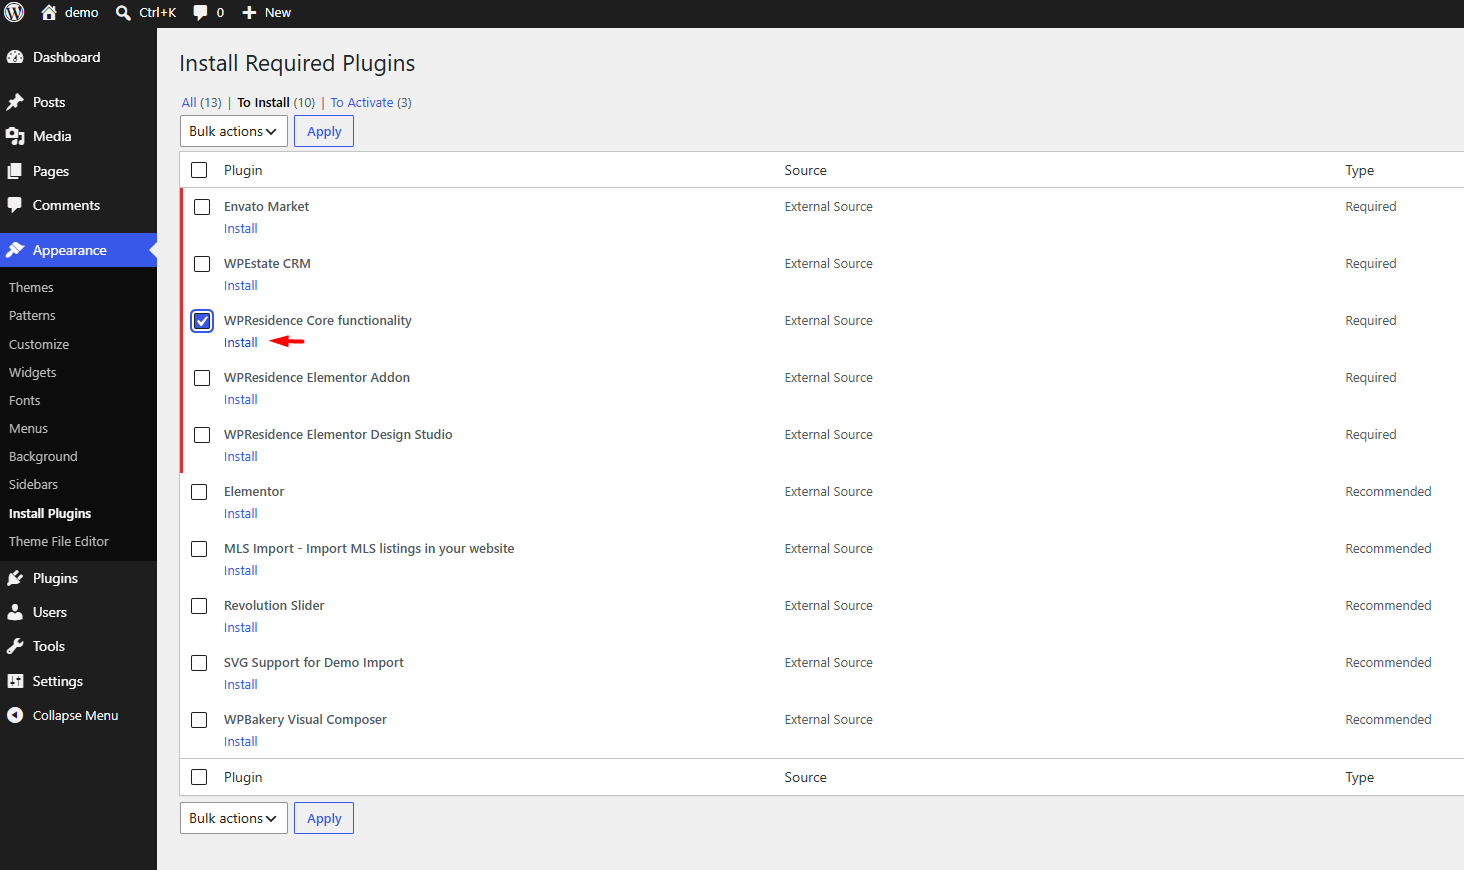
Required Plugin
Install and activate this plugin first:
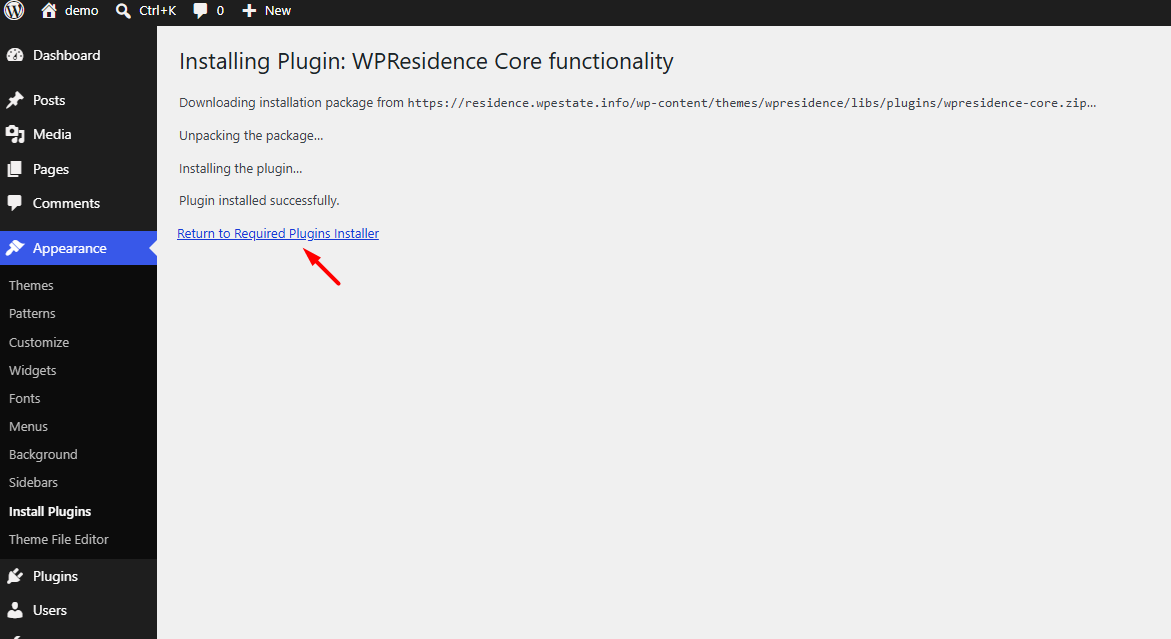
- WPResidence Core Functionality – required for Theme Options, license activation, property functionality, agents, agencies, search, and other main theme features.
Plugins Recommended for Elementor Demos
Most WPResidence demos and demo sections are created with Elementor. If you want to import and edit Elementor demos, install and activate these plugins:
- Elementor – the page builder used to edit Elementor pages and templates.
- WPResidence Elementor Widgets – adds WPResidence widgets for Elementor, such as property lists, search forms, agents, agencies, blog widgets, and other theme elements.
- WPResidence Studio – lets you import pre-built Elementor pages, sections, headers, footers, property templates, blog templates, and other templates. It also lets you create and assign custom templates without editing code.
- One Click Demo Import – required only if you want to import a full demo. You can remove it after the demo import is completed.
WPResidence Elementor Studio help
Optional Plugins
Install these only if you need the feature they provide:
- WPResidence Gutenberg Blocks Functionality – use this if you want to build content with Gutenberg blocks.
- WPBakery Page Builder – optional. Use it only if you want to build pages with WPBakery widgets instead of Elementor.
- Revolution Slider – optional. Use it only if your demo or design uses sliders.
- WPEstate CRM – optional. Use it if you want to manage leads, contacts, and CRM workflows from your website.
- WPEstate Translate – optional. Use it if you want to create a multilingual WPResidence website.
- MLSImport – optional. Use it if you want to import MLS listings into WPResidence from a RESO Web API MLS feed. MLSImport requires a separate MLSImport subscription and approved MLS feed access.
How to set up the WPResidence CRM
WPEstate Translate for WPResidence
Which Plugins Should You Install?
- Basic theme setup: WPResidence Core Functionality
- Import a full Elementor demo: WPResidence Core Functionality, Elementor, WPResidence Elementor Widgets, WPResidence Studio, One Click Demo Import
- Use Elementor templates without full demo import: Elementor, WPResidence Elementor Widgets, WPResidence Studio
- Use Gutenberg blocks: WPResidence Gutenberg Blocks Functionality
- Use WPBakery: WPBakery Page Builder
- Use CRM: WPEstate CRM
- Use multilingual features: WPEstate Translate
- Use sliders: Revolution Slider
- Import MLS listings: MLSImport, with an active MLSImport subscription and approved MLS feed credentials
Plugin Install Fails With Download Failed. Forbidden
If you see this message when installing the required plugin:
An error occurred while installing WPResidence Core Functionality: Download failed. Forbidden
This usually means the server is blocking WordPress from downloading the plugin package.
Common causes are hosting firewall rules, ModSecurity, security plugins, blocked external requests, or incorrect file permissions.
What to check
- Make sure WPResidence is installed and activated.
- Go to Appearance → Install Plugins and try again.
- Confirm that cURL is enabled on the server.
- Temporarily disable security or firewall plugins, then retry the install.
- Ask your hosting provider to check if ModSecurity or a firewall rule is blocking the plugin download with a 403 Forbidden response.
- Confirm that WordPress can write to wp-content/plugins/.
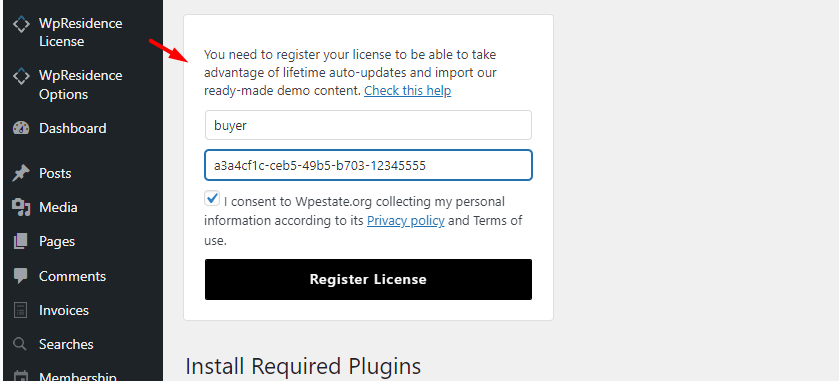
Activate Your License
License activation is required for theme registration and demo import.
Step 1: Get your ThemeForest purchase code
- Log in to ThemeForest with the account used to buy WPResidence.
- Go to Downloads.
- Find WPResidence.
- Select License Certificate and Purchase Code.
- Open the downloaded text file and copy the purchase code.
How to get your buyer license code
Step 2: Register the license in WordPress
- Make sure WPResidence Core Functionality is installed and activated.
- Refresh the WordPress admin page.
- Open the WPResidence License section.
- Paste your ThemeForest purchase code.
- Click the button to register or activate the license.
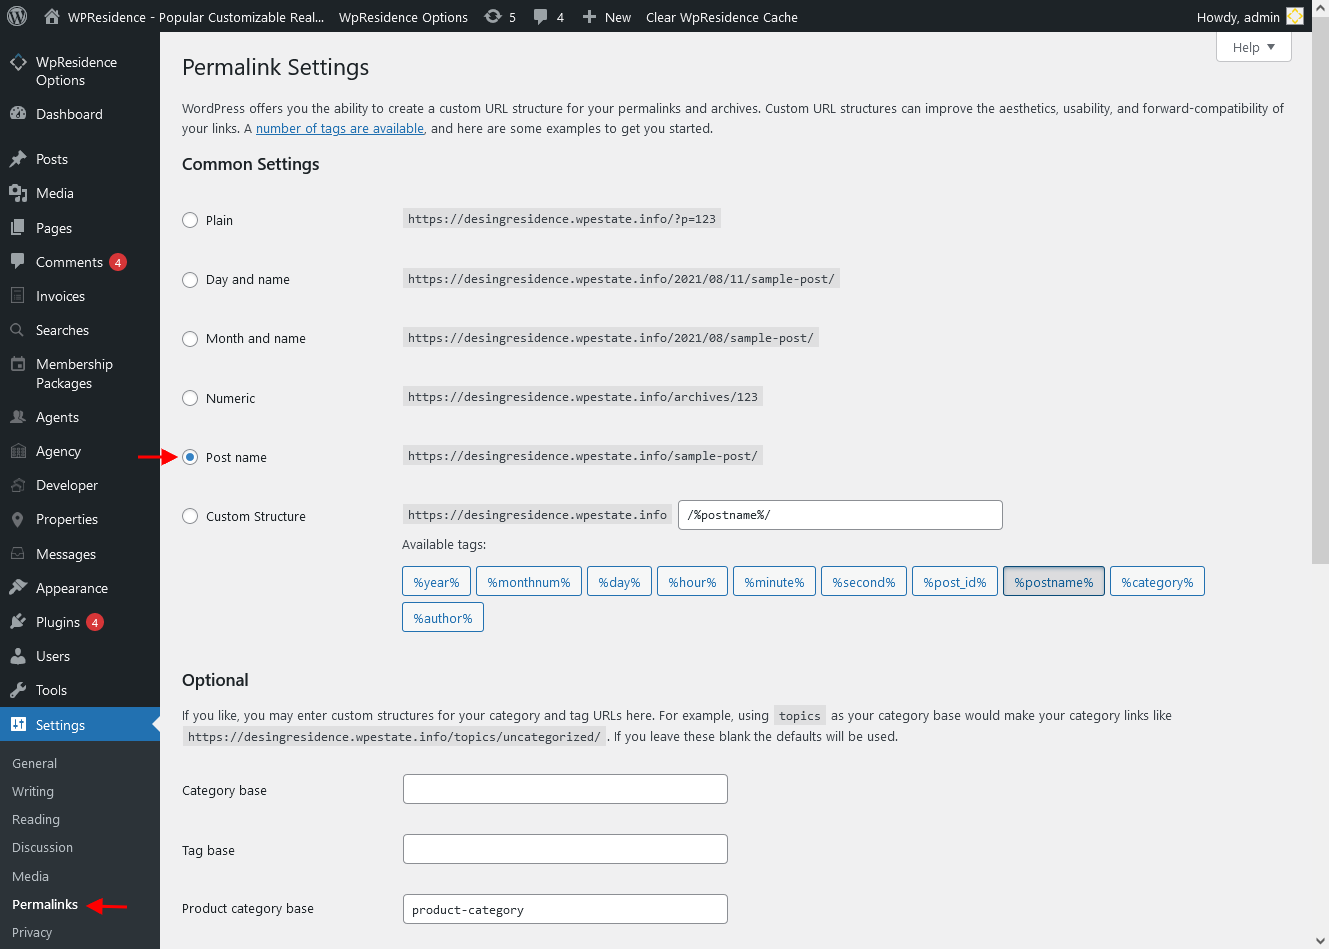
Save Permalinks
After installing the theme and plugins, save permalinks.
- Go to Settings → Permalinks.
- Select Post name.
- Click Save Changes.
Import Demo Content
After the theme is installed, the required plugins are active, the license is activated, and permalinks are saved, you can import a demo.
- Import demos only on a clean WordPress installation.
- Import one demo only.
- Do not import multiple demos on top of each other.
- Importing multiple demos can create duplicate pages, menus, widgets, and settings.
- If you want a different demo, reset the site and import again.
- If you want only pages or sections from other demos, use WPResidence Studio instead of importing a full second demo.
Demo import guides: