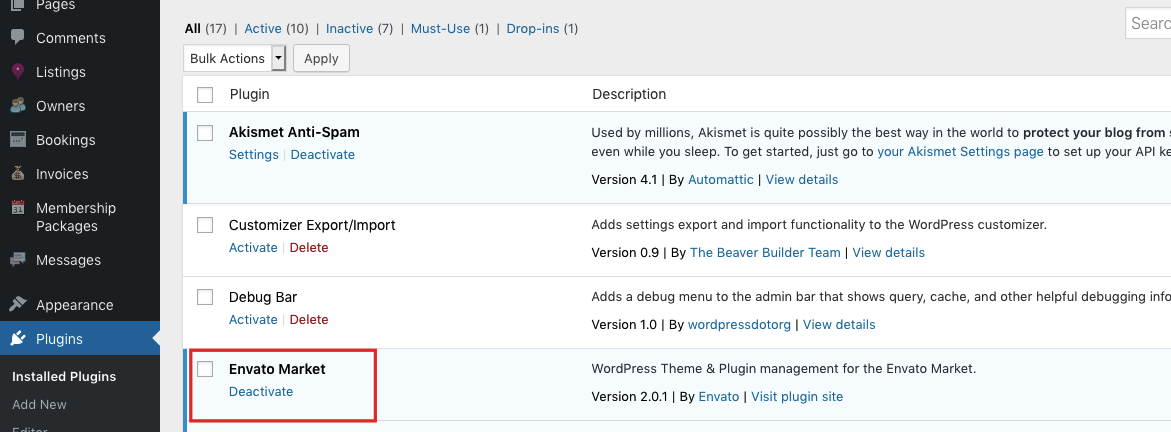
How to update WPResidence
Updating WPResidence is a normal maintenance task. The update replaces the theme files, and plugin updates replace the plugin files.
To avoid issues, always update the theme and the required WPResidence plugins together. The most important plugin to update after the theme is WPResidence Core Functionality, because the theme and core plugin are designed to work as a pair.
- Never edit the parent theme files directly. Theme updates replace parent theme files. If you changed code directly inside the parent theme, those changes will be lost.
- Use a child theme for custom code. Custom PHP, CSS, templates, and translation files should be stored safely outside the parent theme.
- Update on staging first if the website is live, active, or customized.
- Update WPResidence Core Functionality after updating the theme. This is mandatory.
- Update all included WPResidence plugins after updating the theme, especially if Elementor or theme widgets are used.
- Clear all cache after updates. Old cached CSS, JavaScript, or HTML can make the site look broken even when the update completed correctly.
Create a full backup
Before any update, create a full backup of the website.
The backup should include:
- The WordPress files.
- The WordPress database.
- Custom translation files, if used.
- Any custom code added to a child theme.
You can create the backup from your hosting panel or with a WordPress backup plugin.
If you have custom translations saved under plugins/wpresidence-core/languages/, copy them somewhere safe before updating. Plugin folders are replaced during plugin updates, so translations saved there can be overwritten.Recommended: keep custom translation files in a child theme.
Check the changelog
Before updating, check what changed in the new version. This helps you understand if new settings, design changes, compatibility fixes, or plugin updates were included.
Check the update notes here:
Update the theme with Envato Market plugin, recommended
This is the recommended update method because it updates WPResidence directly from ThemeForest through your Envato account connection.
Install the Envato Market plugin
Install the Envato Market plugin from:
https://envato.com/market-plugin/
You can also install it from the theme “Install Plugins” notice, if available.
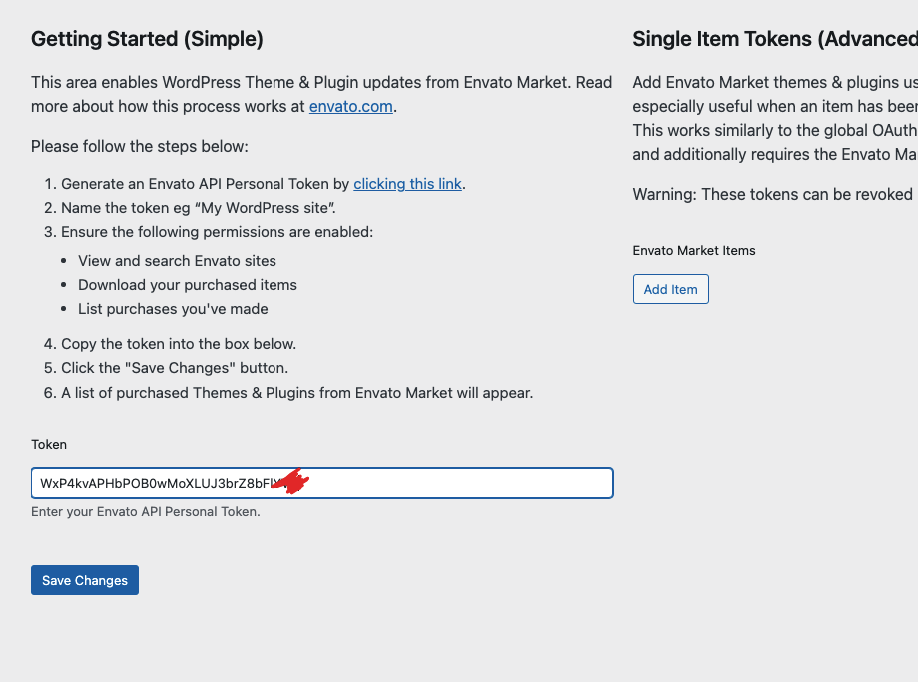
Connect the Envato Market plugin
Go to the Envato Market plugin settings and connect it using an Envato API token.
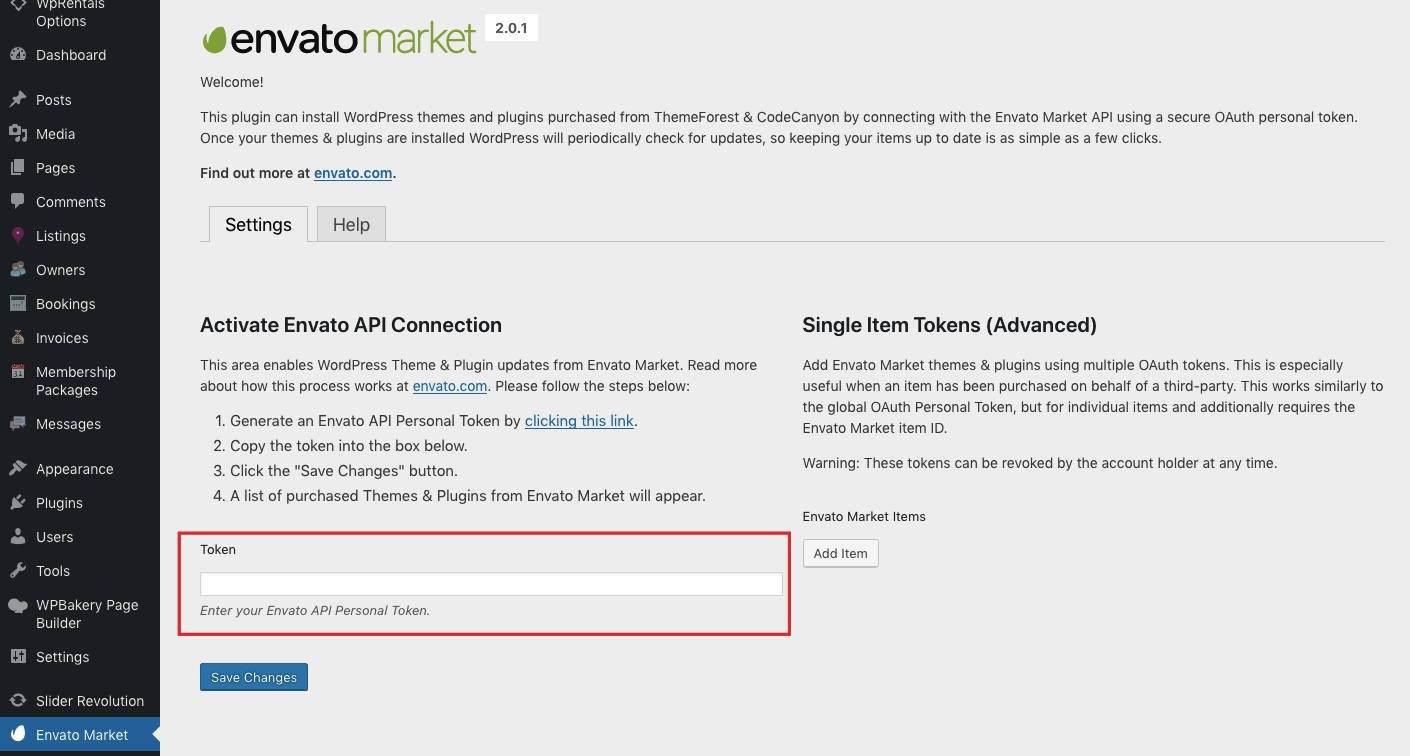
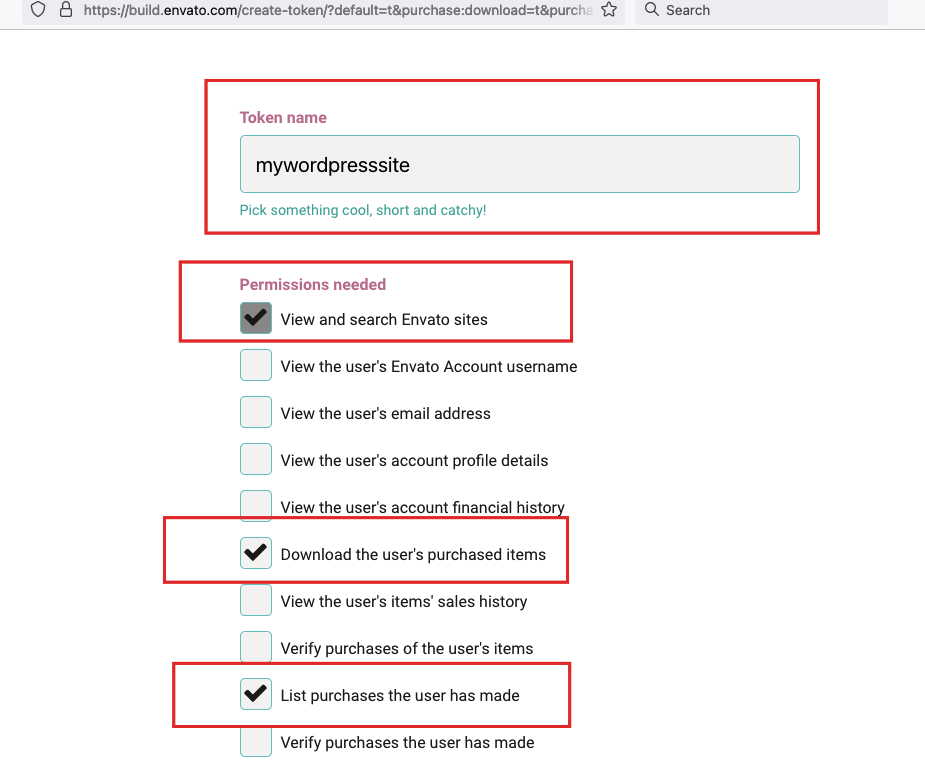
To create the token:
- Follow the Envato token link shown by the plugin.
- Generate an Envato Personal Token.
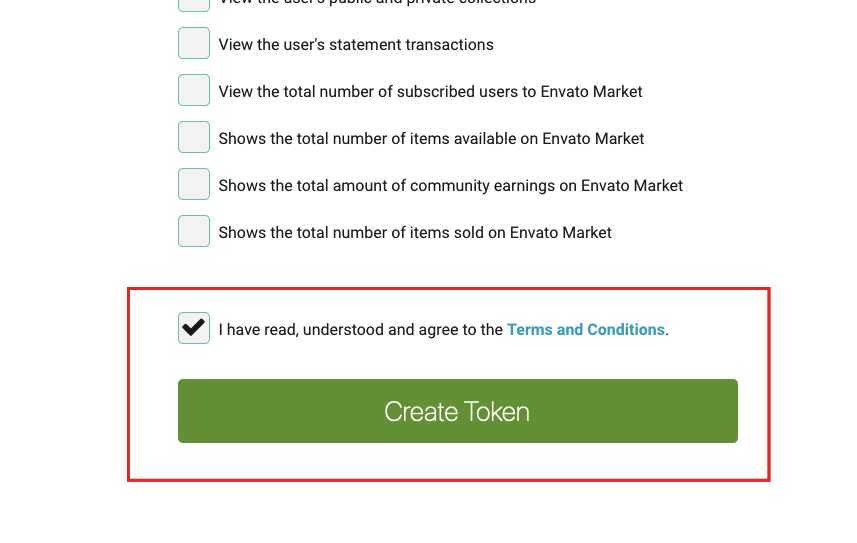
- Select the permissions requested by Envato.
- Add a name for the token.
- Create the token and copy it.
- Paste the token into the Envato Market plugin.
- Click Save Changes.

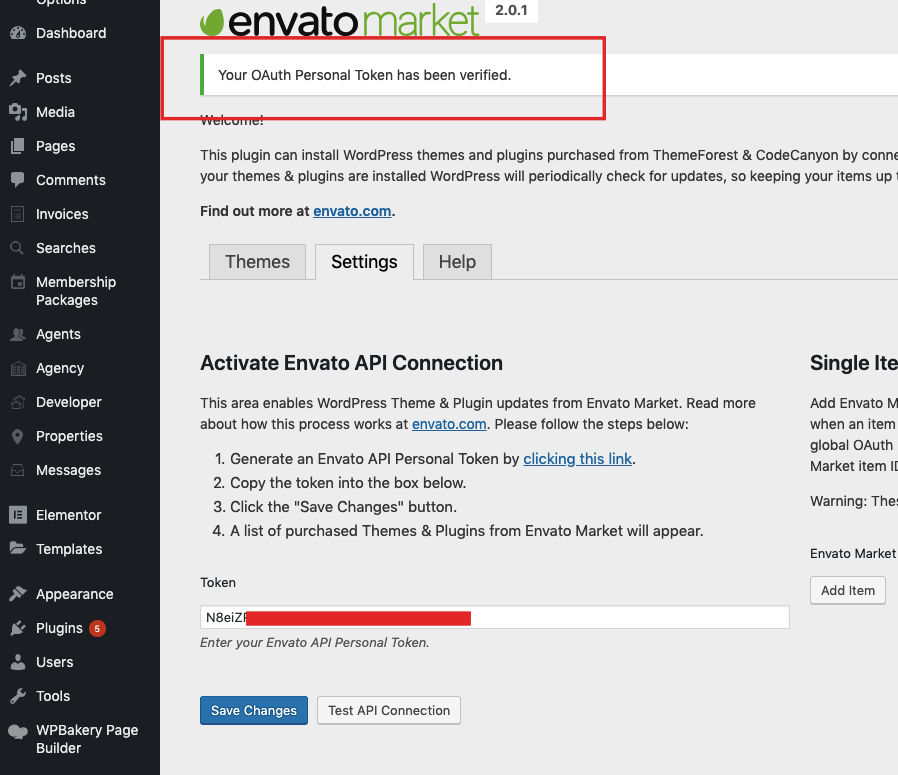
After the token is saved, you should see this confirmation:
Your OAuth Personal Token has been verified
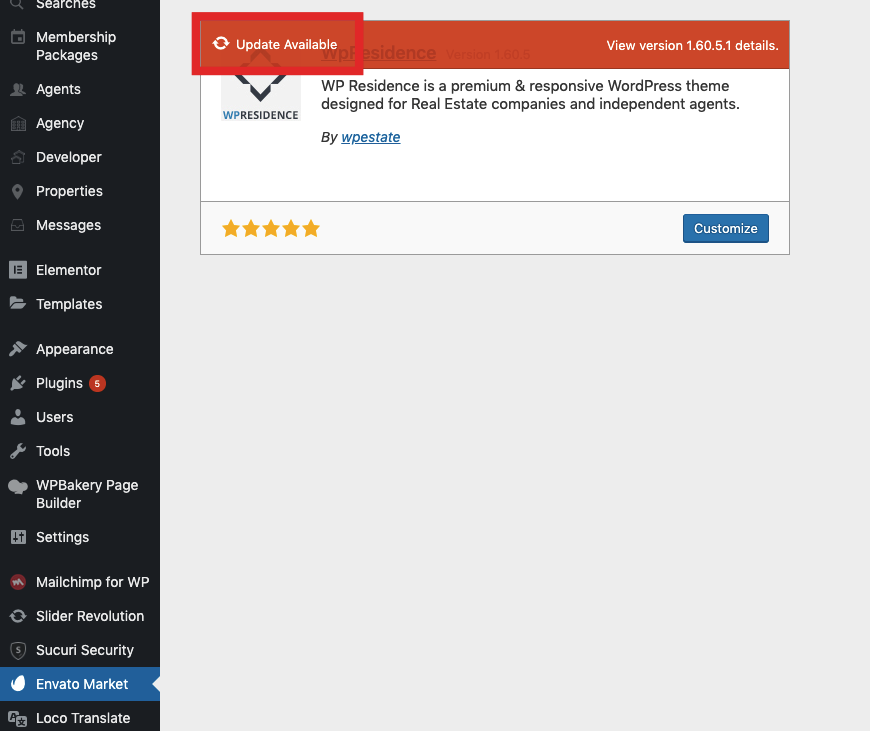
Update WPResidence
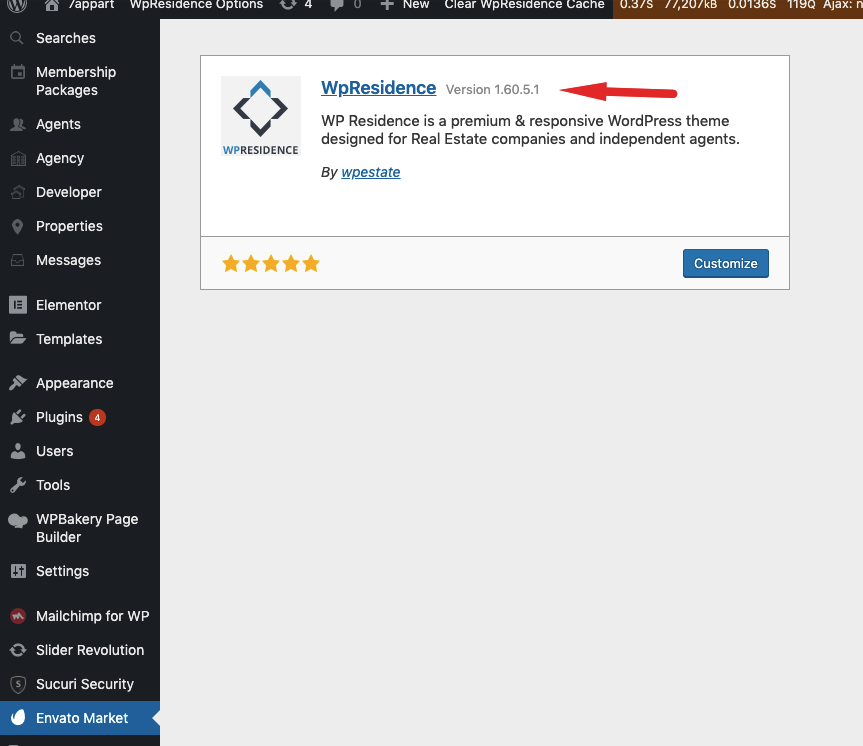
When the update is available, update the WPResidence theme from the Envato Market plugin screen.
This process replaces the parent theme files. If you edited parent theme files directly, those edits will be overwritten.

Update required and bundled plugins
After updating the theme, update the required and bundled plugins.
This step is mandatory, especially for:
- WPResidence Core Functionality
- WPResidence Elementor Widgets, if used
- Other plugins bundled with the theme, when updates are available
The theme and included WPResidence plugins must be kept compatible. If the theme is updated but the core plugin remains old, you may see missing options, broken widgets, layout issues, or PHP errors.
If you do not see the plugin update notice, go to:
Appearance > Install Plugins
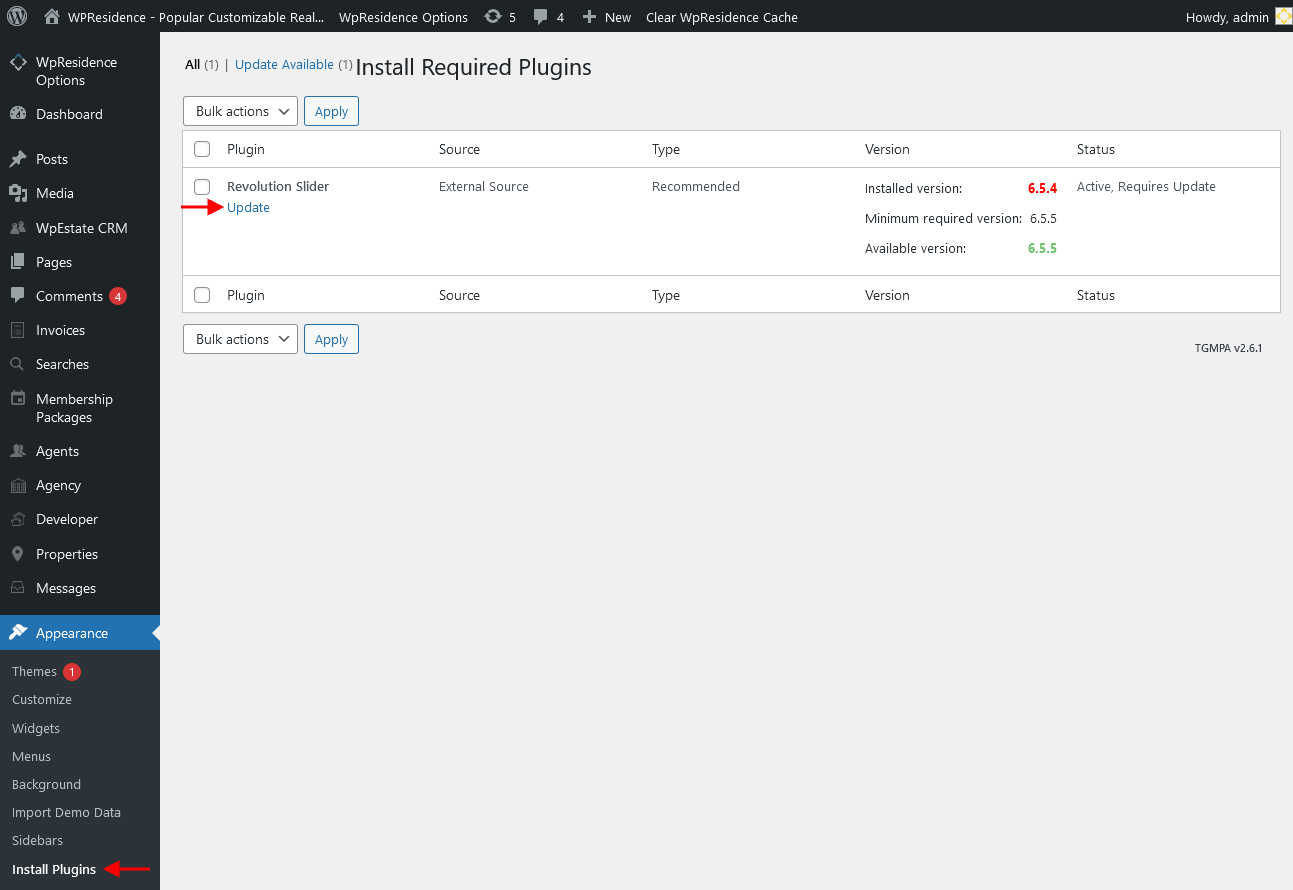
Confirm the plugin updates from the Plugins screen.
You do not need to buy separate licenses for bundled plugins included with WPResidence. Updates for bundled plugins are provided through theme updates.
Update the theme via FTP
Use FTP if the WordPress dashboard update fails, if your hosting blocks large uploads, or if you want to manually replace the theme files.
Download the latest theme version
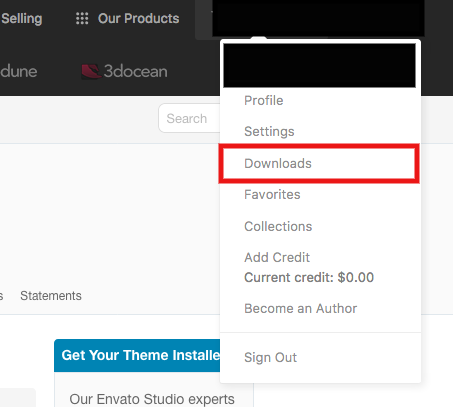
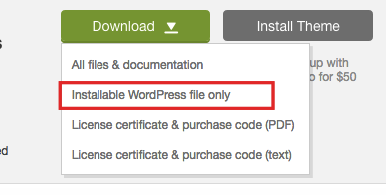
Go to your ThemeForest account, open Downloads, and download:
Installable WordPress file only
This file is usually named:
wpresidence.zip
Enable maintenance mode
If the website is live, enable maintenance mode before replacing files. This is optional, but recommended.
Connect via FTP
Connect to your server with FTP or SFTP and go to:
your-site/wp-content/themes
Backup the current theme folder
Before replacing files, download the current wpresidence folder or rename it to:
wpresidence_old
Extract the new theme ZIP
Extract wpresidence.zip on your computer.
You should get one folder named:
wpresidence
Upload the new theme folder
Upload the new wpresidence folder to:
your-site/wp-content/themes
Overwrite the existing theme folder if needed.
- Do not upload the new theme folder inside another wpresidence folder. The correct path must be wp-content/themes/wpresidence.
- If the path becomes wp-content/themes/wpresidence/wpresidence, the theme will not work correctly.
- If you have custom code changes, move them into a child theme instead of editing the parent theme.
- Child theme help: How to install a child theme
After updating the theme via FTP, update the required plugins from:
Appearance > Install Plugins
Update the theme via WordPress dashboard, manual reinstall
Use this method if you cannot use Envato Market and you do not want to use FTP.
Download the latest wpresidence.zip from ThemeForest. Choose Installable WordPress file only.
In wp-admin, go to:
Appearance > Themes
Activate a different theme temporarily.
Delete the current wpresidence theme.
Go to:
Appearance > Themes > Add New > Upload Theme
Upload the new wpresidence.zip file.
Install and activate WPResidence.
Then update all required plugins.
Your pages, properties, users, media, and Theme Options settings are stored in the database. They are not deleted by reinstalling the theme.However, any code edits made directly inside the parent theme folder will be lost.
For translations, use the child theme PO method:
Translation files in child theme
Update plugins only, without updating the theme
In most cases, the best method is to update the theme and plugins together.Only update plugins separately if you know you need a specific bundled plugin update and the theme version on your website is compatible with that plugin version.
You do not need your own license for bundled plugins. WPResidence includes bundled plugin updates through the theme package.
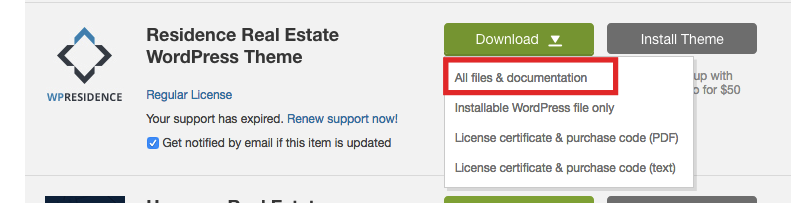
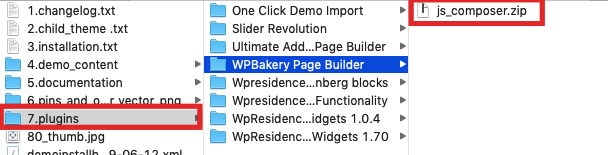
Download all theme files
From ThemeForest, download:
All files and documentation
Open the plugins folder
Unzip the downloaded package and open the plugins folder.
Delete the old plugin version
In wp-admin, go to:
Plugins
Deactivate and delete the old version of the plugin you want to update.


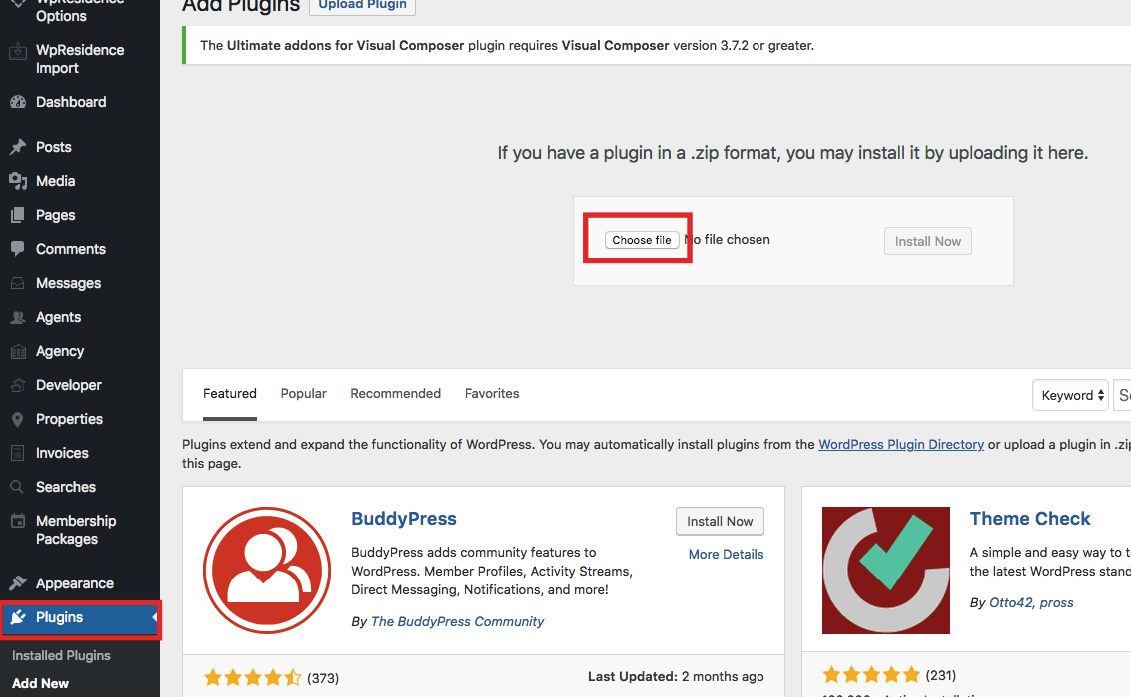
Upload the new plugin ZIP
Go to:
Plugins > Add New > Upload Plugin
Upload the new plugin ZIP file and activate it.
Important steps after update
After updating the theme and plugins, complete these checks:
- Clear CDN cache, if used.
- Clear hosting/server cache, if used.
- Clear WordPress cache plugin cache, if used.
- Clear WPResidence theme cache, if enabled.
- Clear browser cache or test in an incognito window.
- Check that WPResidence Core Functionality is updated.
- Check Appearance > Install Plugins for pending required plugin updates.
- Test the homepage, property page, search page, account/dashboard pages, and contact forms.
If you need a bundled plugin update before the next theme release, please open a support ticket from your support account.
Common update issues and fixes
Site looks broken after update, layout issues, missing CSS, or missing icons
Check the following:
- Clear all cache: server cache, cache plugin, CDN cache, browser cache, and theme cache.
- Confirm WPResidence Core Functionality was updated.
- Go to Appearance > Install Plugins and confirm there are no pending plugin updates.
- If Elementor widgets are affected, confirm WPResidence Elementor Widgets is updated.
Theme update completed, but some options or widgets are missing
This usually means the required plugins were not updated.
Go to:
Appearance > Install Plugins
Update all required and bundled plugins.
Changes were lost after update
If you edited parent theme files directly, the update overwrote those changes.
The correct solution is to move custom code into a child theme.
Child theme help:
How to install a child theme
Translation changes were lost after plugin update
If translation files were saved inside a plugin folder, they may have been overwritten.
Use the child theme translation method instead:
How to add translated PO files in child theme
Envato Market does not show the update
Check the following:
- Confirm the Envato token is valid.
- Confirm the token was created from the Envato account that purchased WPResidence.
- Refresh the Envato Market plugin page.
- If needed, download the latest theme manually from ThemeForest and update via FTP or manual reinstall.
WordPress says the destination folder already exists
This happens when uploading the theme ZIP while the old theme folder still exists.
Use one of these solutions:
- Use the Envato Market plugin update method.
- Use FTP and replace the theme folder.
- Temporarily activate another theme, delete WPResidence, then upload the new ZIP.
Do not delete the theme unless you have a full backup and you are sure you downloaded the correct installable WPResidence ZIP file from ThemeForest.