This help explains how to make a page created with Elementor display full width in WPResidence.
What Full Width Means
For an Elementor page to display full width, you must check three different settings:
- The WordPress page template
- The Elementor page layout
- The Elementor container or section width
If one of these settings is still boxed, the page may not use the full browser width.
Set the WordPress Page Template
- Log in to your WordPress dashboard.
- Go to Pages → Add New to create a new page, or Pages → All Pages to edit an existing page.
- In the page settings, find Template.
- Select Elementor Full Width.
- Publish or update the page.

Set the Elementor Page Layout
- Click Edit with Elementor.
- Click the Settings icon from the bottom left corner of the Elementor panel.
- Find Page Layout.
- Select Elementor Full Width.
- Click Update.

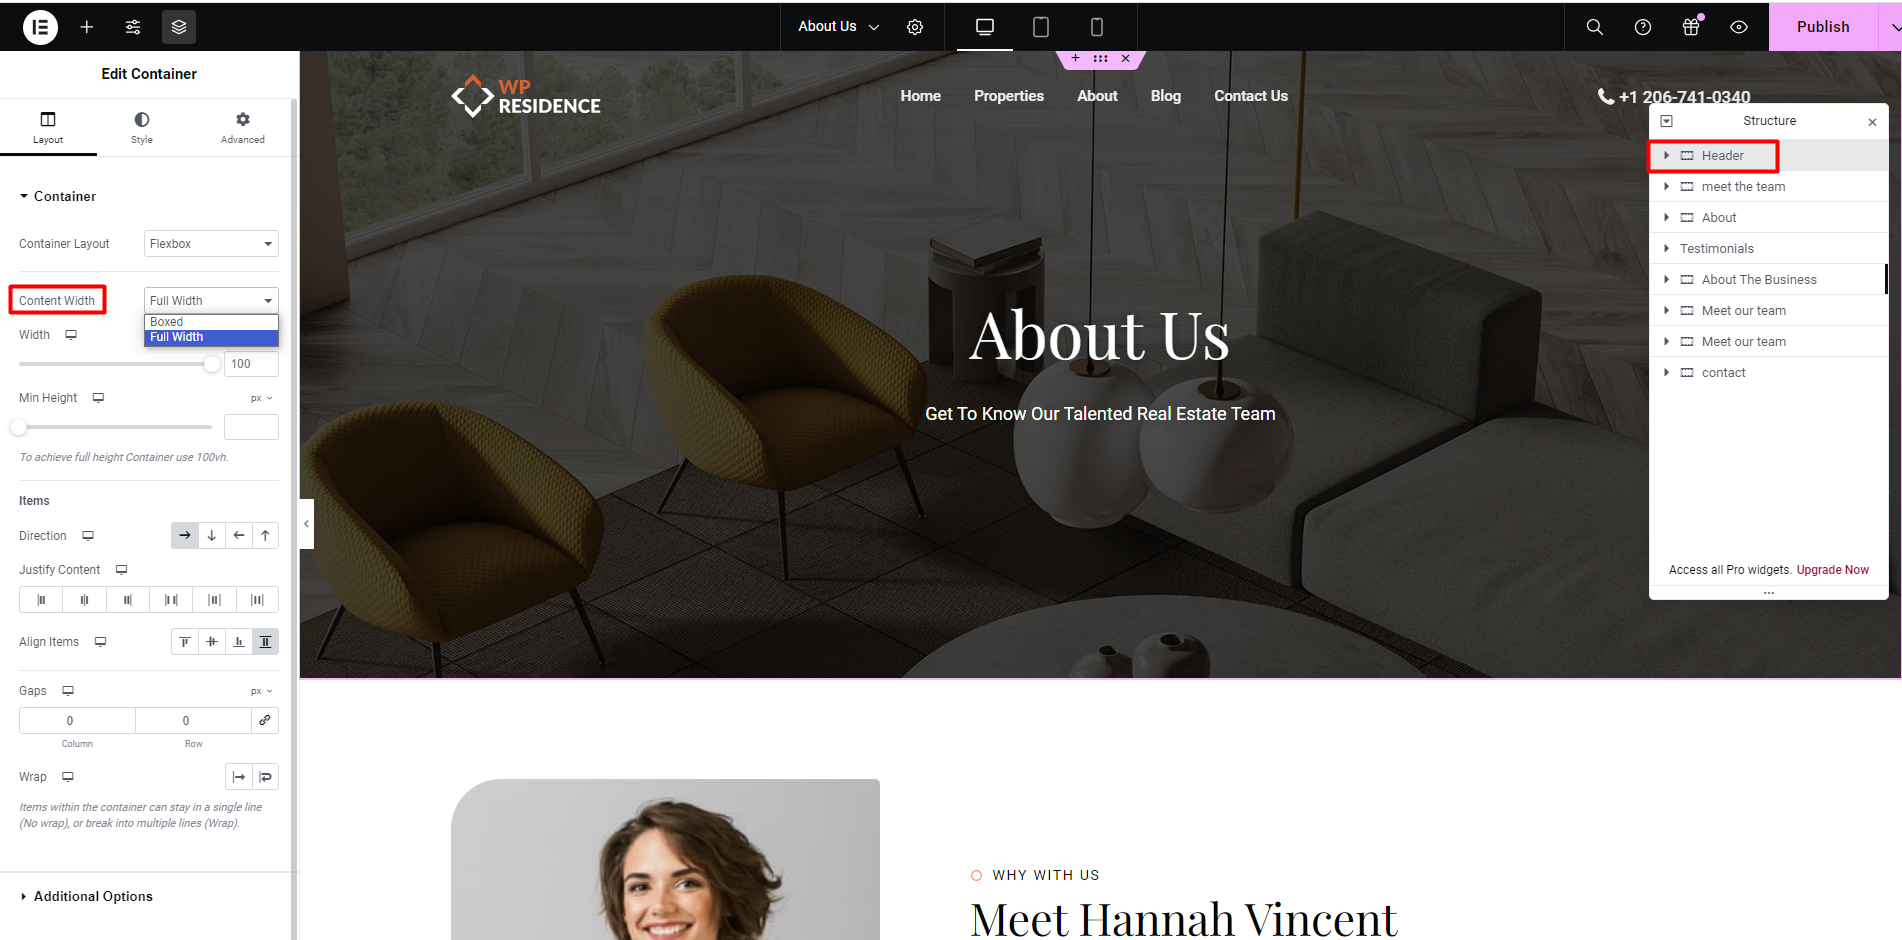
Set the Elementor Container Width
The page can use the full-width template, but each Elementor container can still be boxed. Check the container settings too.
- Edit the page with Elementor.
- Select the container or section you want to make wider.
- Open the Layout tab.
- Set Content Width to Full Width if the section must use the full browser width.
- If you prefer a boxed layout, select Boxed and set the boxed content width manually.
Remove Extra Margin and Padding
If the page still has space on the left, right, top, or bottom, check the container spacing.
- Select the Elementor container or section.
- Open the Advanced tab.
- Check Margin.
- Check Padding.
- Set the values to 0 where you do not want spacing.
- Click Update.

Import WPResidence Studio Templates Full Width
If you import a page or section from WPResidence Studio, set the page to full width first.
- Create or edit the page.
- Select the Elementor Full Width page template.
- Click Edit with Elementor.
- Click the folder icon in Elementor.
- Open the WPResidence Studio Templates library.
- Select the page or section template you want to import.
- Click Insert.
- Update the page.
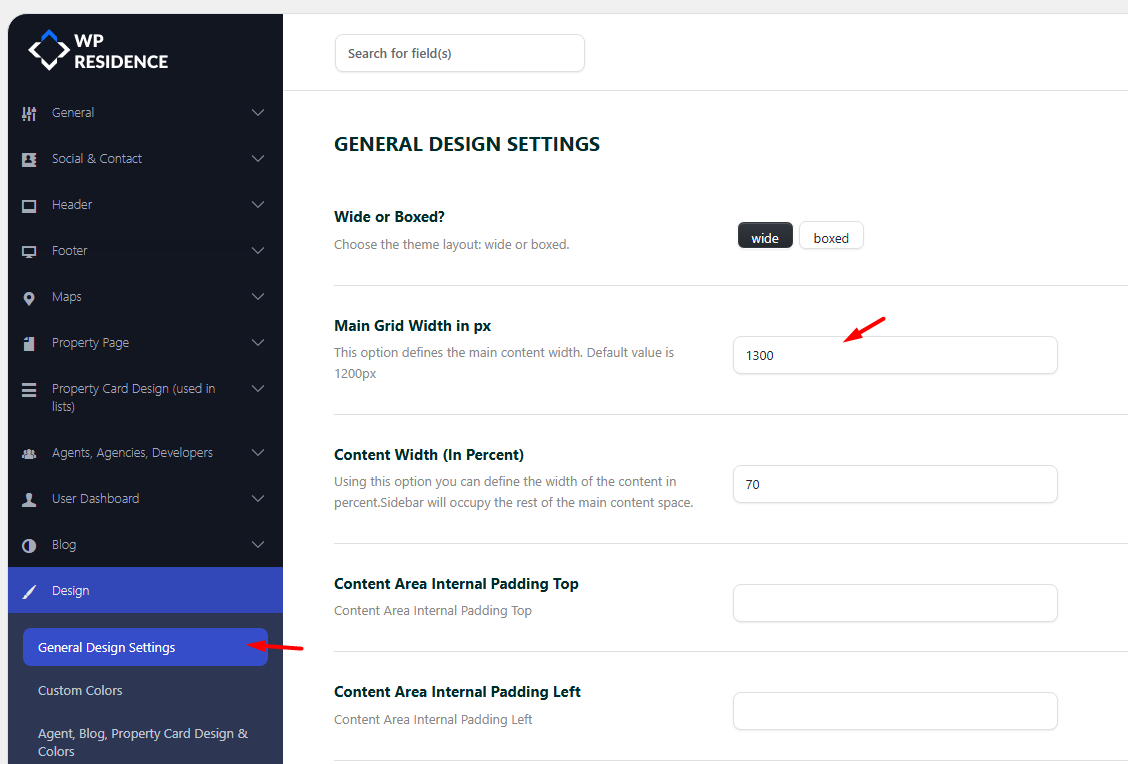
Change the Boxed Width for Non-Elementor Pages
For pages that are not created with Elementor, the global theme content width is managed from:
Theme Options → Design → General Design Settings
These settings control the general site container, content width, and content padding used by the theme layout.