The Contact Form Builder widget lets you create fully customized contact forms and display them anywhere on your site using Elementor Free.
In version 5.6.0, the Contact Form Builder includes more field types and new email/action options, including redirect URL, internal form name, and webhook URL support.
Adding the Contact Form Builder to a page
- Edit the page with Elementor.
- Locate the Contact Form Builder widget in the Elementor panel.
- Drag and drop it into the section where you want the form to appear.

Managing Form Fields
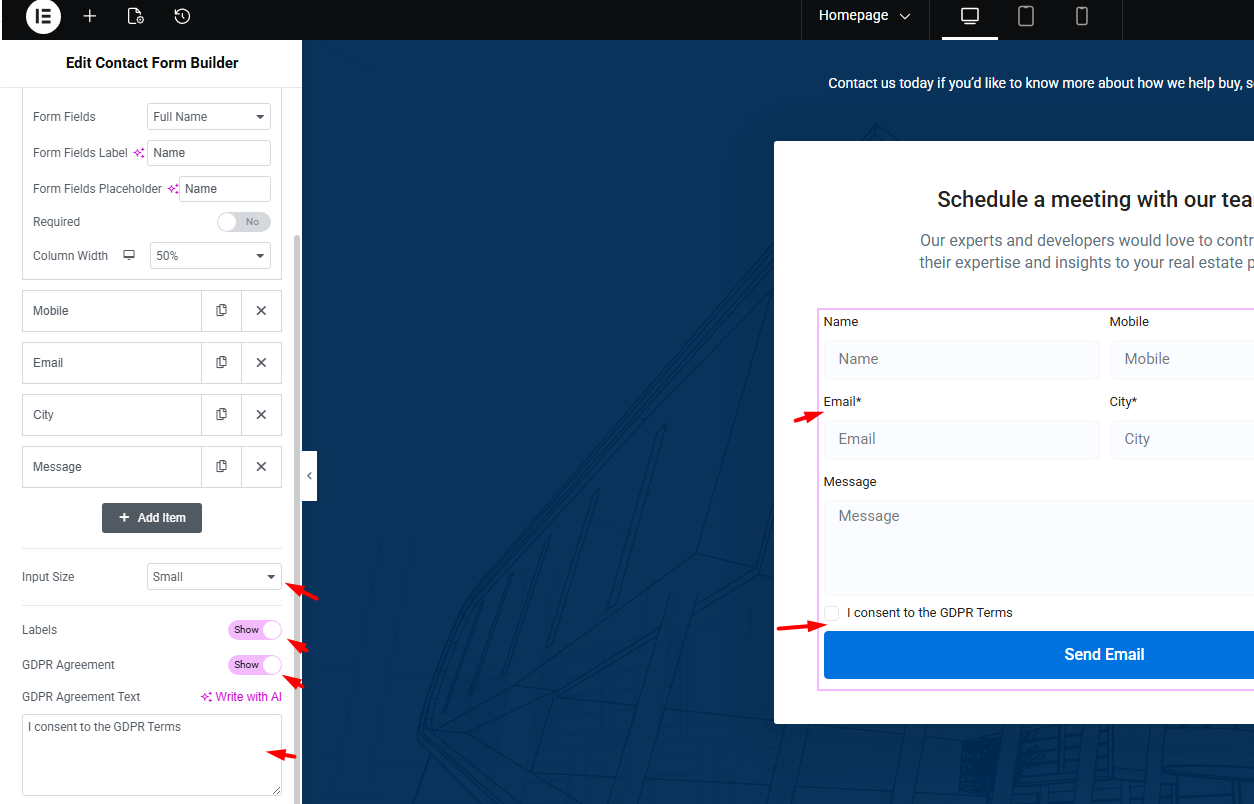
You can fully customize the form fields to match your requirements.
- Add new fields
- Edit existing fields
- Remove fields you do not need
- Reorder fields
For each field, you can control options such as:
- Field type
- Field label
- Field placeholder
- Required yes or no
- Column width
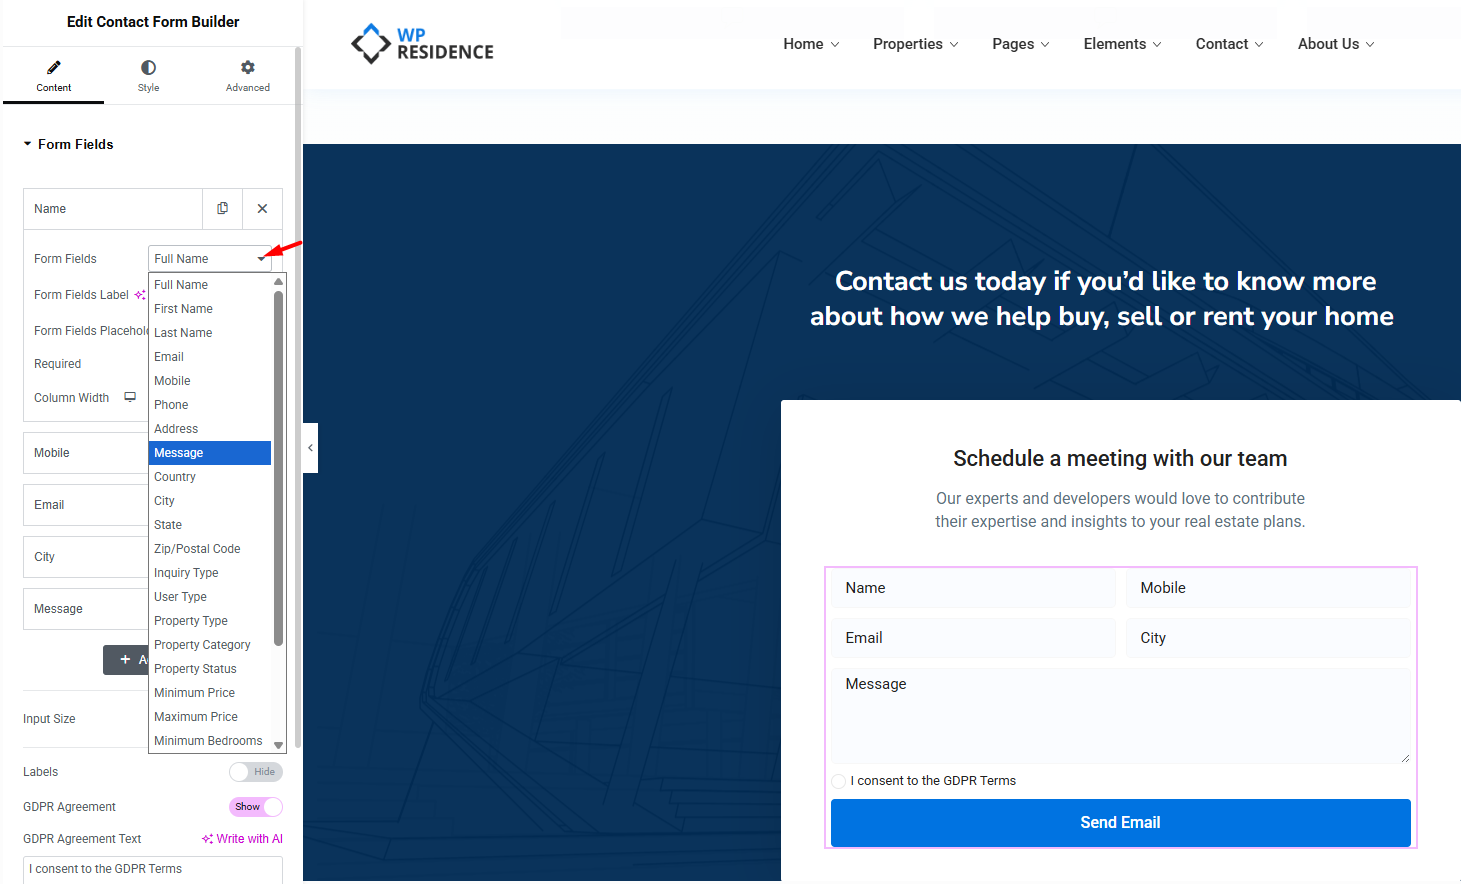
Supported Field Types
The widget supports a wider range of field types, including:
- Full Name
- First Name
- Last Name
- Mobile
- Phone
- Address
- Message
- Country
- City
- State
- Zip/Postal Code
- Inquiry Type
- User Type
- Property Type
- Property Category
- Property Status
- Minimum Price
- Maximum Price
- Minimum Bedrooms
These extra field types are useful when you want to build contact forms that also collect lead qualification details, search preferences, or property requirements.
Form Options
Under the main form settings, you can configure:
- Input Size – controls how large the field inputs appear
- Labels – show or hide field labels
- GDPR Agreement – show or hide the GDPR checkbox
- GDPR Agreement Text – edit the text shown next to the GDPR checkbox
Submit Button Settings
The Submit Button panel allows you to adjust:
- button text
- button size
- button alignment
- normal and hover styles
This lets you match the button to the design of the rest of the page.
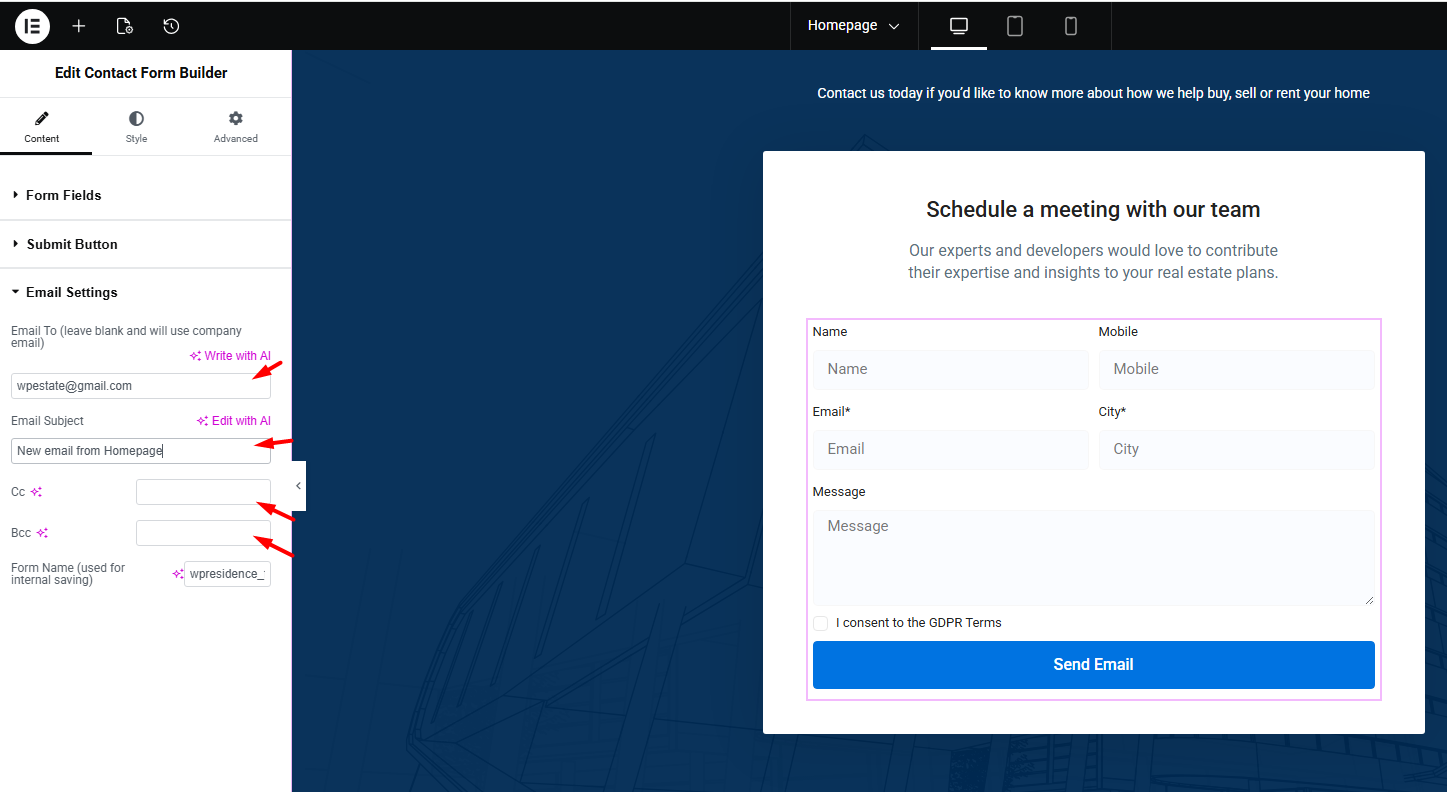
Email Settings
The Email Settings panel defines how the form behaves after submission and where the messages are sent.
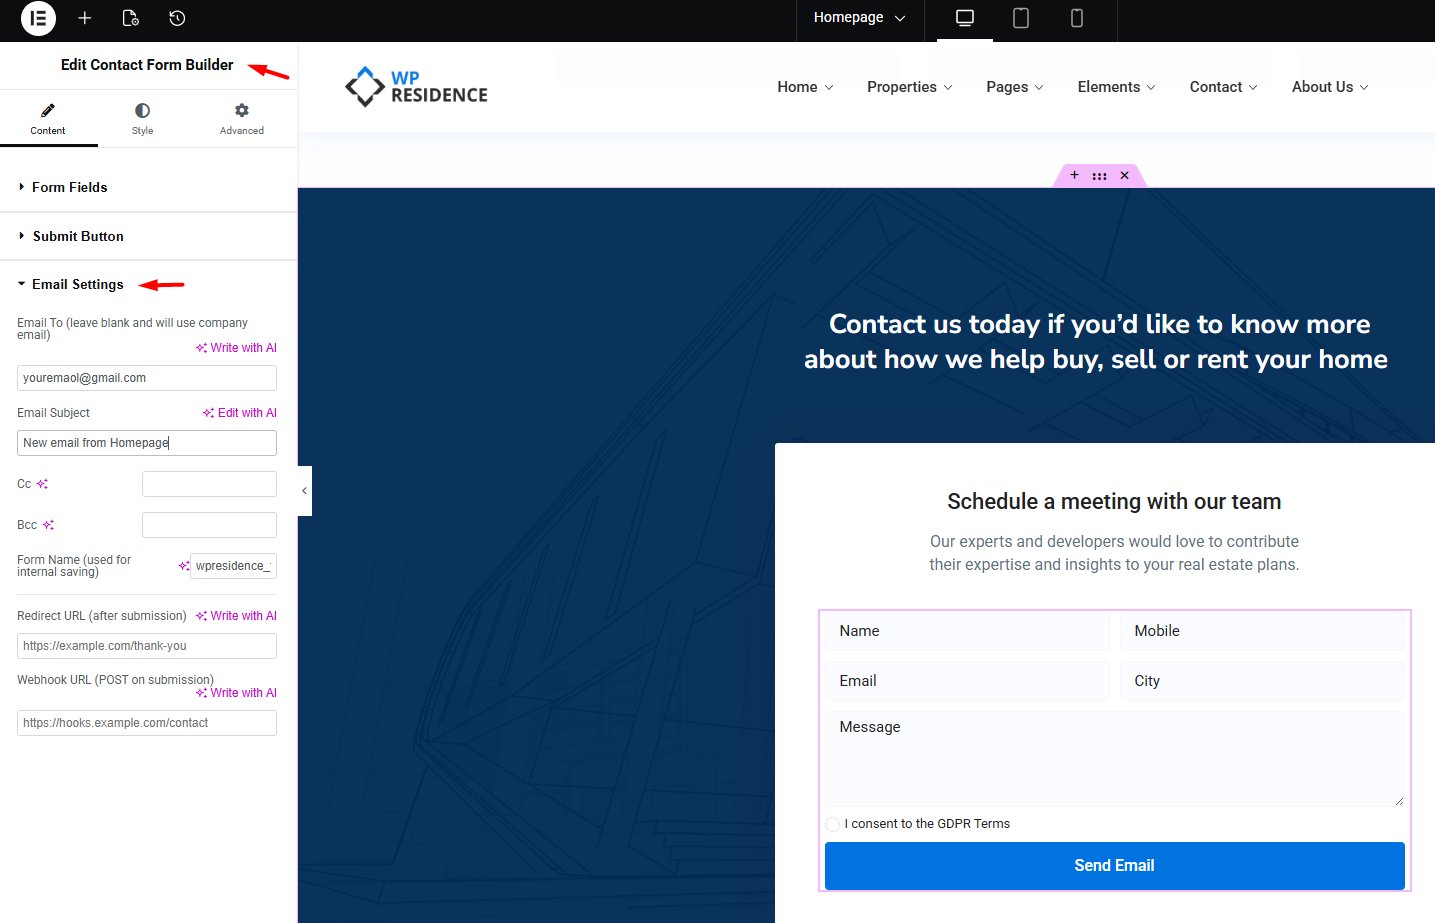
The available options include:
- Email To – add the email address that should receive the form messages
- Email Subject – replace the default subject with your own text
- Cc – send a copy to an additional email address
- Bcc – send a hidden copy to another email address
- Form Name (used for internal saving) – define an internal form name for easier tracking
- Redirect URL (after submission) – send users to a custom page after they submit the form
- Webhook URL (POST on submission) – send the submitted form data to an external URL
Recipient Email
- Add the email address that will receive messages from this form.
- If this field is left blank, messages will be delivered to the email set in Theme Options > Social & Contact > Company Email.
Email Subject
You can replace the default email subject with your own custom text.
Cc and Bcc
Use these fields if you want additional team members to receive a copy of the form submission.
Form Name (used for internal saving)
This option is new and useful when you create multiple custom forms on the site.
It helps identify the form internally, so you can tell which form generated the message or saved entry.
Redirect URL (after submission)
This option lets you redirect the user to another page after the form is submitted successfully.
You can use it for:
- a thank you page
- a confirmation page
- a custom landing page
- another page in your follow-up flow
Webhook URL (POST on submission)
This option is one of the major new additions in version 5.6.0.
When set, the form can send submitted data to an external endpoint using a POST request.
This is useful if you want to connect the form with:
- Zapier
- Make
- HubSpot
- custom CRM tools
- automation workflows
Styling the Form
The Style tab includes extensive design options for customizing the form appearance.
- Form Layout
- Column gap
- Row gap
- Label spacing
- Label typography and color
- Field Style
- Field text color
- Field typography
- Field background color
- Border color
- Border width
- Border radius
GDPR Text Style
You can change the typography and color for the GDPR agreement text.
Submit Button Style
You can customize both the normal and hover states of the submit button, including:
- colors
- typography
- border
- other visual settings
How the Contact Form Builder works in 5.6.0
With the new 5.6.0 options, the Contact Form Builder can now be used for more than a basic contact form.
You can use it as:
- a simple contact form
- a lead capture form
- a property inquiry form
- a qualification form for buyers or renters
- a form connected to external automation tools through webhook integration
This makes the widget much more flexible for both standard contact pages and advanced lead generation workflows.