The help article and video were created using the WordPress Classic Widgets plugin: https://wordpress.org/plugins/classic-widgets/
If you want the same widgets interface shown in the screenshots, you can install the Classic Widgets plugin. You can also use the default WordPress block-based Widgets editor.
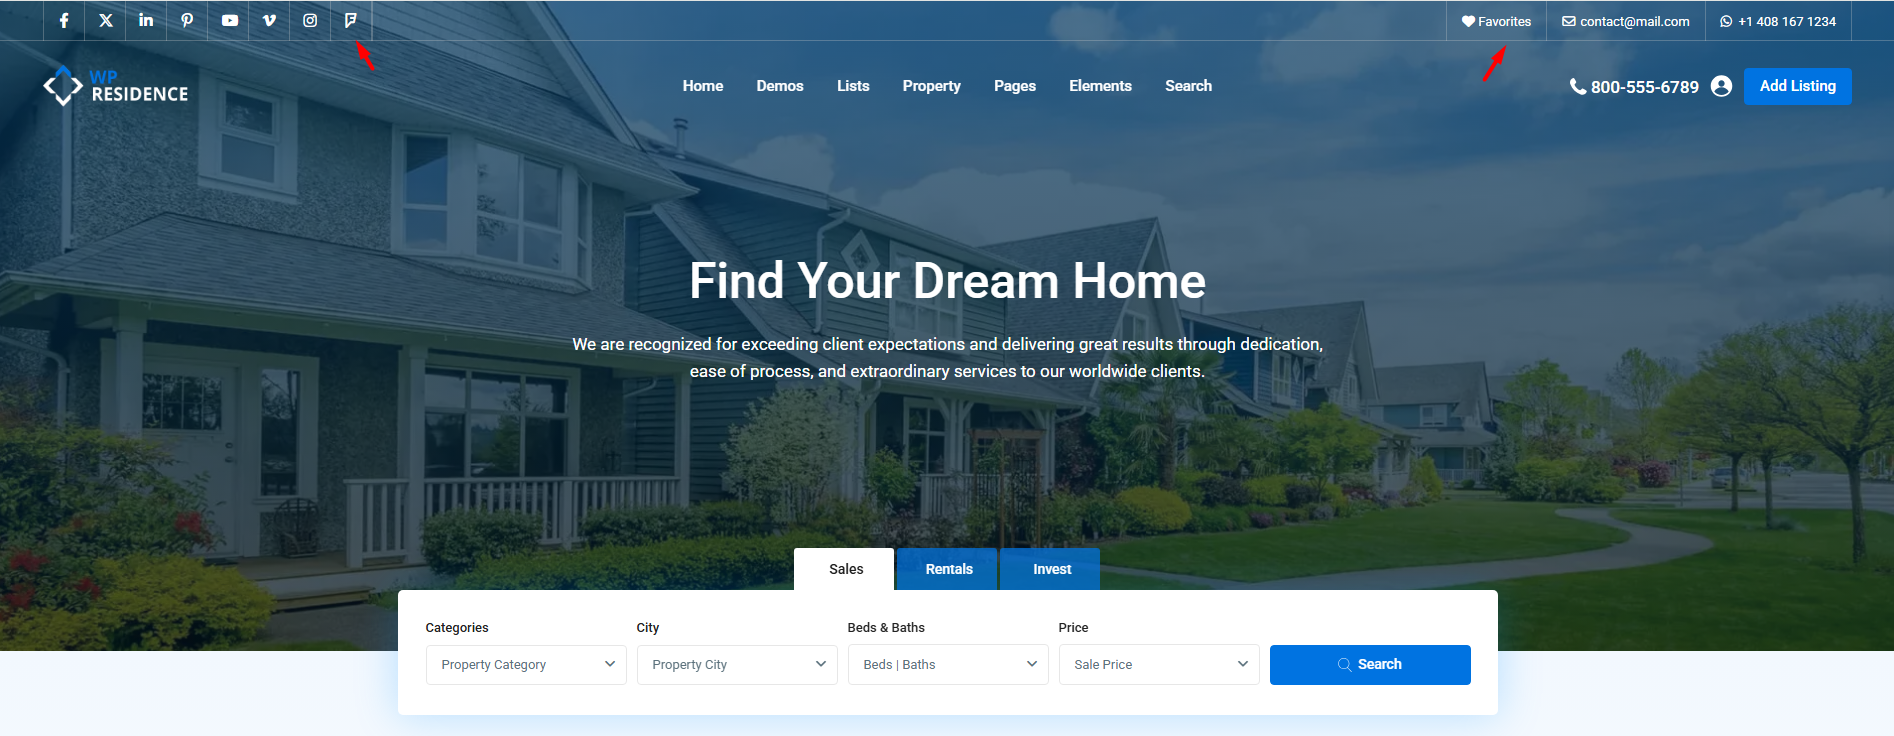
Header Widgets
Header widgets show in the top bar area.
You can enable or disable the top bar from:
Theme Options > Header > Top Bar
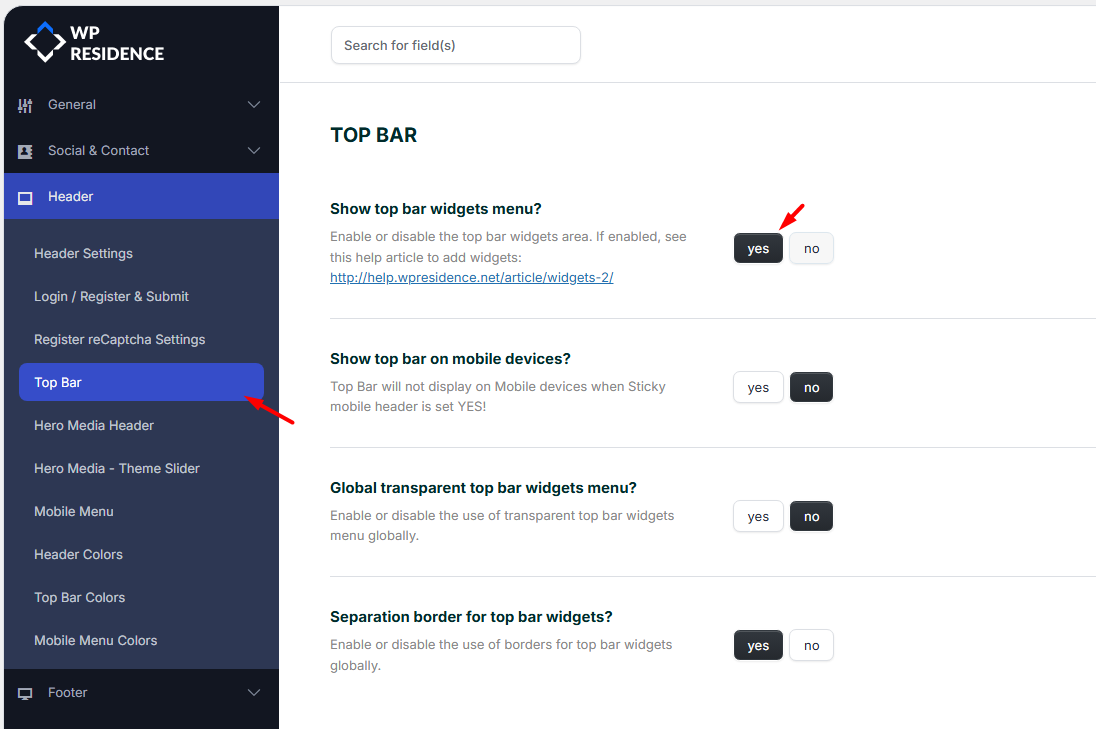
The top bar has two widget areas:
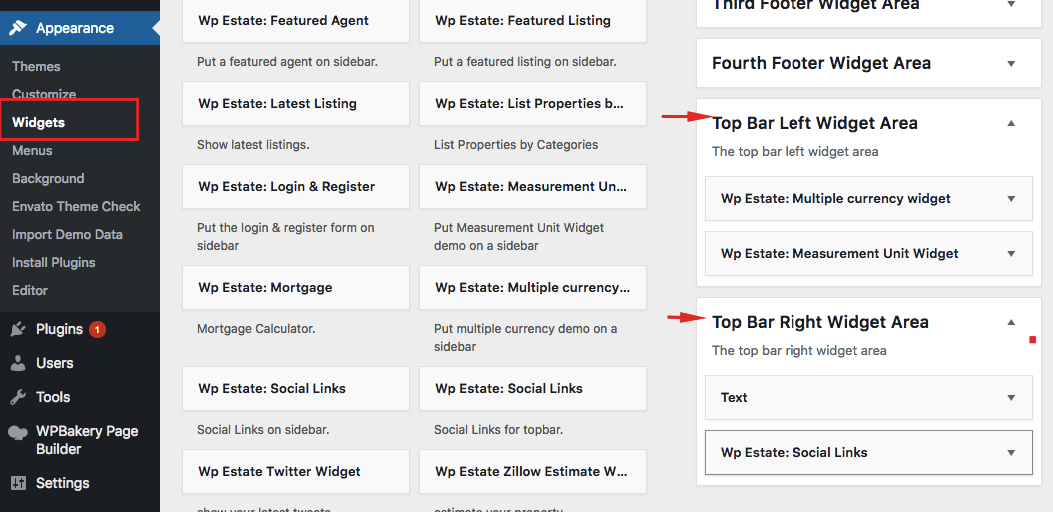
- Top Bar Left Widget Area
- Top Bar Right Widget Area
You can manage them from:
Appearance > Widgets
In the demos, the top bar can include widgets such as:
- A Text widget with Font Awesome icons
- Social links widget
- Multi-currency widget
- Multi-measurement widget
Example contact widget code. Paste this into a Text widget and edit the phone number and email address:
<i class="fa fa-phone"></i> <a href="tel:18475555555">1-847-555-5555</a> | <i class="fa fa-envelope-o"></i> <a href="mailto:sales@yourwebsite.com">sales@yourwebsite.com</a>

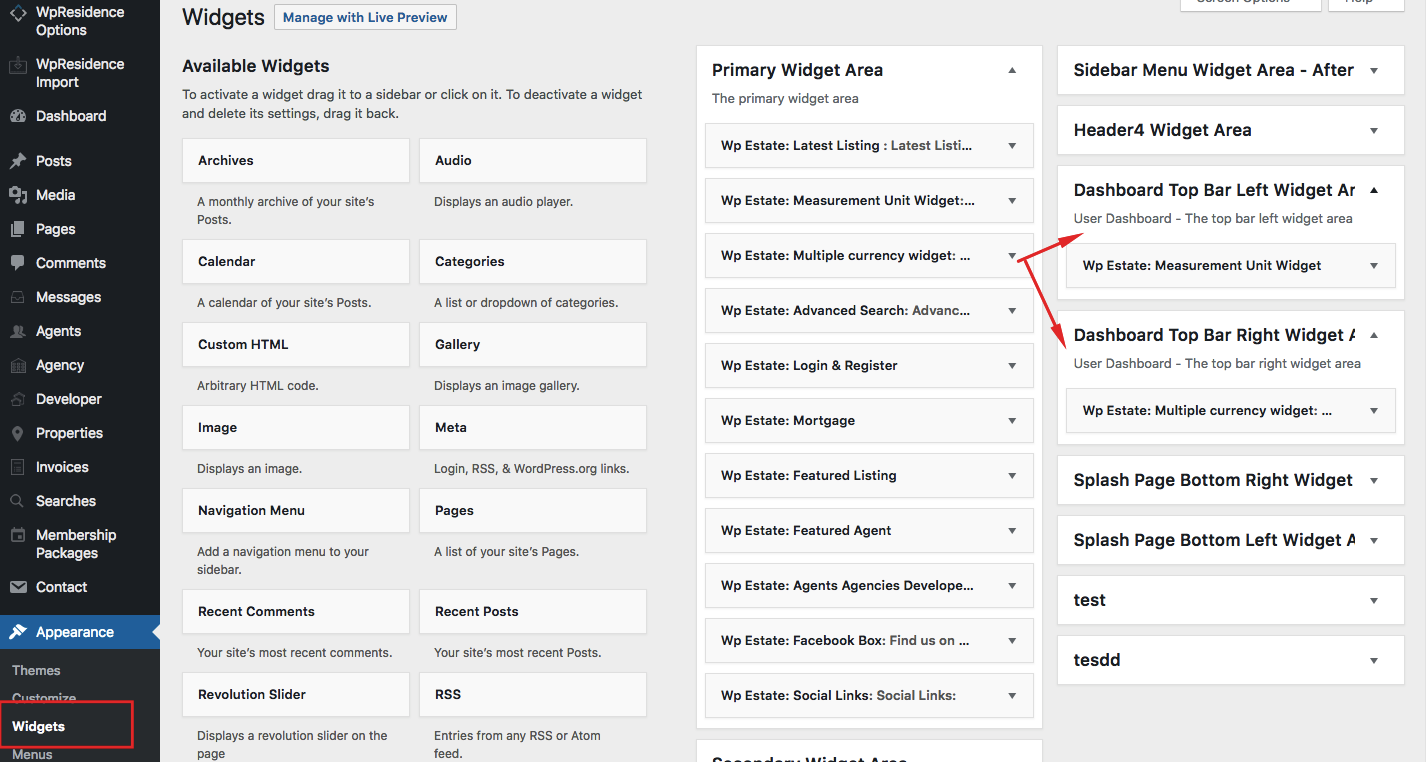
Dashboard Header Widgets
On user dashboard pages, such as Profile, Properties, Add Property, Inbox, and Messages, you can use different top bar widget areas.
First, enable the top bar globally from:
Theme Options > Header > Top Bar
Then manage the dashboard-specific widget areas from:
Appearance > Widgets
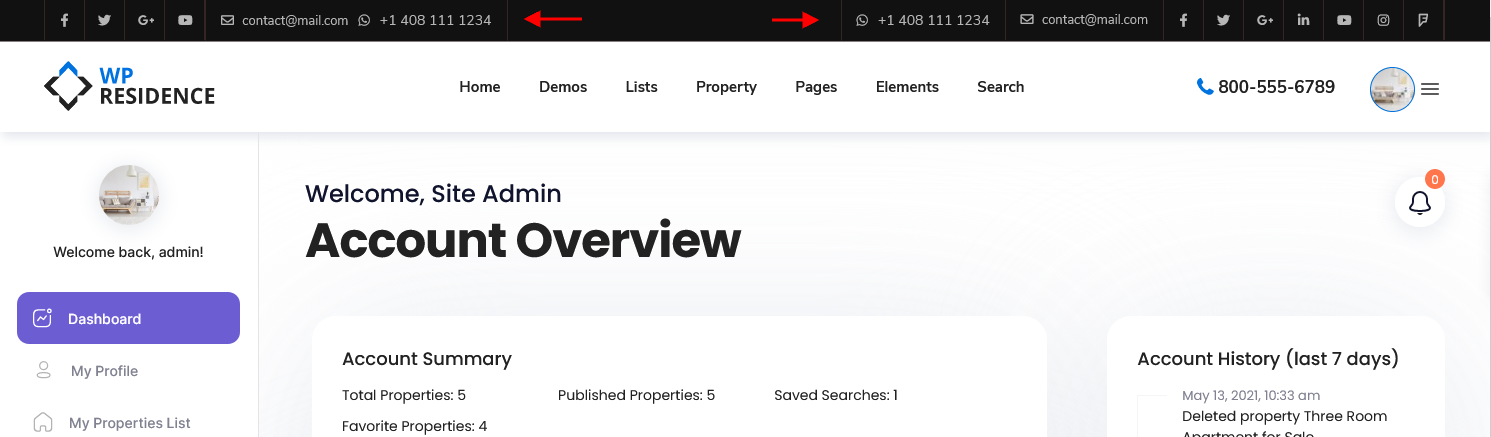
The two widget areas for the dashboard top bar are highlighted in the screenshot below.
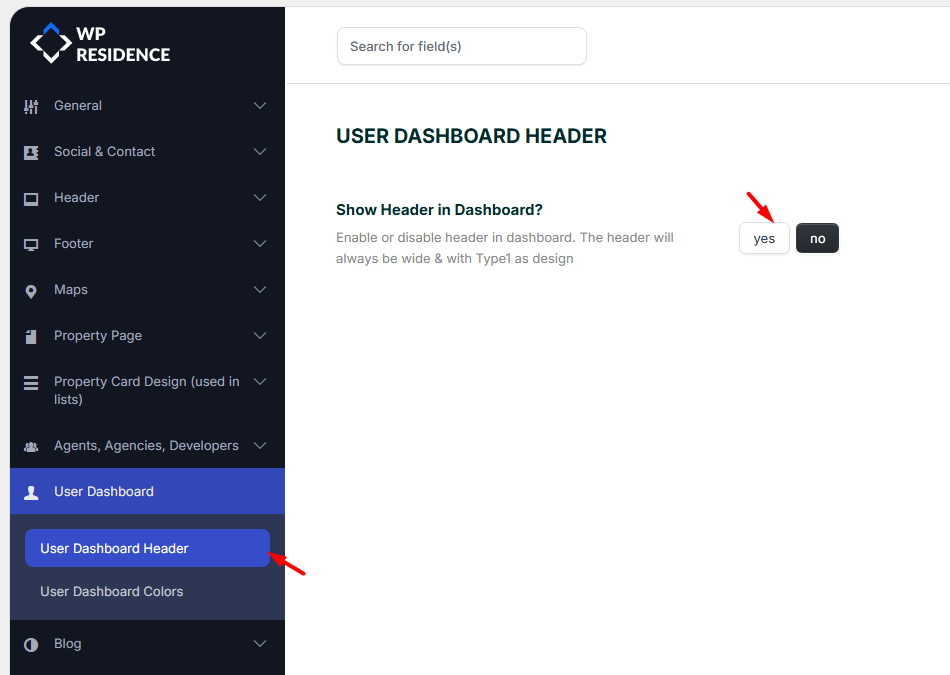
To hide the entire header area in the user dashboard, use the settings from:
Theme Options > User Dashboard
Footer Widgets
Go to:
Appearance > Widgets
Use the footer widget areas to populate the default footer columns. You can drag and drop widgets into each footer column.
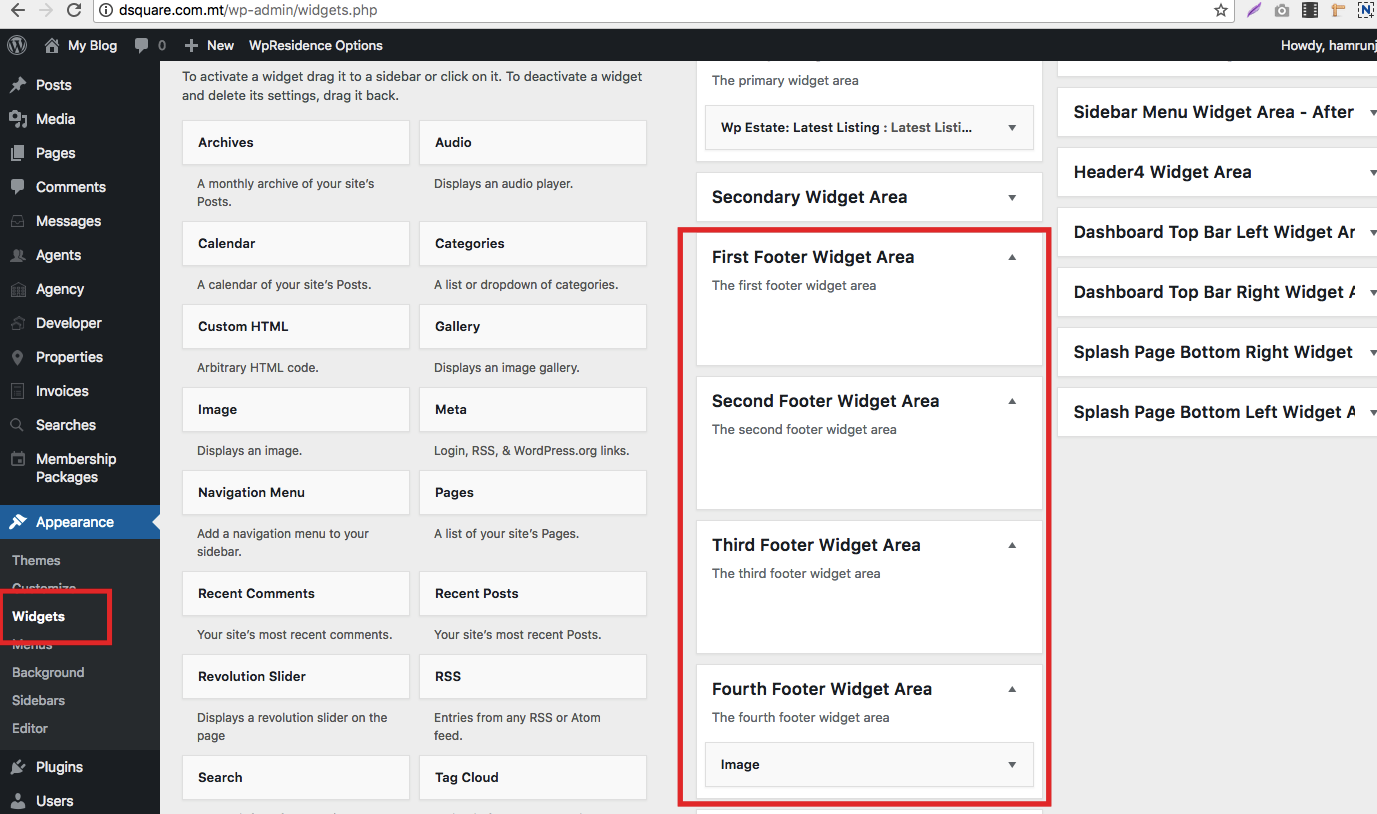
These widgets appear above the copyright footer area.
You can change the number of footer widget columns from Theme Options.
Go to:
Theme Options > Footer
From there, you can manage the footer layout, footer columns, copyright area, and other footer display settings.
Footer settings help: https://help.wpresidence.net/article/footer-settings-from-theme-options/
Footer Missing After Theme Update
If the footer disappears after a theme update, first check what type of footer your site uses.
If your site uses the standard WordPress footer, the footer content comes from:
Appearance > Widgets
The footer is made from footer widget areas, such as Footer Column 1, Footer Column 2, Footer Column 3, and so on, depending on the footer layout selected in Theme Options.
In some cases, after a theme update, theme switch, or theme reload, WordPress can move the old footer widgets to the Inactive Widgets area. This can happen because WordPress no longer knows exactly where to place the widgets that were assigned before.
To restore the footer widgets, follow these steps:
- Go to Appearance > Widgets.
- Check the footer widget areas, such as Footer Column 1, Footer Column 2, Footer Column 3, and so on.
- If the footer widget areas are empty, scroll down and look for Inactive Widgets.
- If you find your old footer widgets there, move them back into the correct footer widget columns.
- Save the widget changes.
- Clear the cache from your cache plugin, server cache, or CDN, if used.
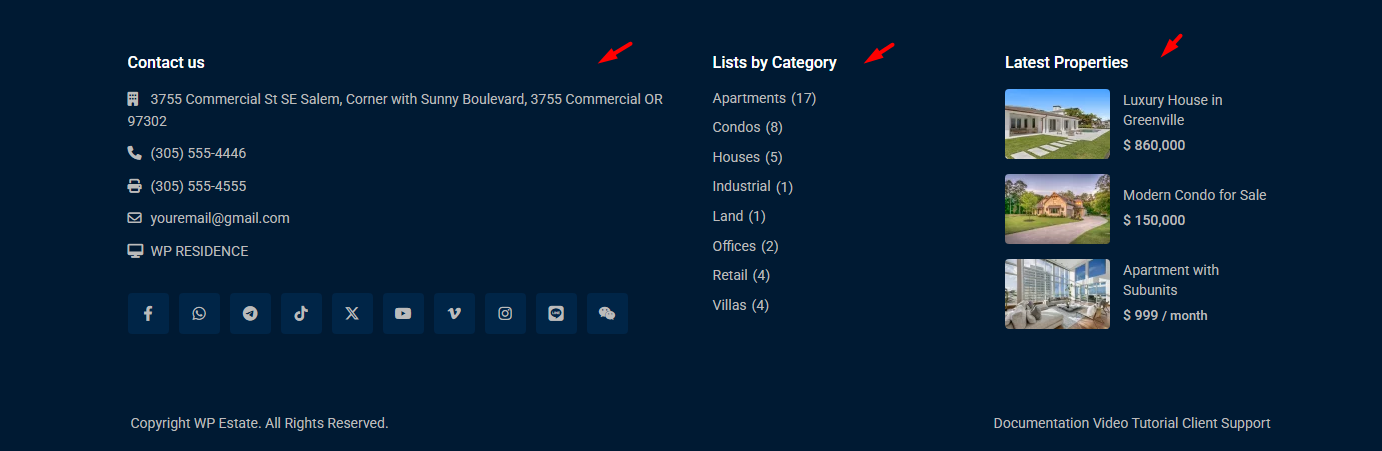
If you do not remember which widgets were used before, you can compare your footer with the demo you imported, or manually recreate the footer widgets from:
Appearance > Widgets
You can add widgets such as text, menus, contact information, social links, featured properties, latest listings, or any other available widget.
If you use the WordPress block-based Widgets editor, the same logic applies. Open each footer widget area and check if the content is missing. If the old widgets were moved to the inactive area, add them back manually.
If you want the older widget interface shown in the screenshots from this article, you can install the Classic Widgets plugin:
https://wordpress.org/plugins/classic-widgets/
Important: This section applies to the standard WordPress footer with footer widgets. If your footer was created with Elementor, Elementor Studio, or a custom footer template, you need to edit the footer from the template builder used on your site.
Widgets Do Not Show in Gutenberg / Block Widgets Editor
In some cases, the footer widgets or other theme widgets may not show correctly in the WordPress block-based Widgets screen.
This can happen when you go to:
Appearance > Widgets
You may see messages like:
- The “social_widget” block was affected by errors and may not function properly.
- The “custom_html” block was affected by errors and may not function properly.
- The “advanced_search_widget” block was affected by errors and may not function properly.
- The “footer_latest_widget” block was affected by errors and may not function properly.
This means that WordPress is trying to load saved widget areas inside the block-based Widgets editor, but some classic widgets cannot be rendered correctly in that editor.
For this setup, the fastest fix is to replace the block-based Widgets screen with the classic Widgets interface.
Install and activate the Classic Widgets plugin:
https://wordpress.org/plugins/classic-widgets/
After the plugin is active, go back to:
Appearance > Widgets
The classic widget areas should load again. You can then check the footer columns, move widgets back if needed, edit the widgets, and save.
After saving the widgets, clear the website cache and check the footer on the front end.
Header Type 3 Widgets
For Header Type 3, you can add widgets after the menu.
Go to:
Appearance > Widgets
Add your content to the Header Type 3 widget area.


Page Sidebar Widgets
The theme includes two default page sidebars:
- Primary
- Secondary
You can add widgets to these sidebar areas from:
Appearance > Widgets
You can control sidebar display per page, or from Theme Options for specific sections of the website.
Custom Sidebars
You can create unlimited custom sidebars and assign them to specific pages or posts.
To create a new sidebar, go to:
Appearance > Sidebars > Add Sidebar
After the sidebar is created, populate it from:
Appearance > Widgets
More information about sidebar positioning:
https://help.wpresidence.net/article/sidebars/
Sidebar Widget Design
The widgets article explains where widgets are added and how widget areas are populated.
The visual design of sidebar widgets is managed separately from:
Theme Options > Design > Sidebar Widgets Design & Colors
From that section, you can control:
- Sidebar widget internal padding
- Sidebar widget background color
- Sidebar widget border size
- Sidebar widget border color
These settings change the design of the sidebar widget container. They do not control which widgets are displayed or where the sidebar is assigned.
Sidebar widget design help: https://help.wpresidence.net/article/1-17-sidebar-widget-design/