WP Residence Help WP Residence Help

  • WpEstate
  • How to Build Your Website
  • Video Tutorials
  • Client Support
  • API
Home / Elementor Shortcodes, WpResidence Elementor Studio / How to manage a Custom Property Page Custom Template with Elementor Builder

How to manage a Custom Property Page Custom Template with Elementor Builder

12731 views 2

CONTENT

  • How to create or import a Property Custom Template
  • How to customize the Overview section
  • How to create a Custom Overview section with Text with Details widget
  • How to customize the Property details section using the Property custom template for Elementor

How to create a Property custom template

In this video you will learn how How to Build a Custom Property Page with WpResidence Template Studio and Elementor FREE and how to assign it to the categories you wish Watch Video on Youtube

How to customize the Overview section

In this video, you learn how to customize the Property Overview section using the property custom template with Elementor. Watch Video on Youtube

How to create a Custom Overview section with Text with Details widget

In this video, you learn how to customize the Property Overview section using the property custom template with Elementor. Watch Video on Youtube

How to customize the Property details section using the Property custom template for Elementor

In this video, you will learn how to create a custom property details section that shows only the information you wish to display publicly. Watch Video on Youtube

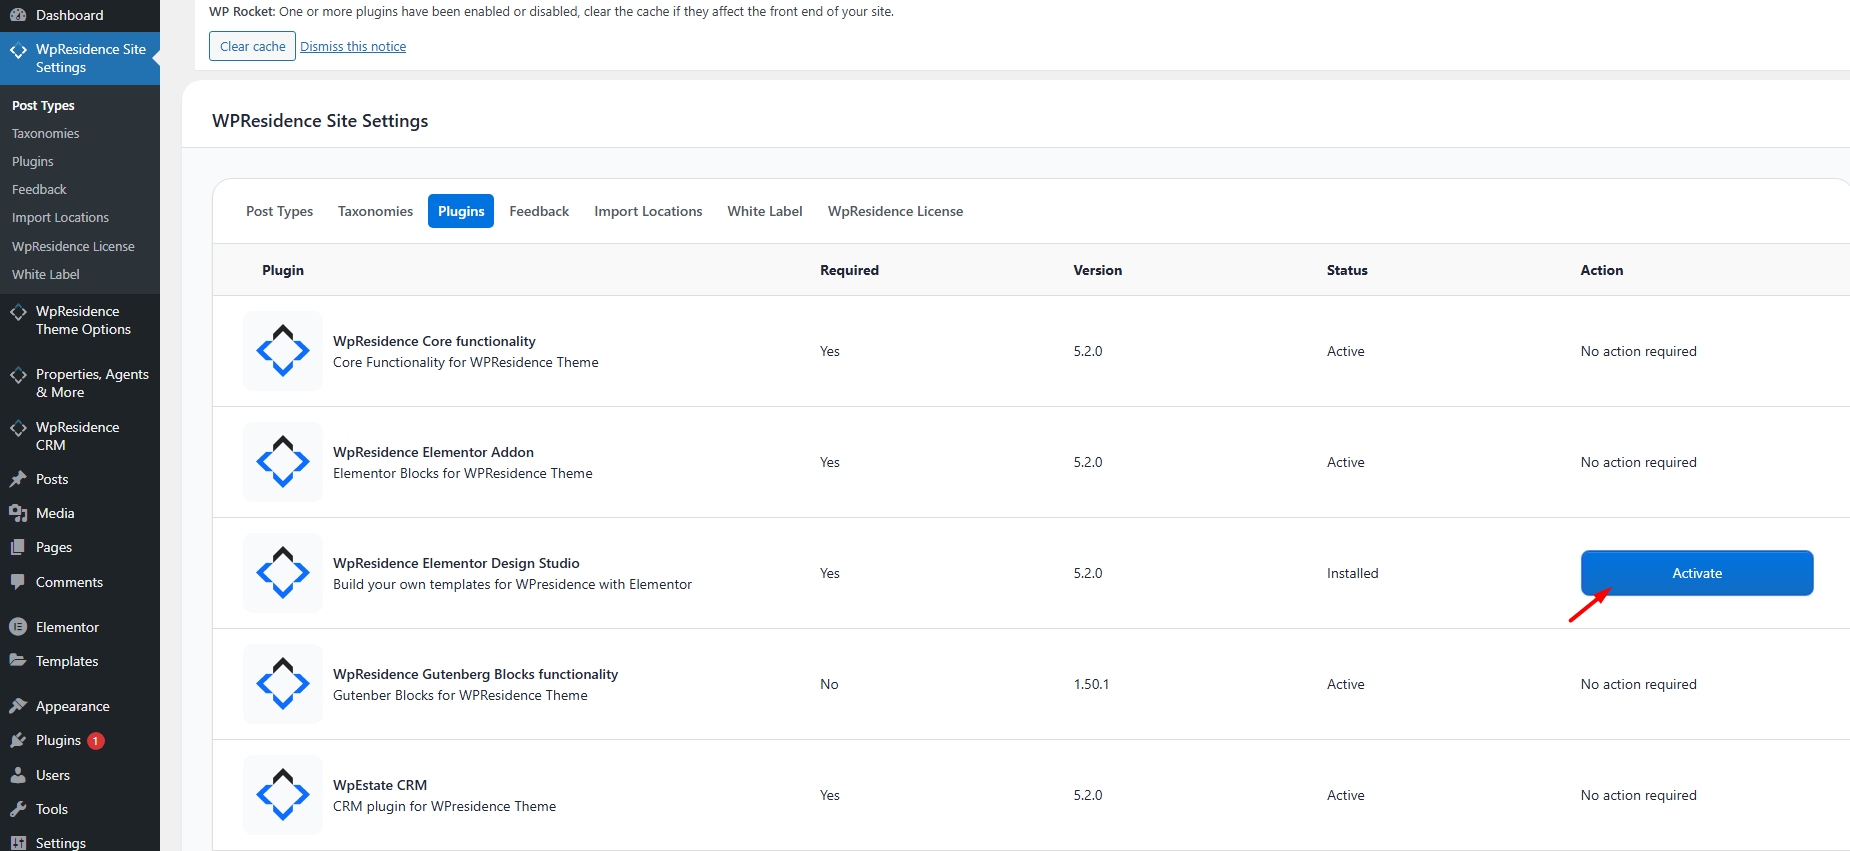
Activate the WpResidence Studio Plugin

Install the WpResidence Elementor Design Studio plugin

  • Go to WP Admin > Appearance > Install Plugins

  • Or go to WpResidence > Site Settings > Plugins

  • Install and activate WpResidence Studio

Once active, you’ll see a new menu item:
WpResidence Studio Templates

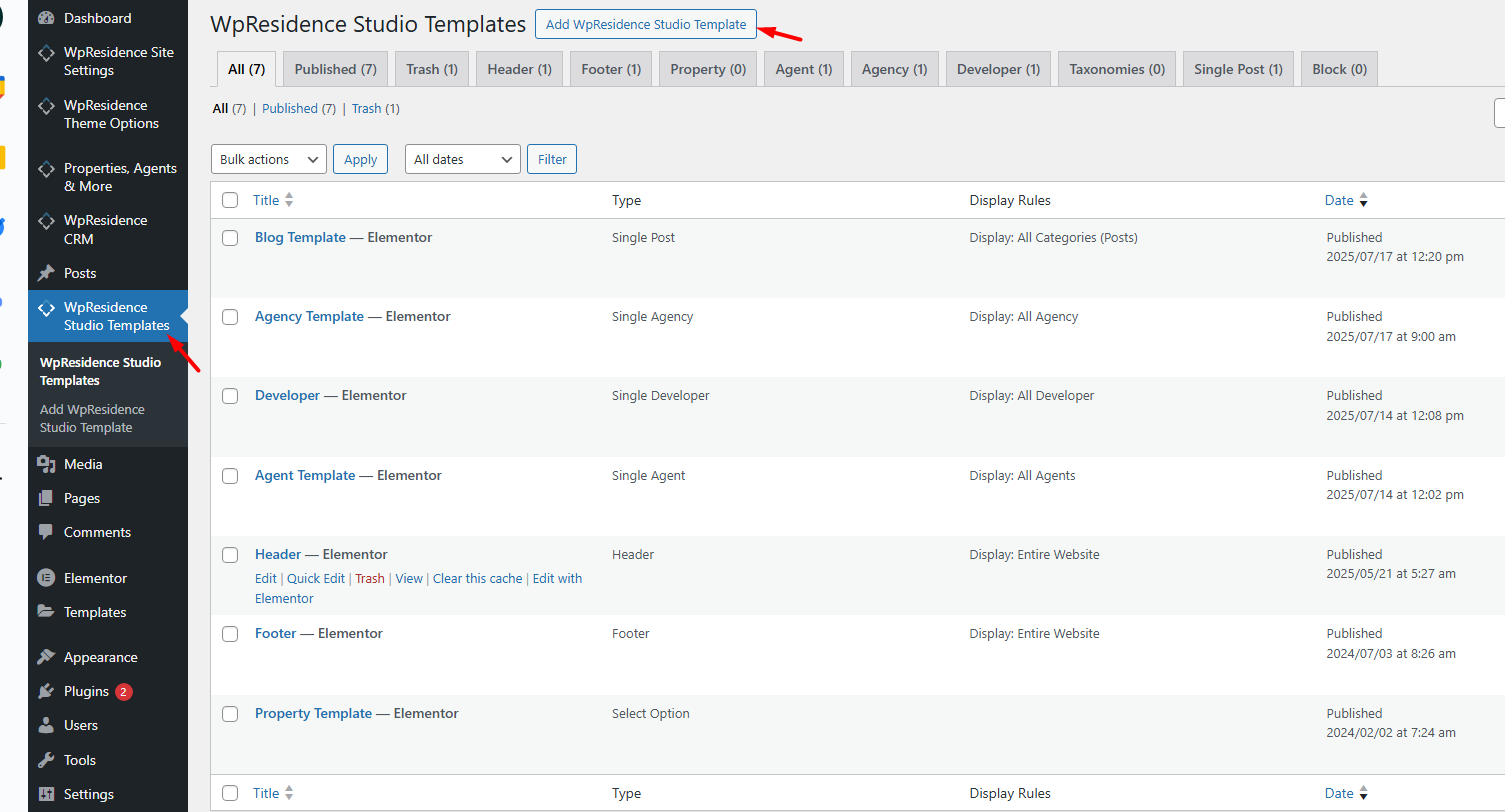
Creating a New Template

  1. Go to WpResidence Studio → Add New.

  2. Enter a descriptive name (e.g., “Property Template”).

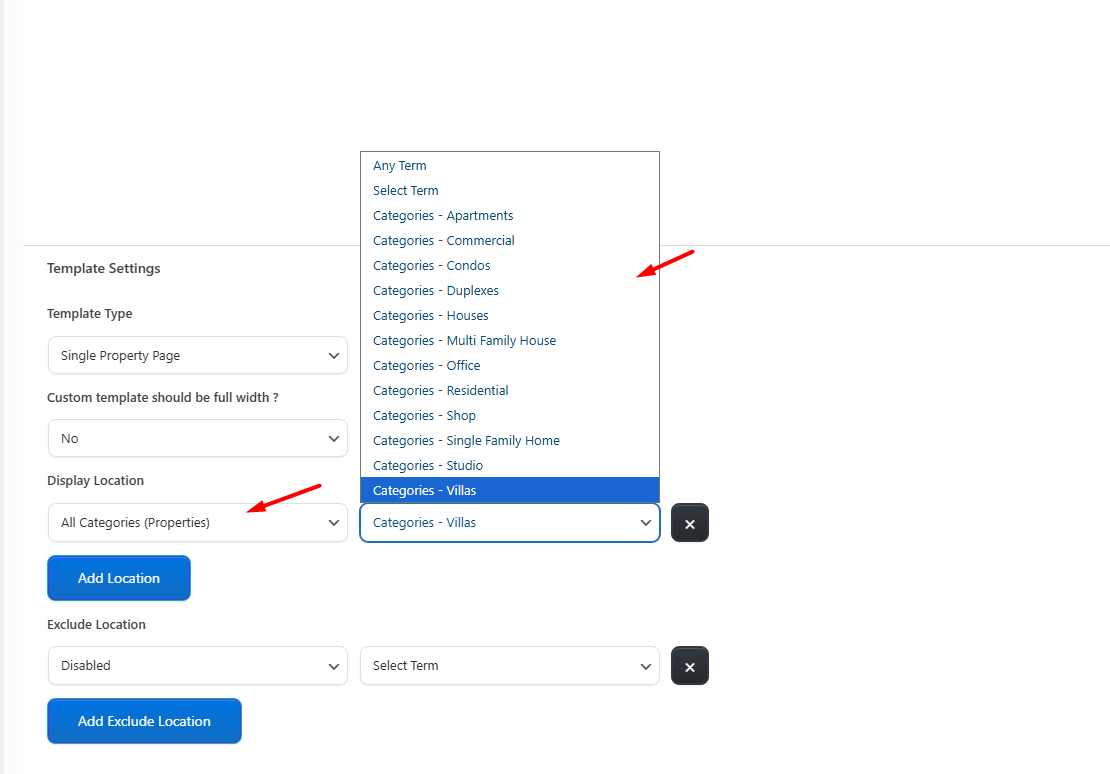
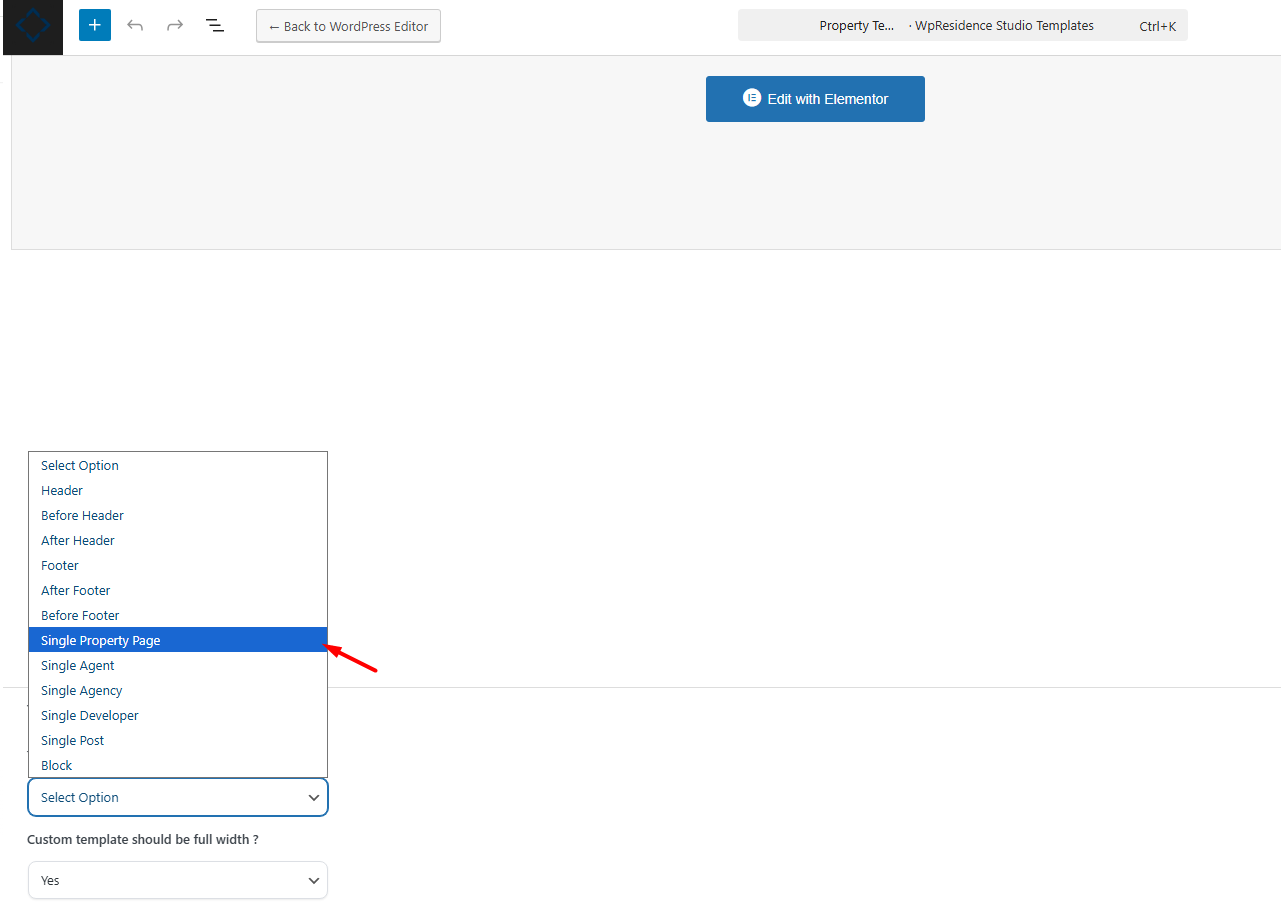
  3. Select the Template Type: Single Property Page.

  4. Set Elementor Full Width to Yes if you want to manage layout and spacing via Elementor.

  5. Click Publish.

  6. Your template will now be listed under its respective tab (Property).

Optional – Import an existing template and edit it

  1. Click the Edit with Elementor button to open the Elementor editor.
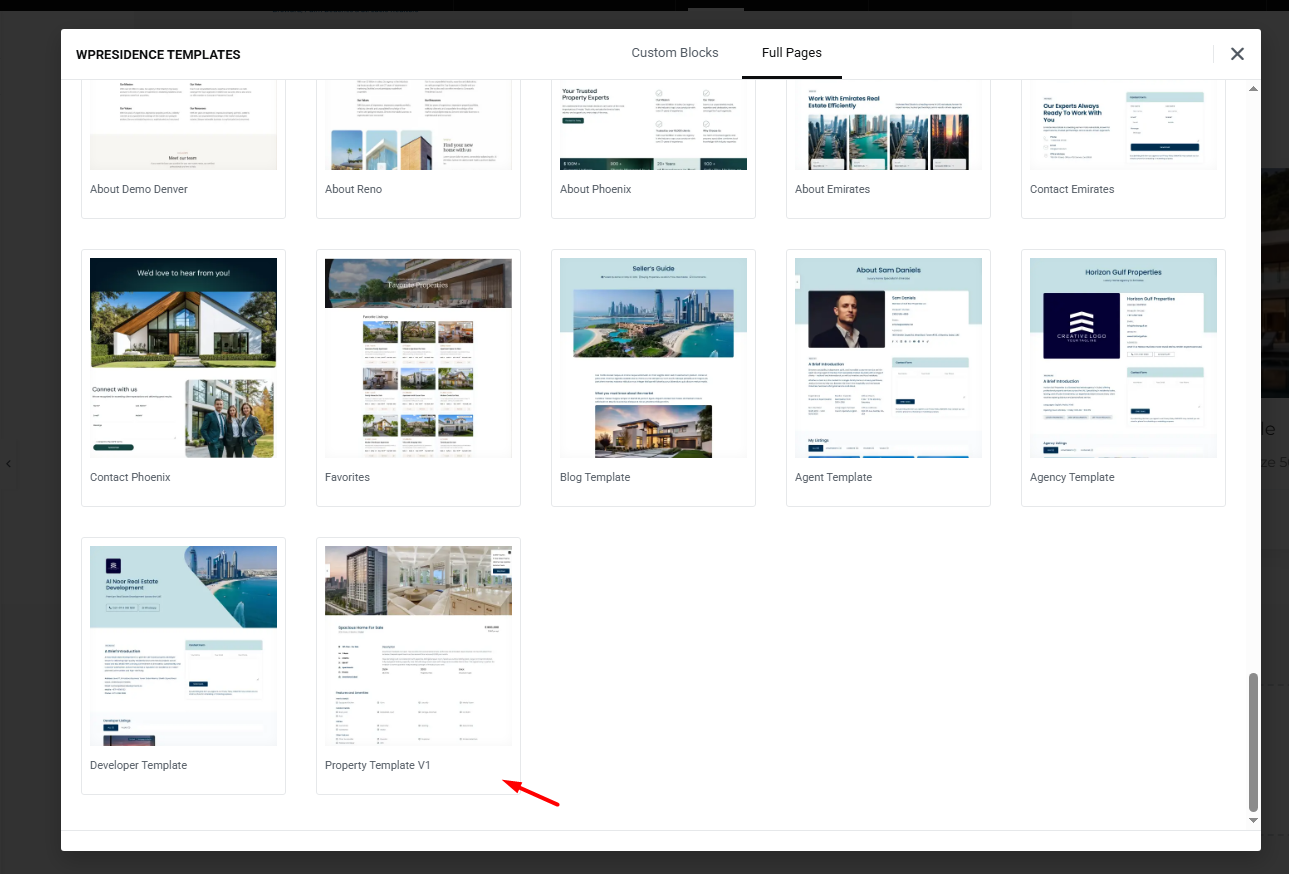
  2. In the Elementor editor, click the Folder icon to open the WpResidence Design Studio Templates library.
  3. Click Insert to add the desired template to your page.

Design the Property Template Layout with Elementor

  • Build your layout from scratch or start with a Studio prebuilt layout (if available).

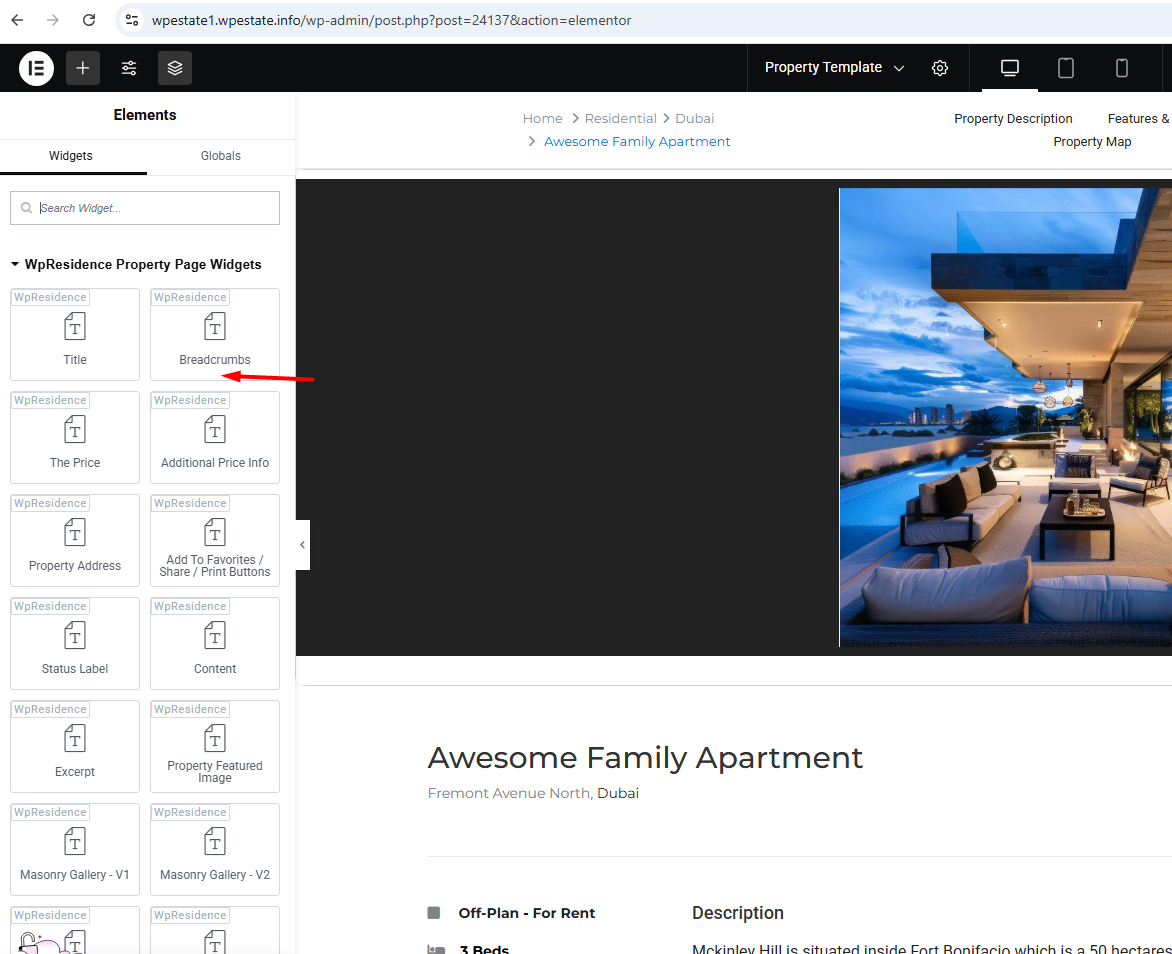
  • Use the dedicated Property Page Widgets (over 50 widgets available).

Responsive Design

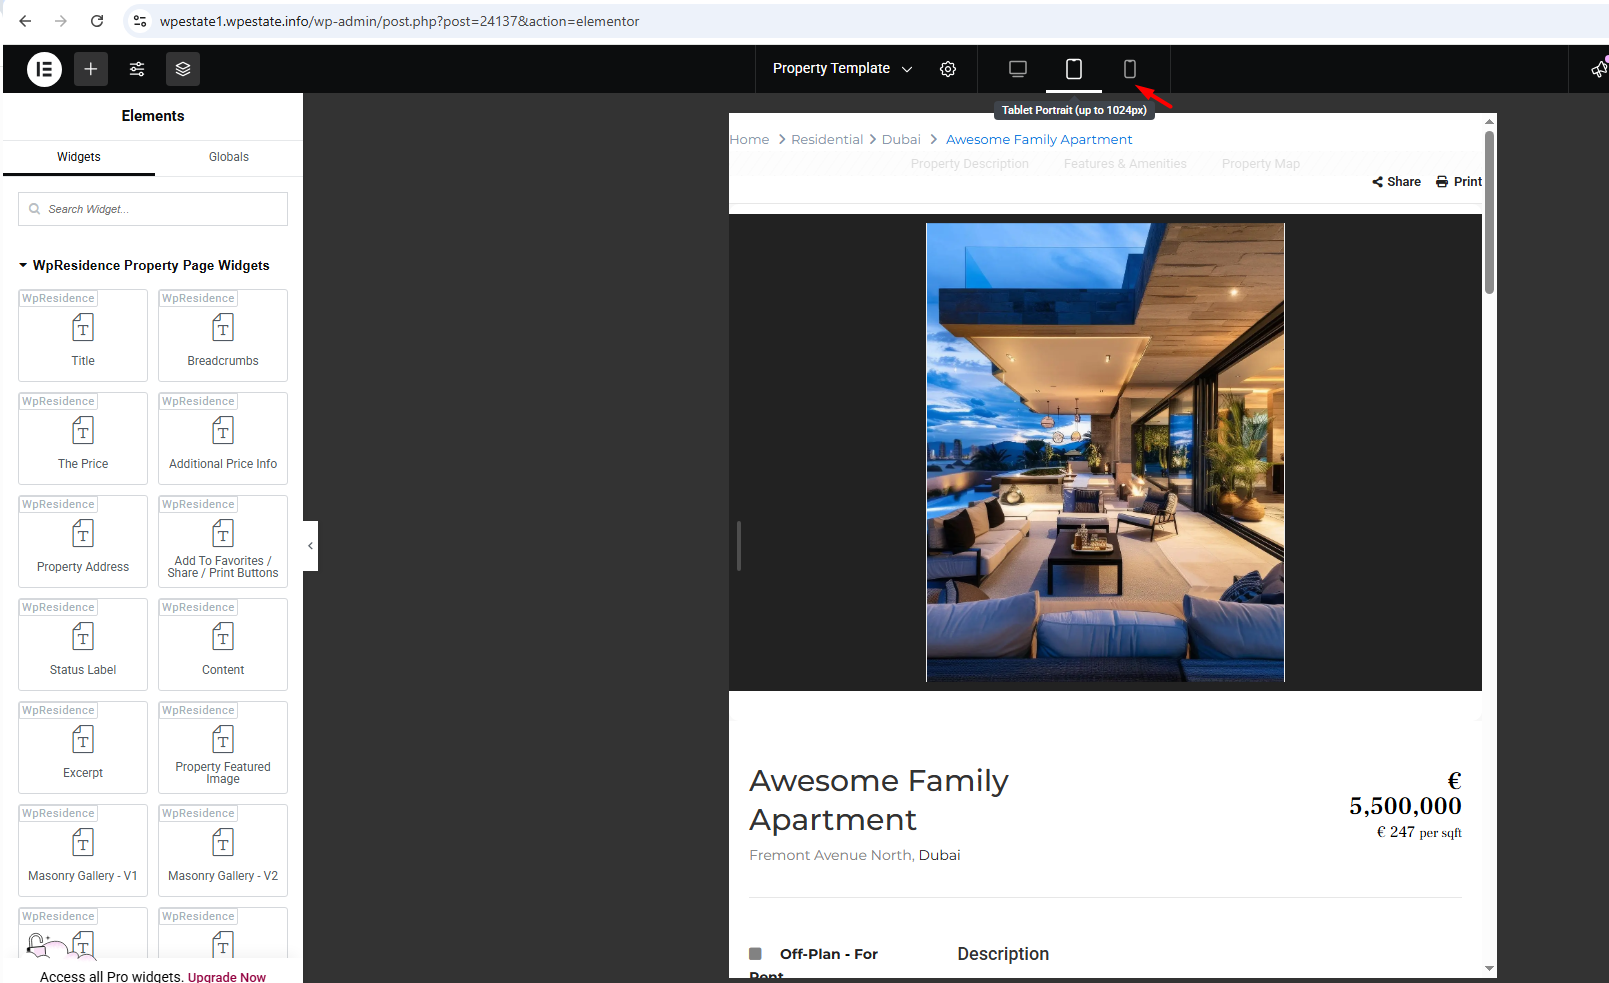
  • Use Elementor’s responsive preview buttons to adjust designs for desktop, tablet, and mobile.

  • Test your templates on actual devices to ensure perfect display.

Assigning Templates

Once your template is ready and fully responsive:

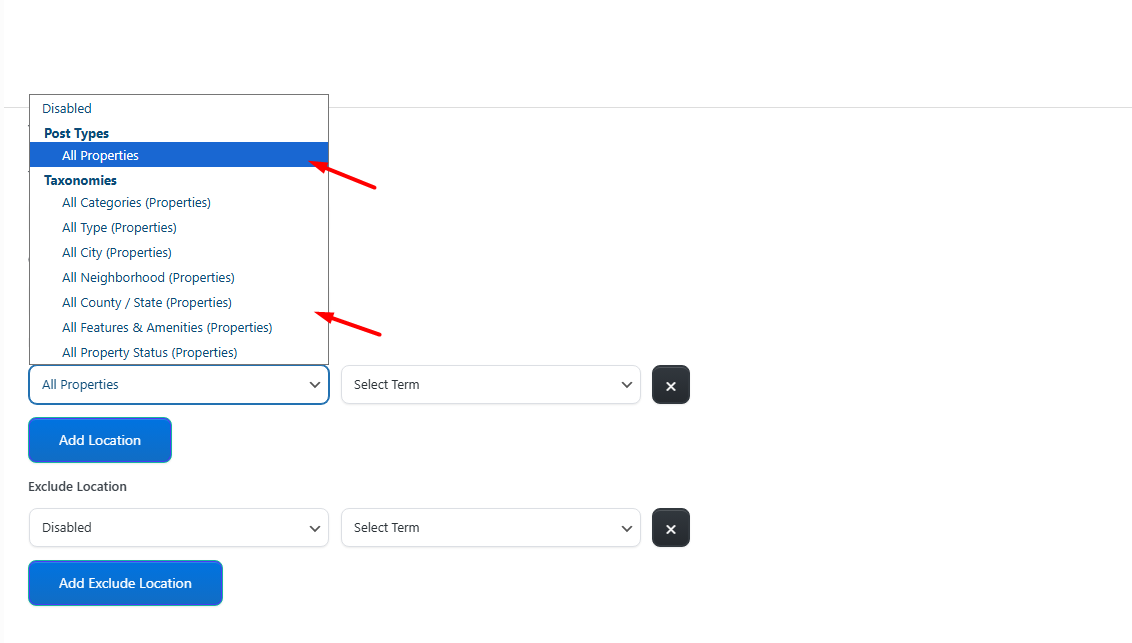
  • Assign it globally from Theme Options to apply to all properties.

  • Or assign it to specific property categories.

Elementor ShortcodesWpResidence Elementor Studio

Related Articles

  • How to create a custom template for each Property Category / Taxonomy with WpResidence Studio and Elementor Free
  • How to manage the WP Residence Scroll Gallery for Elementor
  • How to manage the WP Residence Call to Action Widget for Elementor
  • How to Create a Custom Agent, Agency or Developer Template with WpResidence Studio + Elementor Free

WP Residence Documentation

  • 1. General
    • How to Get Support
    • Get your buyer license code.
    • Use SSL / https
    • Server / Theme Requirements
  • 2. Installation
  • 3. Installation FAQ
  • 4. Advanced Search
    • Advanced Search Display Settings
    • Advanced Search Form
    • Geolocation Search for Half Map
    • Save Search Theme Options
    • Advanced Search Colors
  • 5. Agent, Agency & Developers
  • 6. Property Page
  • 7. Properties List
  • 8. Property Taxonomies
  • WpResidence Elementor Studio
  • 10. Blog Posts & Blog List
  • 11. Shortcodes
    • Contact Form
    • Featured Agency/Developer
    • Membership Packages
    • Testimonials
    • Google Map with Property Marker
    • Listings per Agent, Agency or Developer
    • Display Categories
    • Agent List
    • Recent Items Slider
    • Recent items
    • List Properties or Articles by ID
    • Featured Agent
    • Featured Article
    • Featured Property
    • Login & Register Form
    • Icon Content Box Shortcode
  • 12. Widgets
  • Theme Options
    • General Settings
    • User Types Settings
    • Appearance
    • Logos & Favicon
    • Header
    • Footer Style and Colors
    • Price & Currency
    • Property Custom Fields
    • Features & Amenities
    • Listing Labels
    • Theme Slider
    • Permalinks
    • Splash Page
    • Social & Contact
    • Map Settings
    • Pin Management
    • How read from file works
    • General Design Settings
    • Custom Colors Settings
    • Header Design & Colors
    • Mobile Menu Colors
    • User Dashboard Colors
    • Print PDF Design
    • Property, Agent, Blog Lists Design Settings
    • Sidebar Widget Design
    • Font management
    • How to add custom CSS
    • Custom Property Card Unit – Beta version
    • Email Management
    • Import & Export theme options
    • reCaptcha settings
    • YELP API Integration
    • iHomefinder Optima Express IDX
    • MEMBERSHIP & PAYMENT Settings
    • Property Submission Page
    • PayPal Setup
    • Stripe Setup
    • Wire Transfer Payment Method
  • Translation
  • FAQ
  • Pages
  • Header
  • Footer
  • Google or Open Street Maps
  • Payment Options
  • Plugins
    • Included Plugins
    • Third Party Plugins – IDX Compatibility
    • Third Party Plugins – Multi Languages
    • Third party Plugins – Other
  • Technical
    • Technical how to | Custom Code Required
    • Technical: Child Theme

Join Us On

Powered by WP Estate - All Rights Reserved
  • WpEstate
  • How to Build Your Website
  • Video Tutorials
  • Client Support
  • API