Watch this video first - How to Manage and Display Sold Properties in WpResidence | MLSImport Integration
Watch Video on Youtube
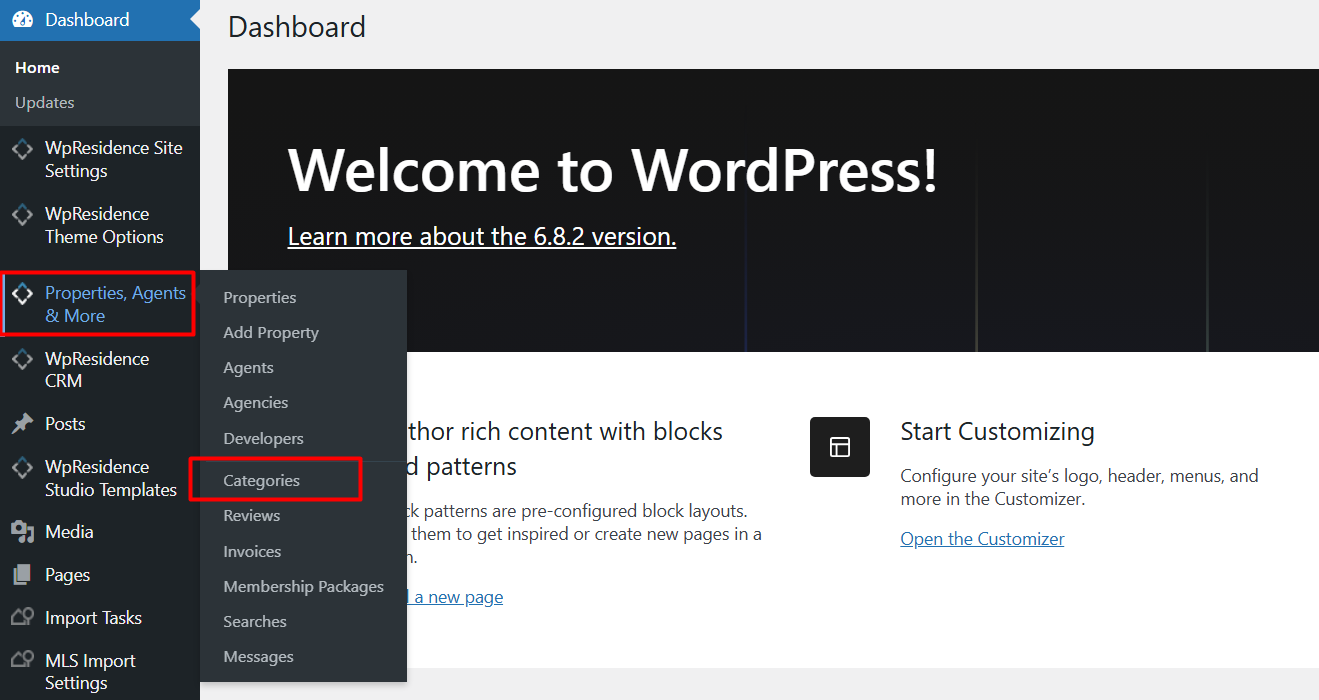
Step 1: Create a “Sold” Property Status
To begin, navigate to Theme Options > Properties, Agents & More > Categories > Property Statuses.
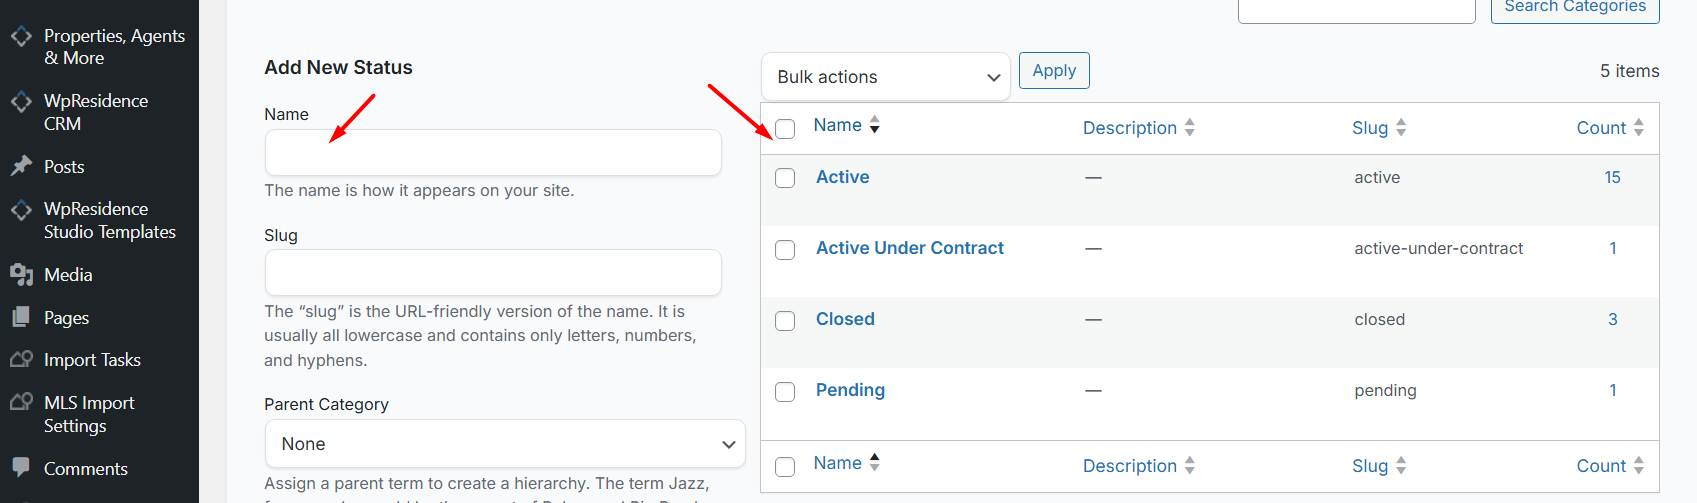
Here, you can add a new status labeled “Sold.” This status will be used to mark properties that have been sold.

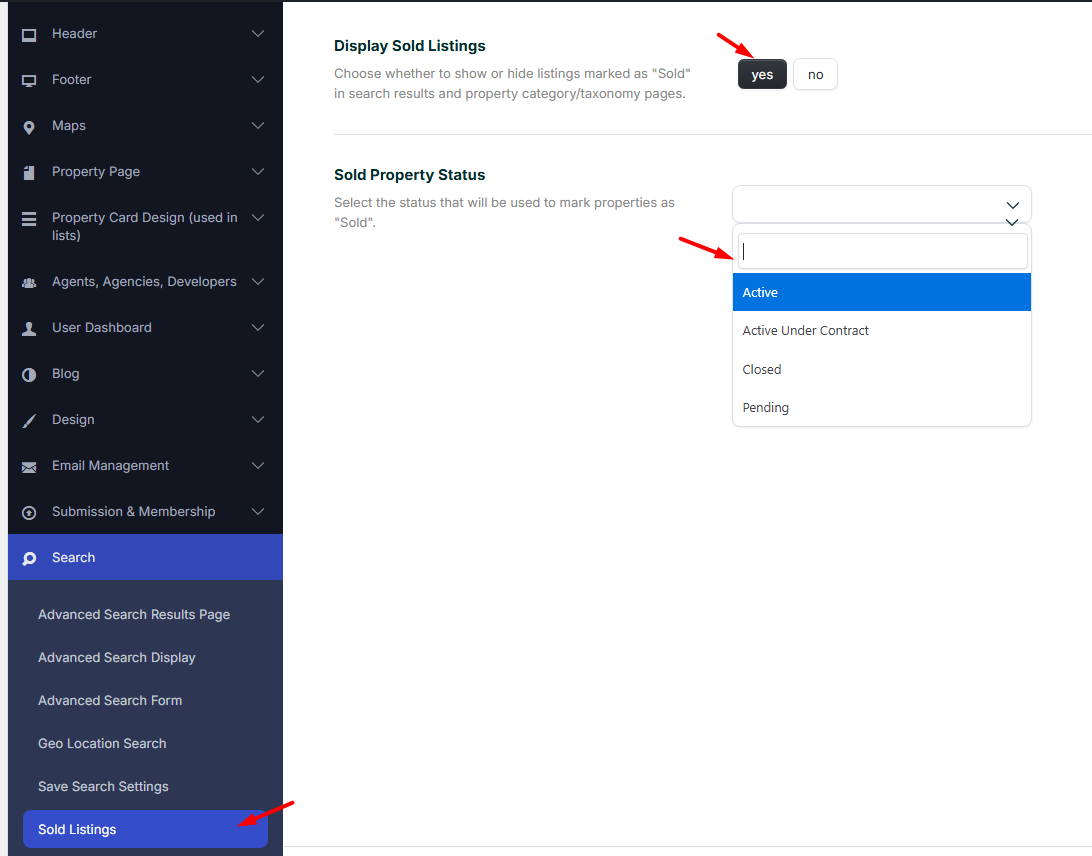
Step 2: Configure Visibility Settings
- After creating the “Sold” status, go to Theme Options > Search > Sold Listings.
- Select the “Sold” Property Status
- Optional – enable the option to hide listings with the “Sold” status from the Advanced Search results page & Lists.
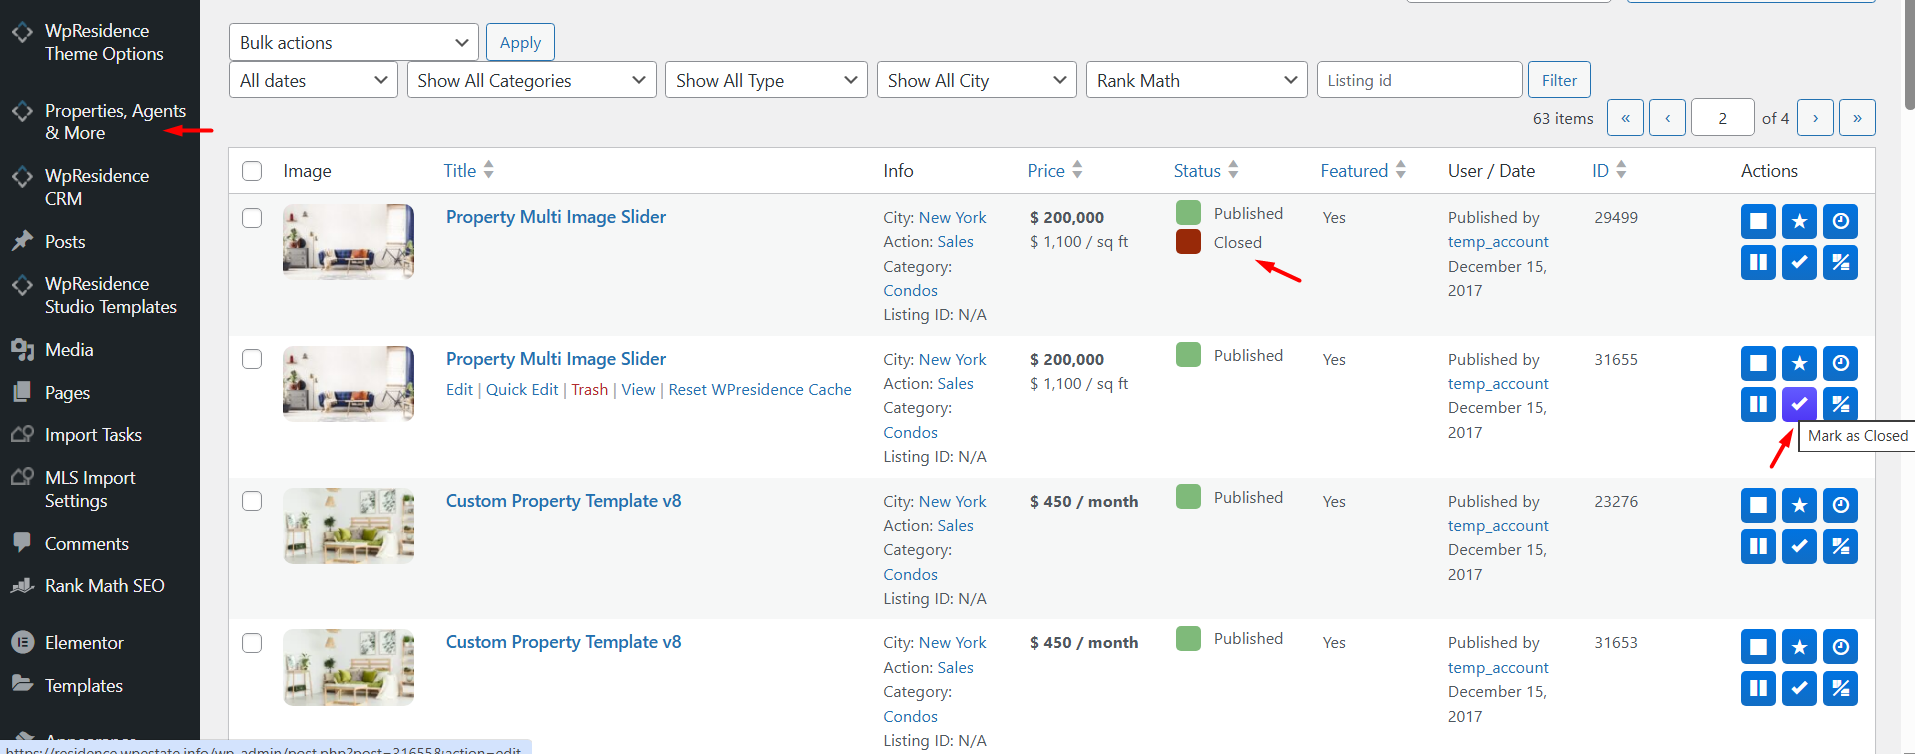
Step 3: Mark Properties as Sold
You can mark properties as sold in two ways:
- One Click: From the property list, use the “Mark as sold” icon
- Individual Update: Edit each property individually and select the “Sold” status from the property status dropdown.
Step 4: Display Sold Properties Selectively
If you wish to showcase your sold properties, you can create a dedicated page or section on your site that lists only properties with the “Sold” status. This can be done by customizing the property list settings to filter by the “Sold” status, providing potential clients with a clear view of your successful transactions.
Additional Resources
By effectively managing your sold properties, you can enhance your site’s professionalism and provide valuable insights to potential clients.