Navigation menus are one of the first things your visitors see, so they need to match the active language. WPResidence Translate extends the native WordPress menu editor so you can create one menu per language, assign each to the same theme location, and keep their structure in sync. This article walks through the full workflow. See our main guide on building a multi-language real estate website for the surrounding context.
The Menu Language Toolbar
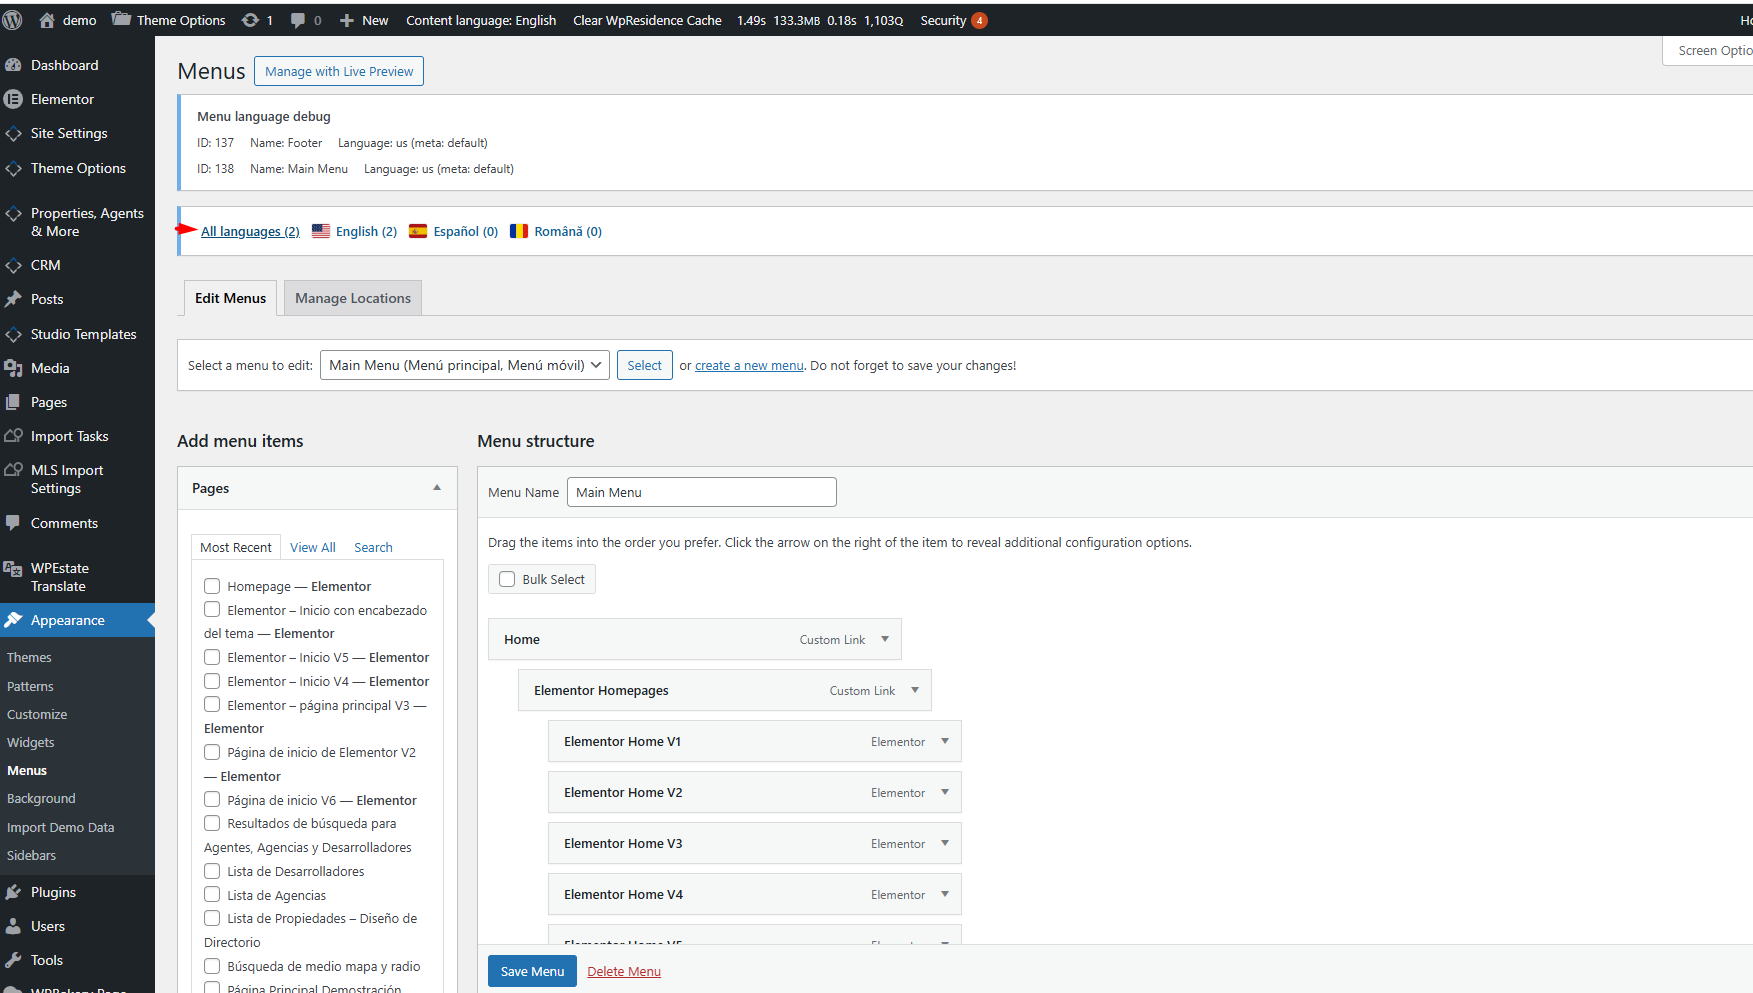
Go to Appearance > Menus. With WPResidence Translate active and more than one language configured, a language toolbar appears above the menu editor. It shows one chip per language plus an “All languages” chip. Each chip displays the language flag and the count of menus in that language.
Click any chip to filter the menu dropdown to menus assigned to that language only. This makes it easy to work on one language at a time without scrolling through every menu on the site.
Creating a Menu Per Language
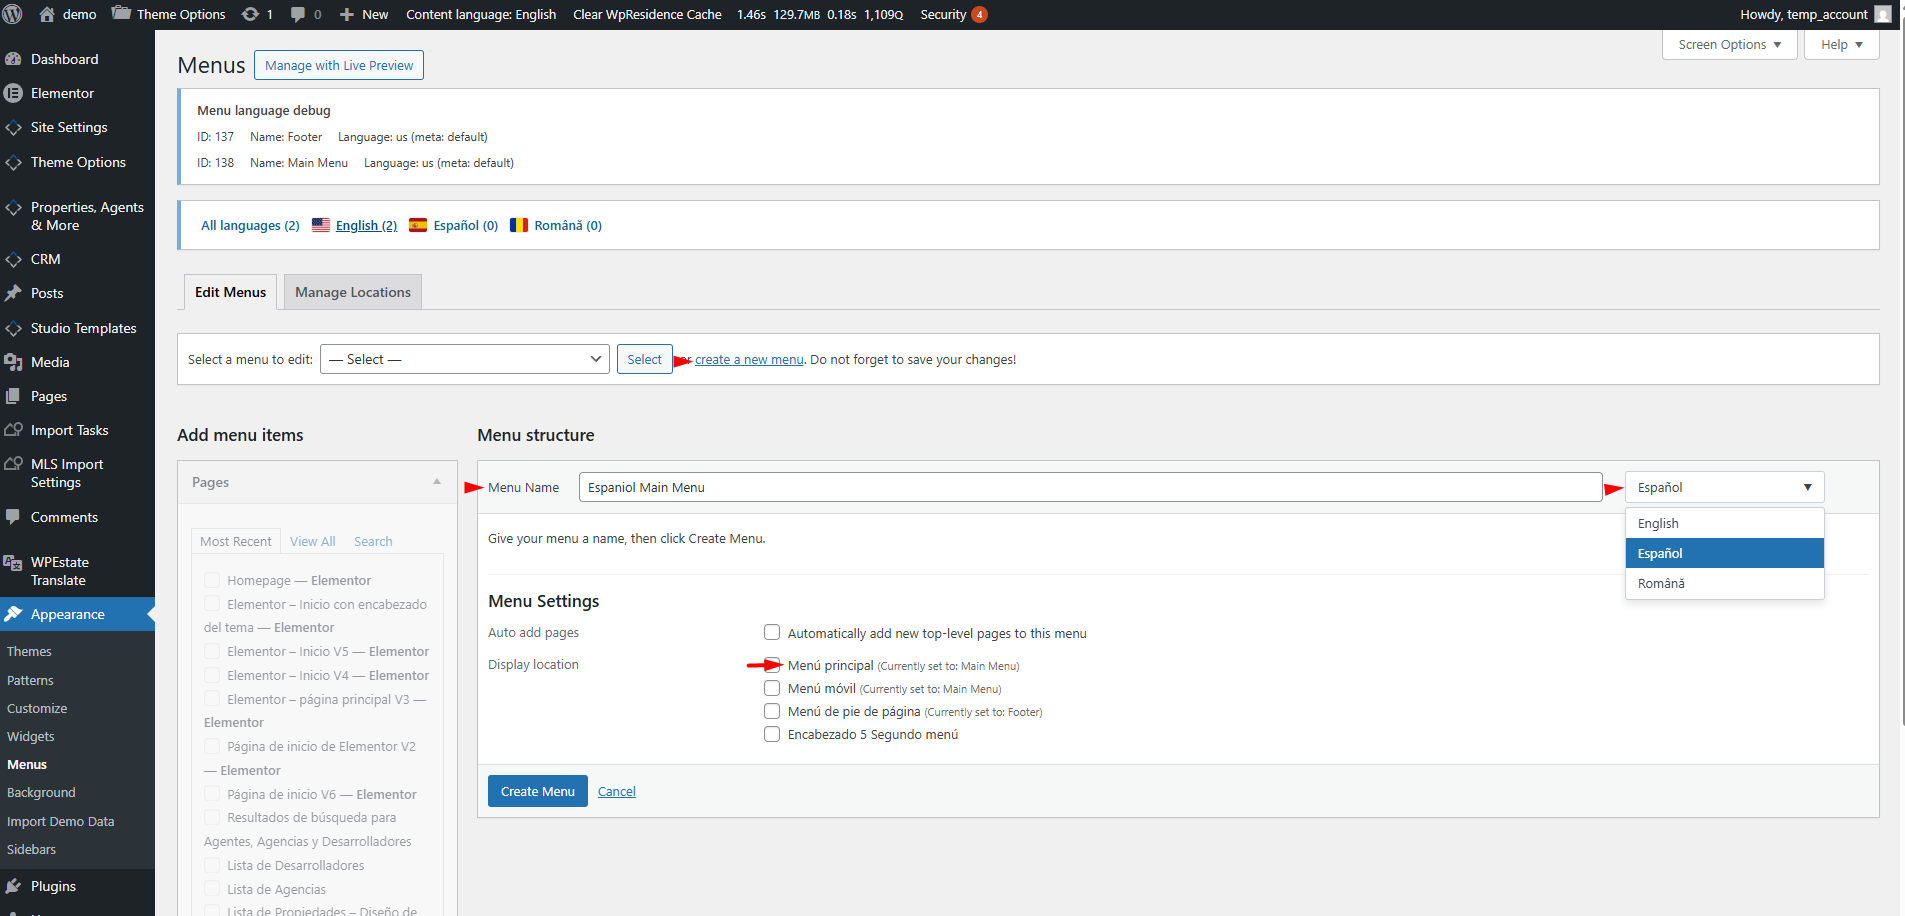
- Click Create a new menu. Give it a clear name (e.g. Header — English, Header — French).
- Save the menu. The plugin stores which language that menu belongs to behind the scenes.
- Repeat for every language you want to serve.
- Use the language toolbar to filter the dropdown and jump between menus.
Assigning Menus to Theme Locations
WPResidence defines theme locations (primary navigation, mobile menu, footer, etc.). With WPResidence Translate, each location stores a map of language to menu ID. When a visitor arrives, the plugin looks up the location assignment for their active language and renders the right menu.
Assign menu locations from either:
- Appearance > Menus > Manage Locations — the native tab, but language-aware.
- The Menu Settings panel at the bottom of each menu, where you pick which theme locations this menu fills.
If a language is missing an assignment for a given location, WPResidence Translate falls back to the default-language menu for that location. You will not end up with a blank header just because a translator has not yet touched the footer menu.
Menu Synchronization
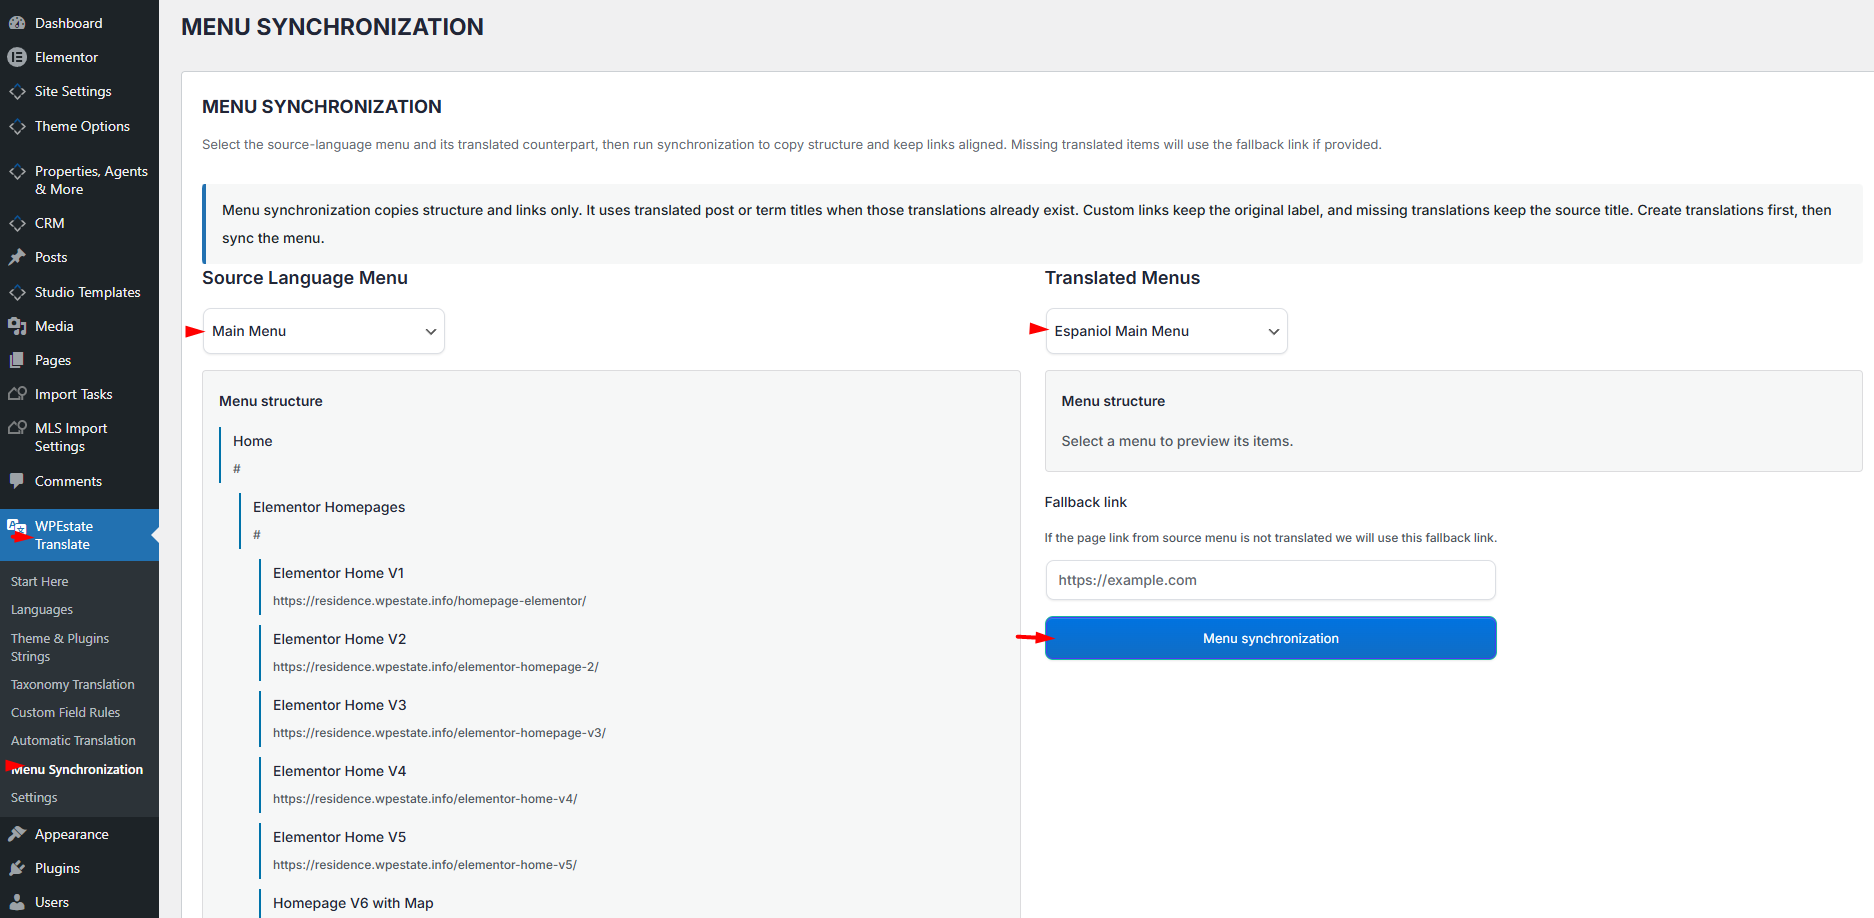
Keeping two or more menus perfectly in sync by hand is tedious. Open WPEstate Translate > Menu Synchronization to copy structure from one menu to another.
- Pick the Source Language Menu — typically your default-language menu. A preview of its items appears.
- Pick the Translated Menu — the menu for another language. Its current items appear in the second column.
- Review the fallback URL if you have set one; it is used for items whose translation does not exist yet.
- Click Synchronize. The target menu is rebuilt to mirror the source structure.
What synchronization does:
- Copies structure and links. Hierarchy (parent/child), depth, and ordering match the source.
- Uses translated titles when they exist. For post and term items, the translated title is pulled in. If no translation exists yet, the source title is kept as a placeholder.
- Keeps custom links as-is. Custom link items (URLs you typed in manually) preserve their label; you translate those by editing the item directly.
Translate the content first, then sync. Synchronizing before translations exist just copies the source titles.
Day-to-Day Workflow
- Create or edit the default-language menu as you normally would.
- Add pages, properties, categories, and custom links.
- Make sure the content referenced by each menu item has been translated.
- Open Menu Synchronization and sync each translated menu against the updated source menu.
- Verify on the frontend by switching languages using the site’s language switcher.
Non-Latin Menu Titles
Menu item titles support any UTF-8 content — Cyrillic, Arabic, Chinese, Japanese, Korean, Thai, Greek, Hebrew, and mixed scripts. Type or paste the translation directly into the menu item title field.
Common Issues
- A translated menu shows source-language item titles. The referenced page/property/term does not yet have a translation. Create the translation, then re-sync.
- A language has no menu in the header. No menu is assigned to that language for that theme location. The plugin falls back to the default language — if there is no default either, the location will be empty. Assign a menu.
- Deleted menu still listed in assignments. The cleanup handler removes deleted menus from the language map automatically, but a browser refresh may be needed.
What To Read Next
- Language Switcher Widget — let visitors change languages themselves.
- Taxonomy Translation — translate the categories and locations that menus often link to.
- Translating Posts & Pages — create the translated targets that menu items point to.
For a complete overview of running a multi-language real estate website, see the main docs page.