This help explains how to manage the Property Overview section in WPResidence, how the default overview fields work, how custom fields such as Garages and Year Built are managed, and how the Map item works in the Overview section.
What the Property Overview Section Is
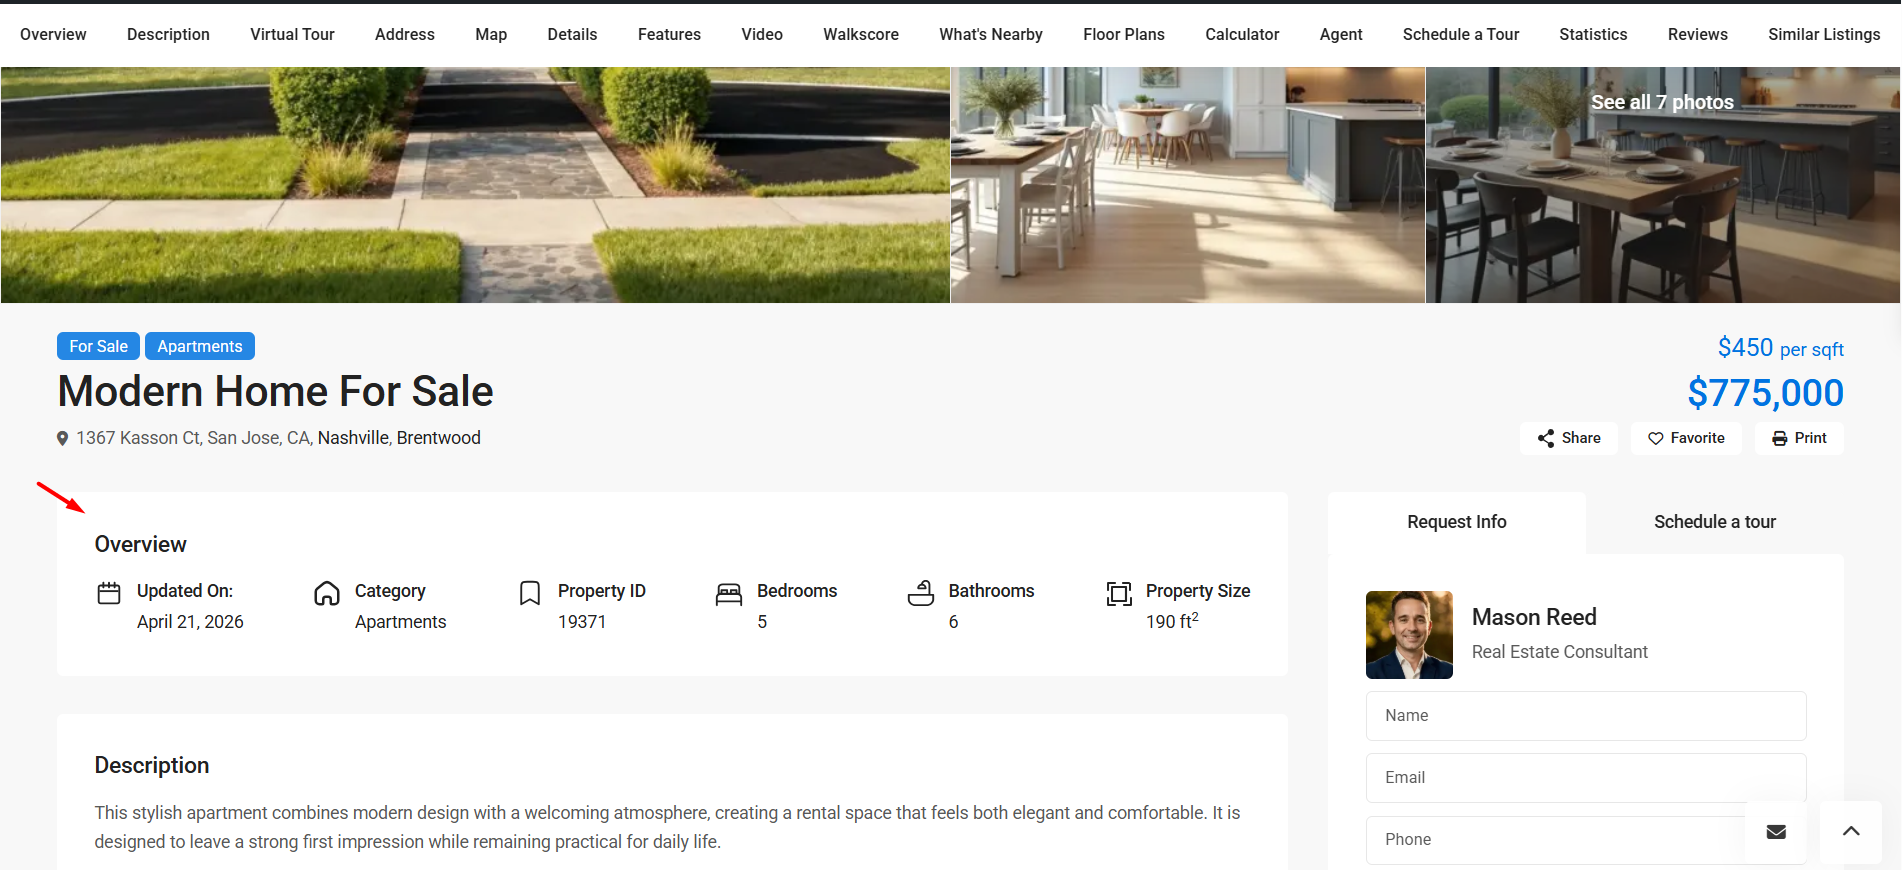
The Property Overview section is the compact information block displayed on the single property page. It can show details such as property size, rooms, bedrooms, bathrooms, category, map, garages, and year built.
The default Overview section is managed from:
Theme Options → Property Page → Overview section
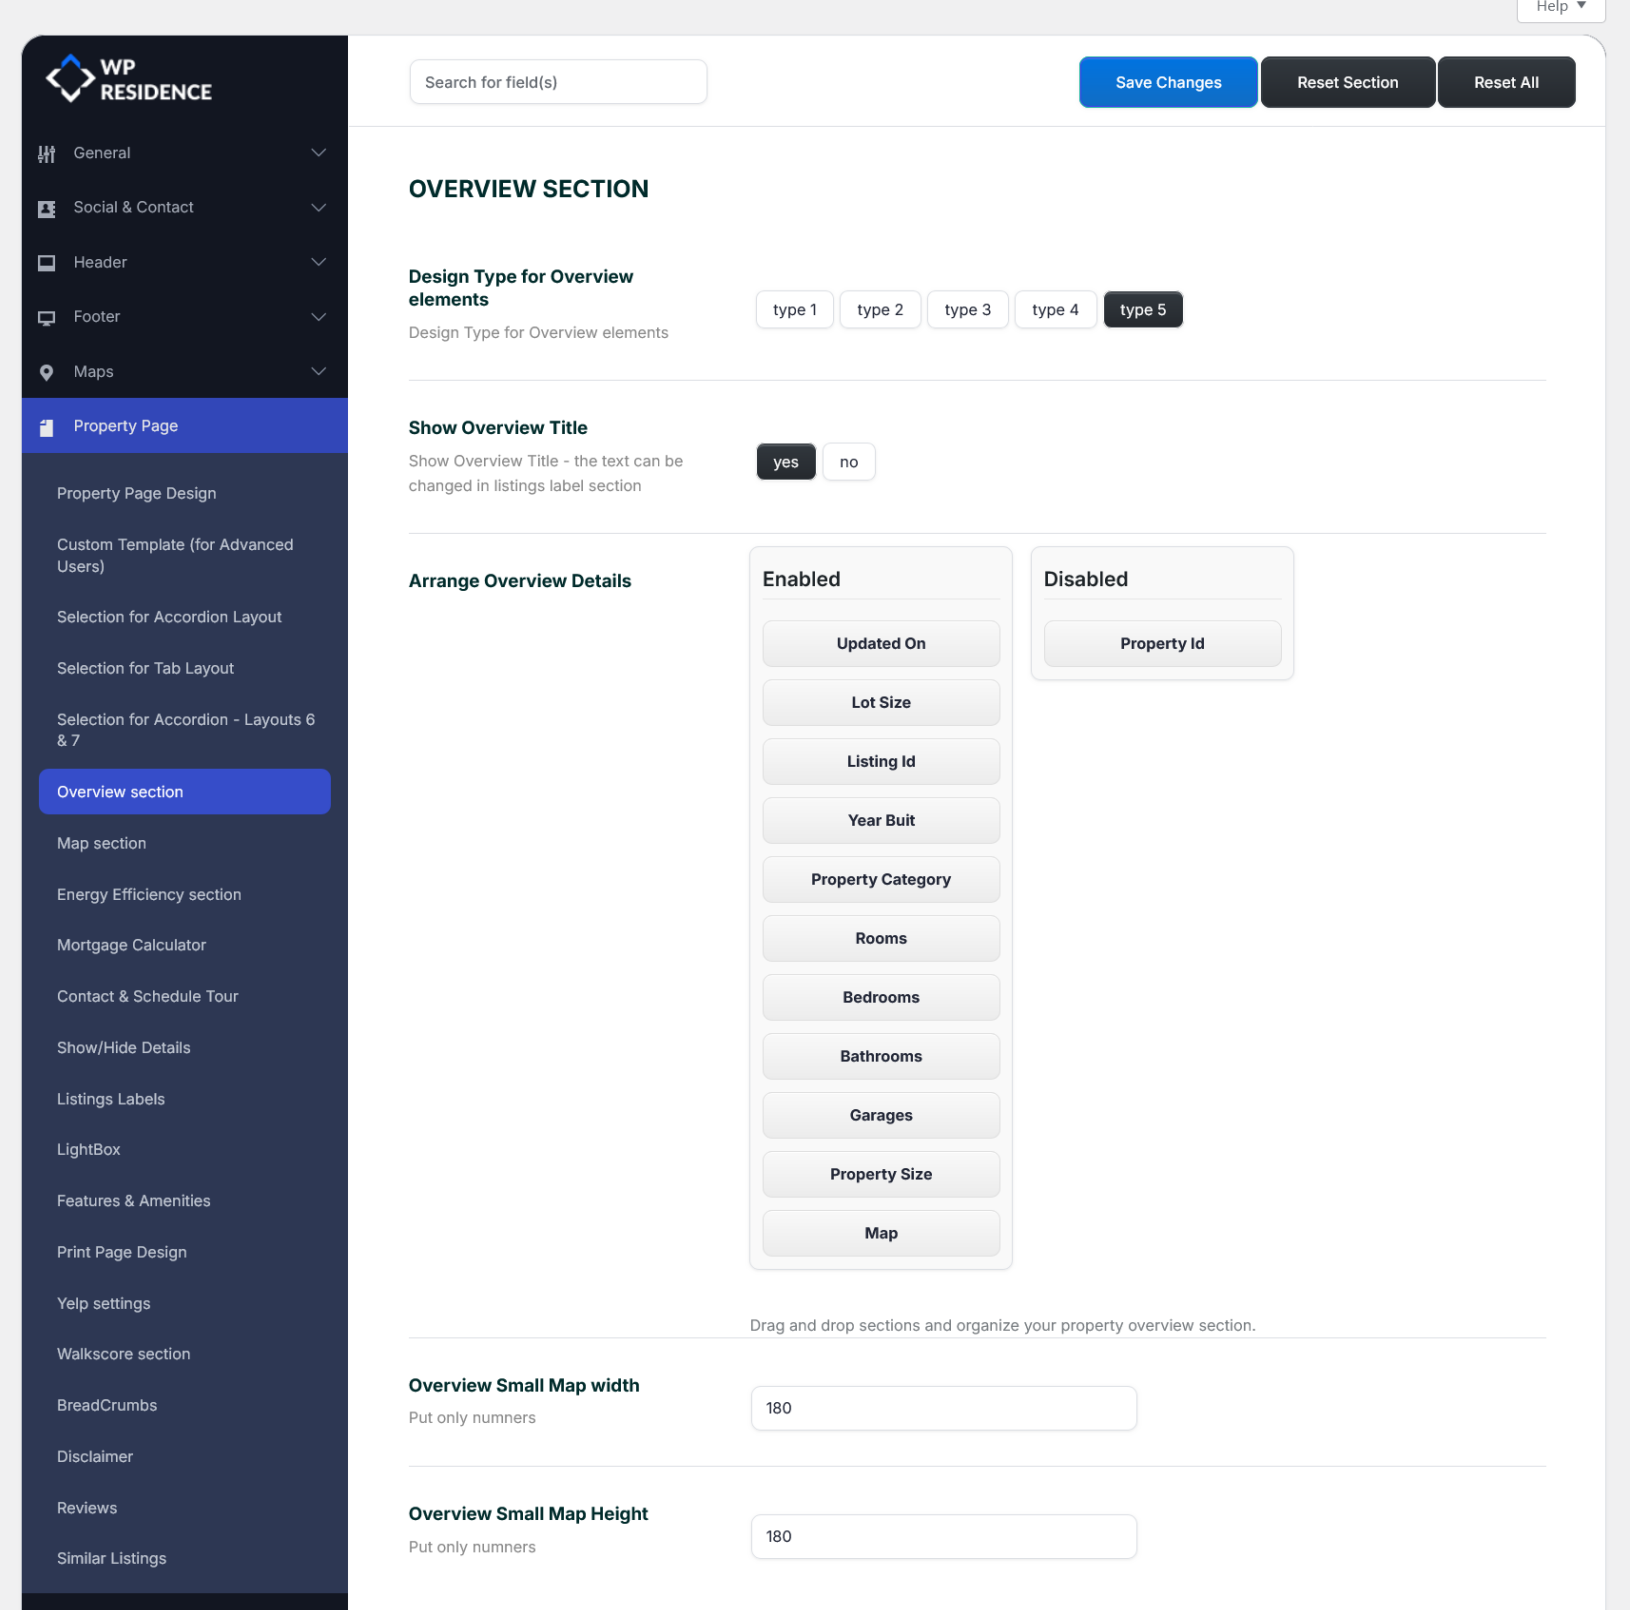
Manage the Default Overview Section
Go to:
Theme Options → Property Page → Overview section
From this area, you can manage:
- The Overview design type
- Whether the Overview title is shown or hidden
- Which fields are shown in the Overview section
- The order of the enabled fields
- The small map width and height, if the Map item is enabled
Choose the Overview Design Type
The option Design Type for Overview elements changes the visual style of the Overview items.
Available design types:
- Type 1
- Type 2
- Type 3
- Type 4
- Type 5
Show or Hide the Overview Title
Use Show Overview Title to show or hide the title above the Overview section.
- Yes – the Overview title is displayed.
- No – the Overview title is hidden.
The Overview title text can be changed from the property labels settings.
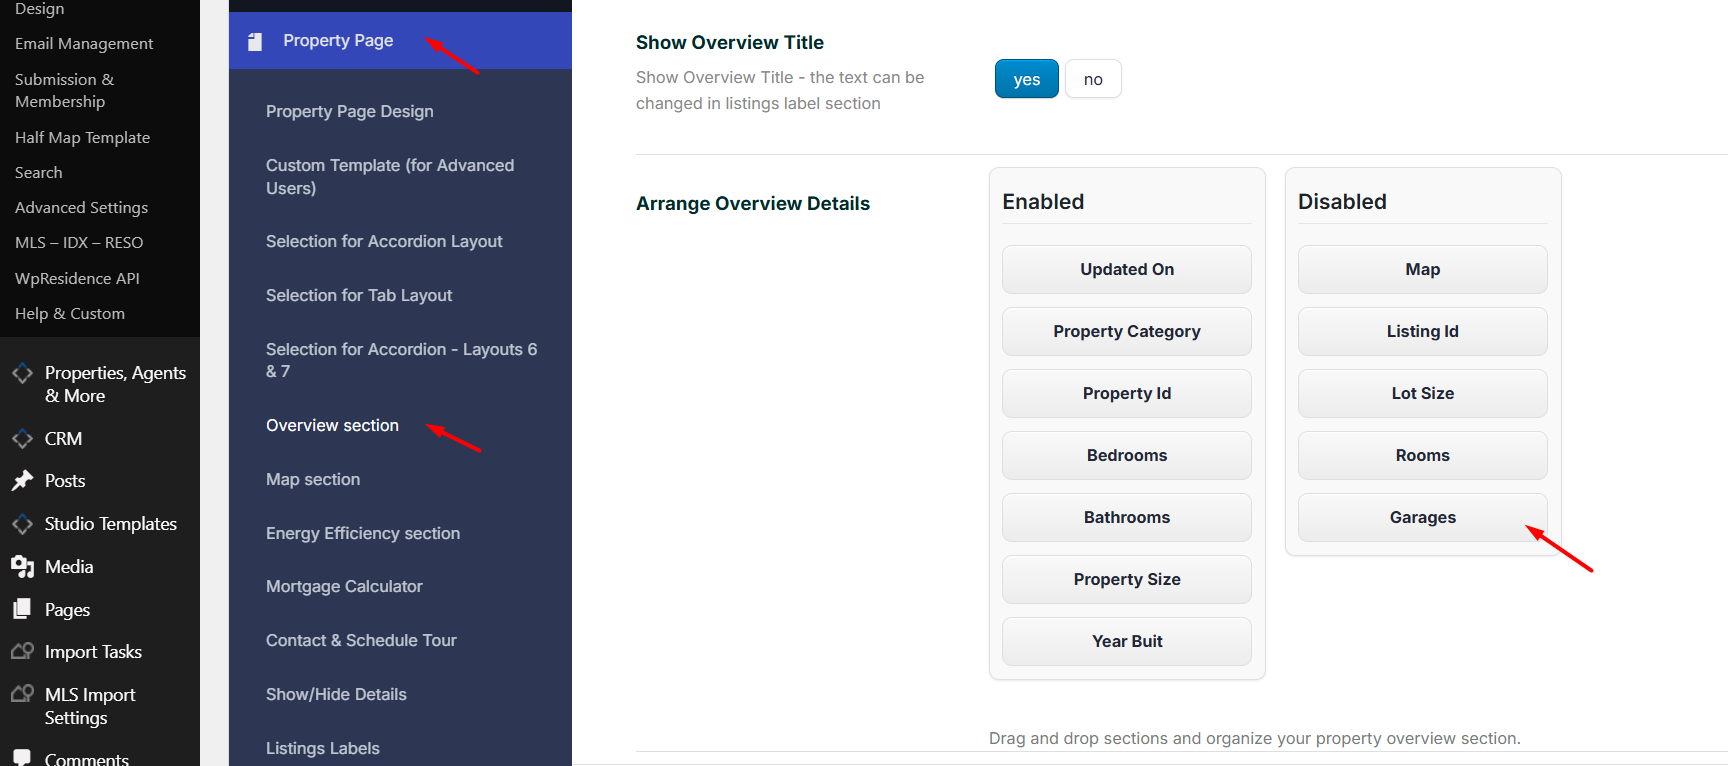
Arrange Overview Details
The Arrange Overview Details option controls which items appear in the Overview section and their display order.
There are two columns:
- Enabled – items shown in the Overview section.
- Disabled – items hidden from the Overview section.
Drag and drop items between the two columns to show, hide, or reorder them.
Available Overview Fields
The default Overview section can display the fields supported by the theme overview system.
Available items include:
- Updated On
- Map
- Listing ID
- Lot Size
- Property Category
- Rooms
- Bedrooms
- Bathrooms
- Garages
- Property Size
- Year Built
- Property ID
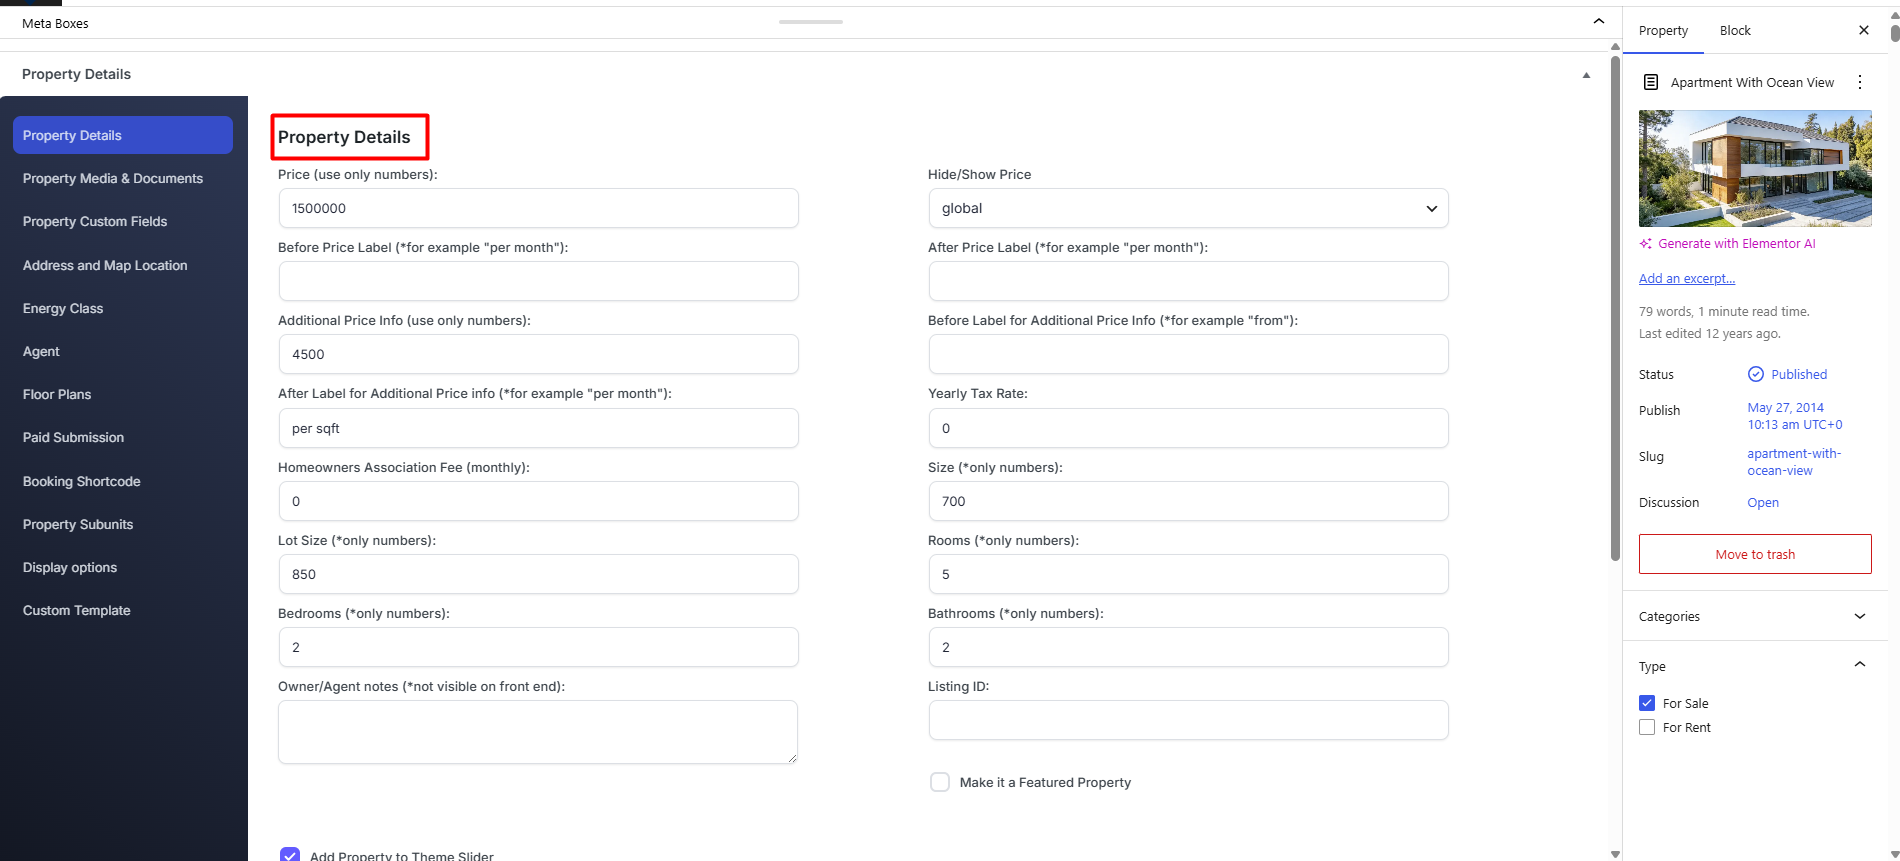
How Default Fields Work
Default fields are property fields already included in WPResidence.
Examples:
- Property size
- Lot size
- Rooms
- Bedrooms
- Bathrooms
- Property category
- Property status
- Address and map location
These values are edited inside each property.
Go to:
Properties → All Properties → Edit Property
Edit the values from the property sections, such as Property Details, Address and Map Location, categories, status, and other property settings.
After editing the property, click Update.
How Custom Fields Work
Property custom fields are created from:
Theme Options → General → Property Custom Fields
Custom fields let you add extra property information beyond the default fields included with the theme.
Each custom field has:
- Field Name – the internal field ID. It must be unique and should not be changed after the field is in use.
- Field Label – the text shown for the field. You can change this label.
- Field Order – controls the display order.
- Field Type – short text, long text, numeric, date, or dropdown.
- Dropdown values – used only for dropdown fields.
After a custom field is created, edit each property and add the value from:
Properties → Edit Property → Property Details → Property Custom Fields
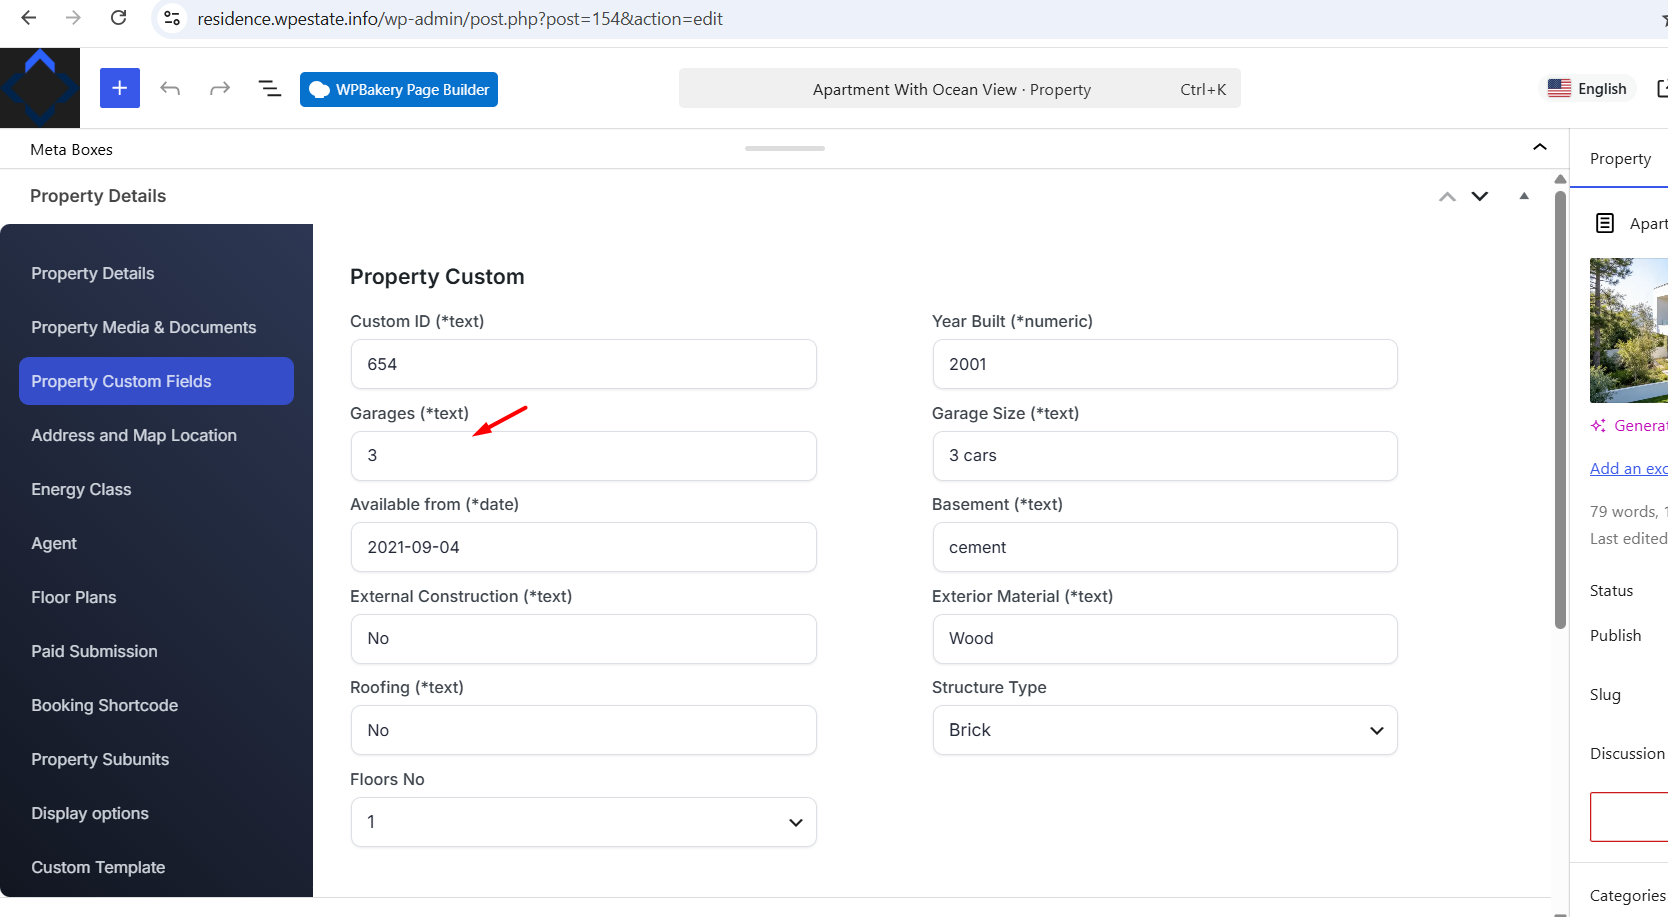
Garages and Year Built Custom Fields
In WPResidence, Garages and Year Built are custom fields used by the demos and recognized by the default Overview section when their Field Names are set correctly.
Use these exact Field Names:
- property garage – used for Garages
- property year – used for Year Built
You can change the Field Label, for example from Garages to Parking, but do not change the Field Name.
To edit the value for a property, go to:
Properties → Edit Property → Property Details → Property Custom Fields
Then edit the value for Garages or Year Built and click Update.
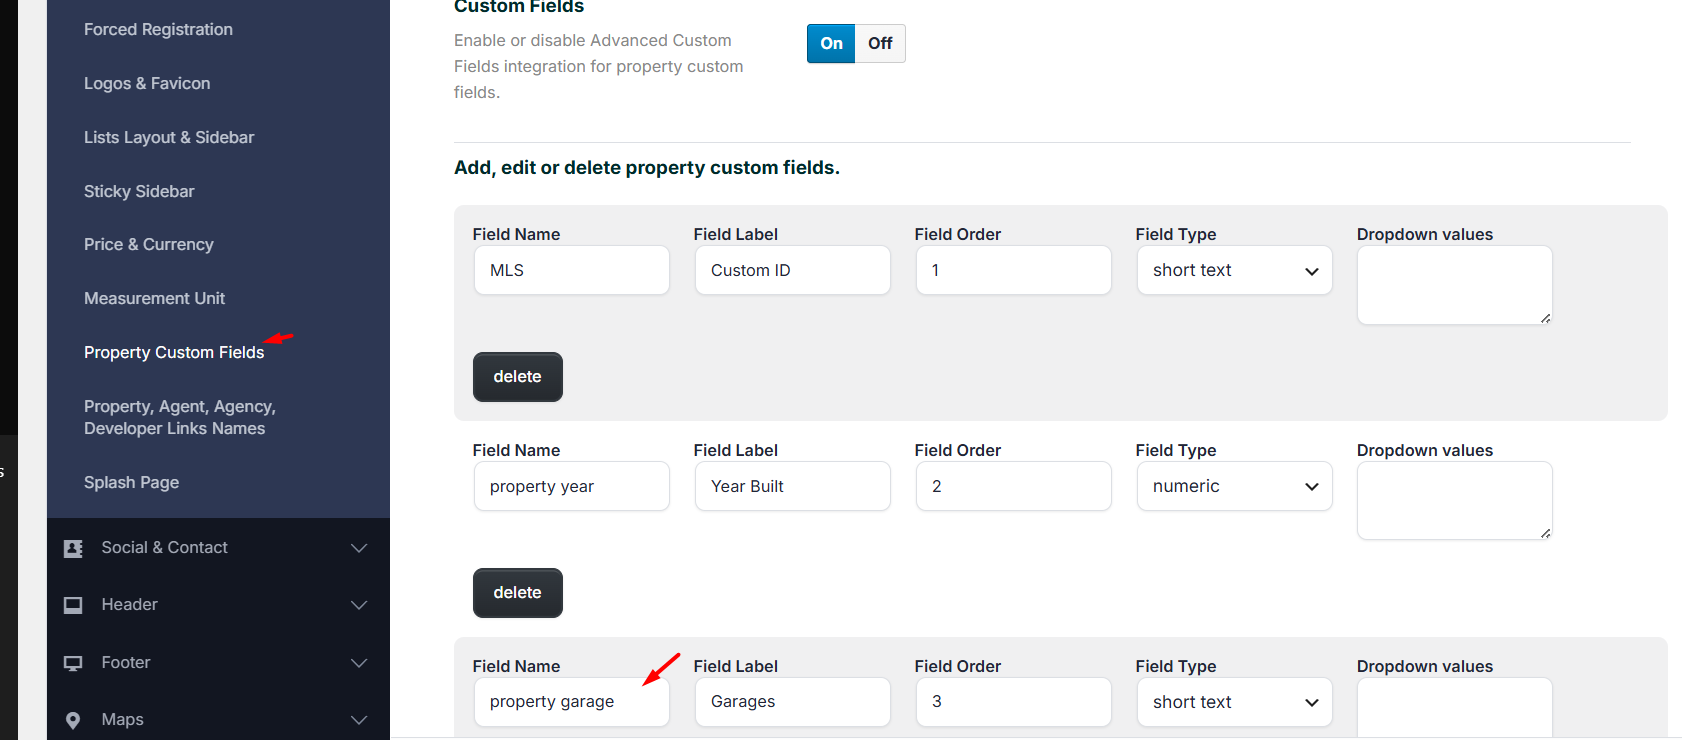
If Garages or Year Built Was Deleted
If the field was deleted from Theme Options → General → Property Custom Fields, create it again using the same Field Name.
For Garages:
- Field Name: property garage
- Field Label: Garages
- Field Type: short text
For Year Built:
- Field Name: property year
- Field Label: Year Built
- Field Type: numeric
After recreating the field, edit each property and add the value again if needed.
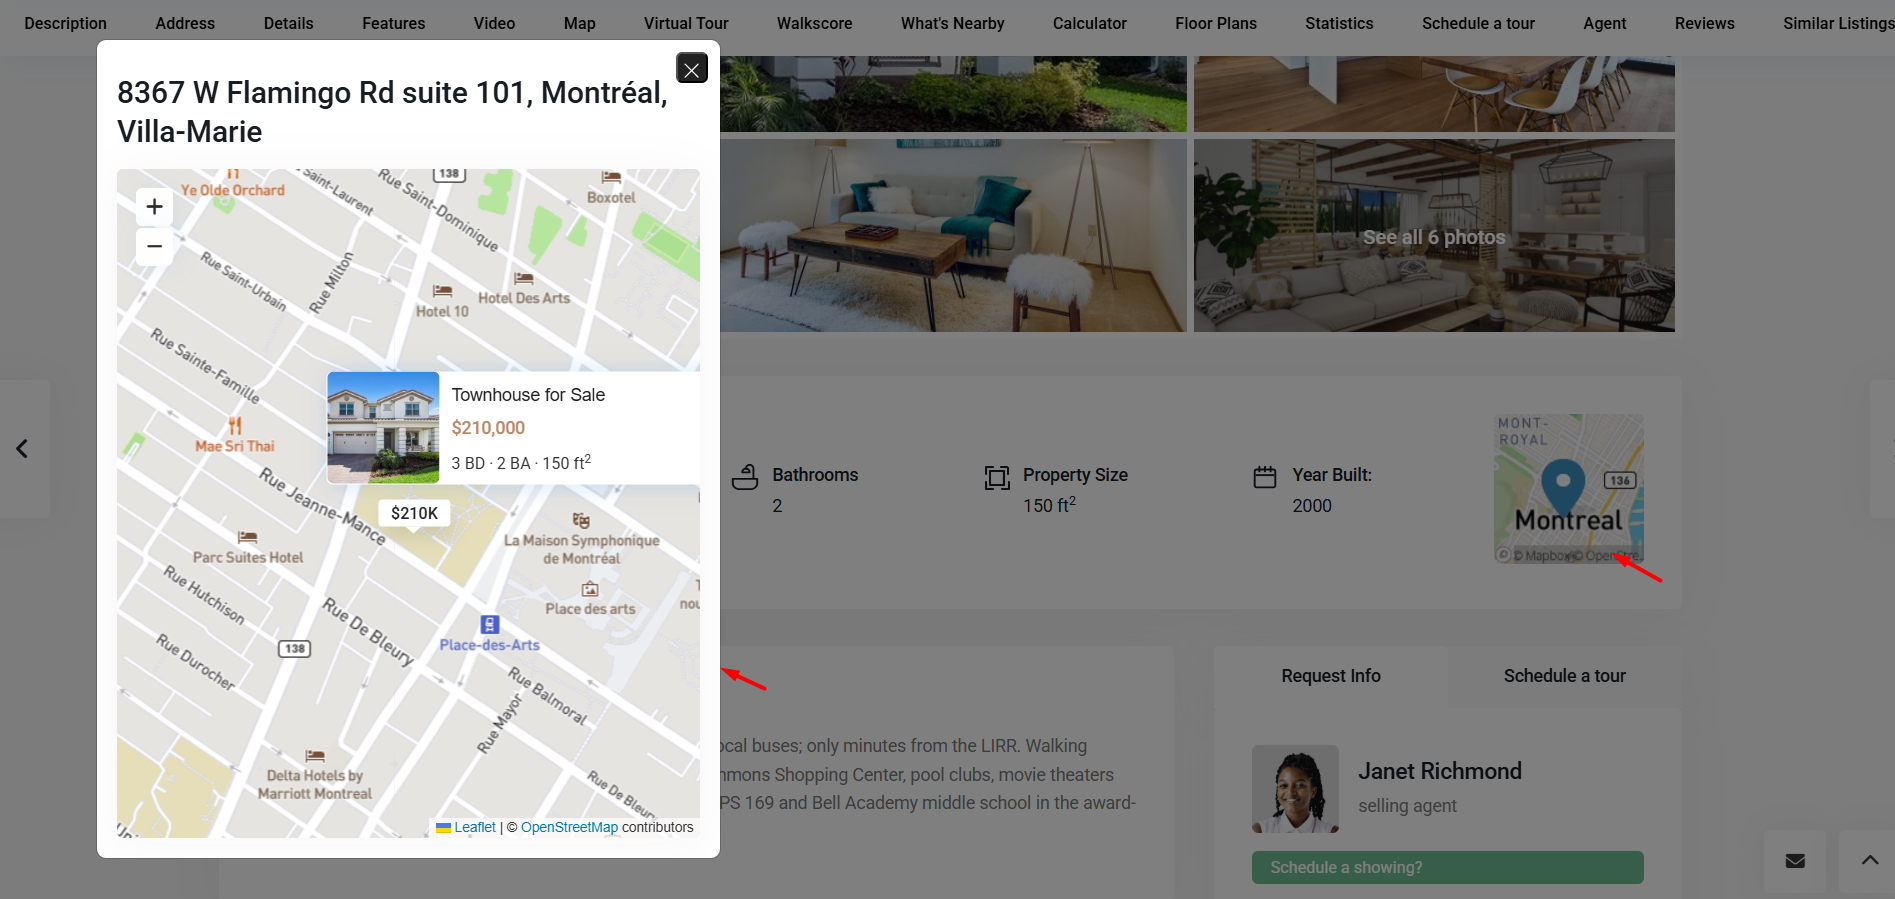
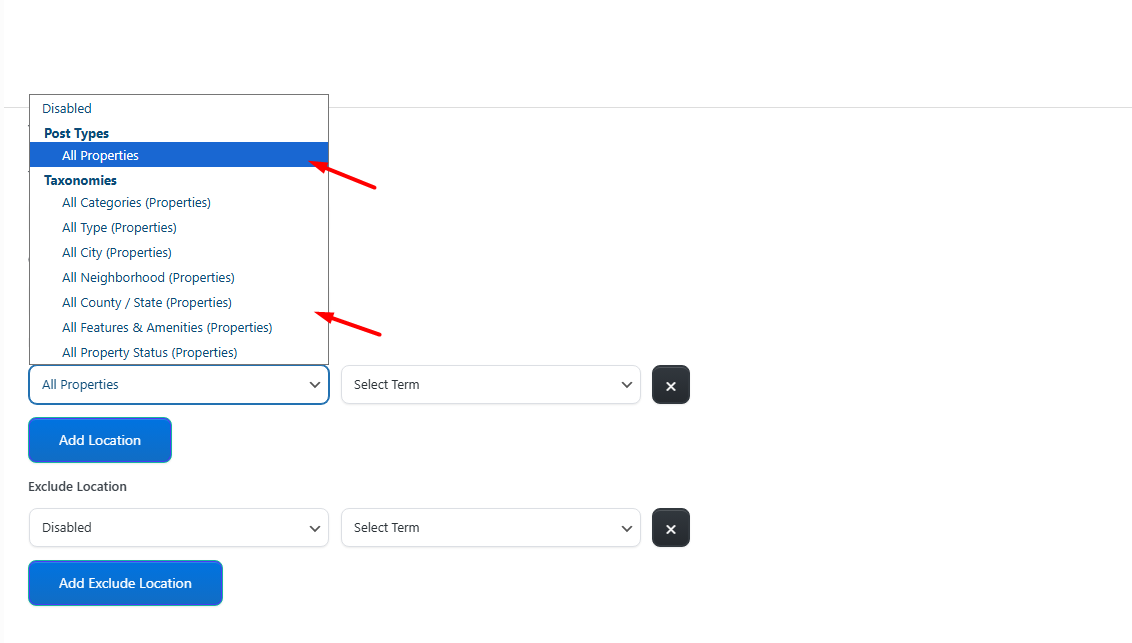
Map in Overview
If the Map item is enabled in Arrange Overview Details, the Overview section can show a small map image for the property location.
The Map item is managed from:
Theme Options → Property Page → Overview section → Arrange Overview Details
You can also control the size of this map from:
- Overview Small Map width
- Overview Small Map height
These fields accept numeric values only.
Map Provider Requirements
The Overview map image works with both map systems supported by WPResidence, but each map system needs the correct API setup.
- OpenStreetMap: a valid MapBox API key is needed for the Overview map image.
- Google Maps: a valid Google Maps API key is needed, and the Google Maps Static API must be enabled in the Google Cloud project used for that API key.
The map system and API keys are managed from:
Theme Options → Map Configuration → Map General Settings
Map Type: OpenStreetMap or Google Maps
Create a Custom Overview Section With Elementor
If you need more control over the Overview section, create a custom property template with WPResidence Studio and Elementor.
This is recommended when you want to:
- Add custom fields that are not available in the default Overview list
- Create a different design for the Overview section
- Show only specific fields for a certain property category
- Use Elementor controls for spacing, columns, icons, and responsive design
- Build a fully custom single property page
Required Plugins
To create a custom property template with Elementor, install and activate:
- Elementor
- WPResidence Elementor Widgets
- WPResidence Studio
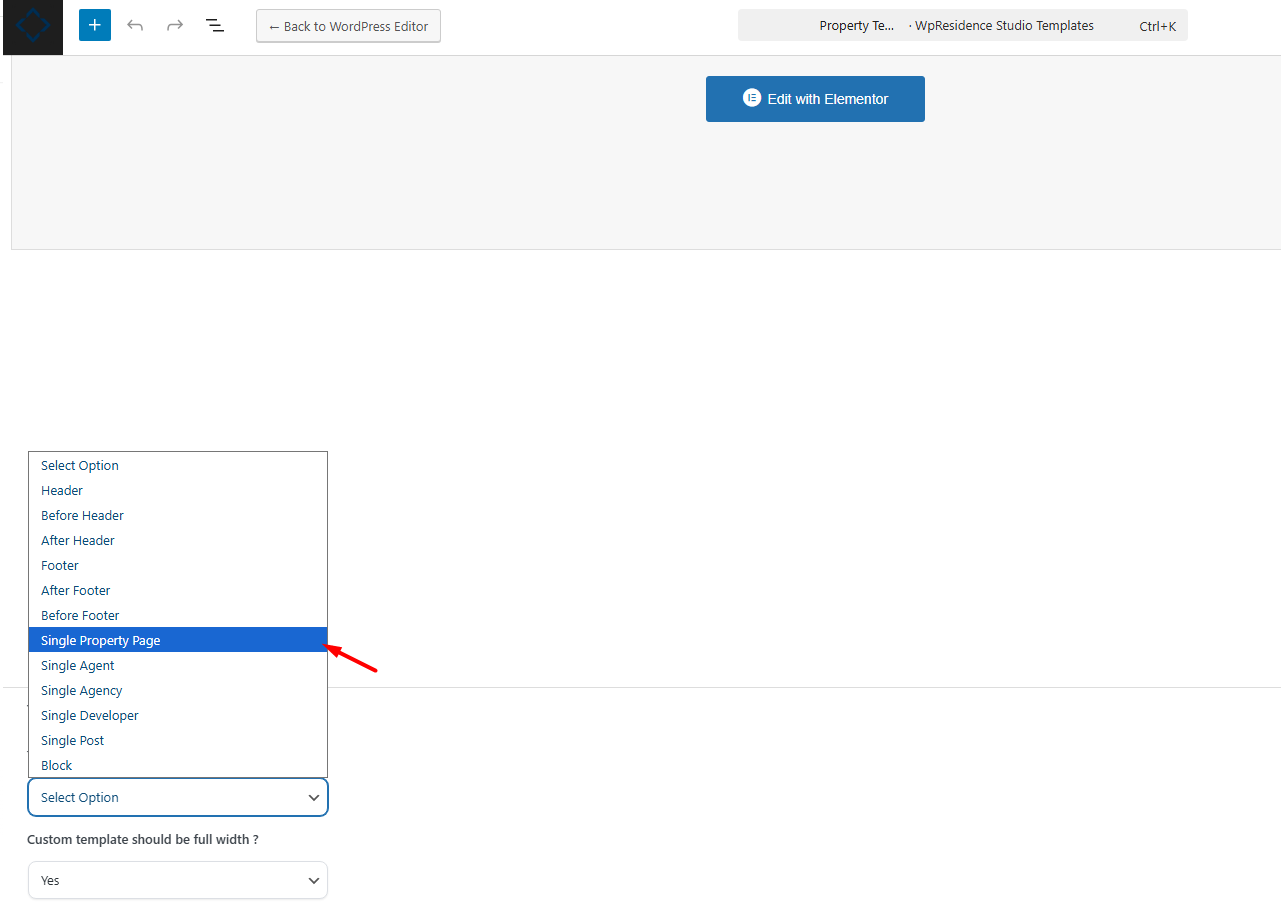
Create the Custom Property Template
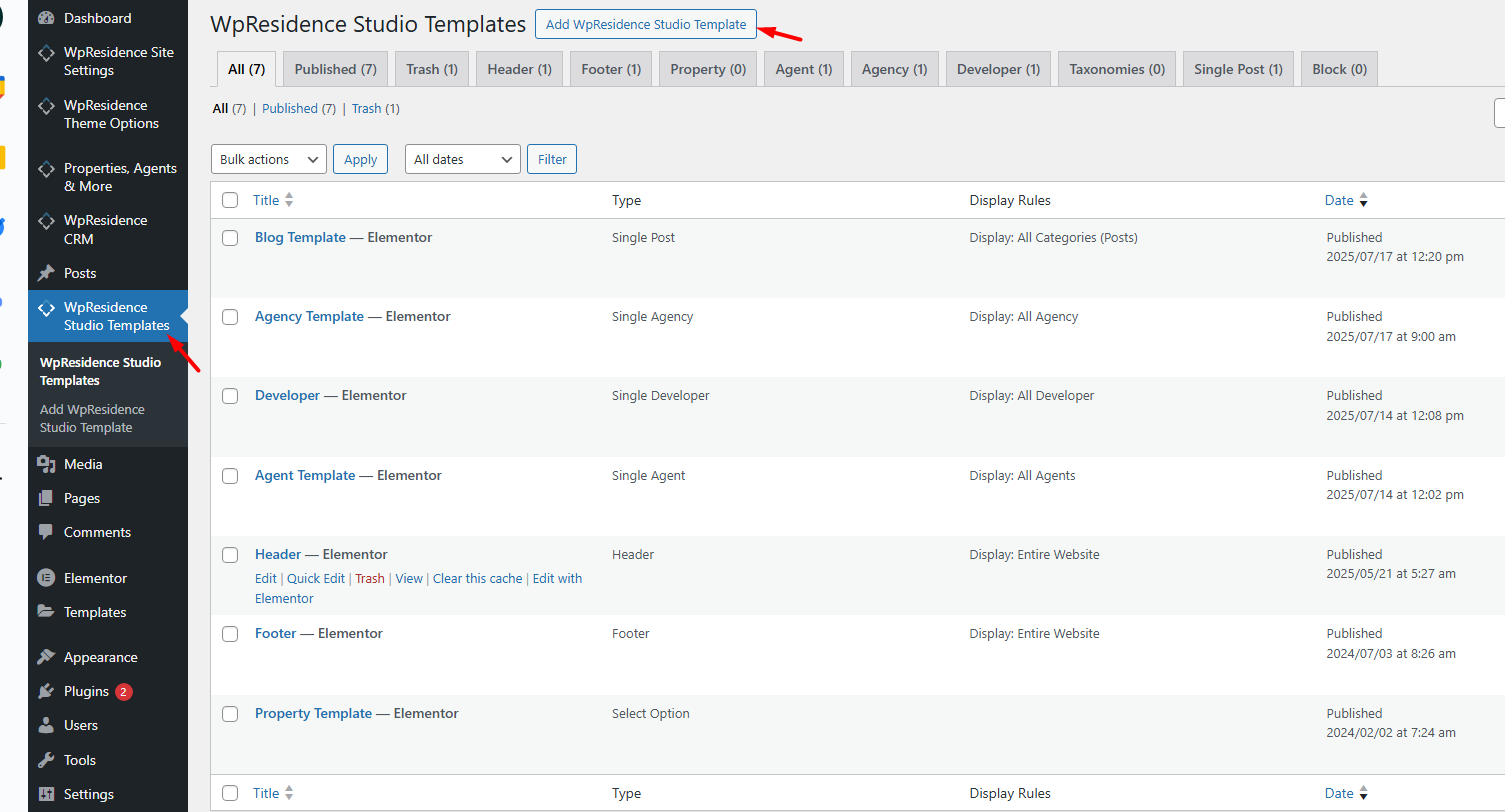
- Go to Studio Templates → Add New.
- Add a template name, for example Custom Property Page.
- Select the template type for a single property page.
- Publish the template.
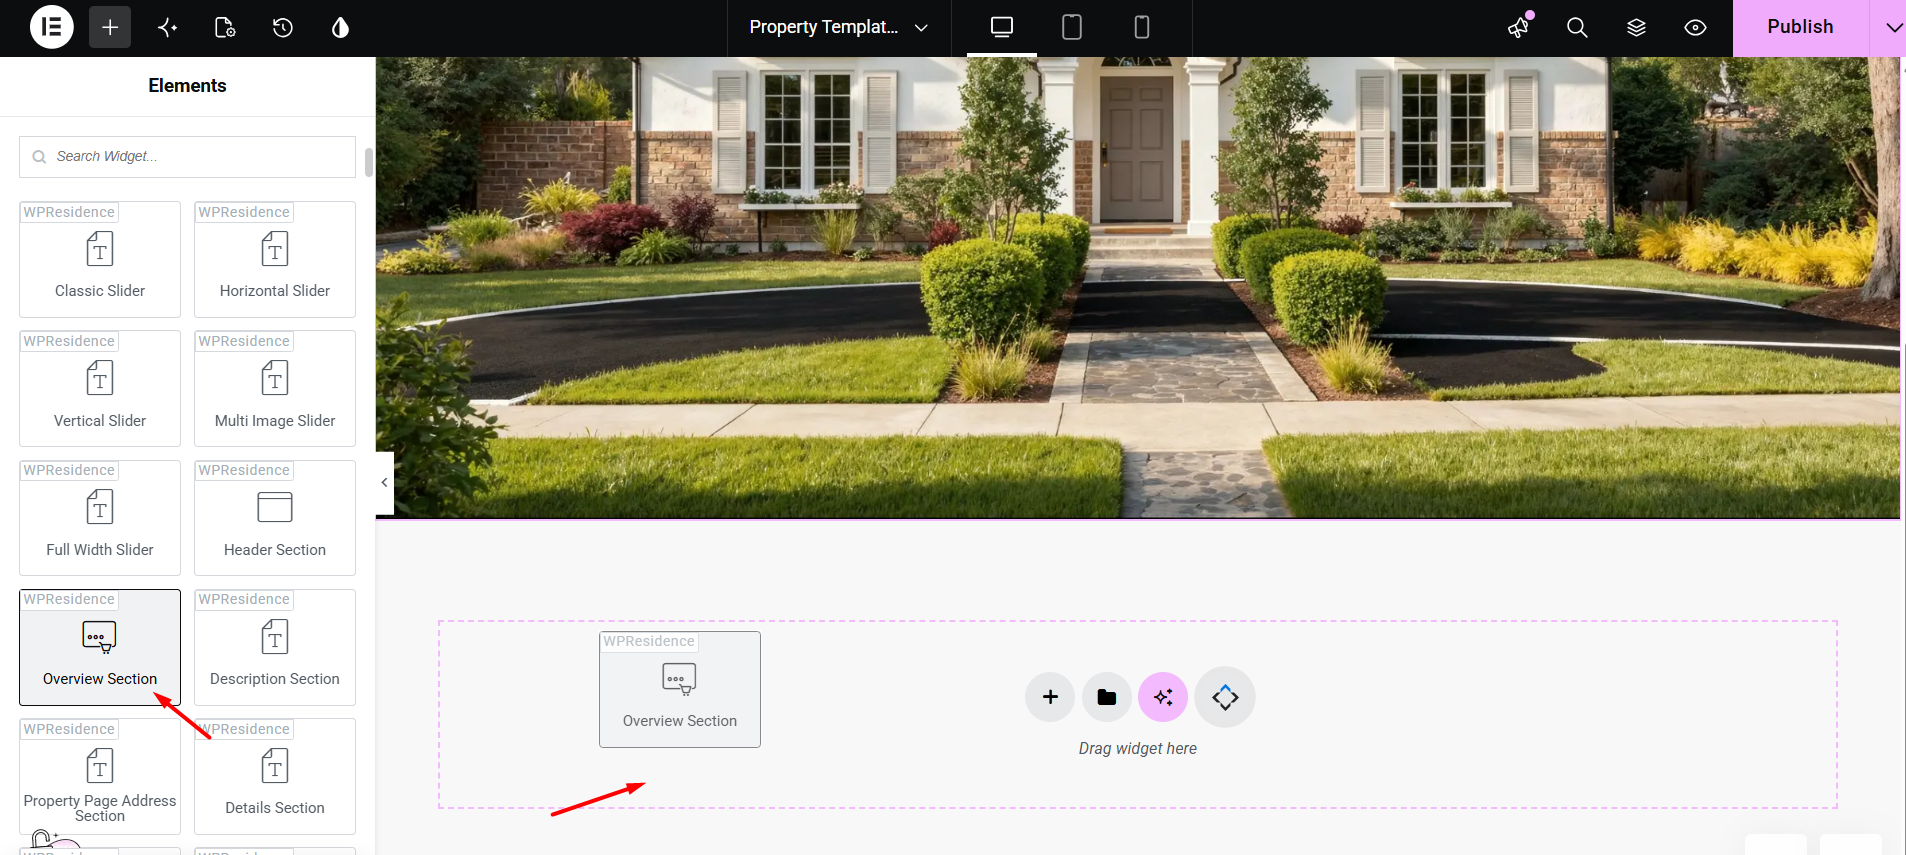
- Edit the template with Elementor.
- Add the WPResidence property widgets you need.
- Create your custom Overview section.
- Save the template.
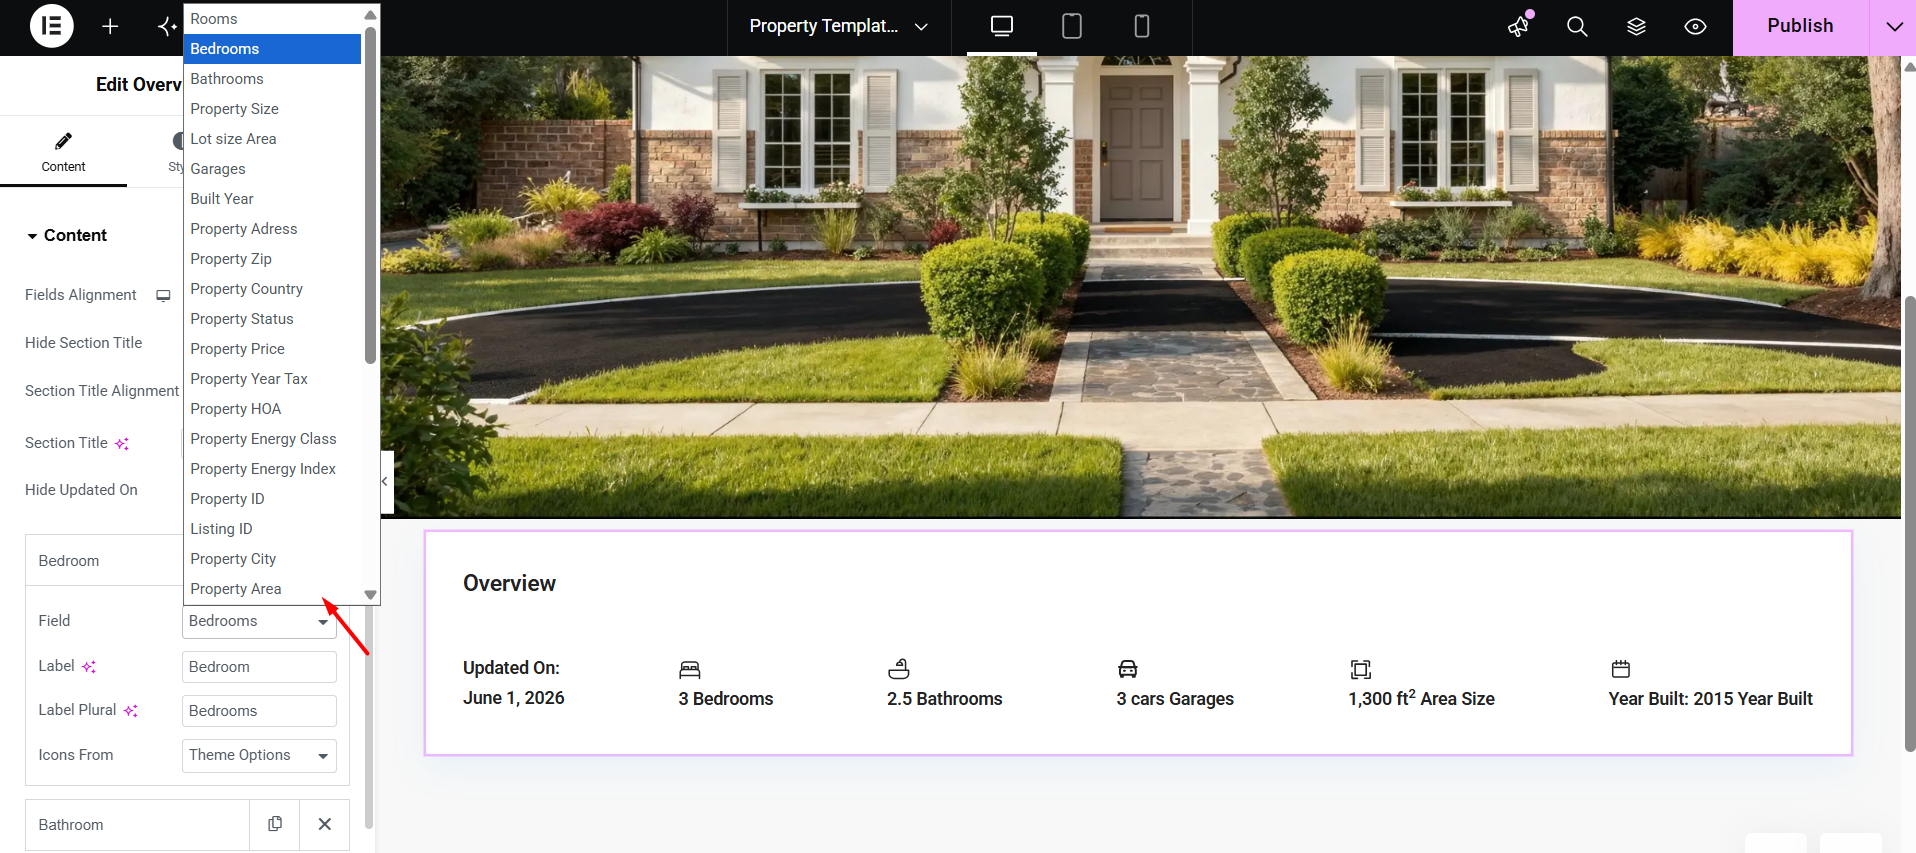
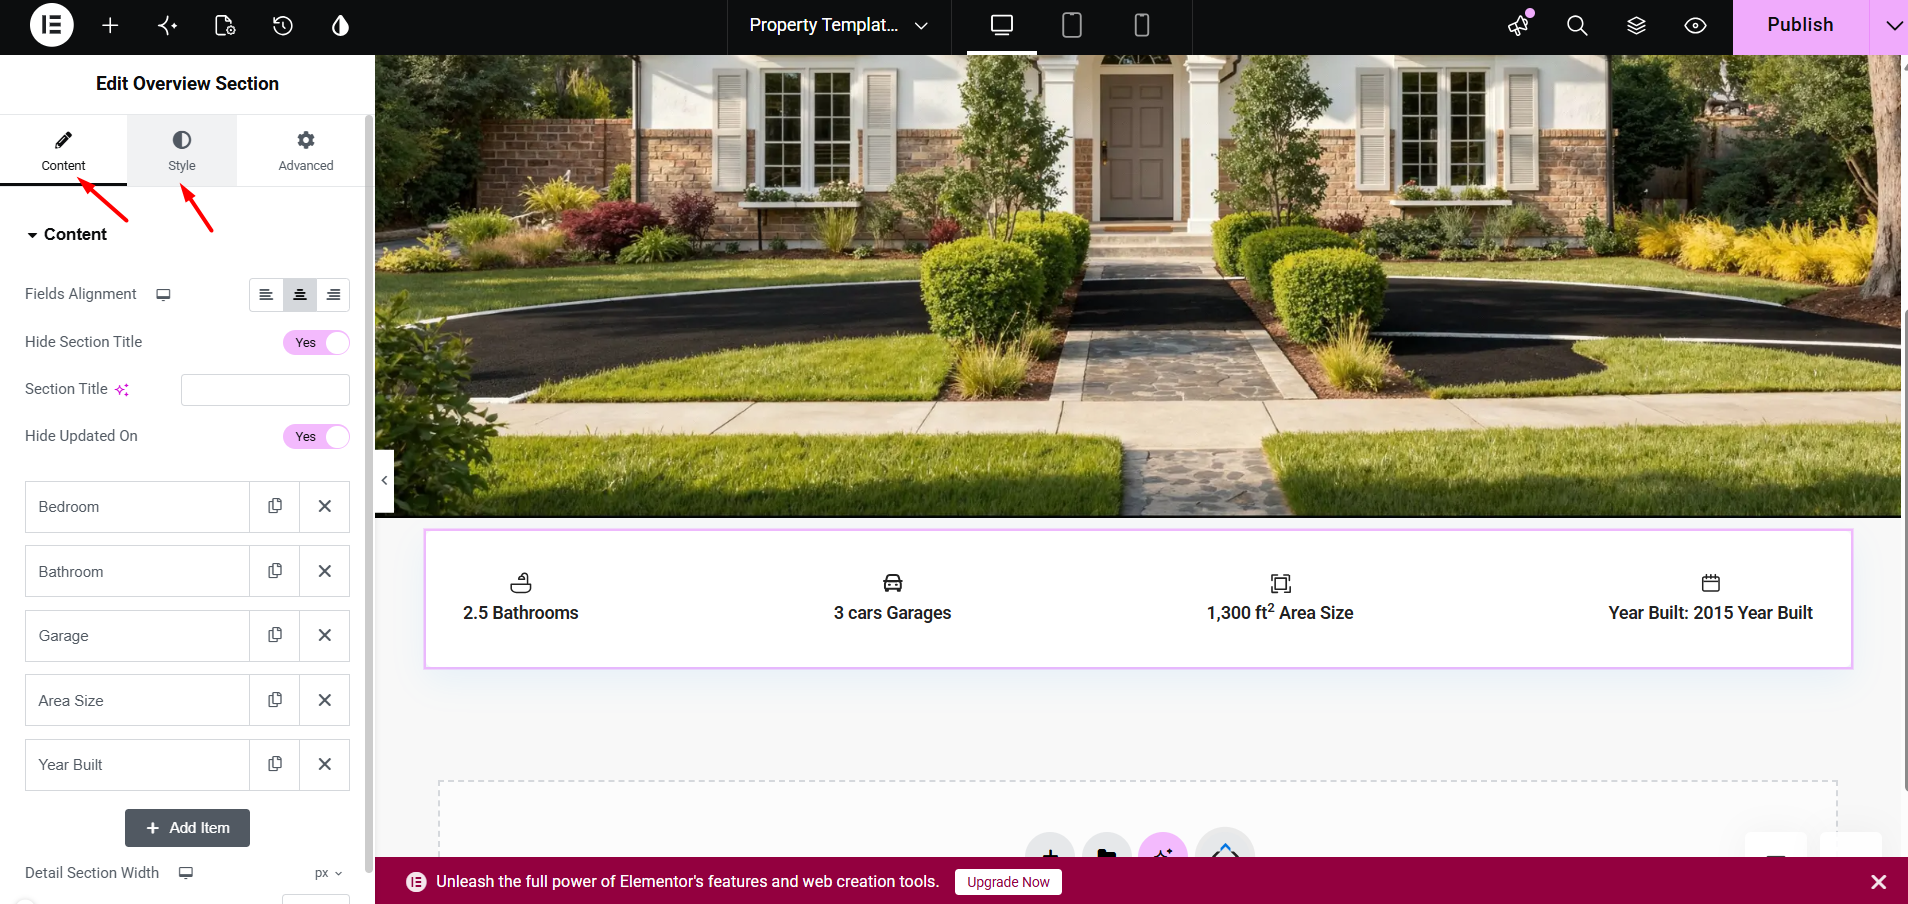
Add and Edit the Overview Section in Elementor
Edit the property template with Elementor and add the Overview Section widget.
From the widget settings, you can:
- Choose which fields display in the Overview section
- Add supported custom fields
- Control the order of the fields
- Manage the design and styling
Assign the Custom Property Template
After the template is ready, assign it where you need it:
- Globally for all properties
- For specific property categories
- For one specific property from the property edit page
When to Use the Default Overview or a Custom Overview
Use the Default Overview Section If:
- You want a fast setup using the theme default property layouts.
- You only need the supported Overview fields.
- You only need to show, hide, reorder, or change the design type of existing Overview items.
Use a Custom Elementor Overview If:
- You need to show extra custom fields in the Overview section.
- You want a custom design that is different from the default Overview design types.
- You need different Overview layouts for different property categories.
- You want full Elementor control over the single property page layout.