WP Residence Help WP Residence Help

  • WPRESIDENCE
  • Video Tutorials
  • Client Support
  • API
Home / Translations & Languages / Multi Languages with WPEstate Translate plugin

Multi Languages with WPEstate Translate plugin

116 views 0

Content

  • Overview
  • Video tutorials
  • Before you start
  • Install and activate WPEstate Translate
  • Add and manage languages
  • Review the plugin settings
  • Add and style the language switcher
  • Translate properties, pages, posts, agents, agencies, and developers
  • Translate Elementor pages and WPResidence Studio templates
  • Translate taxonomies
  • Review custom field rules
  • Translate theme and plugin strings
  • Default language strings and the default language column
  • Generated translation files and the languages/wpr folder
  • Solution when translations are not showing
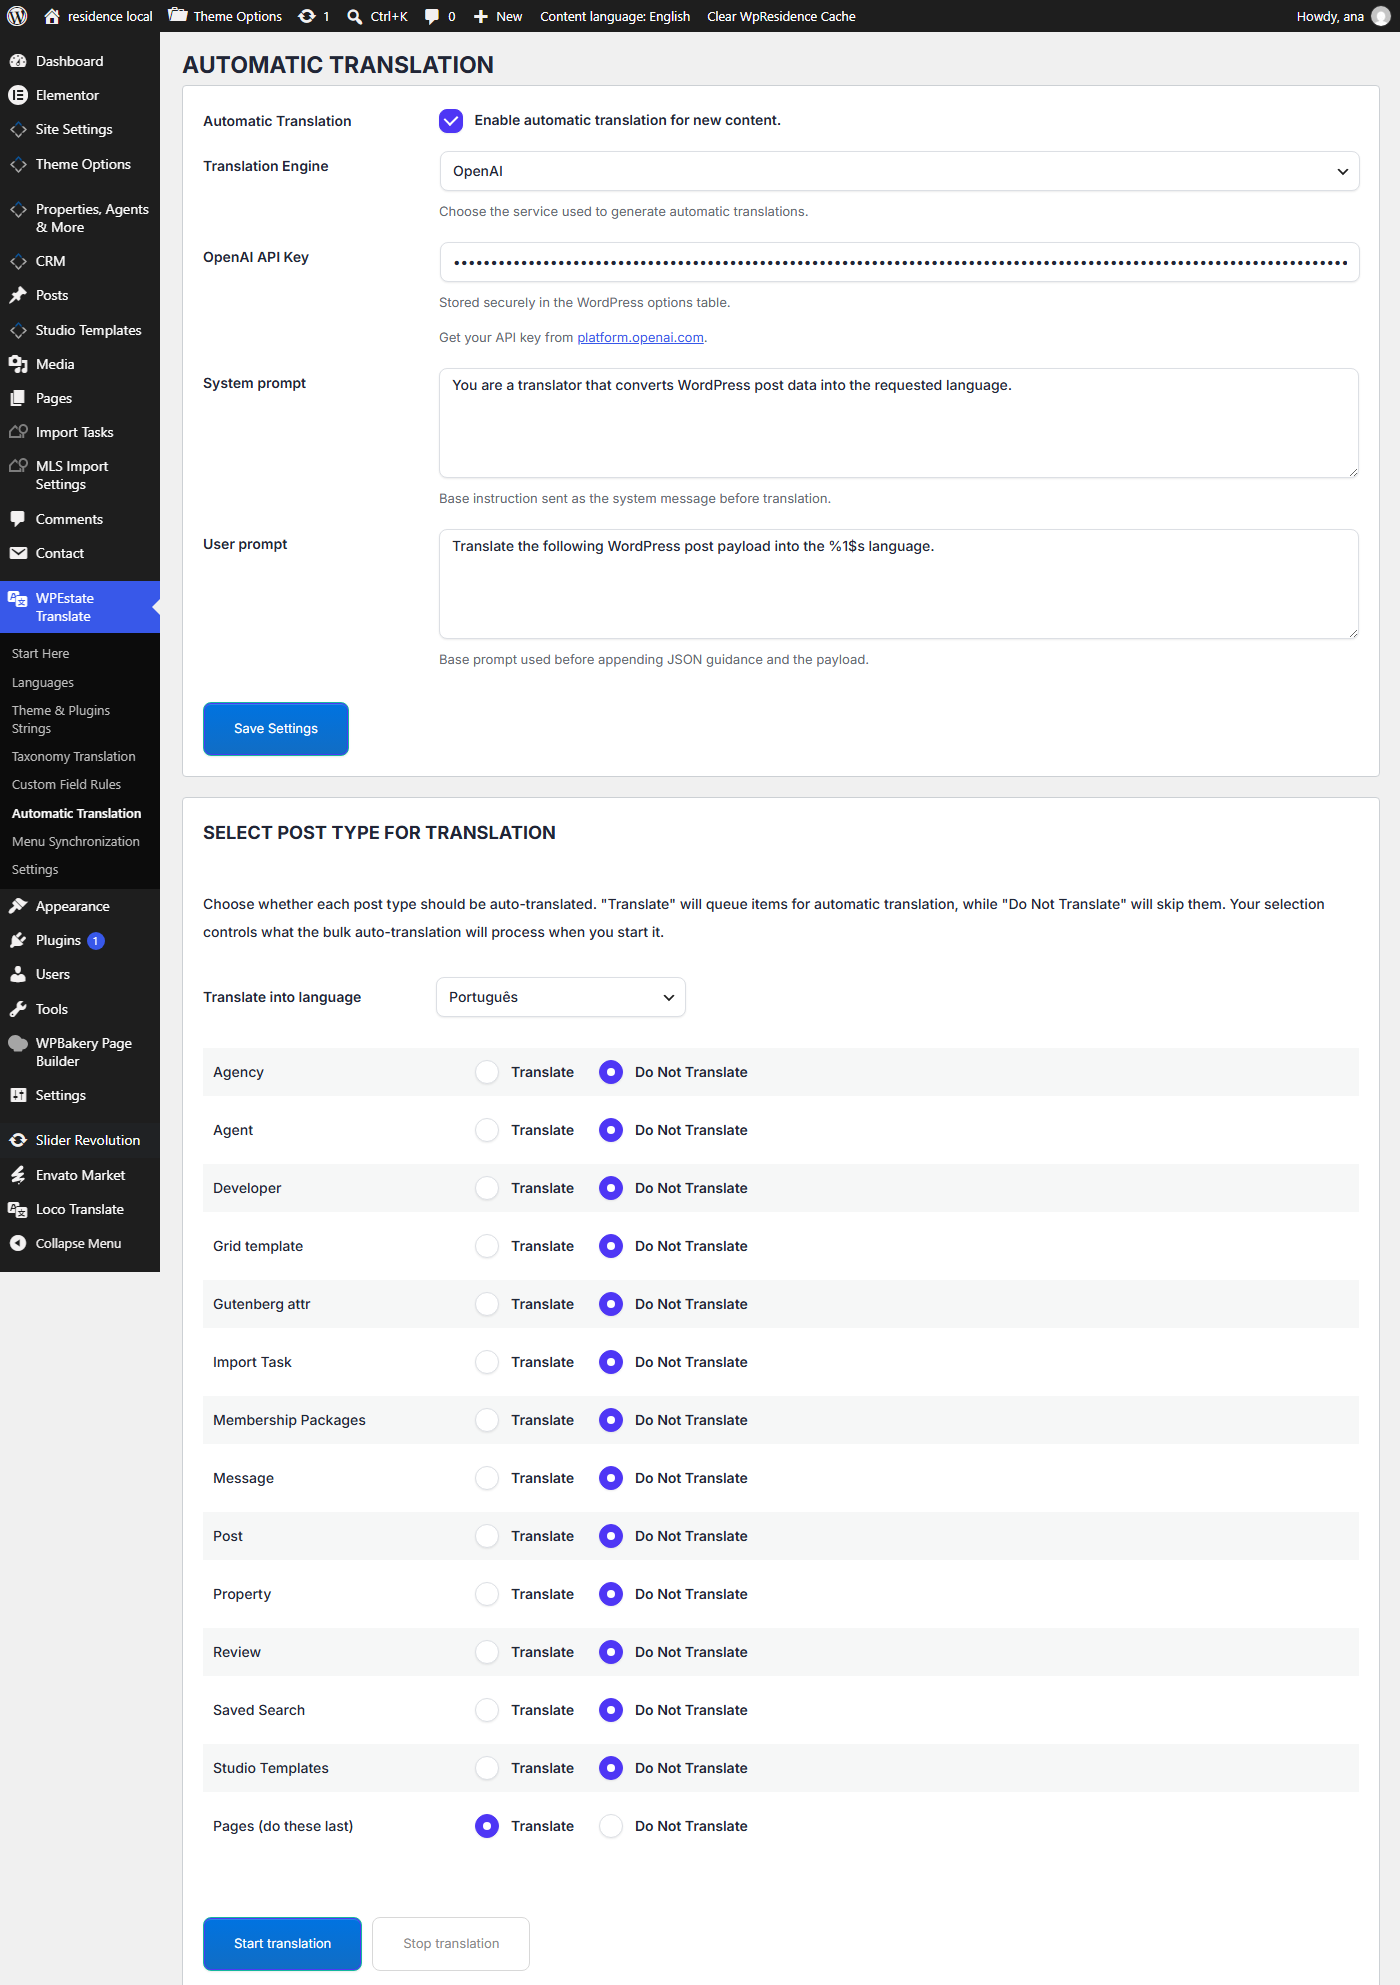
  • Use automatic translation
  • Translate menus
  • Language URLs and SEO notes
  • Test the multilingual website
  • Troubleshooting
  • Important notes
  • Related help

Overview

WPEstate Translate is the multilingual plugin built for WPResidence.

It helps you create a multilingual real estate website by translating:

  • Languages
  • Pages and posts
  • Properties
  • Agents, agencies, and developers
  • Menus
  • Taxonomies
  • Theme and plugin strings
  • Elementor and WPResidence Studio content

After the plugin is installed and activated, a new admin menu named WPEstate Translate is added in the WordPress dashboard.

Use this article as the main setup guide for creating a multilingual website with WPResidence and WPEstate Translate.

Important:
WPEstate Translate is included with WPResidence. There is no separate WPEstate Translate license cost from our side. Automatic translation uses your own API account, for example OpenAI, Google, DeepL, or Azure, and any API cost is billed directly by that provider.

Video tutorials

Build a multilingual real estate website with WPResidence and WPEstate Translate. This video gives you an overview of the main multilingual setup and the recommended workflow. Watch Video on Youtube
Introduction to WPEstate Translate for WPResidence and WPRentals. Learn what the plugin does, what content can be translated, and how it helps create a multilingual website. Watch Video on Youtube
Learn how to install WPEstate Translate, add languages, manage the default language, enable or disable languages, and uninstall the plugin if needed. Watch Video on Youtube
Learn how to translate posts, pages, properties, agents, agencies, and developers in WPResidence using the translation workflow added by WPEstate Translate. Watch Video on Youtube
Learn how to translate Elementor pages, WPResidence Studio templates, and WPResidence widgets so custom page layouts show correctly in each language. Watch Video on Youtube
Learn how to translate taxonomies such as property categories, actions, cities, areas, statuses, and features so search filters and archive pages work correctly in each language. Watch Video on Youtube
Learn how to set up the language switcher, synchronize menus across languages, and manage language-specific menu locations in WPResidence. Watch Video on Youtube
Learn how to use automatic translation for theme and plugin strings, then review and correct the translated text before publishing it on the live website. Watch Video on Youtube

Before you start

Before setting up the multilingual site, check the points below:

  • WPResidence must be installed and updated.
  • The required WPResidence plugins must be installed and active.
  • WPEstate Translate must be installed and active.
  • You should know the default language of the website.
  • You should know which secondary languages you want to add.
  • If you want automatic translation, you need your own API key for the translation provider.
  • Make a full website backup before starting a large translation setup.
Important:
Start with the default language first. Add and check the original content in the default language before creating translated versions.

Install and activate WPEstate Translate

Install the plugin from the package or source provided with your WPResidence theme files.

  1. Go to Plugins > Add New.
  2. Upload the WPEstate Translate plugin zip file.
  3. Install and activate the plugin.
  4. After activation, check the WordPress admin menu for WPEstate Translate.

The main admin menu includes:

  • Start Here
  • Languages
  • Theme & Plugins Strings
  • Taxonomy Translation
  • Custom Field Rules
  • Automatic Translation
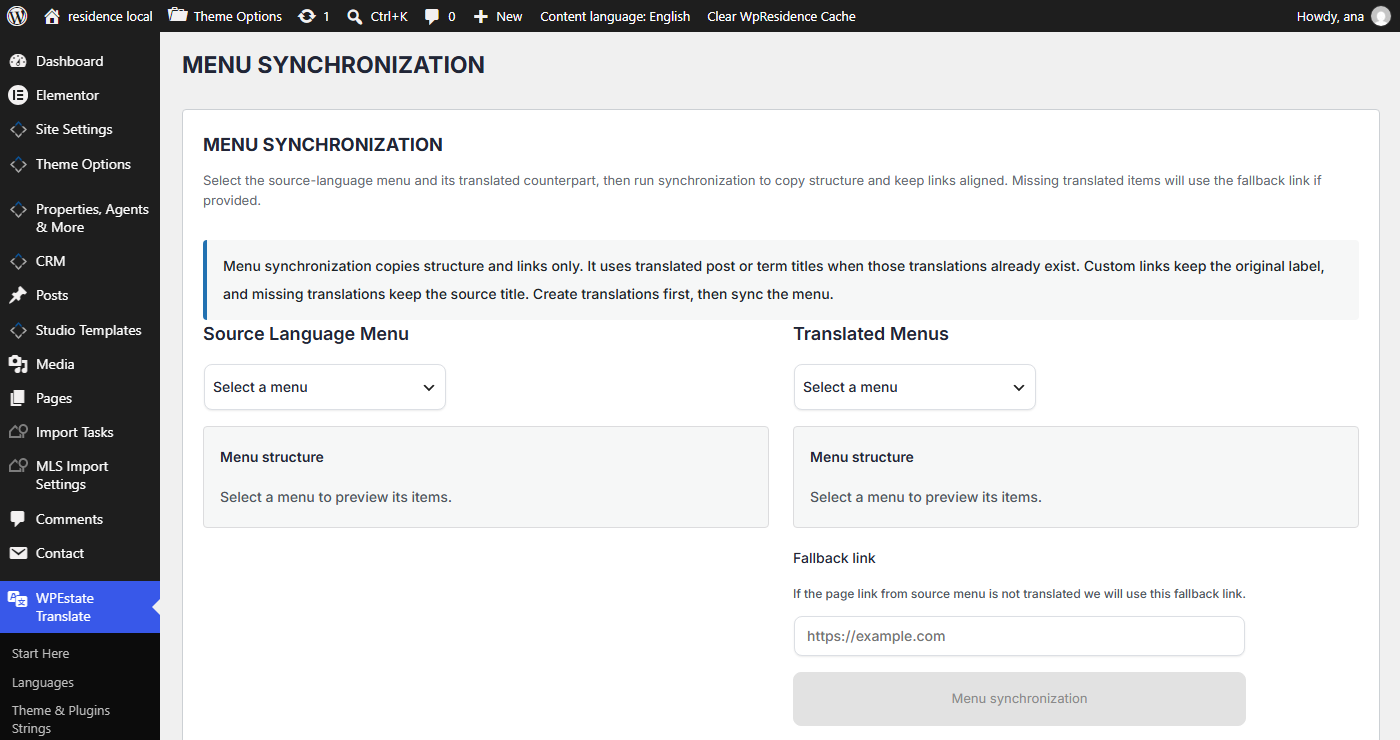
  • Menu Synchronization
  • Settings

Help:

https://help.wpresidence.net/article/installing-activating-uninstalling-wpresidence-translate/

Add and manage languages

Go to:

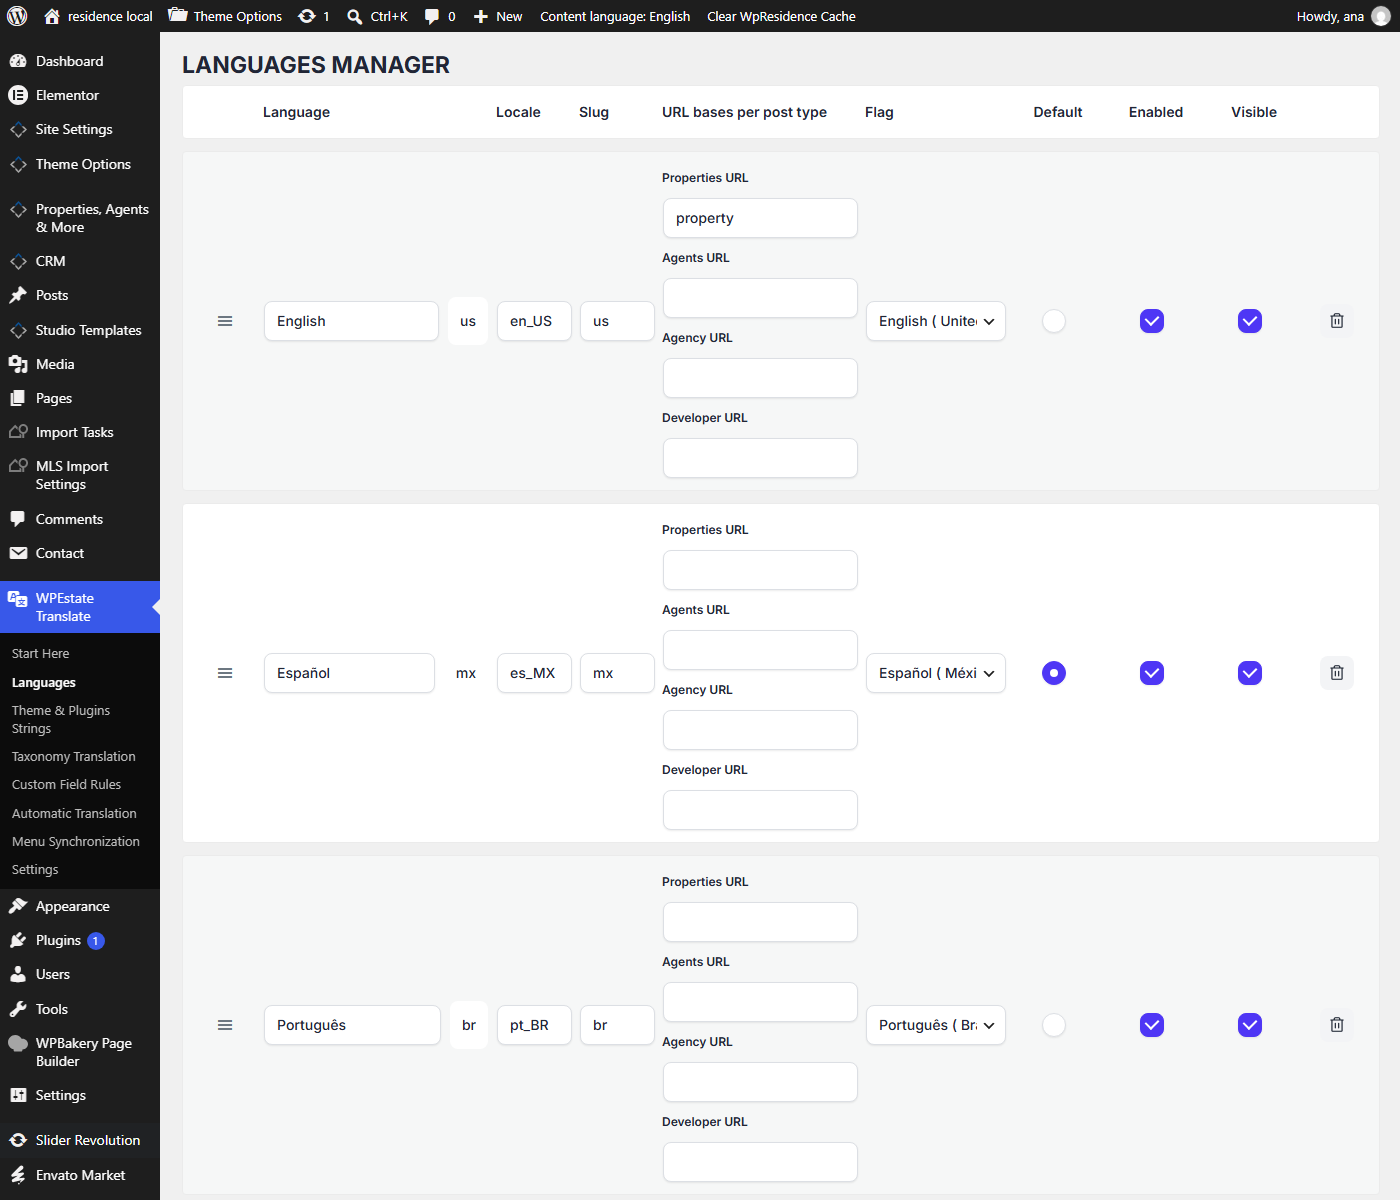
WPEstate Translate > Languages

Use this page to:

  • Add a new language from the language catalog.
  • Enable or disable a language.
  • Set the default language.
  • Reorder languages.
  • Check the language slug used in URLs.
  • Check the flag and display name used in the language dropdown.
Important:
The default language should be the language used for the original content. Translations are created from this main language.

Help:

https://help.wpresidence.net/article/managing-languages-in-wpresidence-translate/

Review the plugin settings

Go to:

WPEstate Translate > Settings

Review the global translation settings before translating the website.

Check:

  • Default Language – confirms the main website language.
  • URL prefix behavior – controls how language slugs are added to URLs.
  • Media synchronization – controls how media is shared between translations.
  • Elementor and shortcode compatibility – helps translated Elementor and shortcode content render correctly.
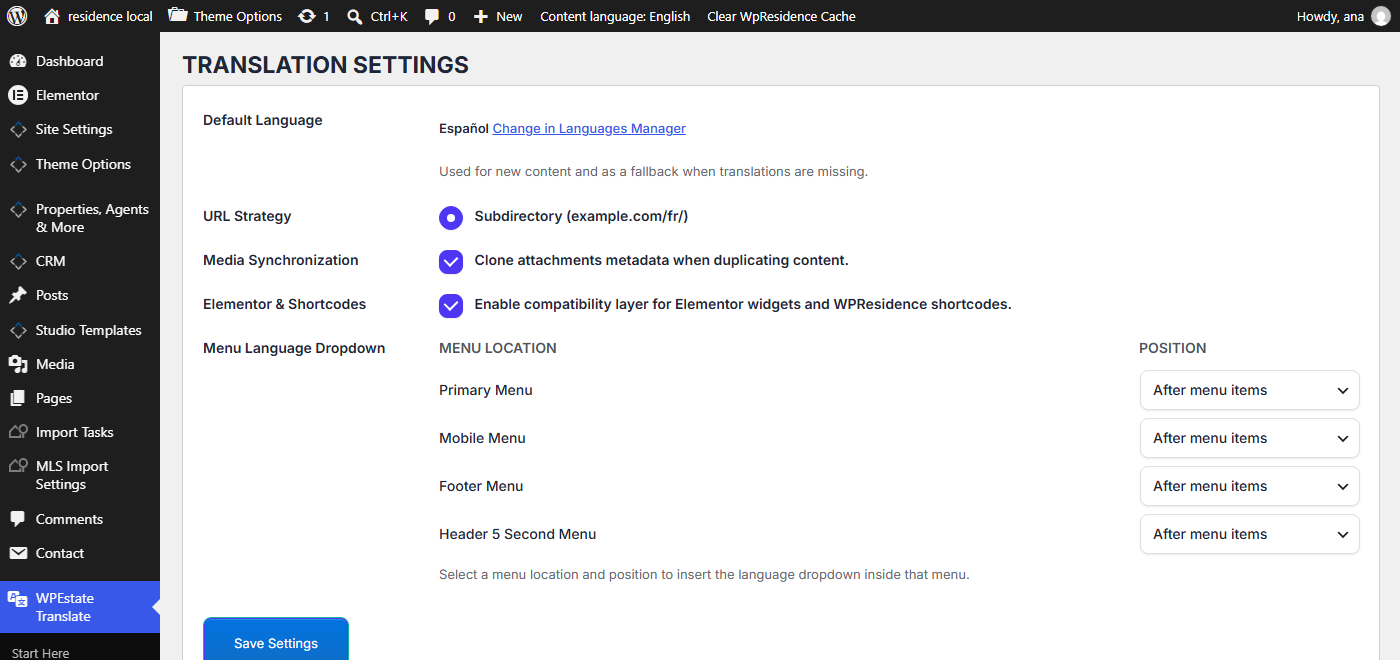
  • Menu Language Dropdown – controls where the language dropdown is added for the default WPResidence menu locations.

Help:

https://help.wpresidence.net/article/wpresidence-translate-settings-page/

Add and style the language switcher

WPEstate Translate includes a language switcher so visitors can change the website language from the front end.

There are two common setups.

Default WPResidence header

If your website uses the default WPResidence header and menu system, add the language switcher from:

WPEstate Translate > Settings > Menu Language Dropdown

Choose the menu location where the language switcher should appear.

Available menu locations can include:

  • Primary Menu
  • Mobile Menu
  • Footer Menu
  • Header 5 Second Menu

For each menu location, choose:

  • No dropdown – no language switcher is added.
  • Before menu items – the language switcher appears before the menu links.
  • After menu items – the language switcher appears after the menu links.

After saving, test the front end.

WPEstate Translate settings language dropdown menu location

Style the default header language switcher

If the language switcher is added to the default WPResidence header/menu, style it from:

Theme Options > Header > Language Switcher

You can manage:

  • Switcher font size
  • Dropdown font size
  • Switcher background color
  • Switcher font color

After changing the design options, save Theme Options and clear cache.

WPResidence Studio header

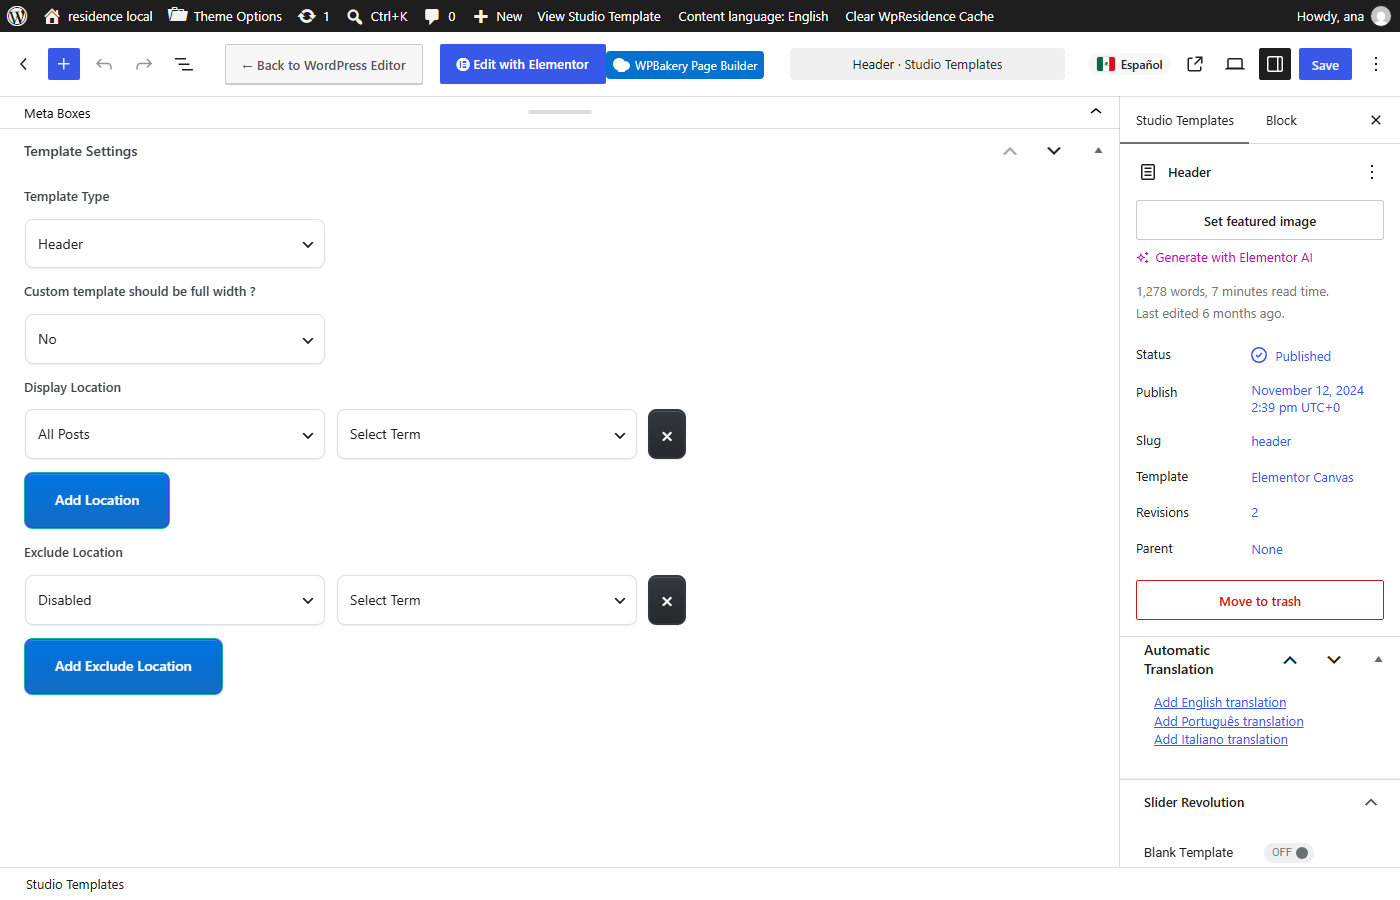
If your website uses a custom header created with WPResidence Studio and Elementor, add the language switcher directly inside the Elementor header template.

Go to:

WPResidence Studio Templates

Open the active Header template with Elementor.

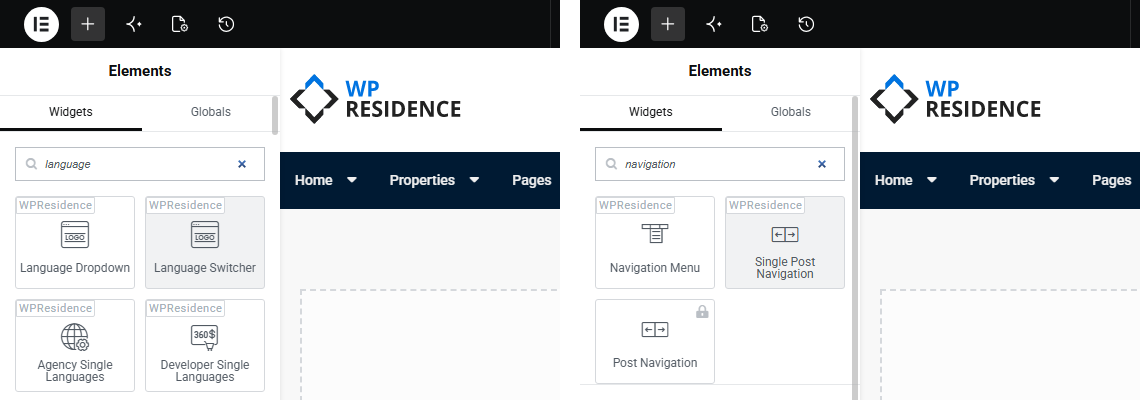
Search for the language switcher widget in the Elementor widgets panel. Depending on the version, it can appear as:

  • Language Dropdown
  • Language Switcher
  • WPResidence Language Switcher

Drag the widget where you want it to appear in the header, update the template, clear cache, and test the front end.

Important:
For a Studio header, the language switcher position and design are controlled from Elementor. Theme Options header styling controls the default WPResidence header, not the custom Elementor header layout.
Tip:
If you add the language switcher inside a Studio header, keep WPEstate Translate > Settings > Menu Language Dropdown set to No dropdown for the default menu locations. This avoids showing the switcher twice.

WPResidence Studio Elementor language switcher widget

Help:

https://help.wpresidence.net/article/the-wpresidence-language-switcher-widget/

Translate properties, pages, posts, agents, agencies, and developers

You can translate:

  • Pages
  • Posts
  • Properties
  • Agents
  • Agencies
  • Developers

To create a translation:

  1. Go to the post type you want to translate, for example Properties or Pages.
  2. Find the item you want to translate.
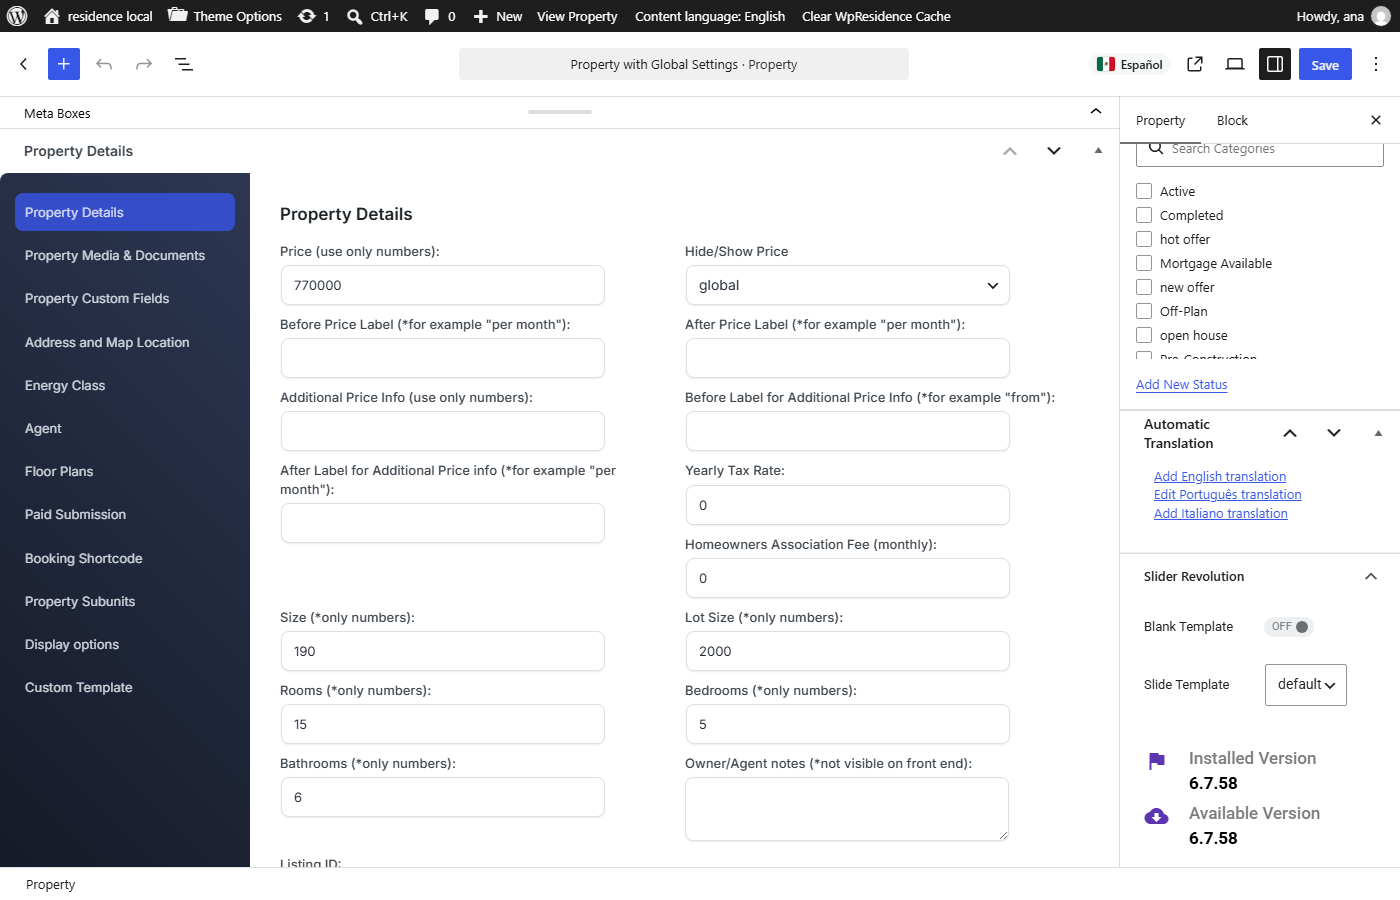
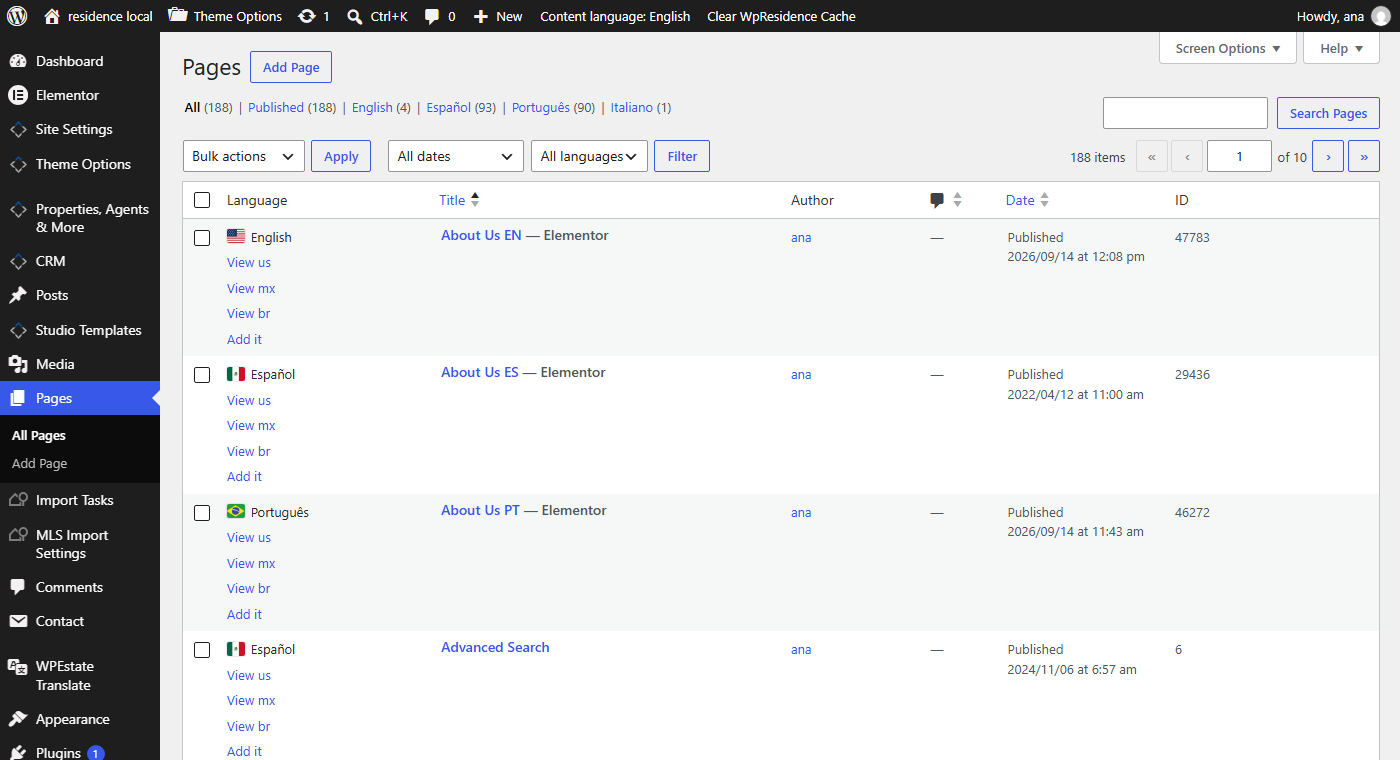
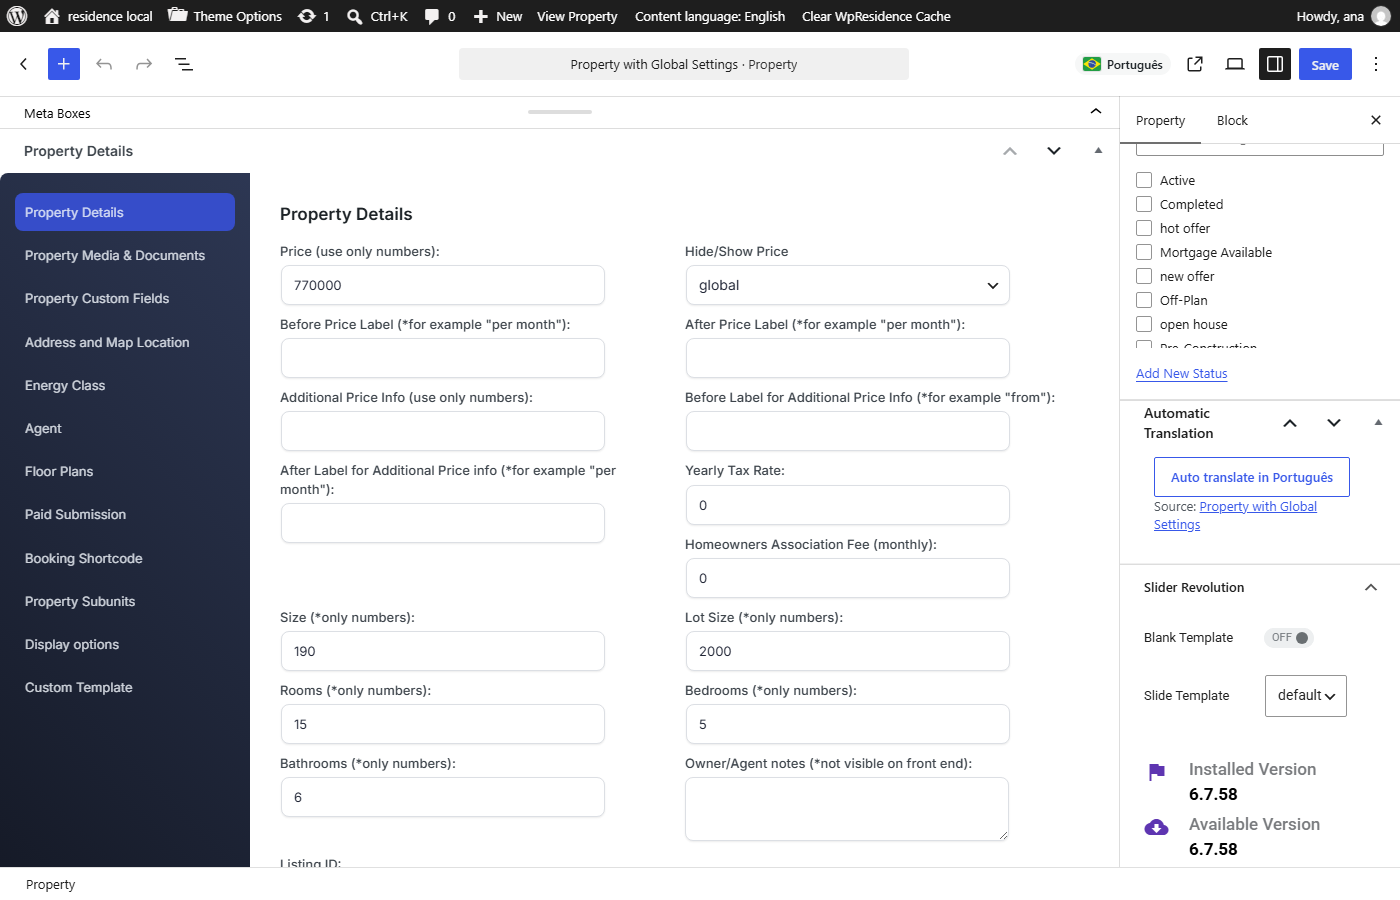
  3. Use the language column or translation controls added by WPEstate Translate.
  4. Create the missing translation for the target language.
  5. Edit the translated draft.
  6. Translate the title, content, excerpt, and language-specific fields.
  7. Publish or update the translation.
Important:
Each translation is a separate WordPress item, but it is linked to the original content by WPEstate Translate. Do not create unrelated duplicate posts manually if you want the language dropdown and translation links to work correctly.

Help:

https://help.wpresidence.net/article/translating-posts-and-pages/

Translate Elementor pages and WPResidence Studio templates

If your WPResidence website uses Elementor pages, Studio templates, or WPResidence Elementor widgets, translate those elements as part of the page/template translation workflow.

To translate Elementor pages:

  1. Create or open the translated version of the page.
  2. Edit the translated page with Elementor.
  3. Translate headings, text widgets, buttons, tabs, sections, and other visible text.
  4. Check WPResidence Elementor widgets used on the page.
  5. Update the page.
  6. Open the translated page on the front end and confirm the text appears in the correct language.
Important:
If text was typed directly inside an Elementor widget or Studio template, translate it inside the translated Elementor version of that page or template.

Elementor layout not copied correctly after translation

In some cases, a translated Elementor page may be created, but the page layout may not be copied correctly from the original language.

If the layout was not copied correctly, the safest workaround is:

  1. Edit the original page with Elementor.
  2. Save the original page as an Elementor template.
  3. Edit the translated page with Elementor.
  4. Insert the saved Elementor template into the translated page.
  5. Translate the text manually or use the translation tools available for the page content.
  6. Update the page.
  7. Clear cache and check the translated page on the front end.

This method keeps the original Elementor layout and allows you to translate the content after the correct design structure is inserted.

Translate taxonomies

Taxonomies are very important for real estate websites because they are used in property lists, search forms, maps, and archive pages.

Examples include:

  • Property categories
  • Property actions
  • Cities
  • Areas
  • Counties or states
  • Property status
  • Features and amenities

Go to:

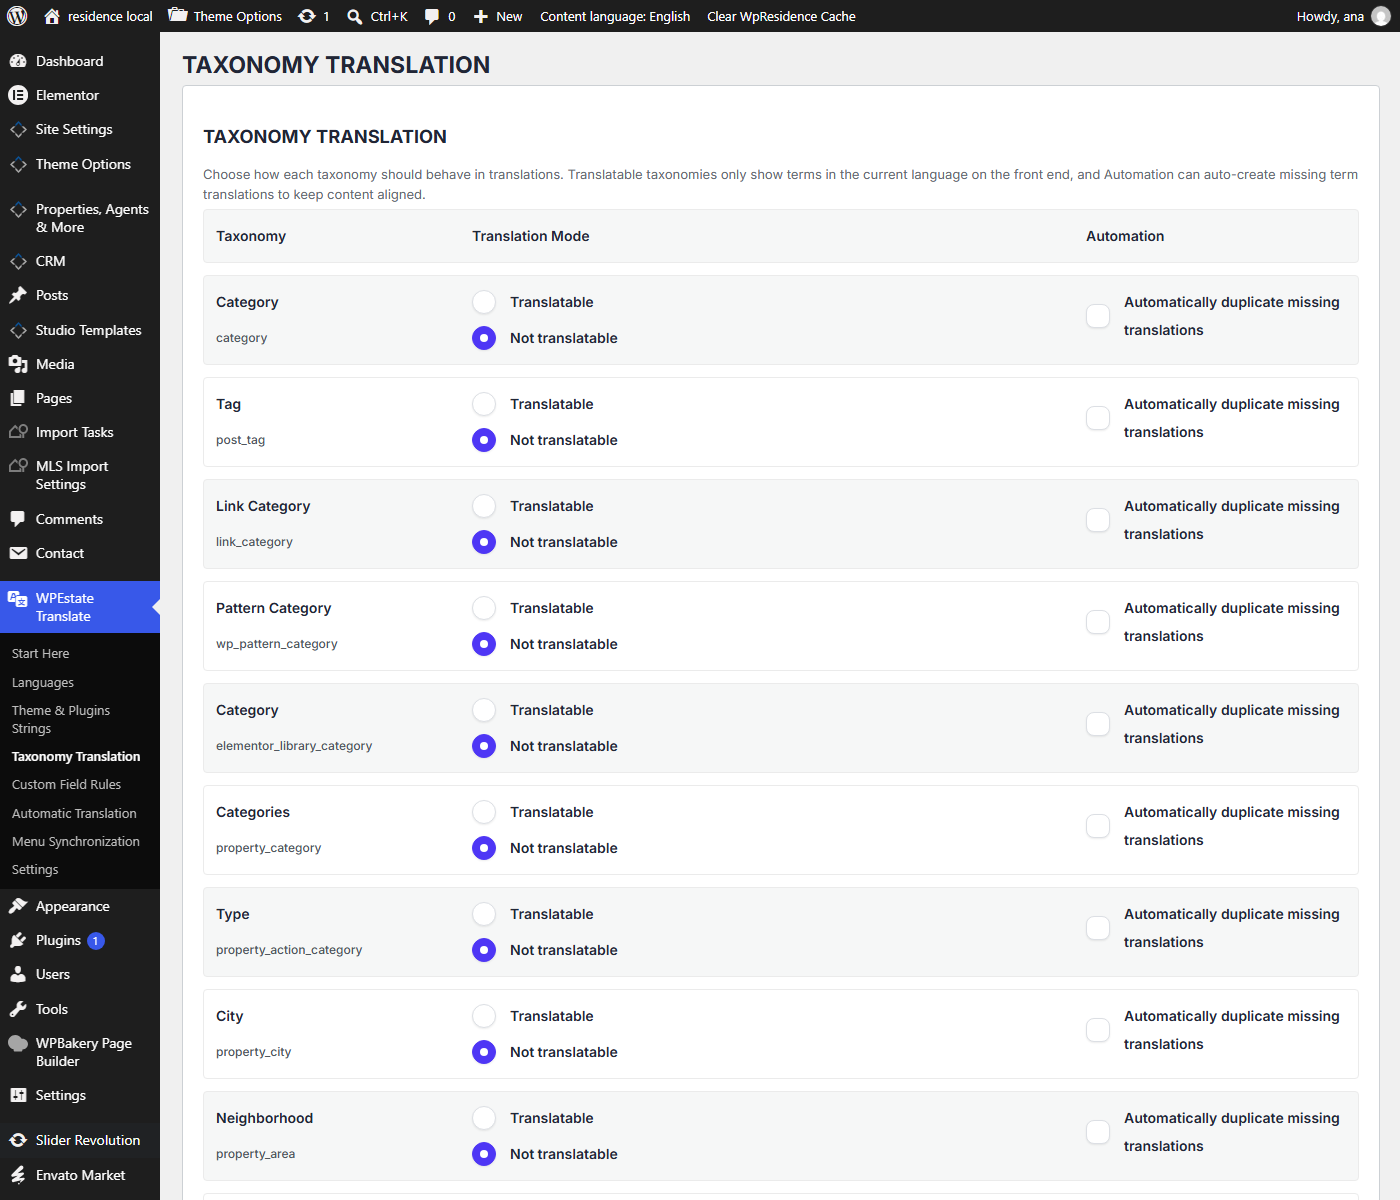
WPEstate Translate > Taxonomy Translation

Use this section to enable and translate the taxonomies that must be multilingual.

  1. Open Taxonomy Translation.
  2. Enable the taxonomies that must be translated.
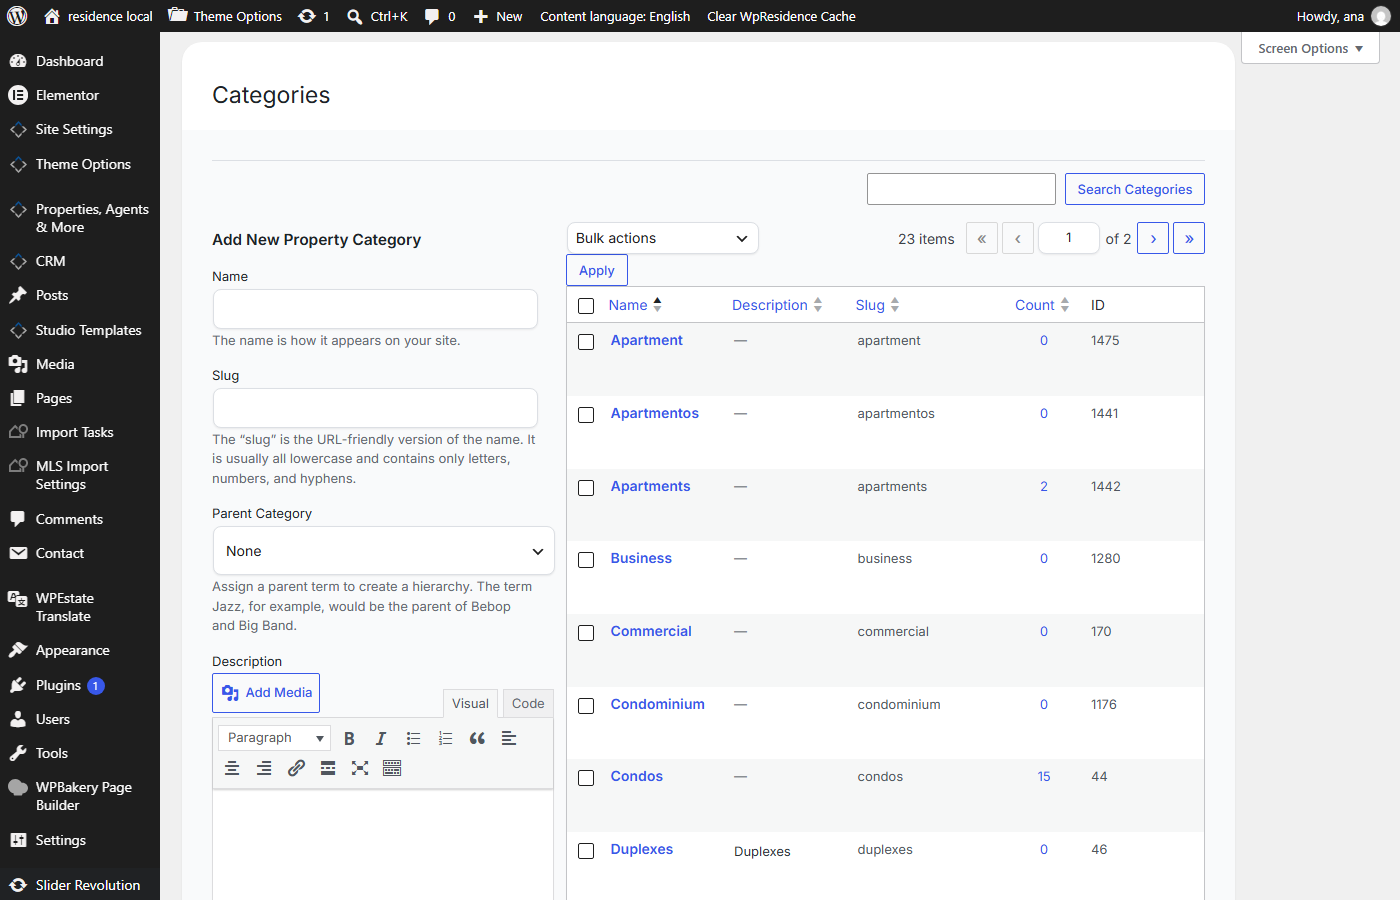
  3. Create or link translated versions of each term.
  4. Check parent-child hierarchy if the taxonomy is hierarchical.
  5. Save the changes.
  6. Test taxonomy archive pages and search filters in each language.
Important:
Property search filters depend on taxonomy terms. If categories, cities, areas, or features are not translated correctly, search results and archive links may not look correct in each language.

Help:

https://help.wpresidence.net/article/taxonomy-translation/

Review custom field rules

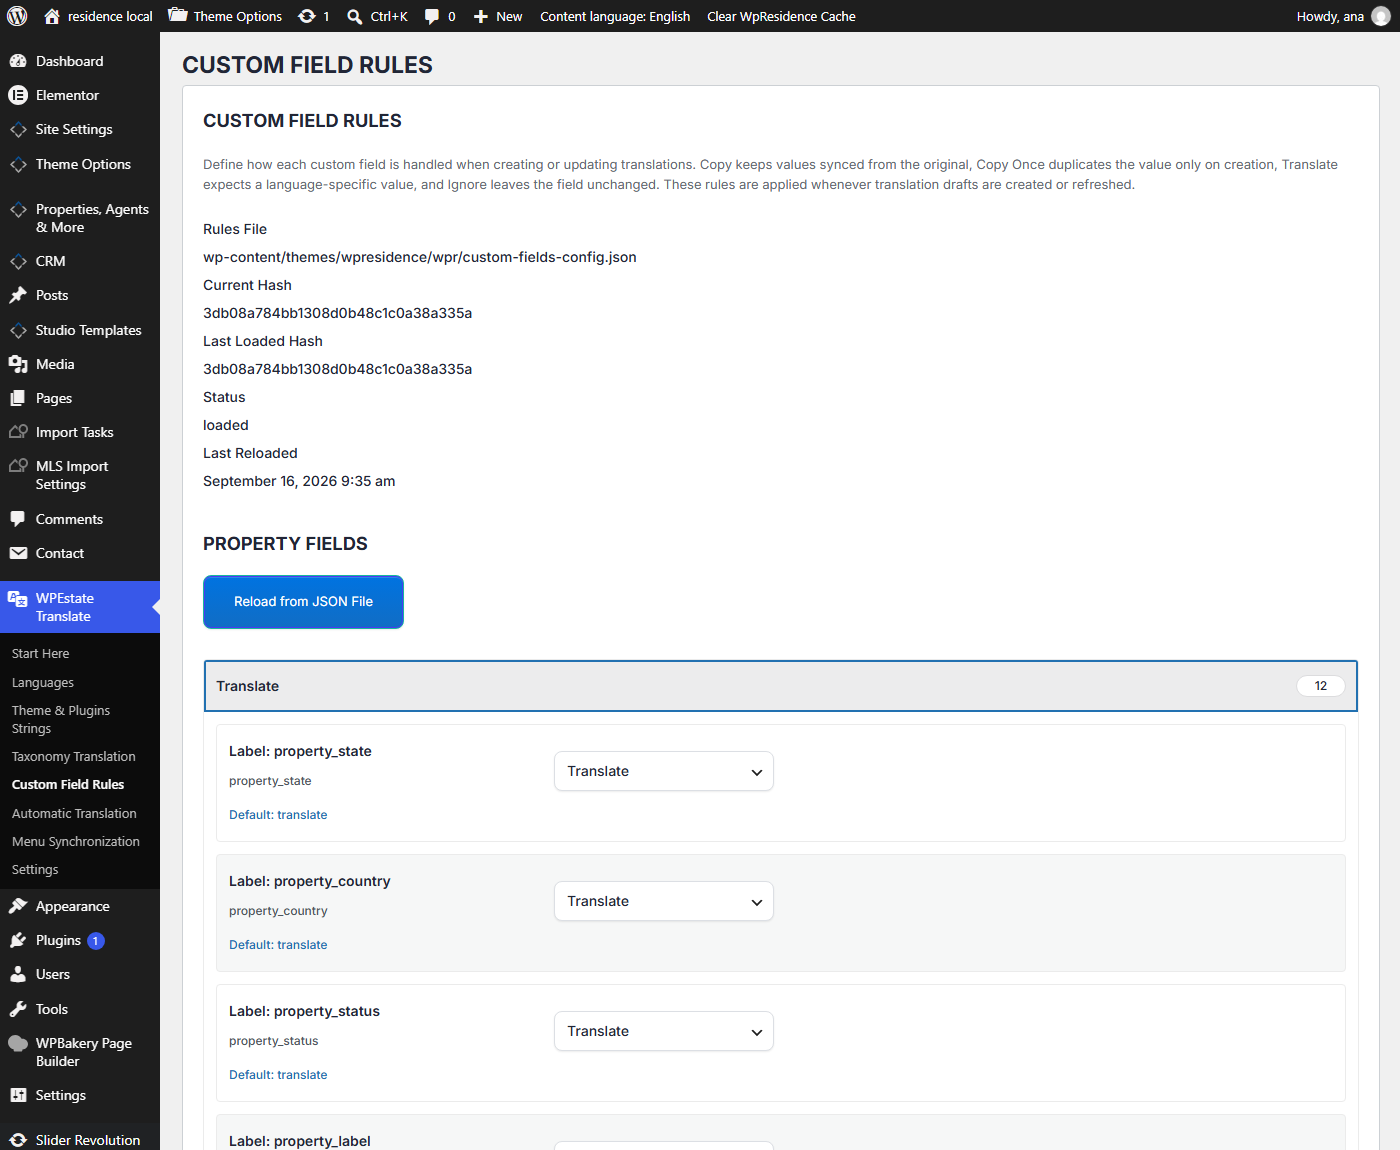
Real estate listings use many custom fields. Some values should stay the same in every language, while other values should be translated separately.

Go to:

WPEstate Translate > Custom Field Rules

Common examples:

  • Copied fields: price, coordinates, property size, rooms, bedrooms, bathrooms, and other factual values.
  • Translated fields: descriptions, marketing text, custom SEO text, and other language-specific text.
Important:
Review custom field rules before translating many properties. This helps avoid situations where factual values are translated by mistake or language-specific text is copied instead of translated.

Help:

https://help.wpresidence.net/article/meta-sync-across-language-variants/

Translate theme and plugin strings

Theme and plugin strings are labels that come from WPResidence, WPEstate Translate, or other plugins.

Examples include:

  • Button text
  • Search form labels
  • Dashboard labels
  • Form messages
  • Email labels
  • Frontend notices
  • Widget labels

Go to:

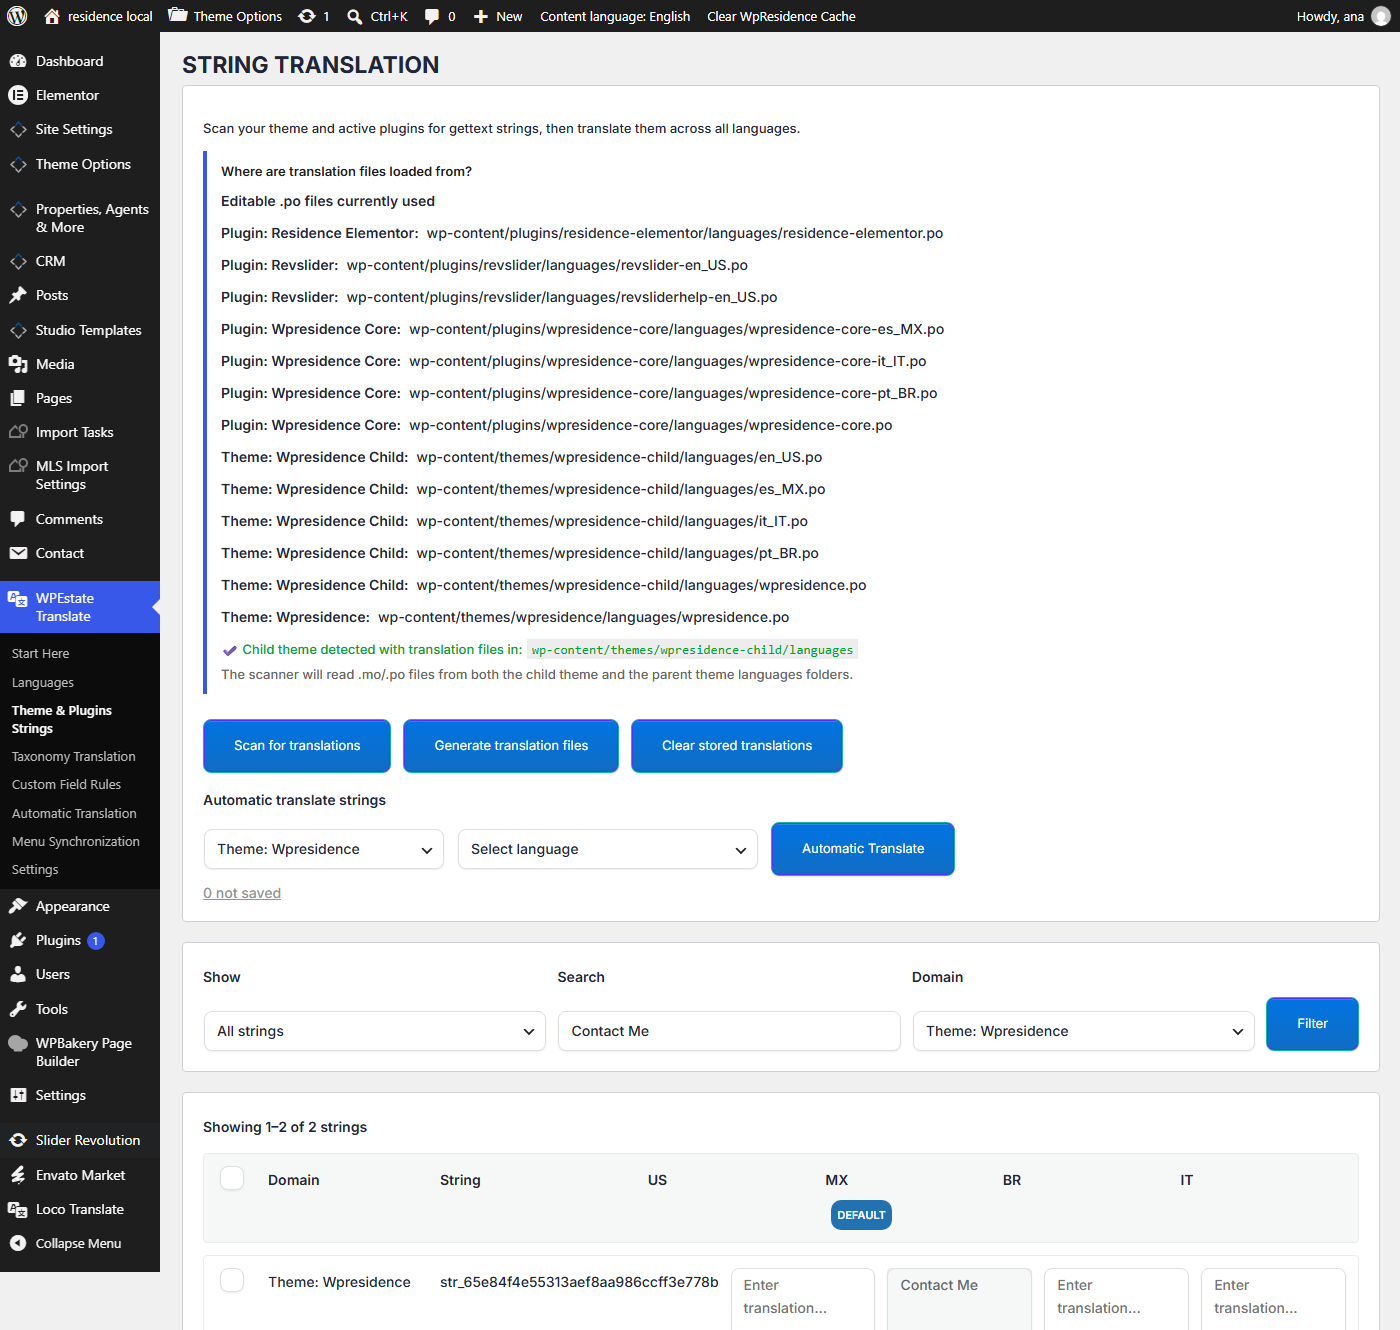
WPEstate Translate > Theme & Plugins Strings

Use this section to scan and translate theme and plugin strings.

  1. Open Theme & Plugins Strings.
  2. Scan the theme and plugin strings.
  3. Select the string you want to translate.
  4. Add the translation for each secondary language.
  5. Save the translation.
  6. Click Generate translation files.
  7. Clear cache and test the front end.
Important:
After editing theme or plugin strings, always click Generate translation files. The front end reads the compiled .mo files, so saved string changes may not appear until the translation files are generated again.

Help:

https://help.wpresidence.net/article/translating-theme-plugin-strings/

https://help.wpresidence.net/article/the-string-scanner/

Default language strings and the default language column

In Theme & Plugins Strings, the website default language is treated as the source language for the string table.

Because of this, the default language column may not behave like a normal translation field.

For example, if Spanish is the website default language, the Spanish column is treated as the source column. If you edit strings directly in the Spanish column, some values may revert back to the original/source value after saving.

The recommended workflow is:

  • Keep the default language/source column as-is.
  • Add translations in the secondary language columns.
  • Click Generate translation files after editing.
  • Clear cache and test the front end.

If the default language labels need to be corrected, edit the correct .po file, generate/update the .mo file, clear cache, and test again.

Temporary workaround for default language string editing

If you need to generate translation files for the default language from the string table, you can temporarily switch the WordPress site language.

  1. Go to Settings > General > Site Language.
  2. Temporarily switch the site language to English.
  3. Go to WPEstate Translate > Theme & Plugins Strings.
  4. Add the translations in the target language column.
  5. Click Generate translation files.
  6. Switch the site language back to the real default language.
  7. Clear all cache and test again.
Important:
Use this workaround only when needed. For normal multilingual work, edit secondary language columns and keep the default language as the source language.

Generated translation files and the languages/wpr/ folder

When you use WPEstate Translate and generate translation files, the plugin can create this folder:

languages/wpr/

This folder is normal.

The languages/wpr/ folder is created by WPEstate Translate and stores generated translation files used by the plugin.

For WPResidence, the folder can be located in the child theme language path:

wp-content/themes/wpresidence-child/languages/wpr/

or in another active theme language location, depending on your setup.

Inside this folder, WPEstate Translate stores generated .po and .mo files for the languages used on the website.

For each language, both file types are needed:

  • .po file – editable translation file
  • .mo file – compiled translation file used by WordPress on the front end
Important:
The file names must match the file names already used in the languages/wpr/ folder. If the files are saved with the wrong name, wrong locale, or wrong text domain, WordPress may not load them.

Theme and core plugin translation files

For WPResidence default theme and plugin labels to show translated correctly, the correct translation files must exist in the languages/wpr/ folder.

This includes:

  • Theme translation files
  • Core plugin translation files

Theme translation file examples:

wpresidence-es_ES.po
wpresidence-es_ES.mo

wpresidence-fr_FR.po
wpresidence-fr_FR.mo

wpresidence-it_IT.po
wpresidence-it_IT.mo

Core plugin translation file examples:

wpresidence-core-es_ES.po
wpresidence-core-es_ES.mo

wpresidence-core-fr_FR.po
wpresidence-core-fr_FR.mo

wpresidence-core-it_IT.po
wpresidence-core-it_IT.mo

The exact locale depends on the language used on the website.

If automatic translation is not connected

If no AI / automatic translation provider is connected, WPEstate Translate can still generate the language files, but the generated content may remain in English or in the source language.

To generate translated files automatically, connect a supported translation provider first.

Help:

https://help.wpresidence.net/article/automatic-translation-openai-google-deepl-azure/

If you already have existing translated files, they can be added manually by FTP into the correct languages/wpr/ folder using the exact file names used by the plugin.

If needed, support may ask for FTP access to add the existing theme and core plugin translations into the correct folder with the correct file names.

Labels not included in .po / .mo files

Not all labels come from the theme or plugin code.

Some labels are custom text saved in Theme Options, Elementor widgets, Studio templates, pages, menus, or widgets.

The logic is:

  • Default theme/core labels – translated from .po / .mo files.
  • Custom labels saved in Theme Options – edited from the Theme Options field where the label was added.
  • Page and Elementor text – edited directly in the translated page/template.
  • Secondary language custom strings – translated from the String Scanner / String Translator when available.

String Scanner help:

https://help.wpresidence.net/article/the-string-scanner/

Solution when translations are not showing

If translations are not showing on the front end, check these points in this order.

1. Check the languages/wpr folder

Check that the folder exists:

wp-content/themes/wpresidence-child/languages/wpr/

Then check that it includes the correct files for the active language.

Example for Italian:

wpresidence-it_IT.po
wpresidence-it_IT.mo
wpresidence-core-it_IT.po
wpresidence-core-it_IT.mo

If these files are missing, or if they exist but contain English/source text, default theme/core labels may remain in English.

2. Check that the files are translated

If no AI / automatic translation provider was connected when the files were generated, the files may exist but still contain English/source values.

To fix this, you can:

  • Connect a supported automatic translation provider and generate the translations again.
  • Manually edit the .po files and generate the matching .mo files.
  • Ask support to add the existing translated theme/core files into the correct wpr folder by FTP.

3. Check the file names

The files must be saved with the exact names used in the languages/wpr/ folder.

Do not rename them unless you are sure the text domain and locale are correct.

4. Check if the label is controlled by Theme Options or Elementor

If a label is not found in the theme/core .po files, it may be custom text saved somewhere else.

Check:

  • Theme Options custom text fields
  • Elementor page content
  • WPResidence Studio templates
  • Menus
  • Widgets
  • Third-party plugins

If the label is page or Elementor content, edit the translated page/template directly.

If it is a secondary language custom string, use the String Scanner / String Translator when available:

https://help.wpresidence.net/article/the-string-scanner/

5. Generate MO files and clear cache

After updating translation files or translated strings:

  1. Click Generate translation files where needed.
  2. Regenerate/update the .mo files if you edited .po files manually.
  3. Clear theme cache.
  4. Clear Elementor cache/files.
  5. Clear plugin cache.
  6. Clear server/CDN cache, if used.
  7. Clear browser cache.
  8. Test the front end again.

Help:

https://help.wpresidence.net/article/gettext-mo-files-making-translations-appear-on-the-front-end/

https://help.wpresidence.net/article/cache-purge-reset-tools/

Use automatic translation

WPEstate Translate can use automatic translation to create a first draft of translated content.

The automatic translation workflow uses your own API key. WPEstate does not charge for this feature and does not sell translation credits.

Automatic translation can help with:

  • Posts
  • Pages
  • Properties
  • Agents
  • Theme and plugin strings
  • Some compatible Elementor content
Important:
Automatic translation creates a draft or first version. Always review and correct the translated content before using it on a live website.

Help:

https://help.wpresidence.net/article/automatic-translation-openai-google-deepl-azure/

You can check OpenAI API pricing here:

https://openai.com/api/pricing/

You can check your OpenAI API usage and costs here:

https://platform.openai.com/usage

Translate menus

Navigation menus should match the language used by the visitor.

Go to:

Appearance > Menus

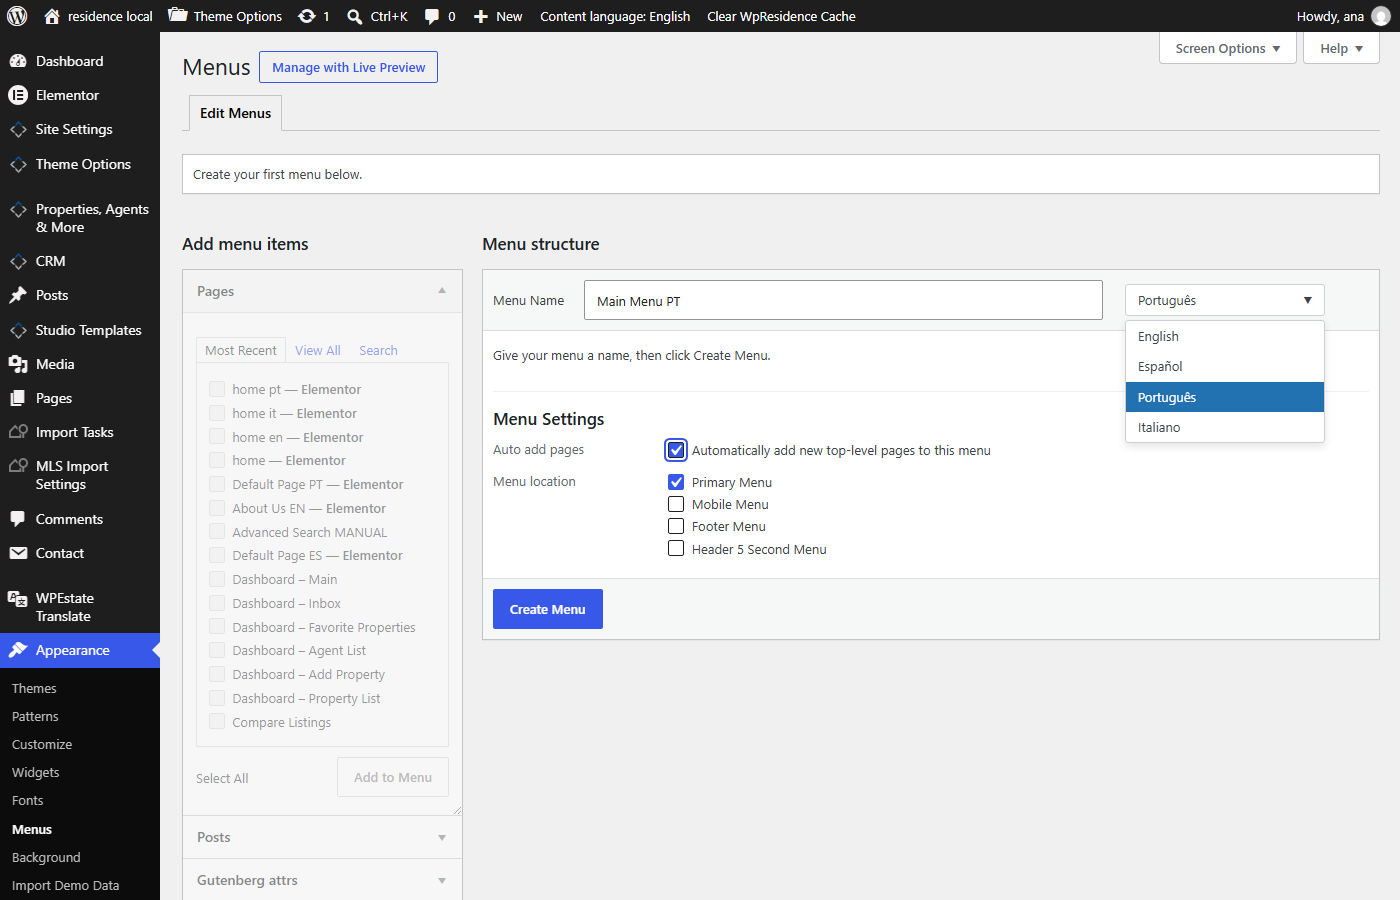
With WPEstate Translate active, menus can be assigned to specific languages.

You can also use:

WPEstate Translate > Menu Synchronization

Recommended workflow:

  1. Create the main menu in the default language.
  2. Create or synchronize menus for the other languages.
  3. Replace menu links with translated page, property archive, or taxonomy URLs.
  4. Assign each menu to the correct language and theme location.
  5. Test the header menu in every language.

Help:

https://help.wpresidence.net/article/menu-translation-language-specific-menu-locations/

Language URLs and SEO notes

WPEstate Translate creates language-aware URLs so each language can have its own version of the page or property link.

Example:

  • yourdomain.com/property/example-property/ – default language URL
  • yourdomain.com/fr/property/example-property/ – French URL, if French uses the fr slug

The plugin can help multilingual SEO by keeping language versions connected and by handling language-aware links.

Important:
After changing languages, URL settings, or permalinks, clear cache and resave permalinks if needed from Settings > Permalinks.

Help:

https://help.wpresidence.net/article/url-structure-permalinks-in-wpresidence-translate/

Test the multilingual website

After setup, test the website carefully in each language.

Check:

  • The language dropdown shows all active languages.
  • Each language opens the correct translated page.
  • Header and footer menus show the correct language.
  • Properties show in the correct language.
  • Property cards show translated labels.
  • Single property pages show translated content.
  • Agents, agencies, and developers have translated versions where needed.
  • Property categories, actions, cities, areas, and features are translated.
  • Search filters show translated terms.
  • Elementor pages and widgets show translated text.
  • Theme and plugin labels are translated.
  • Custom labels from Theme Options are translated or edited in the correct place.
  • Translated URLs work correctly.
  • Cache is cleared after major translation changes.

Troubleshooting

The translation is saved but does not show on the front end

  • Check if the text is theme/plugin code, Theme Options text, Elementor content, a widget, a menu, or a taxonomy.
  • If it is a theme/plugin string, check the files inside languages/wpr/.
  • Make
Translations & Languages

Related Articles

  • How to Translate WPResidence Into Another Language
  • How to Translate Measurement Correctly
  • Rename theme words with Loco Translate Plugin
  • What Details are translated from Theme Options

Help Categories

  • 18Agent, Agency & Developers
  • 5Blog Posts & Blog Lists
  • 39Elementor Shortcodes Built-In
  • 54FAQ
  • 15Footer
  • 5Getting Started
  • 37Header
  • 2IDX & MLSImport
  • 6Installation & Setup
  • 24Installation FAQ
  • 23Maps & Location Settings
  • 21Multi-Language - Third Party Plugins
  • 6Other Third party Plugins
  • 21Pages
  • 4Payments & Monetization
  • 20Property Lists, Categories & Archive
  • 37Property Pages & Layouts
  • 32Search & Filtering
  • 162Technical how to | Custom Code Required
  • 8Technical: Actions and filters
  • 7Technical: Child Theme
  • 86Theme Options & Global Settings
  • 7Translations & Languages
  • 16WPBakery Shortcodes
  • 50WPEstate / WPResidence Translate Plugin
  • 51WPResidence / WPEstate CRM
  • 50WPResidence 5.0 Documentation
  • 9WPResidence Elementor Studio

Join Us On

Powered by WP Estate - All Rights Reserved
  • WPRESIDENCE
  • Video Tutorials
  • Client Support
  • API