
Each language of your site can have its own header, mobile and footer menu. With WPEstate Translate you give every menu a language, place it in the usual theme locations, and let Menu Synchronization copy the structure of the default-language menu so the links point to the translated pages.
Filter the Menus by Language
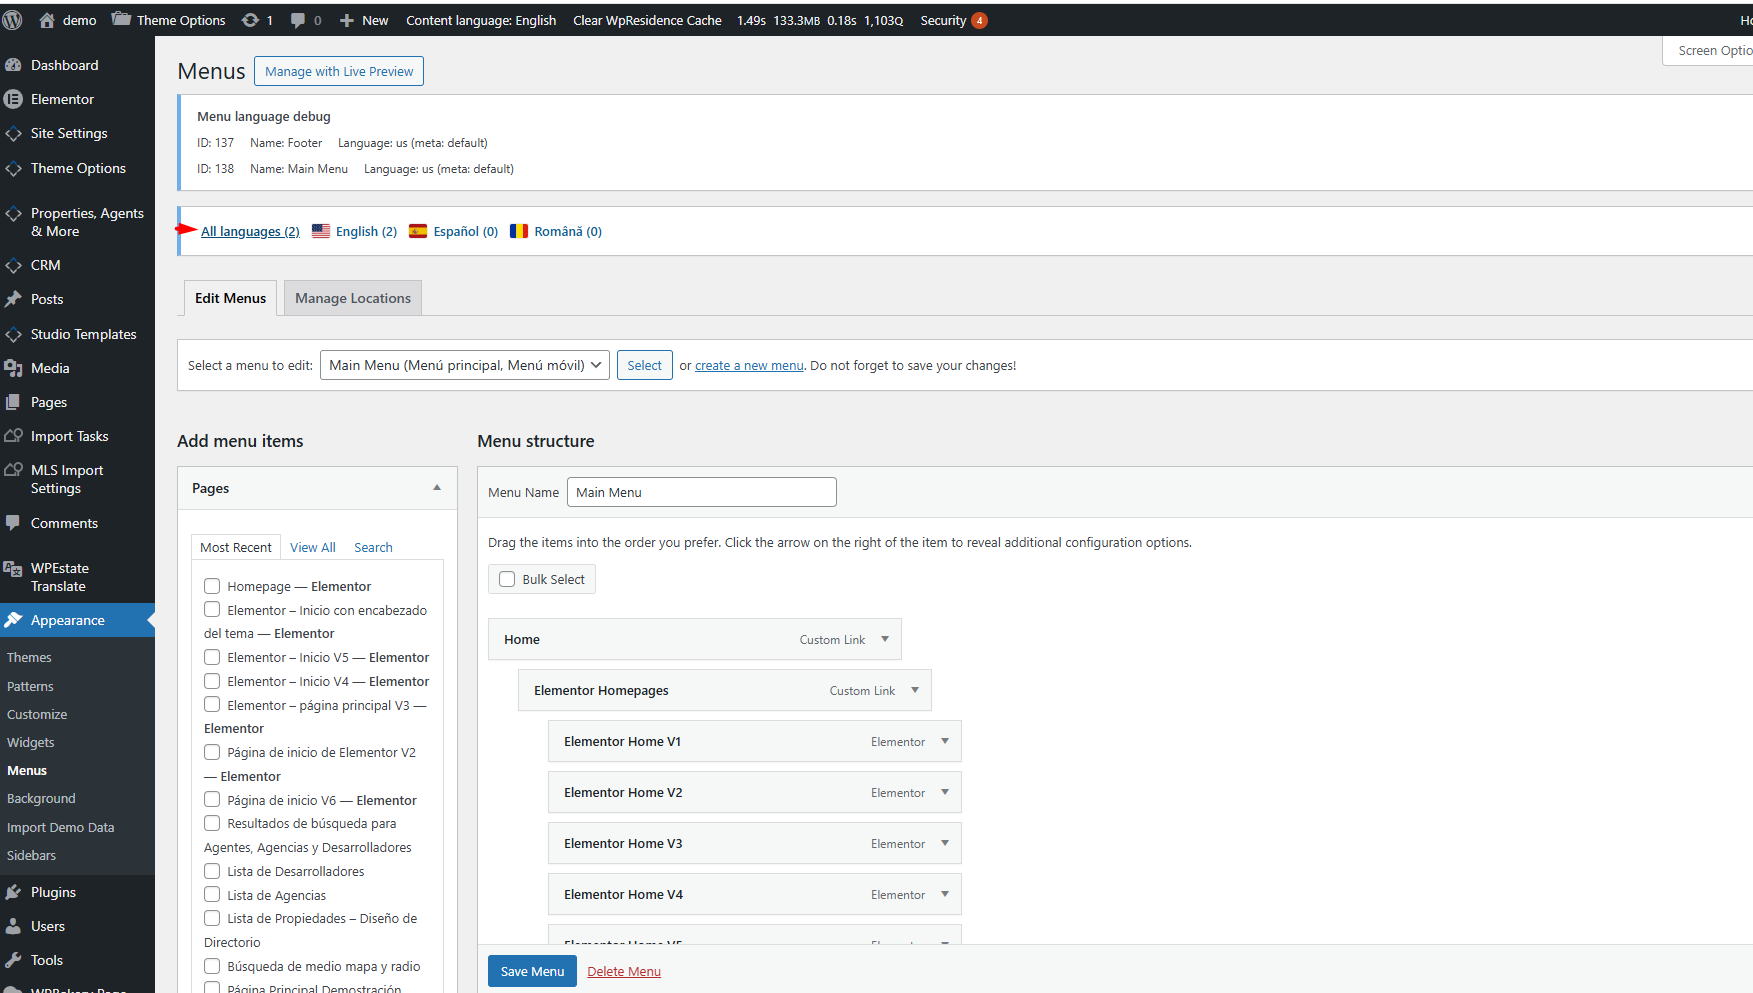
In Appearance > Menus, a language bar appears above the tabs when the site has more than one language. It shows All languages and one link per language, each with its flag and the number of menus in that language. Click a language to see only its menus in Select a menu to edit.
Create a Menu for Another Language
- Translate the pages first, so the new menu has translated pages to link to. See Translating Posts and Pages.
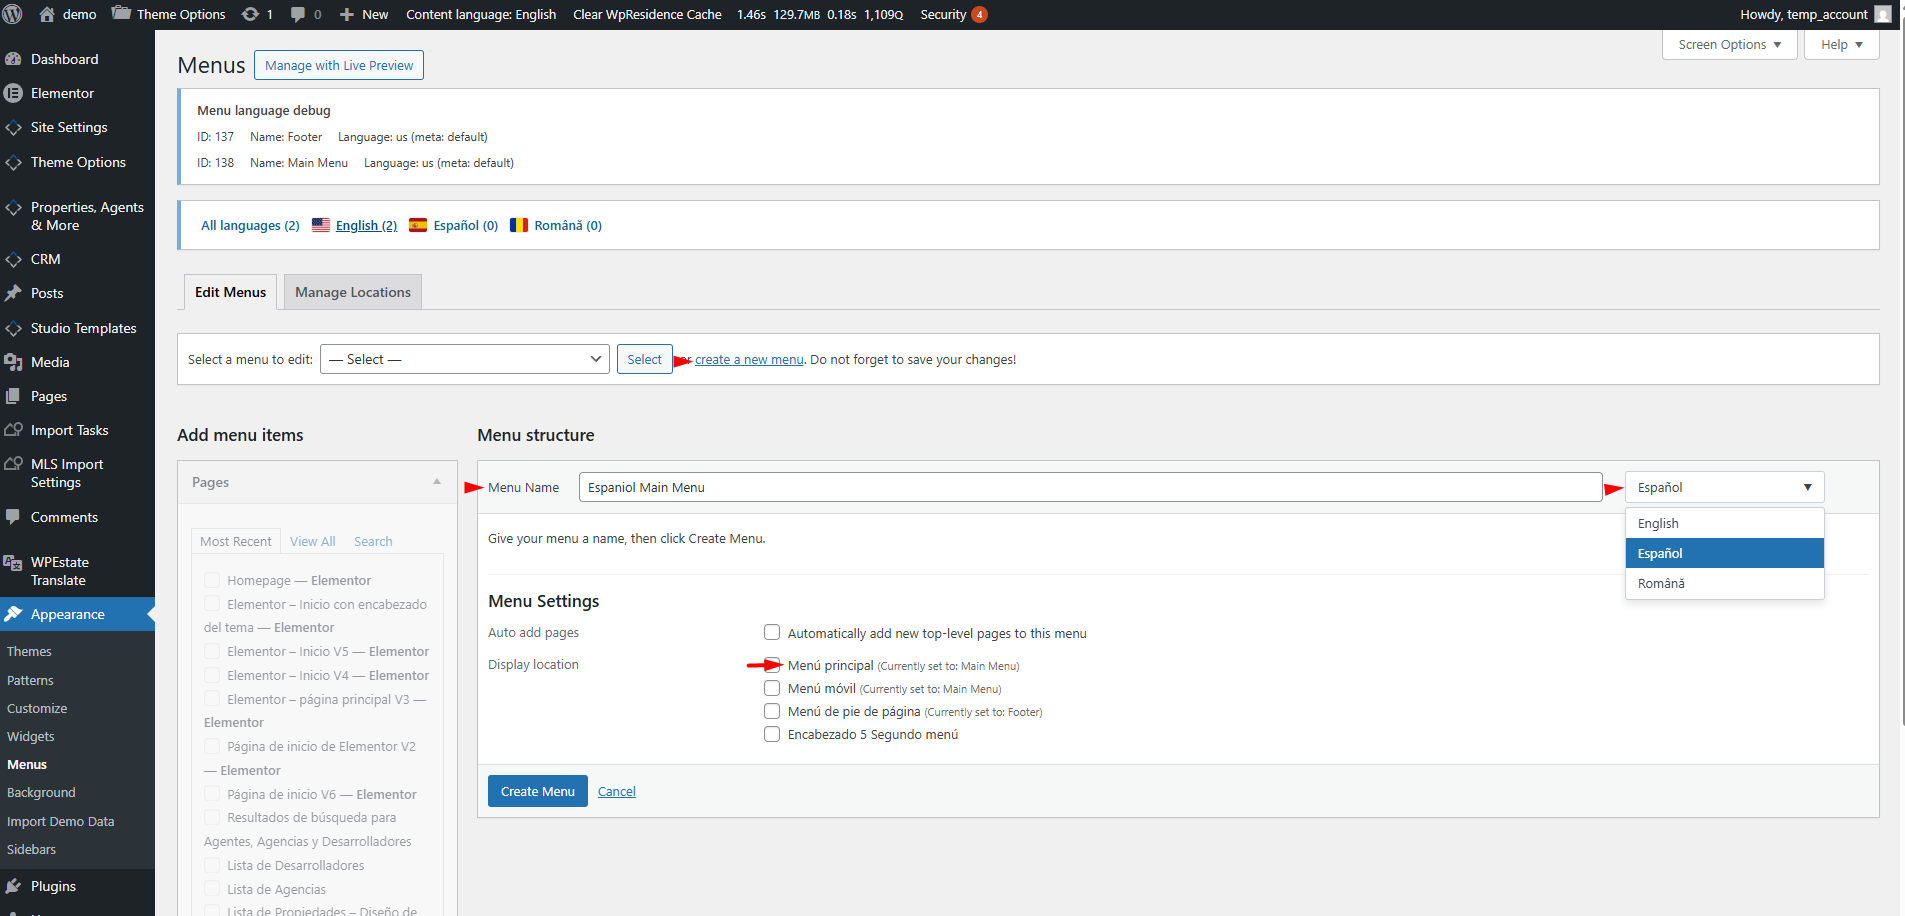
- Go to Appearance > Menus and click create a new menu.
- Type a Menu Name, for example Main Menu ES.
- Choose the language in the dropdown at the right of the menu name.
- Tick the Display location boxes, for example the primary and mobile menu, the same ones the default-language menu uses.
- Click Create Menu.
How Menu Locations Work per Language
Each theme location keeps one menu per language. Ticking a location for the Spanish menu does not remove the English menu from it: English pages keep the English menu and Spanish pages get the Spanish one. You can also set this in Appearance > Menus > Manage Locations.
If a language has no menu in a location, that location shows the default-language menu, so the header is never empty while a translation is missing.
Fill the Menu with Menu Synchronization
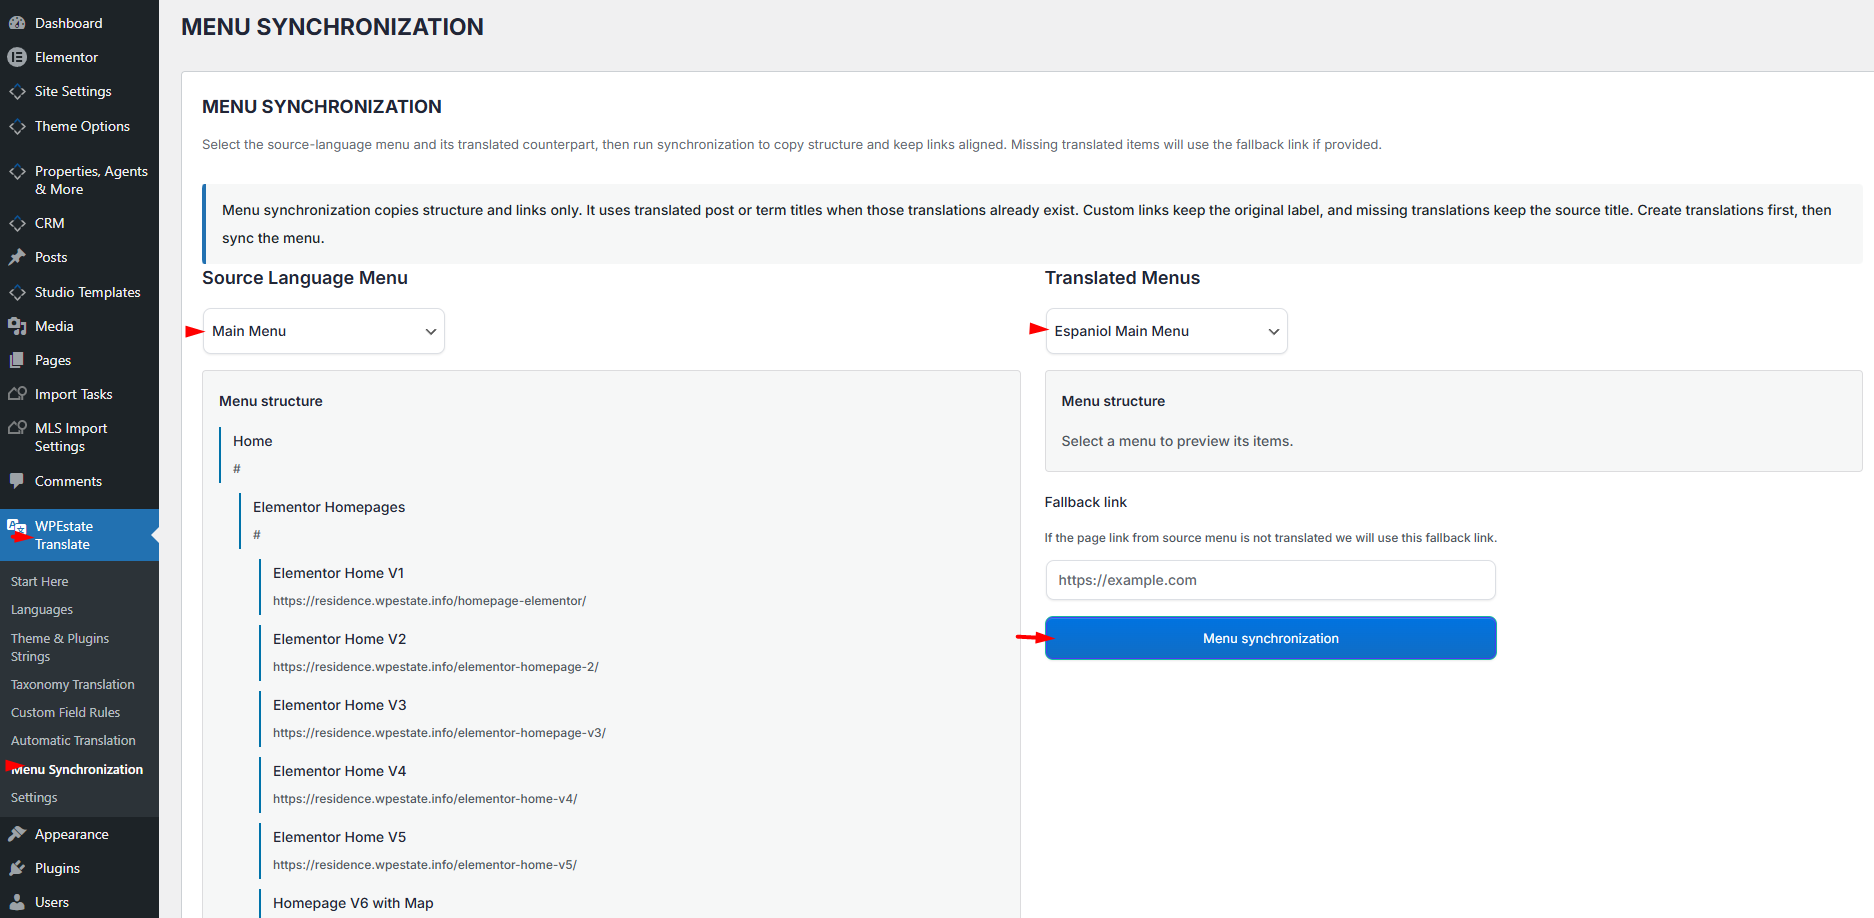
- Go to WPEstate Translate > Menu Synchronization.
- Choose the default-language menu in Source Language Menu. Its items show below.
- Choose the new menu in Translated Menus.
- Type a Fallback link (optional). It is used for items whose page has no translation yet.
- Click Menu synchronization.
| Item in the source menu | In the translated menu |
|---|---|
| Page, post, property or category with a translation | Links to the translation, with its translated title |
| Page, post, property or category without a translation | Keeps the source title and links to the Fallback link, or to # if you left it empty |
| Custom link | Same URL and the same label |
Parents, sub-items and order match the source menu. To translate a custom link label, edit the item in Appearance > Menus.
Keep the Menus Up to Date
- Change the default-language menu as usual.
- Translate any new page you added to it.
- Run Menu Synchronization again for each translated menu.
- Click Clear WpResidence Cache in the admin bar and check each language on the front end.
Each synchronization rebuilds the translated menu from the source. Items you added to the translated menu by hand, and labels you edited there, are replaced, so edit them again after a sync, or stop syncing that menu and maintain it by hand.
Troubleshooting
- A translated menu shows default-language titles. Those pages have no translation yet. Translate them and synchronize again.
- A language shows the default-language menu. No menu of that language is set in that location. Open the menu and tick the location.
- The menu is not in Source Language Menu. That list shows default-language menus only. Check the language chosen next to the menu name.
- A menu shows “(inactive)” or “Unknown language” next to its name. Its language was disabled or removed. Choose an active language and save the menu.
To show the language dropdown inside a menu, see The Language Switcher.