
The language switcher is the dropdown visitors use to change the language. It lists your languages with their flags, in the order set in WPEstate Translate > Languages, and opens the current page in the chosen language. You can place it in three ways, depending on how your header is built.
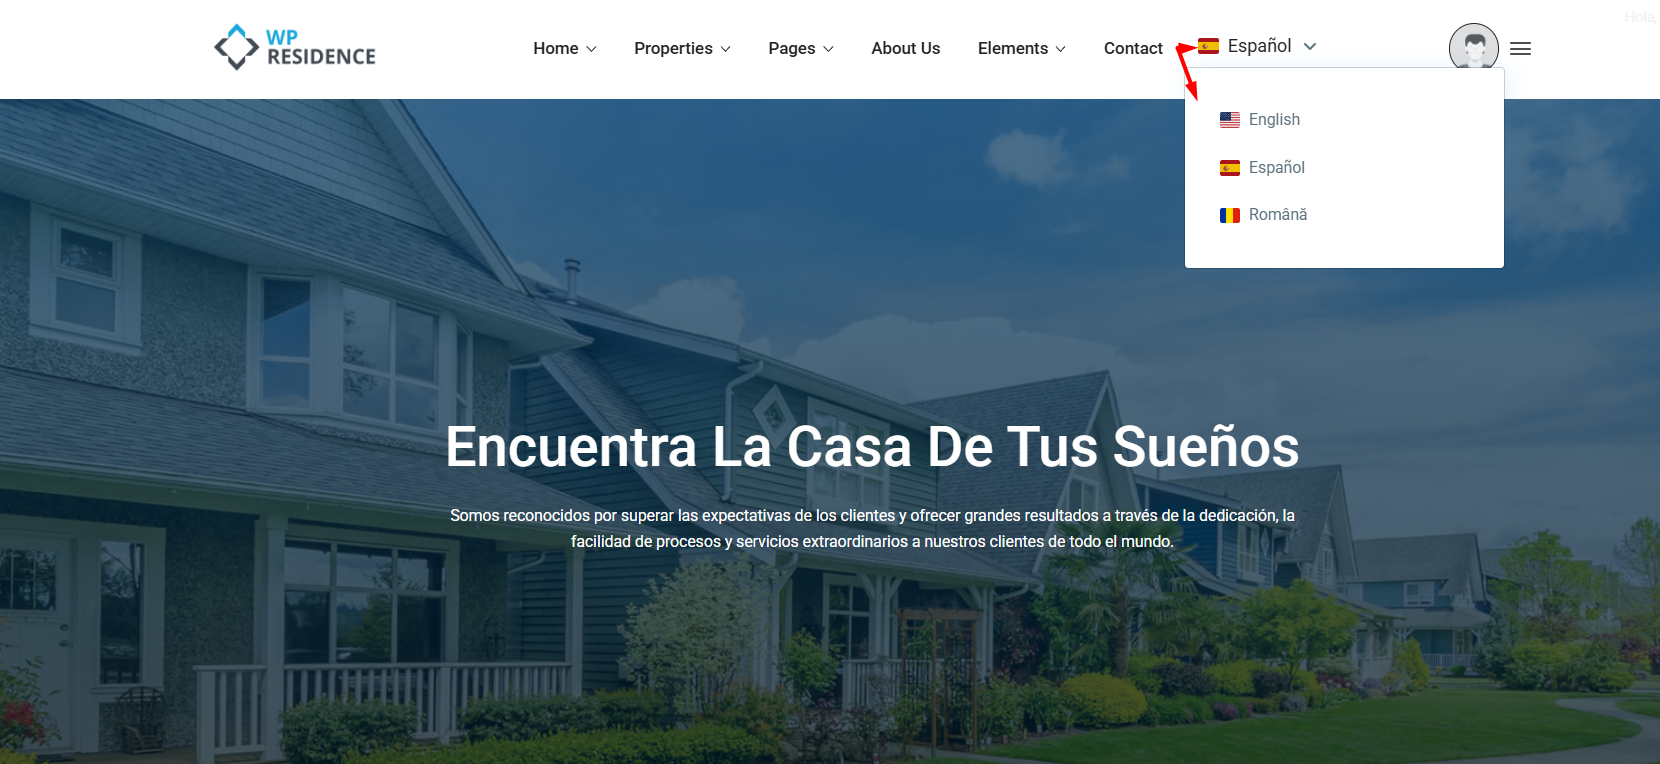
In the Theme Header Menu
- Go to WPEstate Translate > Settings.
- Find Menu Language Dropdown. Each menu location of the theme has its own row.
- Choose the Position for the menu that should hold the switcher: Before menu items or After menu items. Leave the others on No dropdown.
- Click Save Settings.
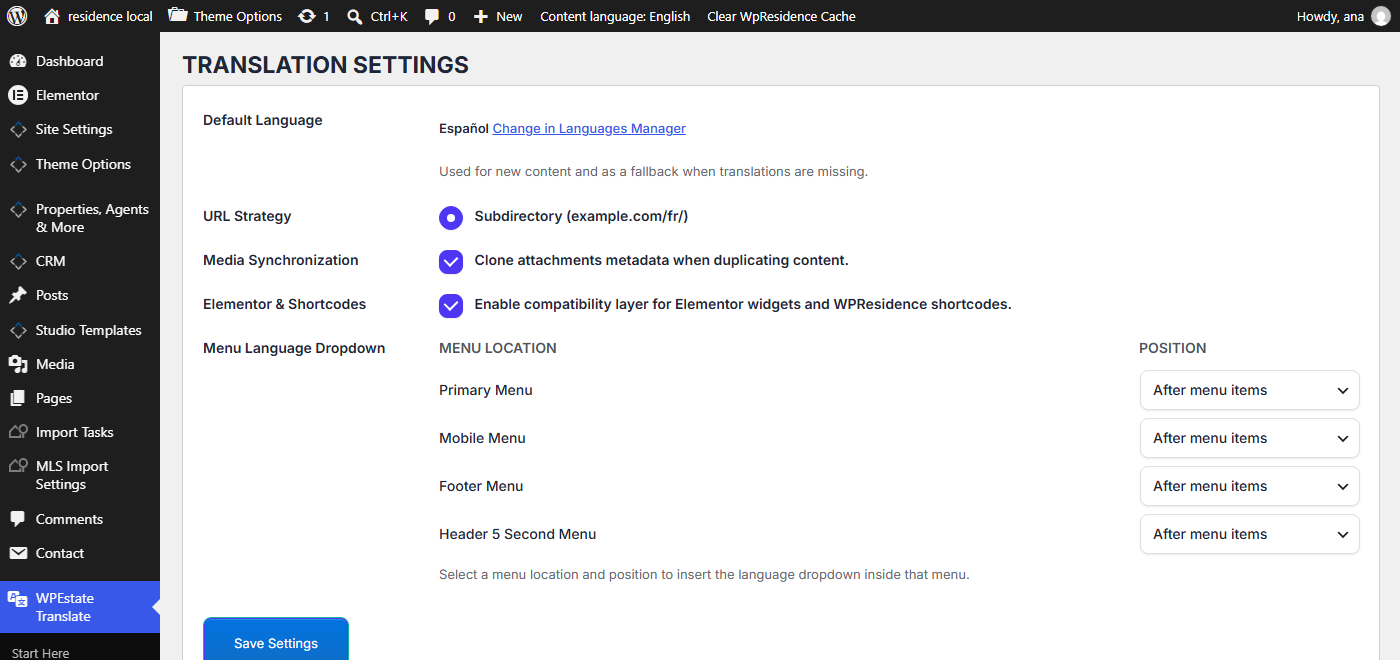
If each language uses its own menu, turn the dropdown on for the location of every language menu. See Menu Translation and Language-Specific Menu Locations.
In an Elementor Header or Footer
For headers and footers built with WPResidence Studio:
- Go to Studio Templates, open the header or footer and click Edit with Elementor.
- Search for Language Switcher in the widget panel and drag it where you want it. In older versions of WPResidence Elementor two widgets are called Language Dropdown: use the one whose Content tab reads This widget outputs the WPResidence Translate language dropdown. The other one is for WPML and Polylang.
- Click Update.
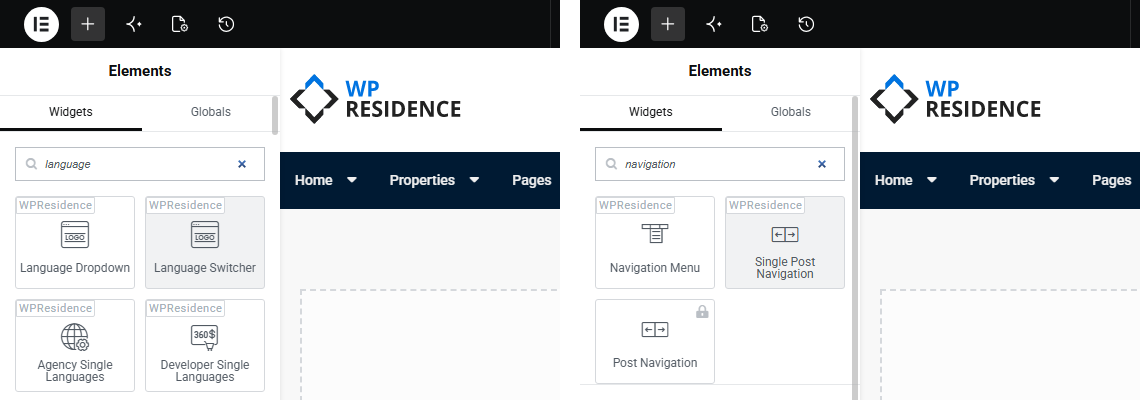
A Navigation Menu widget also shows the dropdown when its menu sits in a location where Menu Language Dropdown is turned on. More about Studio headers: Translate WPResidence Studio Templates.
In a Sidebar or Footer Widget Area
- Go to Appearance > Widgets.
- Add WPResidence Language Switcher to a sidebar or a footer column.
- Type a Title if you want one above the dropdown, or leave it empty.
- Save.
The widget has no other options: languages, flags and order come from the Languages screen. You can add it to several widget areas.
Style the Switcher
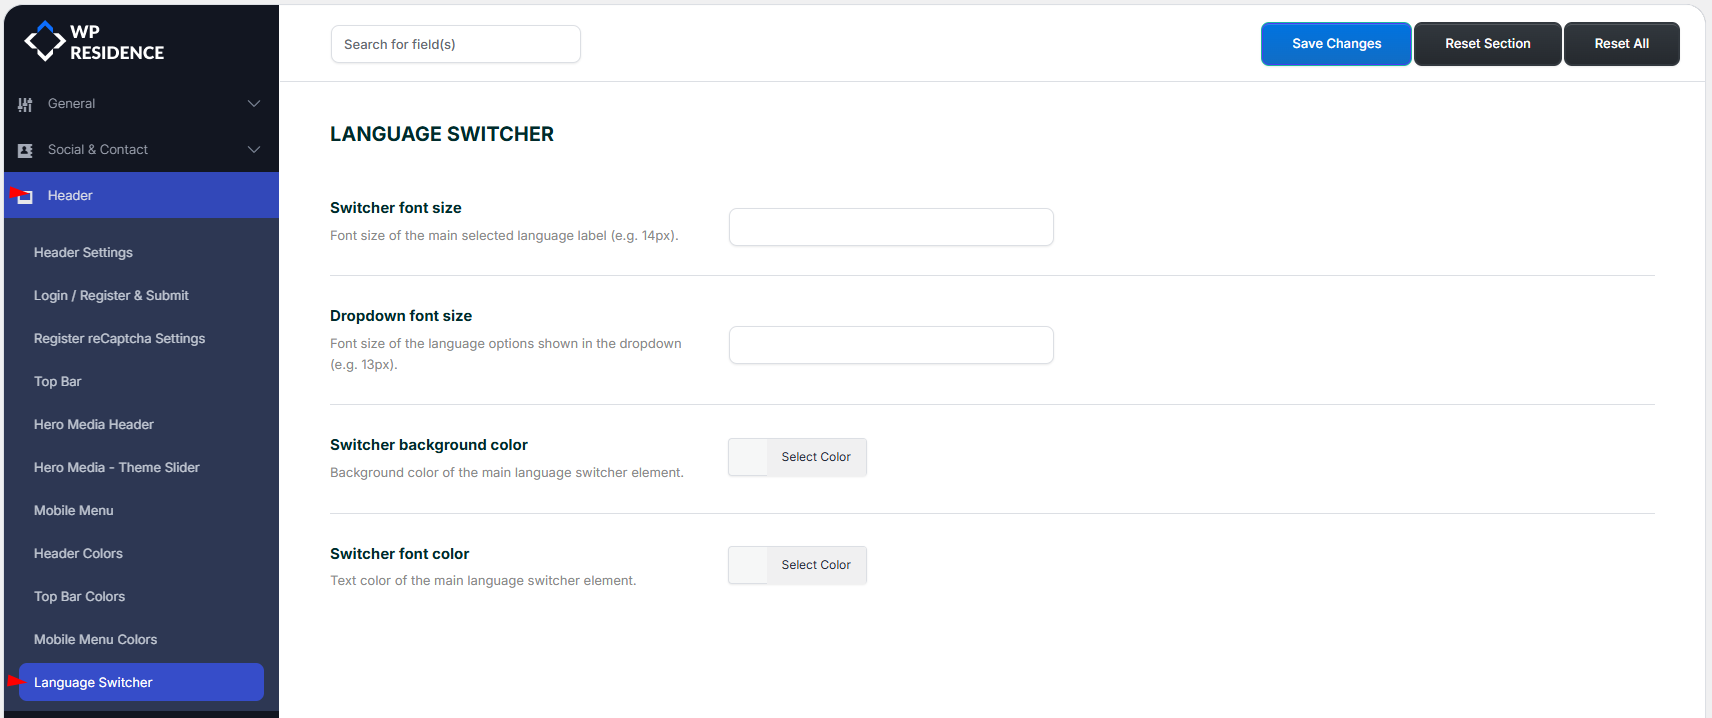
- Theme header menu and widget: Theme Options > Header > Language Switcher sets Switcher font size, Dropdown font size, Switcher background color and Switcher font color. Click Save Changes.
- Elementor widget: use the Style tab of the widget: typography, colors, hover colors, spacing and borders.
Where Each Language Link Goes
| The visitor is on | Clicking another language opens |
|---|---|
| The home page | The home page of that language |
| A property, page or post with a translation | The translation |
| A property, page or post without a translation | The original |
| A category, city or area page | The translated term page, or the original term page if the term has no translation |
| Search results and other lists | The same page under the language prefix |
The Switcher Does Not Show
- Only one language is live. The switcher needs at least two languages with Enabled and Visible ticked in WPEstate Translate > Languages.
- The menu location is wrong. The header may use a different location than the one set in Menu Language Dropdown. Check Appearance > Menus > Manage Locations.
- A flag is missing. Pick a flag for that language in the Flag column of the Languages screen.