What is the Mega Menu feature
The Mega Menu feature lets you replace the standard dropdown menu with a larger custom layout built in WPResidence Studio Templates.
This is useful when you want to show multiple columns, grouped links, images, icons, headings, or richer navigation content inside a menu dropdown.
The Mega Menu can be used with:
- default WordPress menus
- menus displayed in WPResidence default header options
- menus created with WPResidence Elementor Studio
Where Mega Menu templates are created
Mega Menu layouts are created from:
WP Admin > Studio Templates
In Studio Templates, Mega Menu templates appear under the Mega Menu type.
Step 1. Create a new Studio Mega Menu template
- Go to Studio Templates from the WordPress admin menu.
- Click Add Studio Template.
- Create a title for your new template. Use a clear name so you can identify it later in the menu settings.
This template will be the content shown inside the dropdown mega menu.

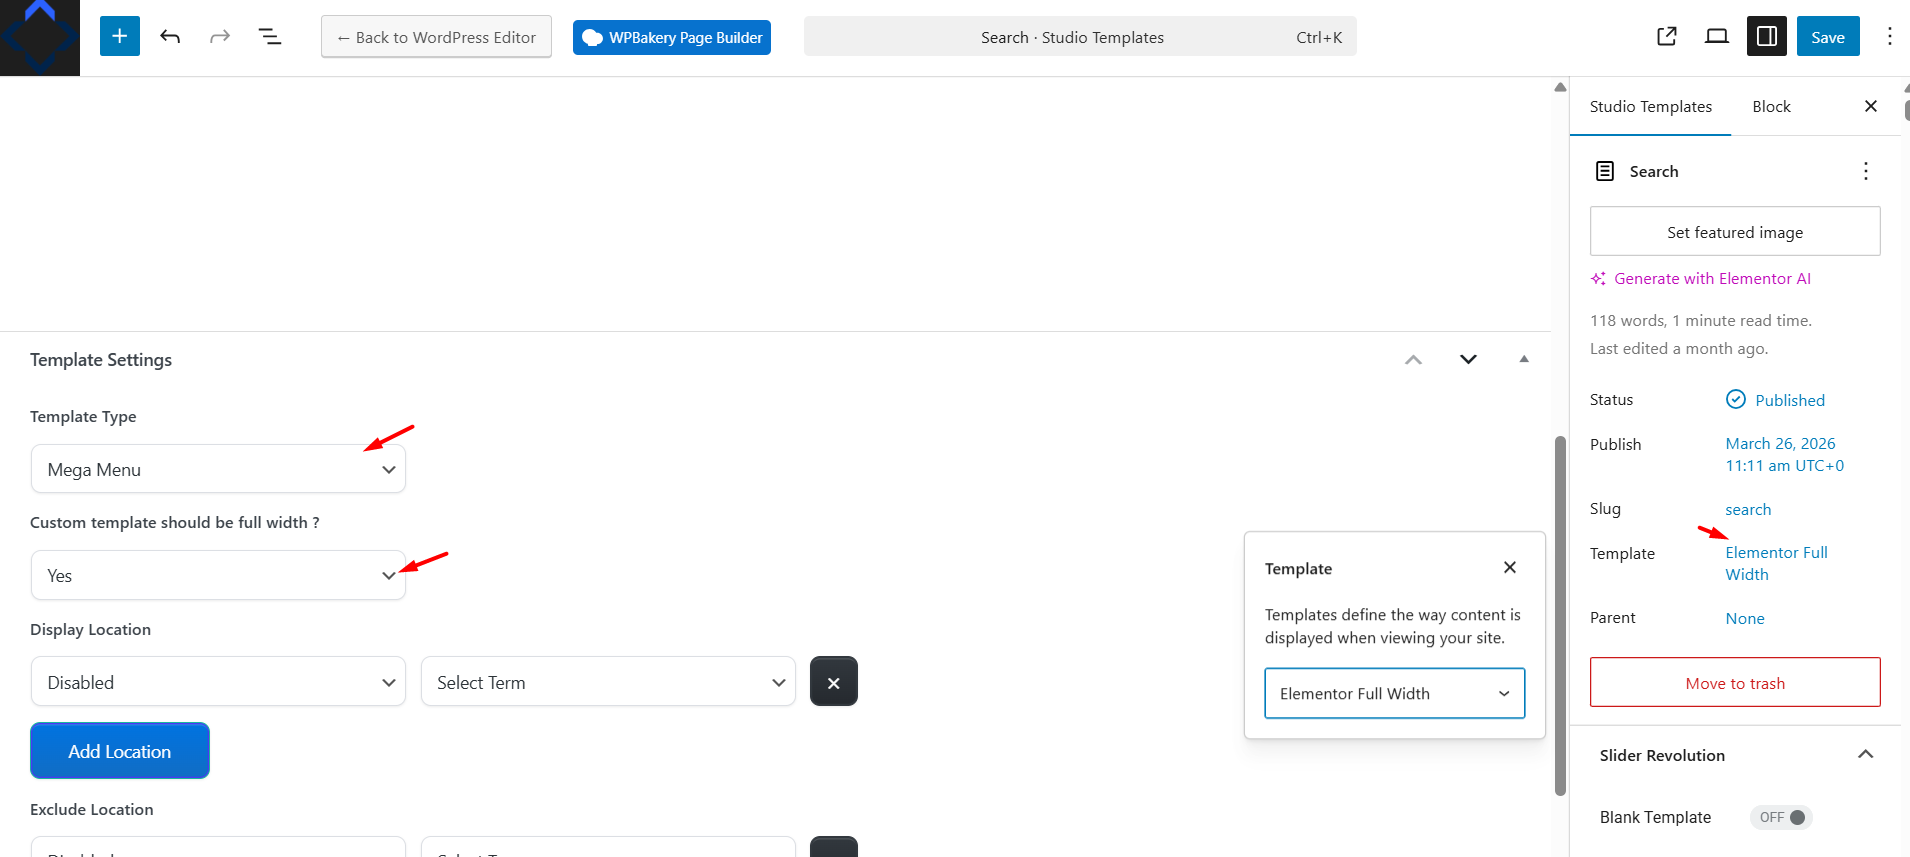
Step 2. Set the correct template options
After creating the new Studio template, configure the template settings before designing the content.
- Set Template Type to Mega Menu.
- Set Custom template should be full width? according to the design you want.
For most Mega Menus, this option is usually set to Yes so the dropdown has enough horizontal space.
Also make sure the page template on the right side is set to Elementor Full Width.
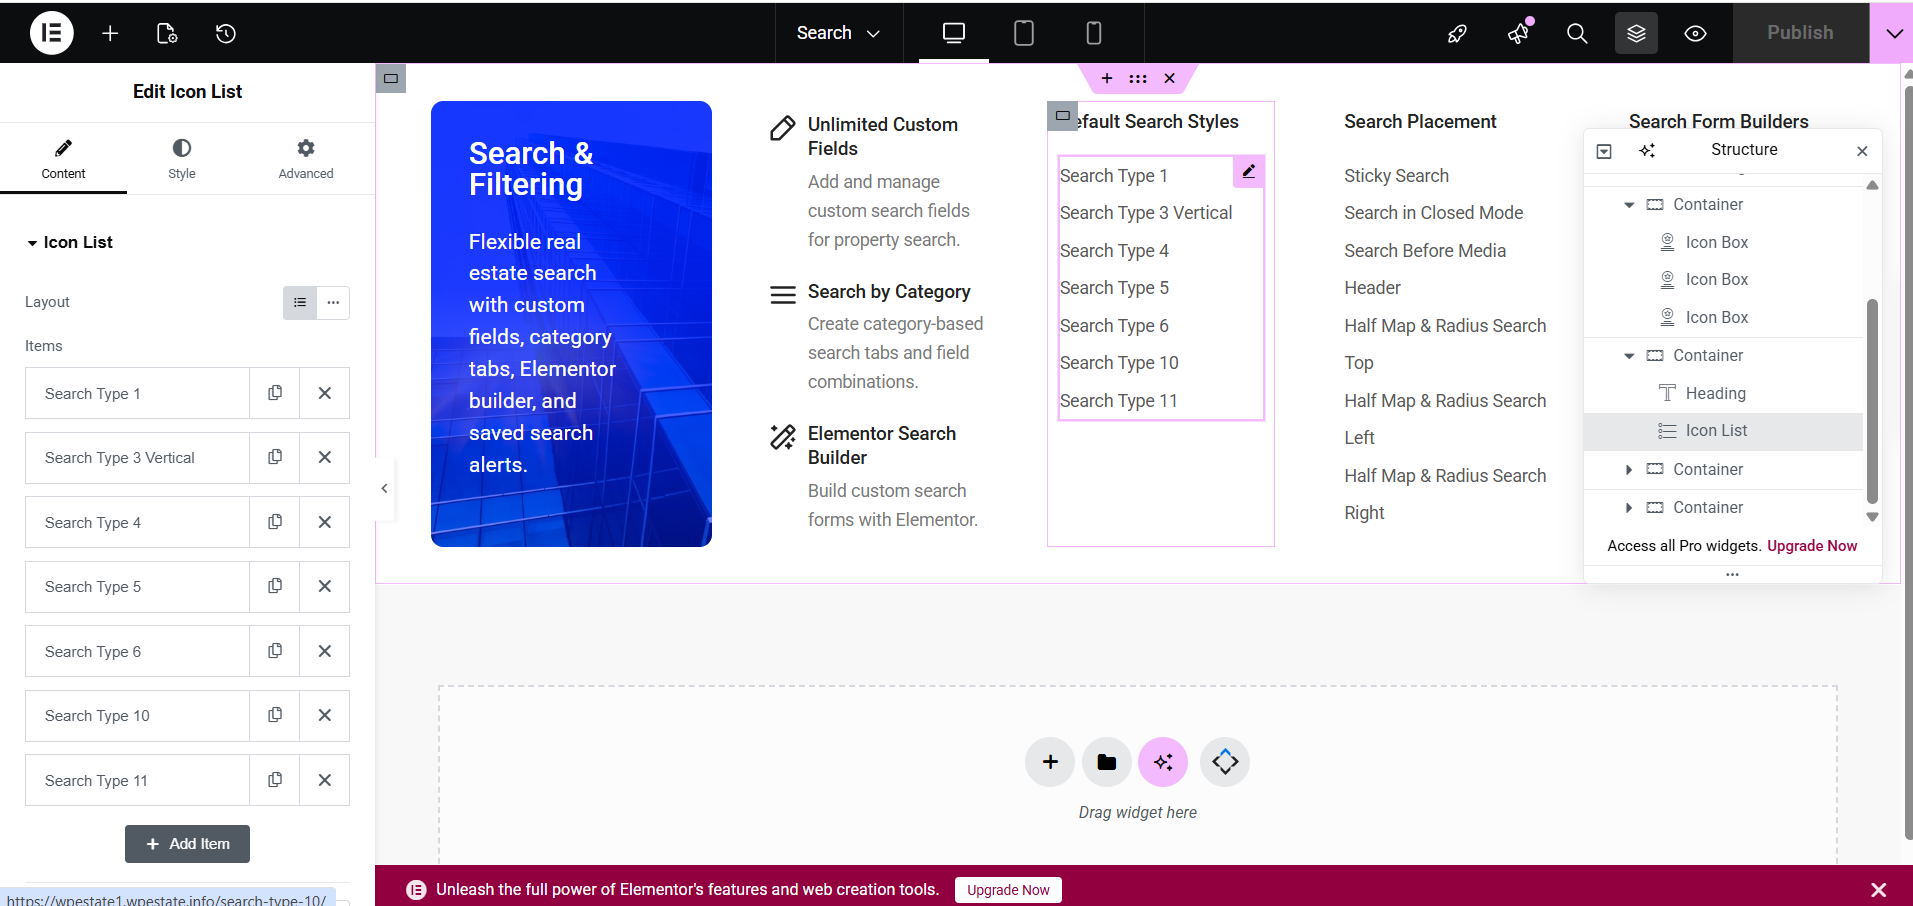
Step 3. Design the Mega Menu content with Elementor
After the template settings are correct, click Edit with Elementor and build the Mega Menu layout.
You can design the dropdown exactly as needed using Elementor widgets and layouts.
Typical Mega Menu content can include:
- headings
- text blocks
- icon lists
- images
- buttons
- links grouped in columns
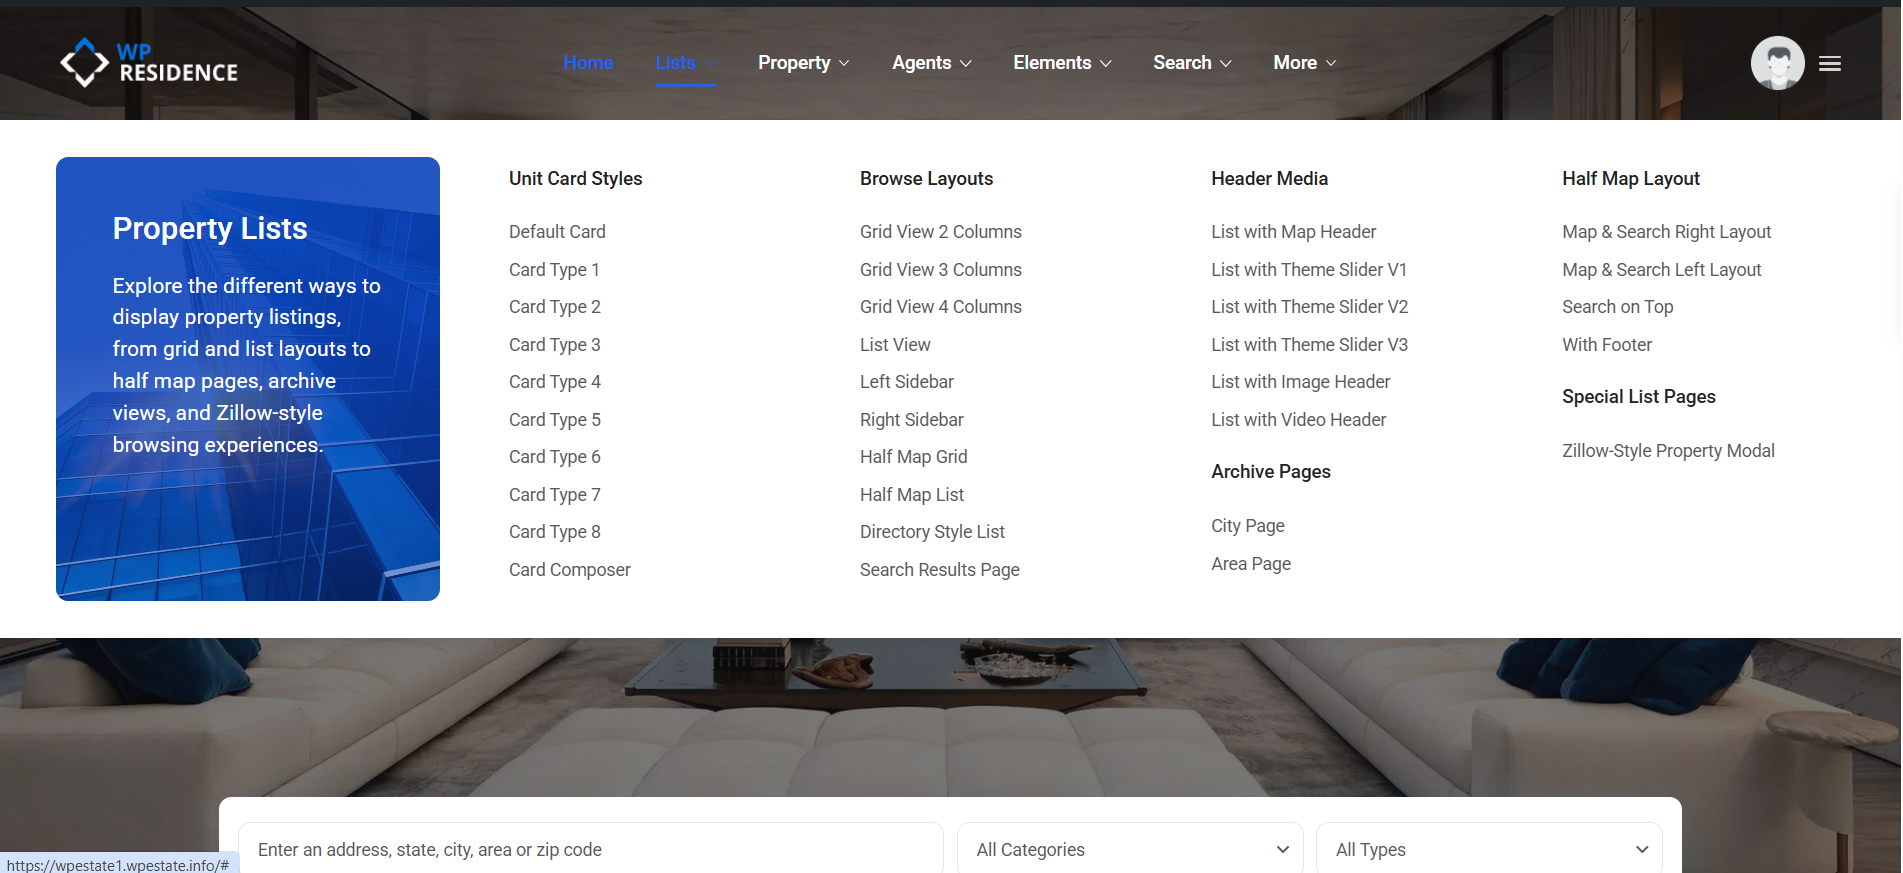
In the example shown, the Mega Menu was built with:
- a left content column with a title and description
- multiple columns of navigation links
- grouped menu sections such as property lists, browse layouts, header media, archive pages, and special list pages
After finishing the design, click Publish or Save.
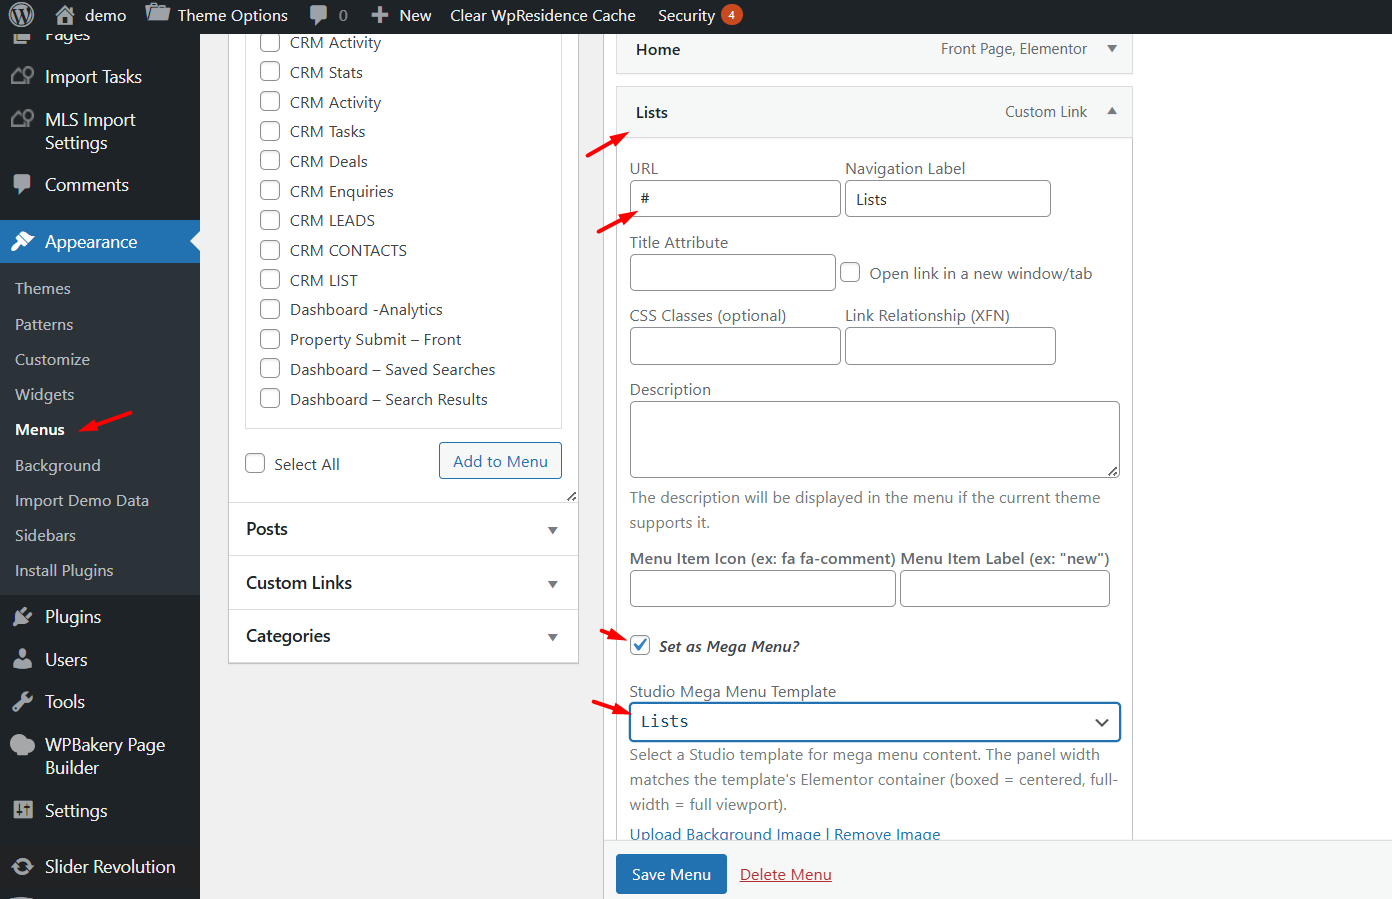
Step 4. Assign the Mega Menu to a default WordPress menu item
Once the Studio Mega Menu template is created, assign it to a menu item from the WordPress menu manager.
- Go to Appearance > Menus.
- Open the menu item that should trigger the Mega Menu dropdown.
- In the menu item settings, enable Set as Mega Menu?
- From the Studio Mega Menu Template dropdown, select the template you created earlier.
- Click Save Menu.
After saving, that menu item will display the selected Studio template as a Mega Menu on the front end.
How Mega Menu works with menus created in WPResidence Elementor Studio
The same Mega Menu setup can also be used with menus displayed through WPResidence Elementor Studio.
If your website header is built with a Studio Header template, the menu still uses the WordPress menu structure assigned to that header location.
This means the steps remain the same:
- Create the Mega Menu content as a Studio Template with type Mega Menu.
- Design the layout with Elementor.
- Go to Appearance > Menus.
- Open the desired top-level menu item.
- Enable Set as Mega Menu?
- Select the correct Studio Mega Menu Template.
- Save the menu.
So even when the header itself is built in WPResidence Elementor Studio, the Mega Menu is still assigned from the standard Appearance > Menus area.
Important notes
- Create the Mega Menu content first, then assign it to the menu item.
- Use clear names for Studio templates so they are easy to find in the dropdown list.
- For best layout control, use Elementor Full Width on the template.
- The Mega Menu is usually attached to top-level menu items.
- If the Mega Menu does not appear as expected, recheck the selected Studio template and save the WordPress menu again.
After these steps are complete, your selected menu item will open a fully custom Mega Menu built with WPResidence Studio Templates and Elementor.