What Header and Footer Studio templates do
With WPResidence Studio and Elementor Free, you can create fully custom headers and footers for your WPResidence website.
A custom Header template replaces the default WPResidence header in the locations where you assign it.
A custom Footer template replaces the default WPResidence footer in the locations where you assign it.
If you create and publish a custom Footer Studio template, it replaces the theme default footer for the selected display locations. If you want to keep the default footer with widget columns, copyright text, footer layout, and footer colors, use Theme Options > General > Footer instead.
Default footer help:
Footer Settings from Theme Options
Video guide
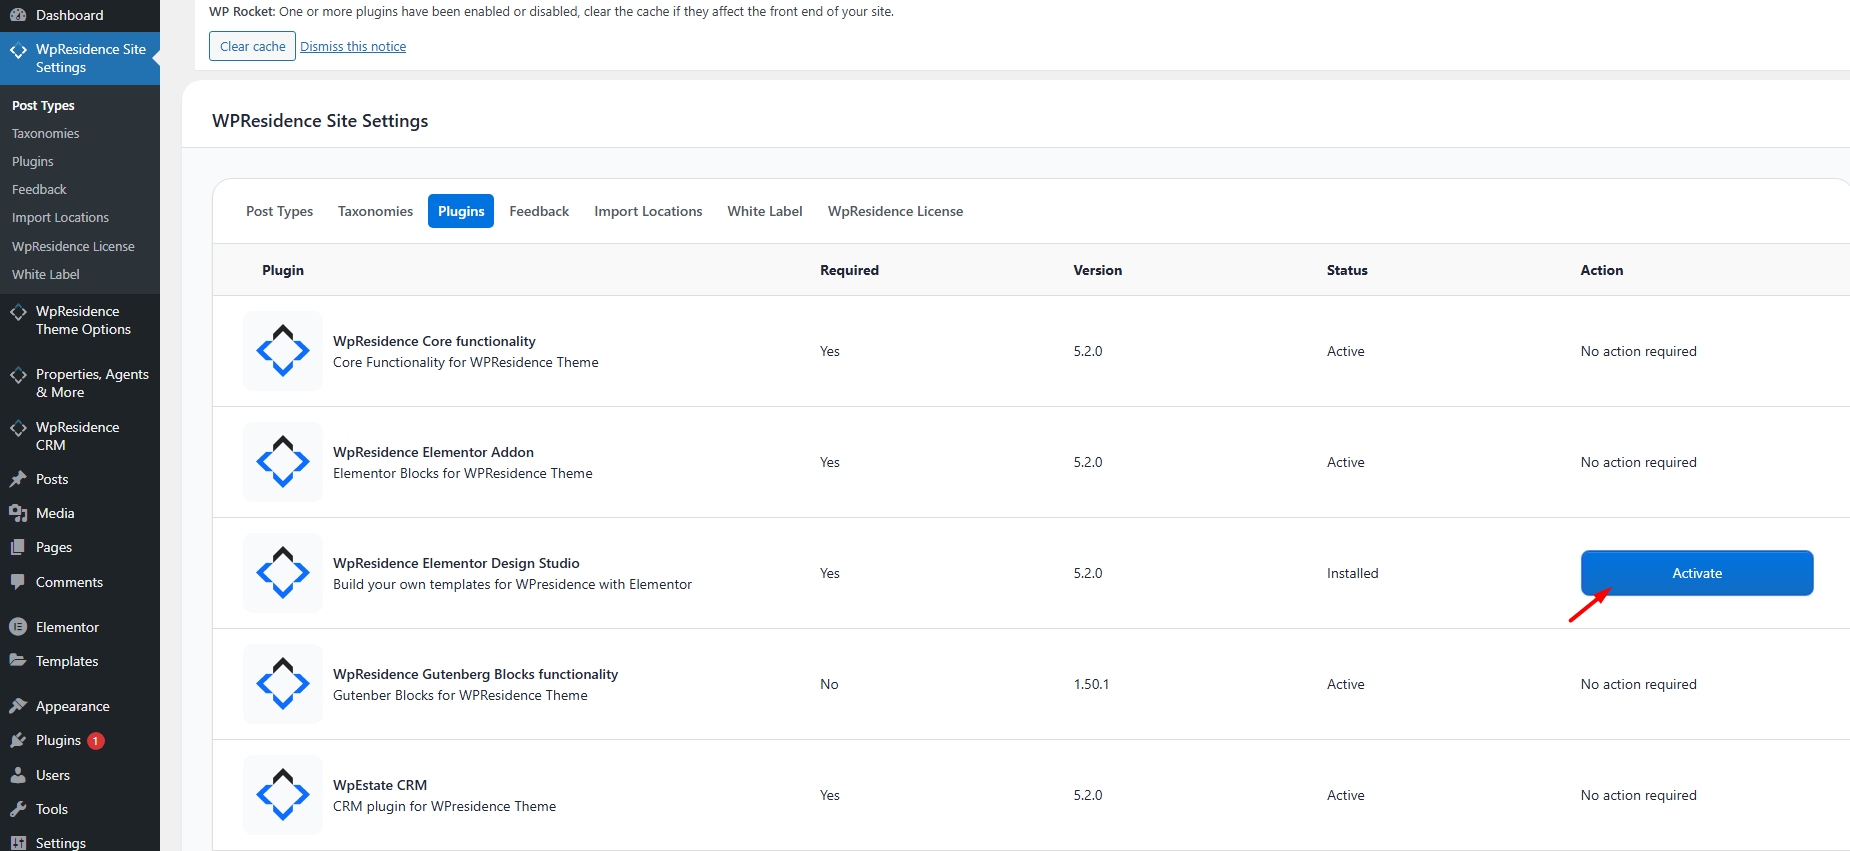
Install WPResidence Studio
Install the WPResidence Elementor Design Studio plugin.
You can install it from:
- WP Admin > Appearance > Install Plugins
- WPResidence > Site Settings > Plugins
Then install and activate WPResidence Studio.

Activate the plugin from Appearance > Install Plugins or from WpResidence Site Settings > Plugins.
Once active, you will see a new menu item:
WPResidence Studio Templates
Create Header and Footer templates
From the WordPress admin panel, open:
WPResidence Studio Templates
Click Add New WPResidence Studio Template.
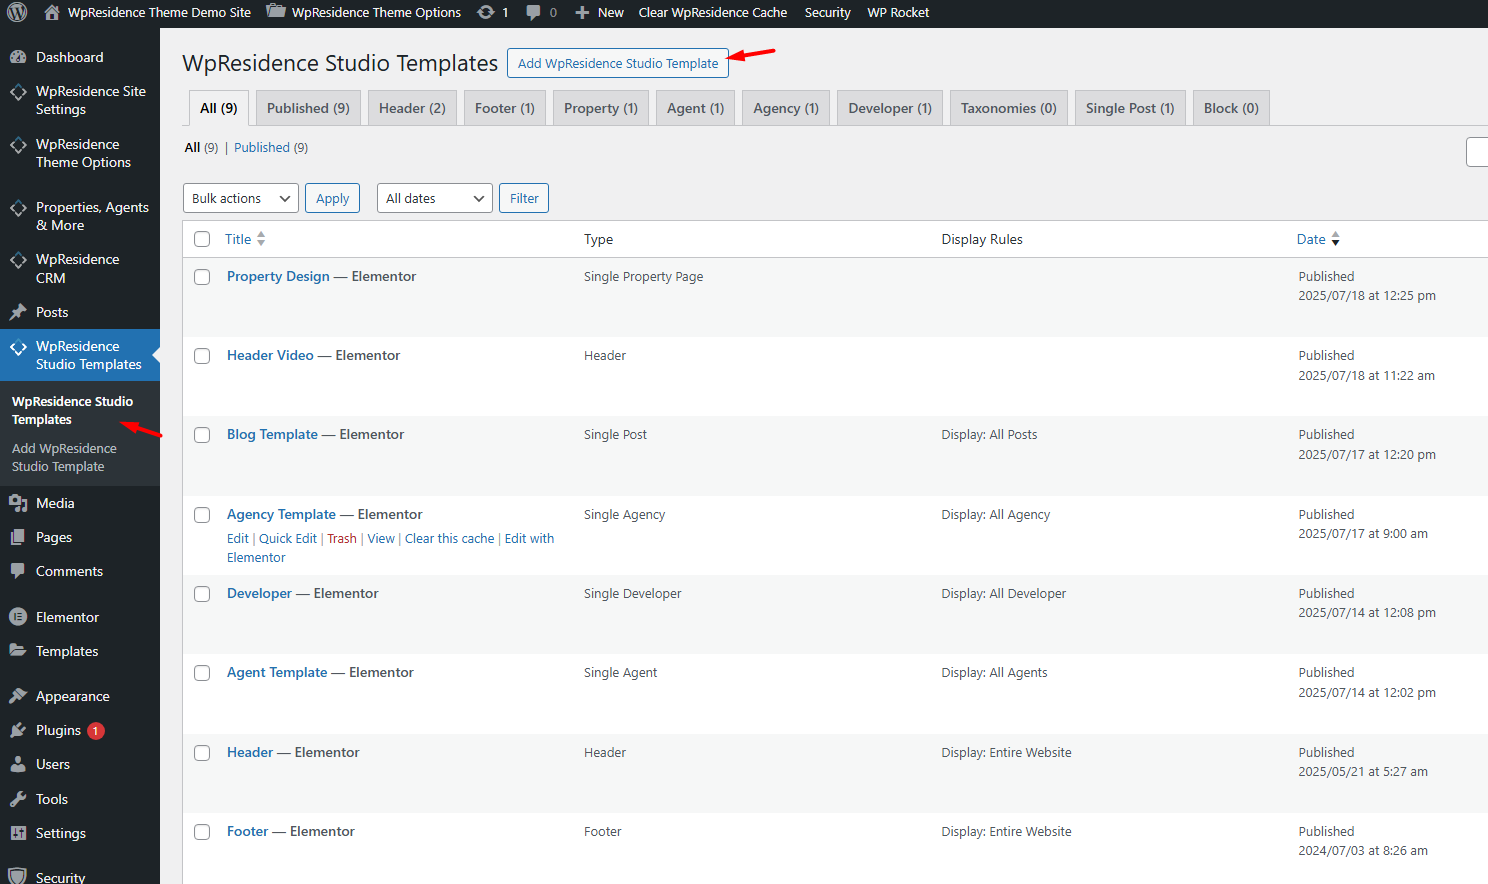
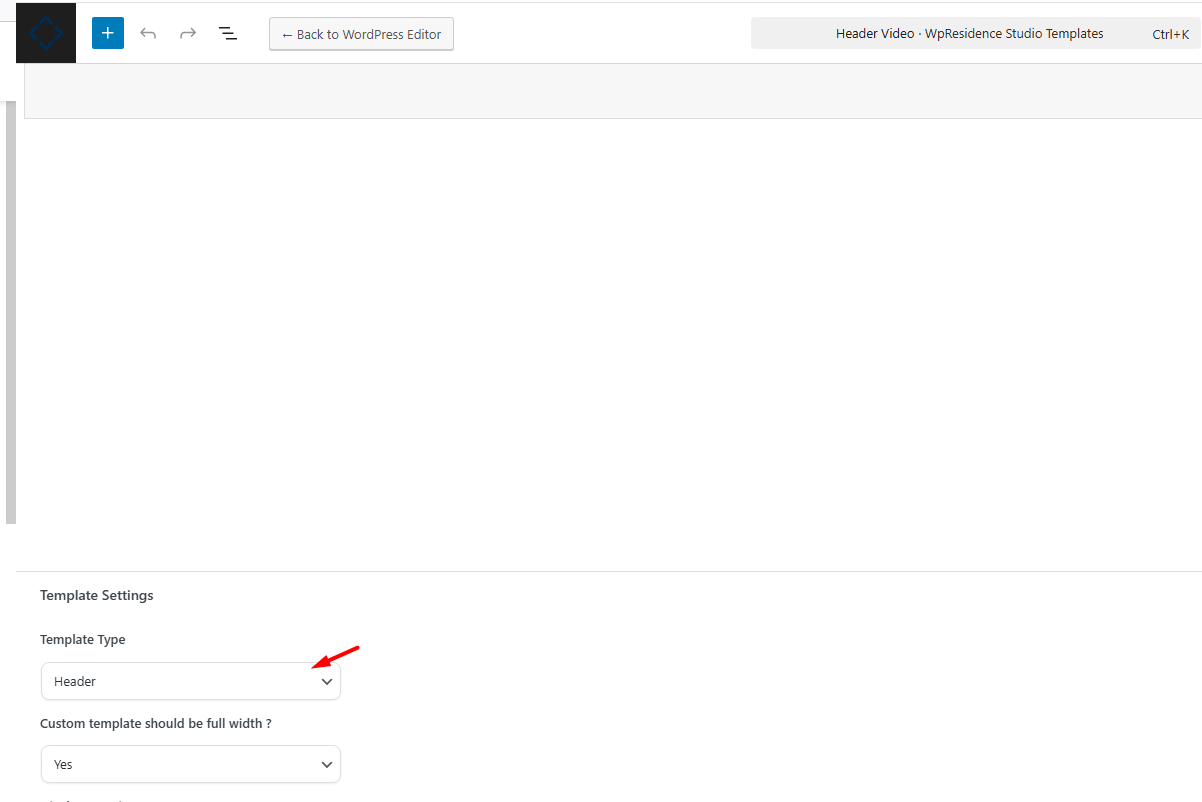
Select Header as the template type if you want to create a custom header.
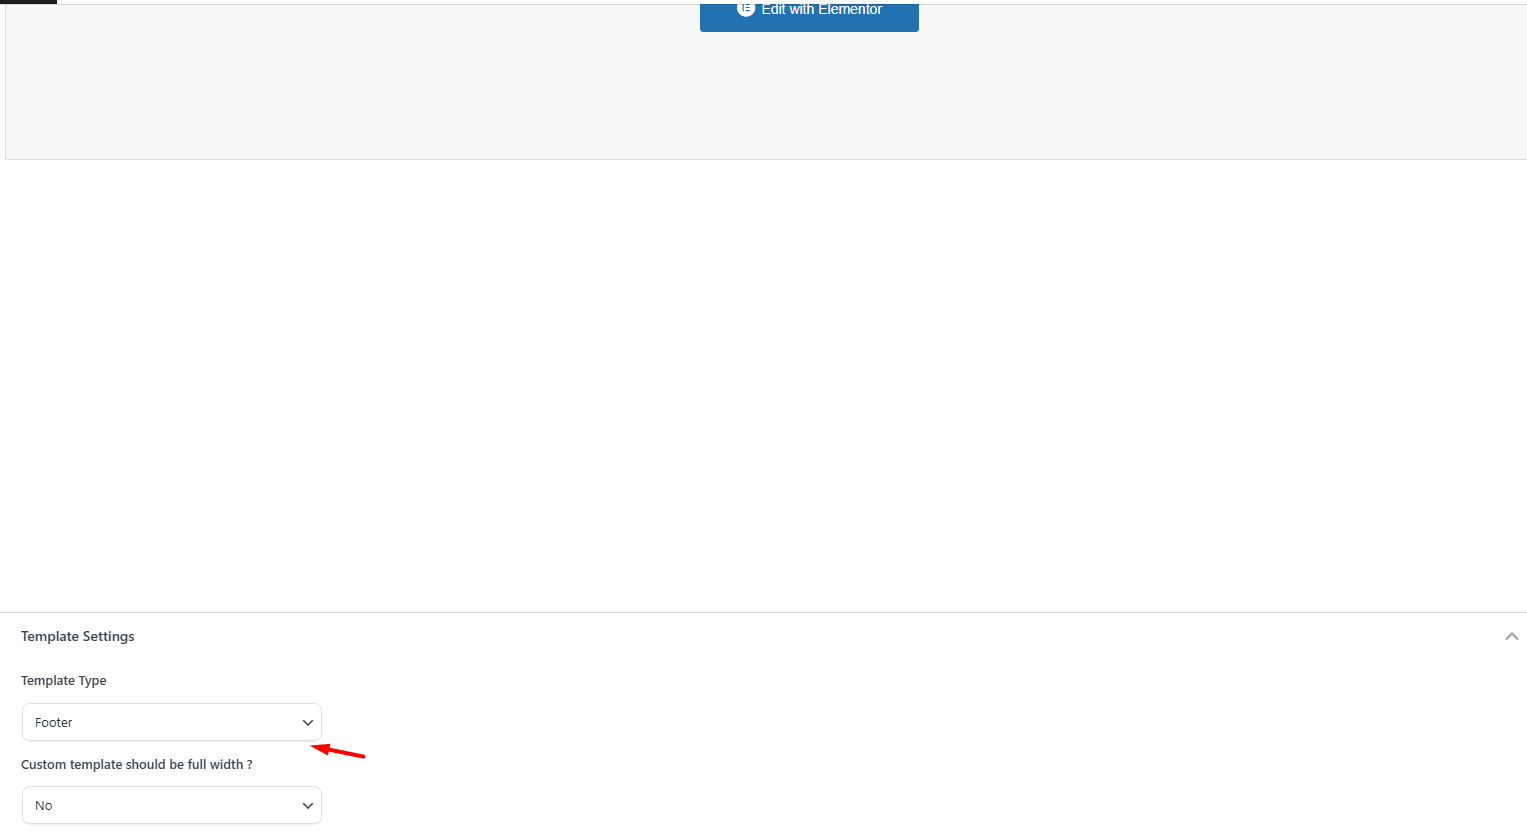
Select Footer as the template type if you want to create a custom footer.
After the template is created, publish it and open it with Edit with Elementor to design it.
Header and Footer template types
WPResidence Studio includes several template types connected to the header and footer areas.
- Header: replaces the default WPResidence header in the locations where it is assigned.
- Before Header: adds content before the custom Elementor header.
- After Header: adds content after the custom Elementor header.
- Footer: replaces the default WPResidence footer in the locations where it is assigned.
- Before Footer: adds content before the custom Elementor footer.
- After Footer: adds content after the custom Elementor footer.
The Header and Footer template types replace the theme default header and footer sections based on the display locations you select.
Set display locations
You can choose where the custom header or footer should appear.
For example, you can display a custom header or footer on:
- the entire website
- all singular pages
- all archive pages
- all properties
- all agents
- specific property taxonomy pages
- specific terms, such as one city, category, or neighborhood
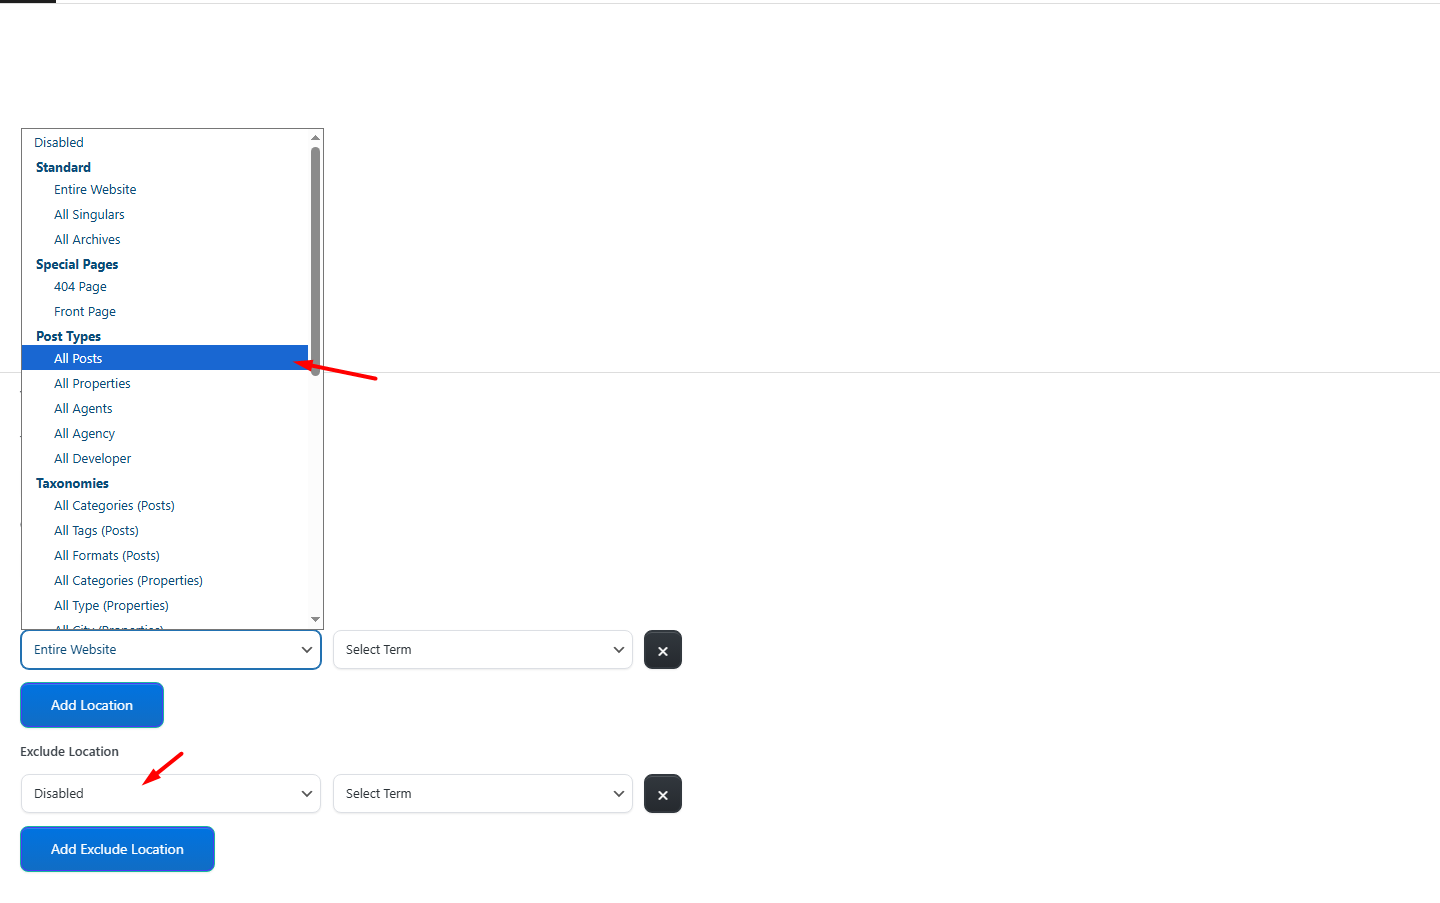
You can assign multiple display rules if needed.
Each display row can include:
- a display condition, for example All Properties
- an optional term condition, for example only property_category: Apartments
Display location options
The display location options are grouped by type.
Standard options
- Entire Website
- All Singulars, for individual posts, pages, and custom post types
- All Archives, for category, tag, and custom taxonomy archives
Special pages
- 404 Page
- Front Page
Post types
- All Blog Posts
- All Properties
- All Agents
- All Agencies
- All Developers
Post taxonomies
- All Categories
- All Tags
- All Post Formats
Property taxonomies
- Property Categories
- Property Type, such as For Rent or For Sale
- Property Cities
- Property Neighborhoods
- Property Counties / States
- Features and Amenities
- Property Status, such as Completed or Off-Plan
Agent taxonomies
- Agent Categories
- Agent Action Categories
- Agent Cities
- Agent Neighborhoods
- Agent Counties / States
Agency taxonomies
- Agency Categories
- Agency Action Categories
- Agency Cities
- Agency Neighborhoods
- Agency Counties / States
Developer taxonomies
- Developer Categories
- Developer Actions
- Developer Cities
- Developer Neighborhoods
- Developer Counties / States
Other
- Review Categories
Term-specific assignments
In addition to selecting a taxonomy, such as Property Cities, you can assign the header or footer to a specific term using the second dropdown.
For example, you can assign a custom header only to Property City: Dubai.
Disabled option
Use Disabled to deactivate a custom header or footer for a specific display row.
Design the header or footer with Elementor
Use the Edit with Elementor button to design your custom header or footer.
Elementor gives you a drag-and-drop editor where you can manage the layout, widgets, spacing, colors, images, menus, buttons, and content.

After saving, test the header or footer on the frontend in the display locations you selected.
If the new header or footer does not show, check the display location rules and clear cache after saving the template.
When to use the default footer instead
Use the default footer from:
Theme Options > General > Footer
when you want to manage the footer using the theme options instead of Elementor.
The default footer is recommended if you want to control:
- footer widget columns
- copyright text
- footer colors
- footer background
- sticky footer behavior
- footer layout
Full documentation:
Footer Settings from Theme Options