This guide explains how to create and assign a custom single blog post template using WpResidence Studio Templates and Elementor Free.
WPResidence already includes a default blog post layout. You can read more about the default blog options here:
Blog List Page.
Use a Studio template if you want to fully customize the single blog post page design, including the title, featured image, content area, author box, share buttons, related posts, comments, and navigation.
Install and activate WpResidence Studio
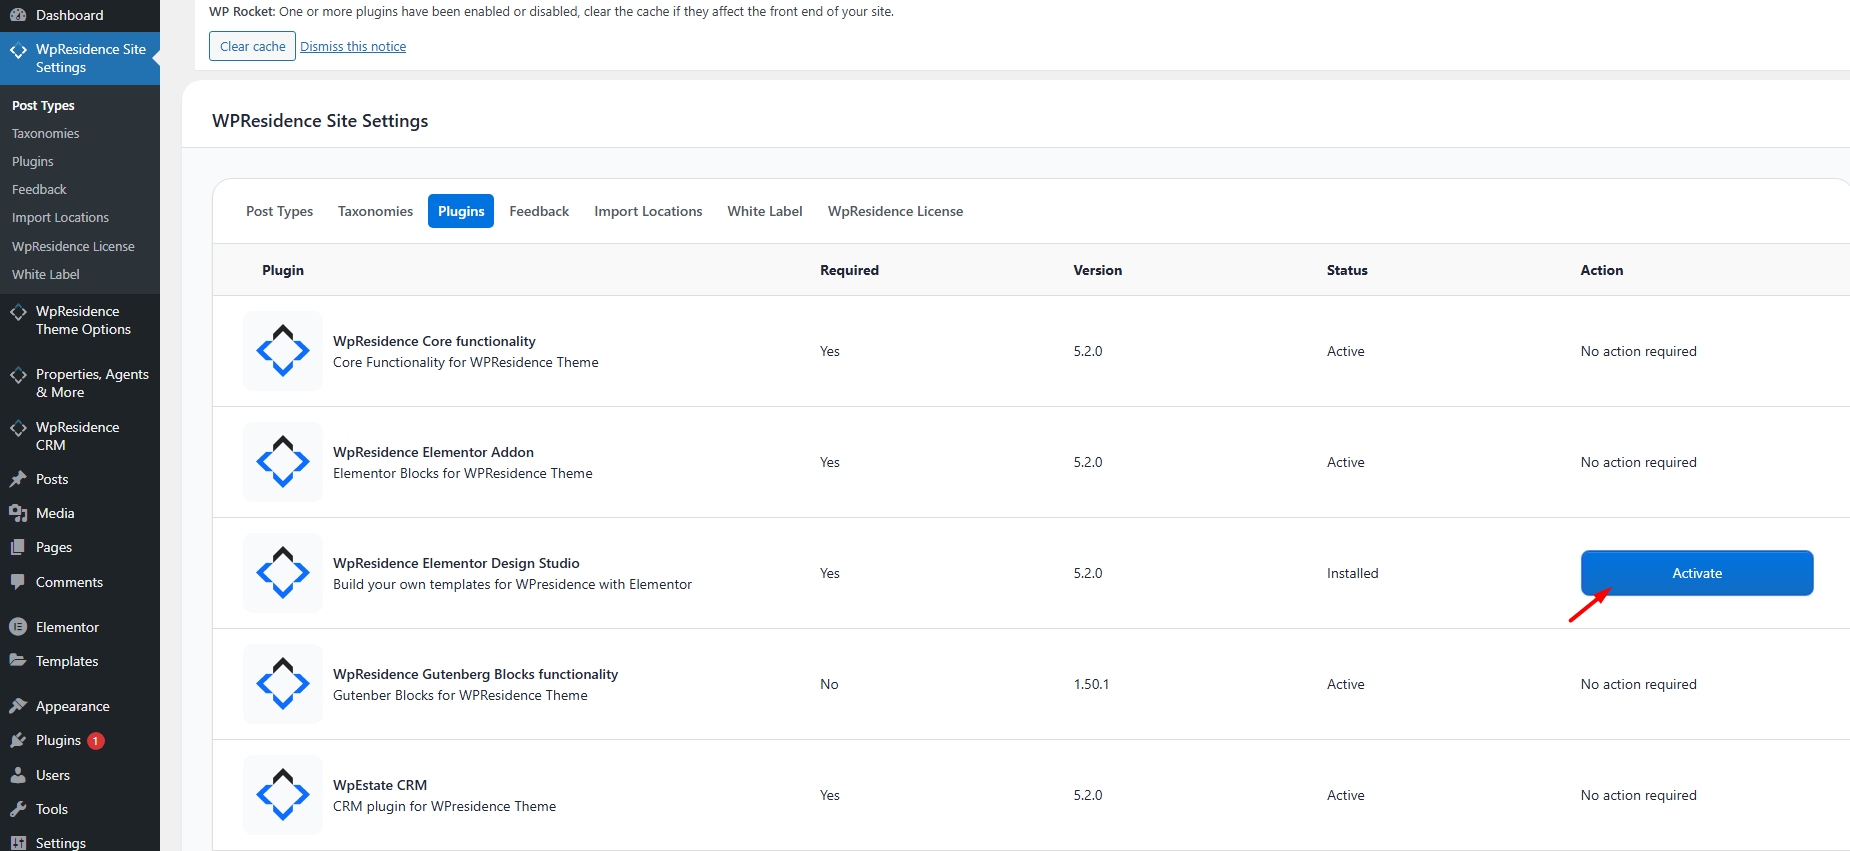
To create custom blog post templates, first install and activate the WpResidence Elementor Design Studio plugin.
You can install it from:
- WP Admin > Appearance > Install Plugins
- or WpResidence > Site Settings > Plugins
Install and activate:
WpResidence Studio

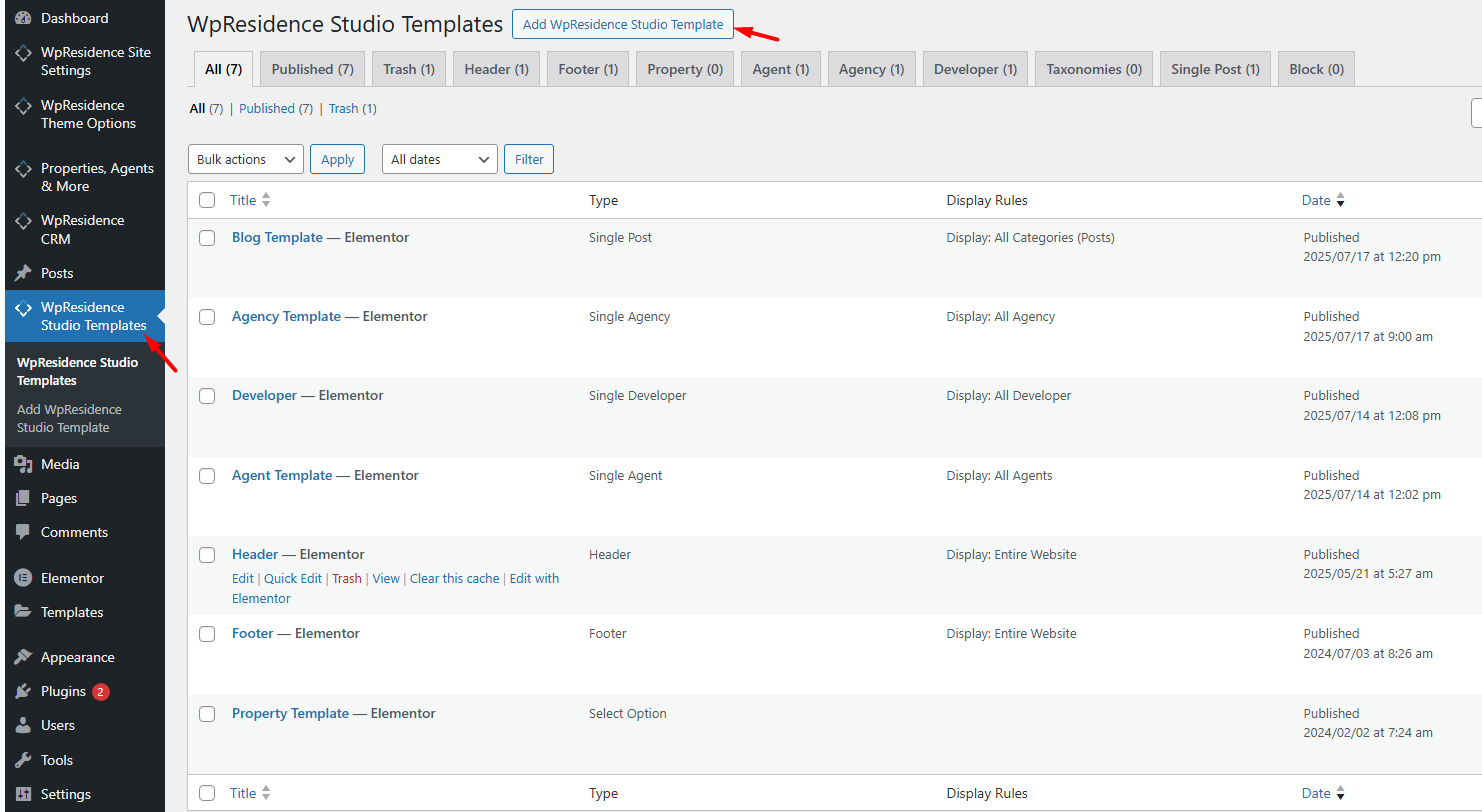
After the plugin is active, you will see a new admin menu:
WpResidence Studio Templates
Create a custom blog post template
- Go to WpResidence Studio Templates > Add New.
- Add a template name, for example Blog Layout – Clean.
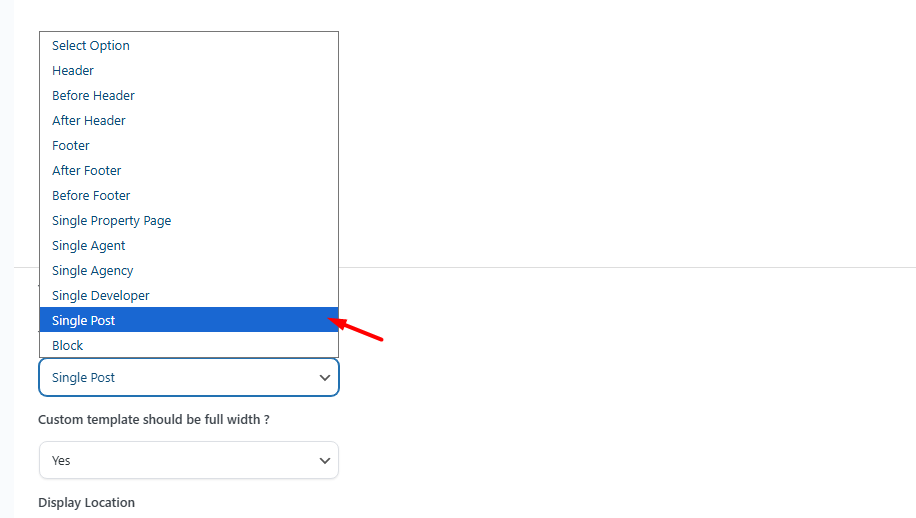
- For Template Type, choose Single Post.
- Set Elementor Full Width to Yes if you want to manage the layout and spacing from Elementor.
- Click Publish.
- Click Edit with Elementor.
Optional: Import an existing Studio template
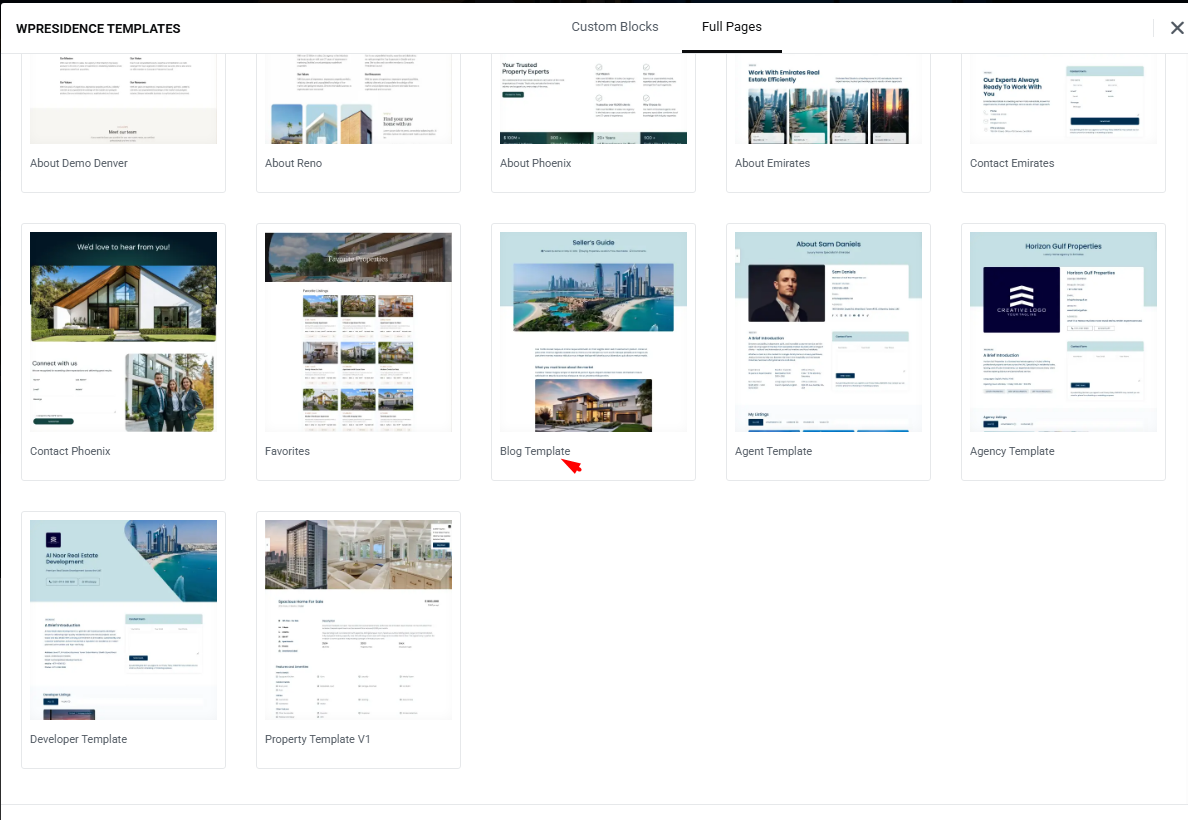
You can build the design from scratch, or you can import a prebuilt Studio template and edit it.
- Click Edit with Elementor to open the Elementor editor.
- Click the Folder icon in Elementor.
- Open the WpResidence Design Studio Templates library.
- Click Insert to add the template.
- Edit the layout, text, spacing, and widgets as needed.


Design the blog layout with Elementor
After opening the template with Elementor, you can create the blog post layout using drag-and-drop widgets.
You can control the layout, columns, spacing, typography, colors, and the position of each blog post element.
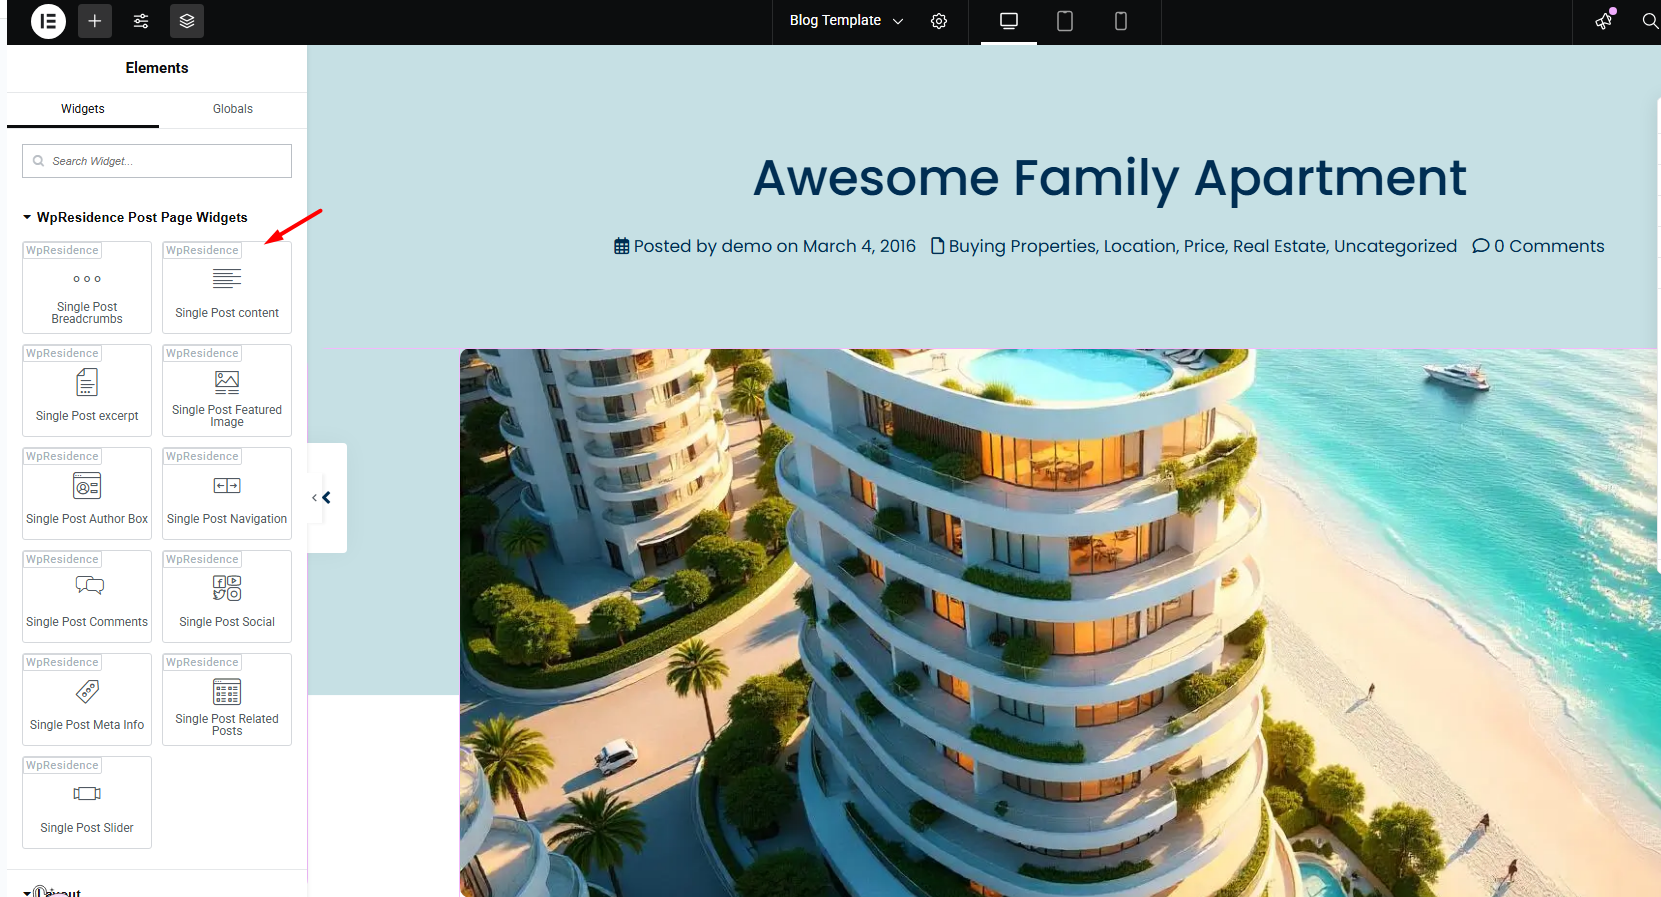
Blog post widgets available in Elementor
Inside Elementor, look for:
WpResidence > Post Page Widgets
These widgets are available for the blog post template:
- Title
- Featured Image
- Post Meta – author, date, category
- Post Content
- Tags
- Share Buttons
- Author Box
- Related Posts
- Next / Previous Navigation
- Comments Section
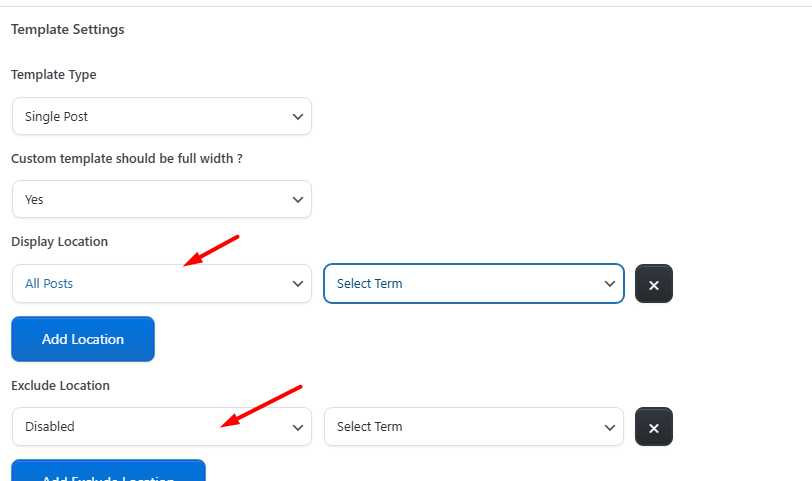
Assign the template to blog posts
After the template is ready, assign it from Theme Options.
- Go to Theme Options > Blog Settings.
- Find Template for Blog Post.
- Select the Studio template you created.
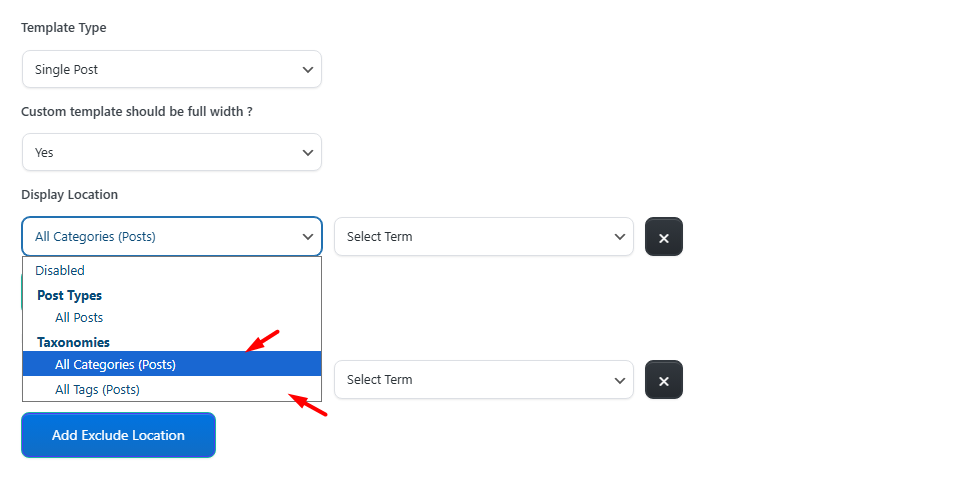
- Choose where the template should apply.
- Save changes.
You can assign the template to:
- All blog posts
- Specific blog categories
- Specific blog tags

After saving, open a blog post on the front end to check the new layout.
Important notes
- This template is for single blog posts, not for the blog list/archive page.
- The template type must be Single Post.
- The template works with Elementor Free.
- Use the widgets from WpResidence > Post Page Widgets for dynamic blog post content.
- If a widget does not show content, test the template on a real published blog post.
- After assigning the template, clear cache if the old blog design still appears.