
Overview
WPResidence has 50 ready-made demos. A demo import adds the demo’s Theme Options, pages, menus, widgets, demo properties and media to your site. Every demo has its own video in Demo import video tutorials.
The current demos are built with Elementor. WPBakery is optional and the demos do not use it.
Before you import a demo
- Import one demo on a clean WordPress installation.
- The import replaces your Theme Options with the demo’s settings.
- Importing a second demo on top of the first duplicates menus, widgets, pages and properties, and the homepage does not change. To switch demos, reset WordPress first.
- To use pages or sections from another demo, import them with WPResidence Design Studio templates instead of a full demo.
Check the server requirements
The import downloads and saves a lot of content. Before you start, check that your hosting meets the server requirements: max_execution_time 600, memory_limit 512M, post_max_size 64M, upload_max_filesize 64M.
Install and activate WPResidence
- Download the installable theme ZIP (wpresidence.zip):
- Bought on wpresidence.net: My Licenses on care.wpestate.org, button Download theme.
- Bought on ThemeForest: unzip the full package from your ThemeForest Downloads and use wpresidence.zip from inside it.
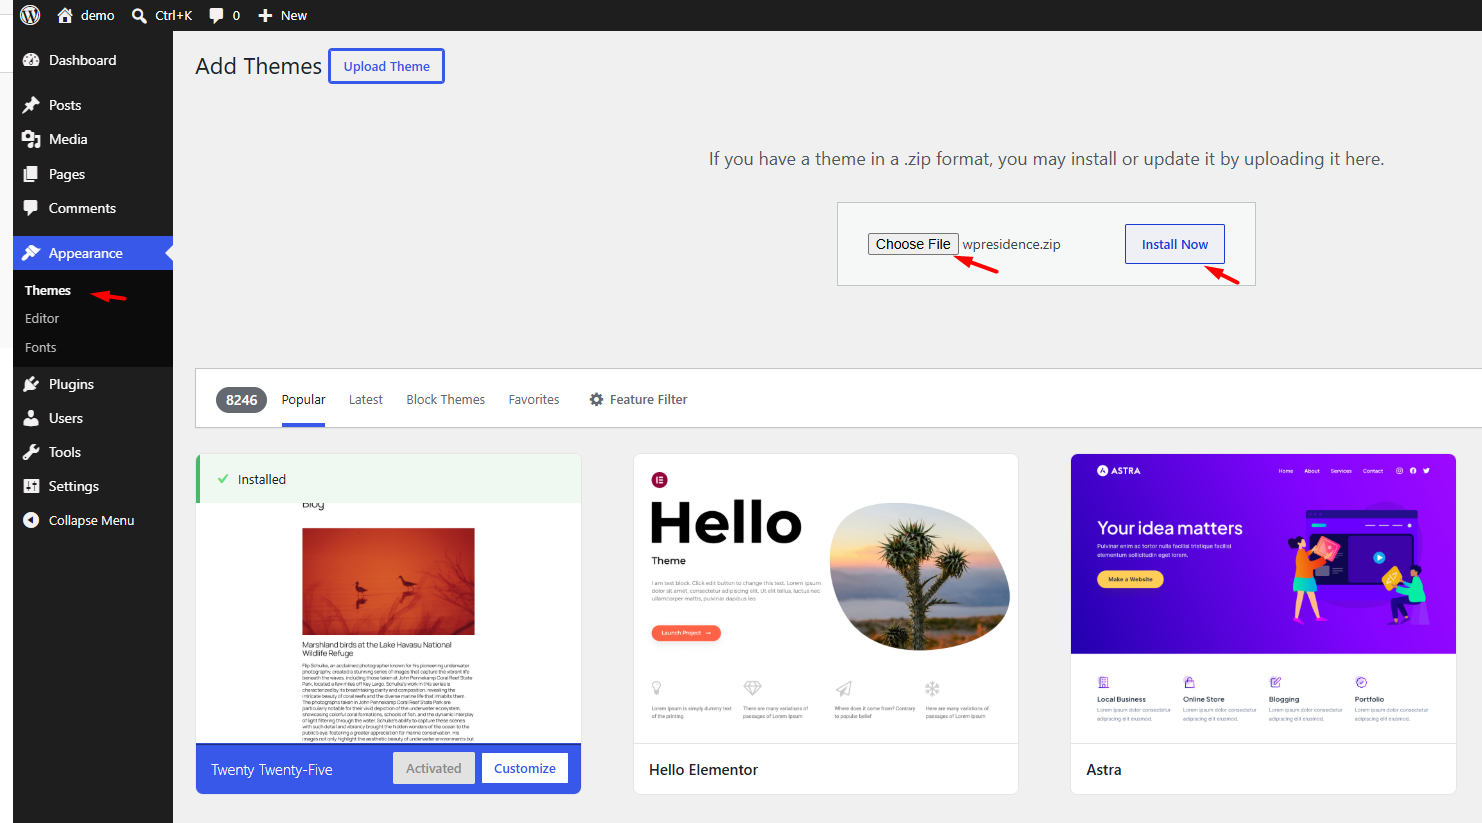
- Go to Appearance → Themes → Add New → Upload Theme.
- Upload wpresidence.zip and click Install Now.
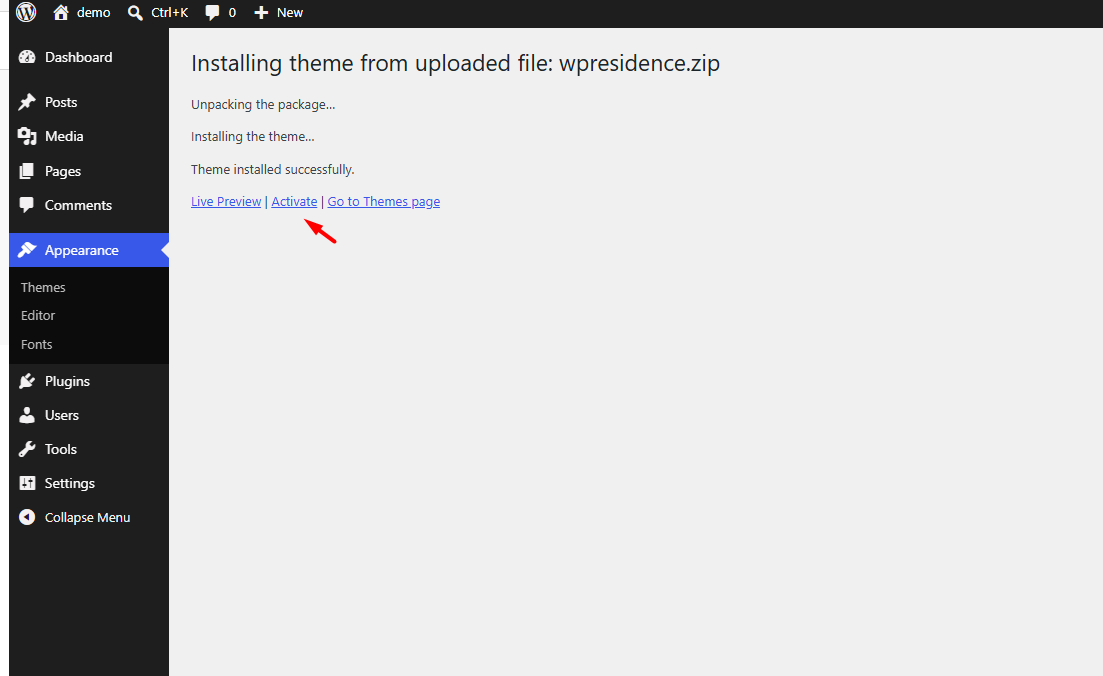
- Click Activate.
Install the required plugins
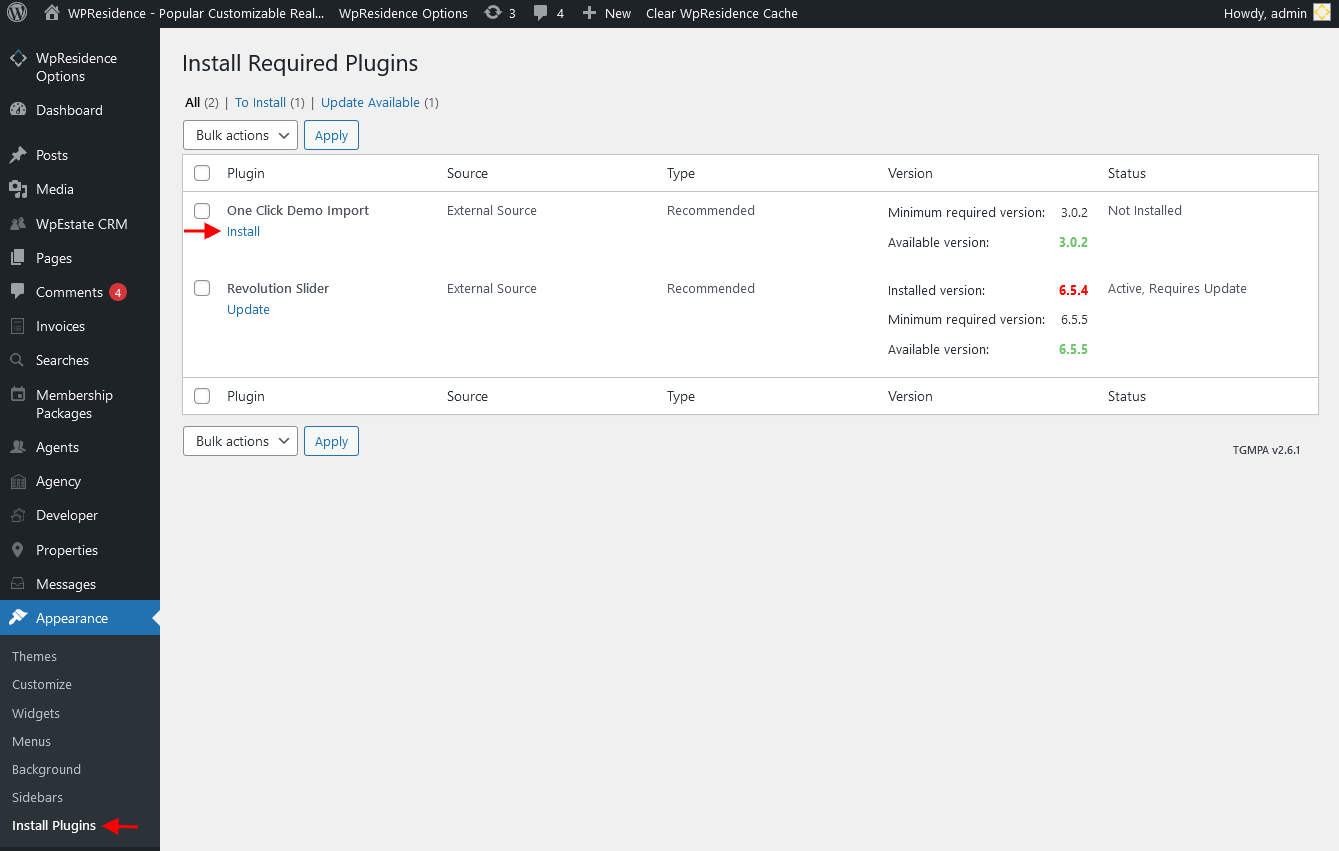
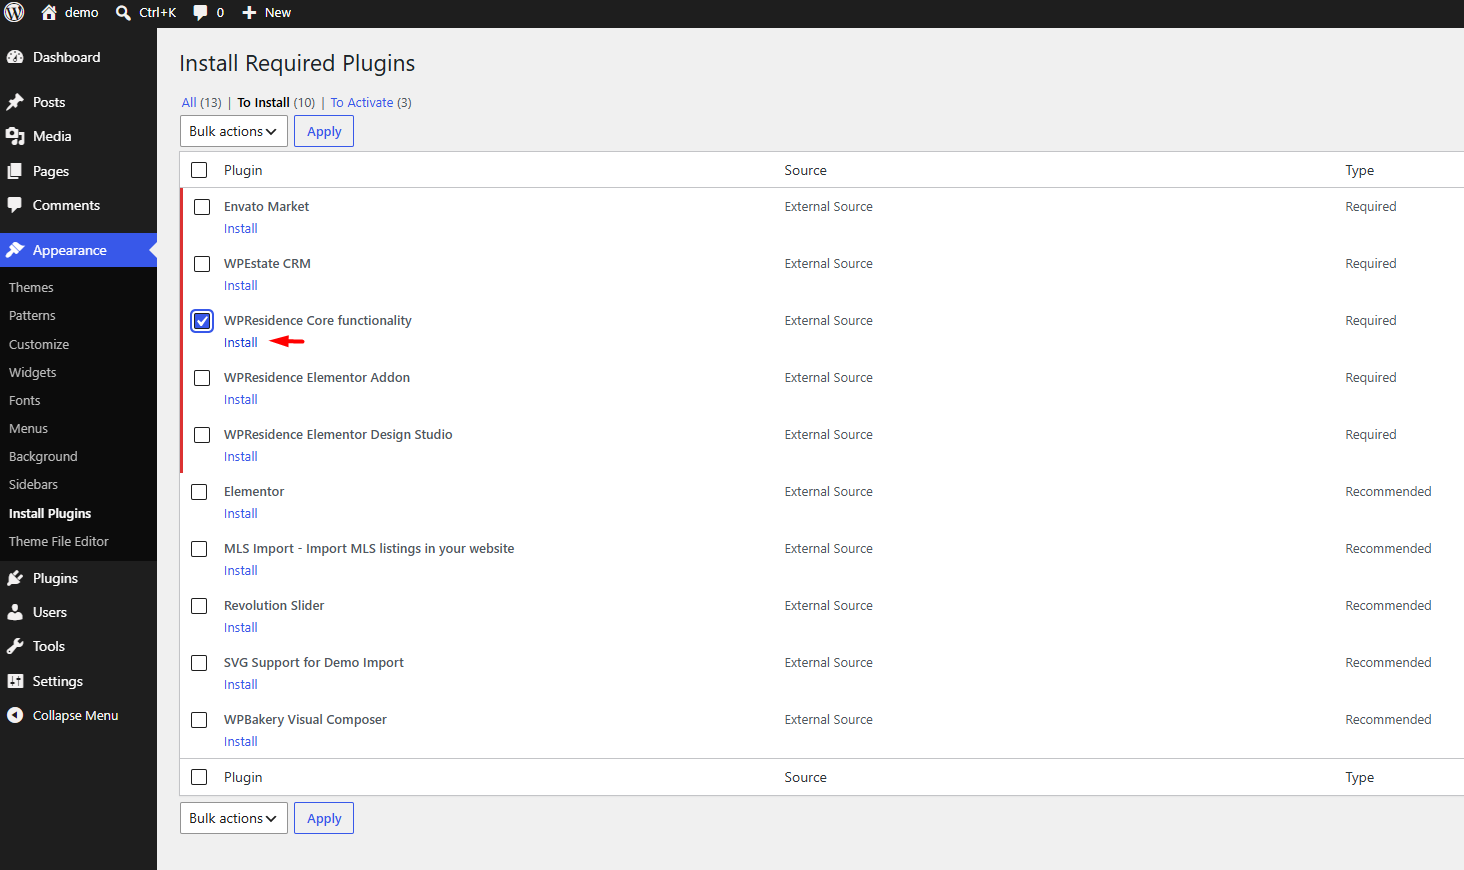
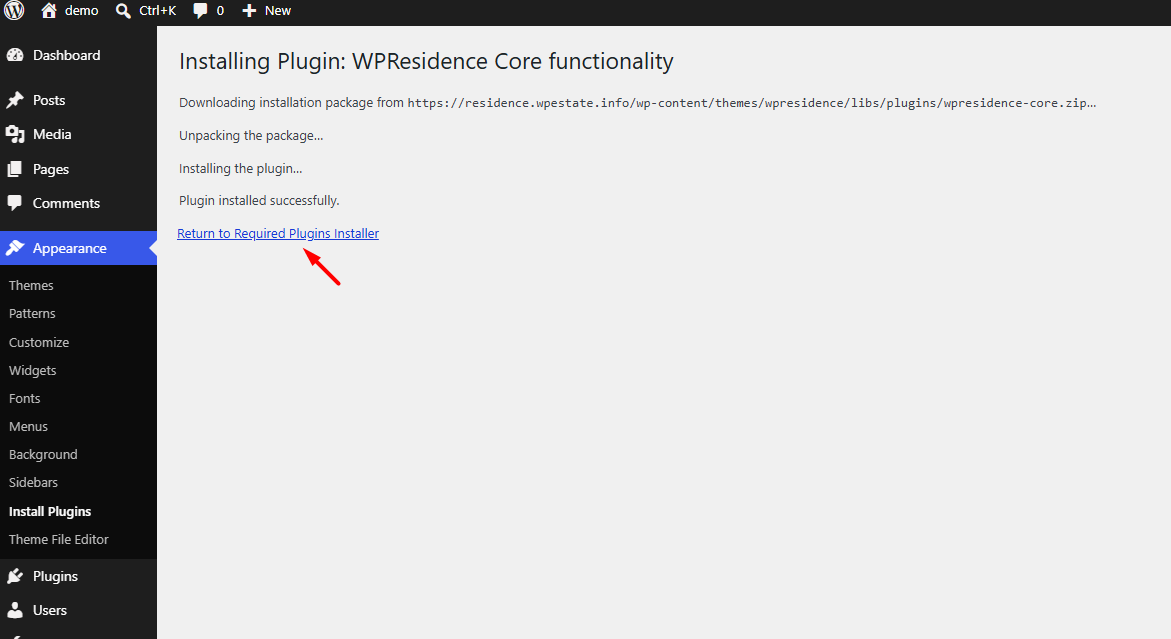
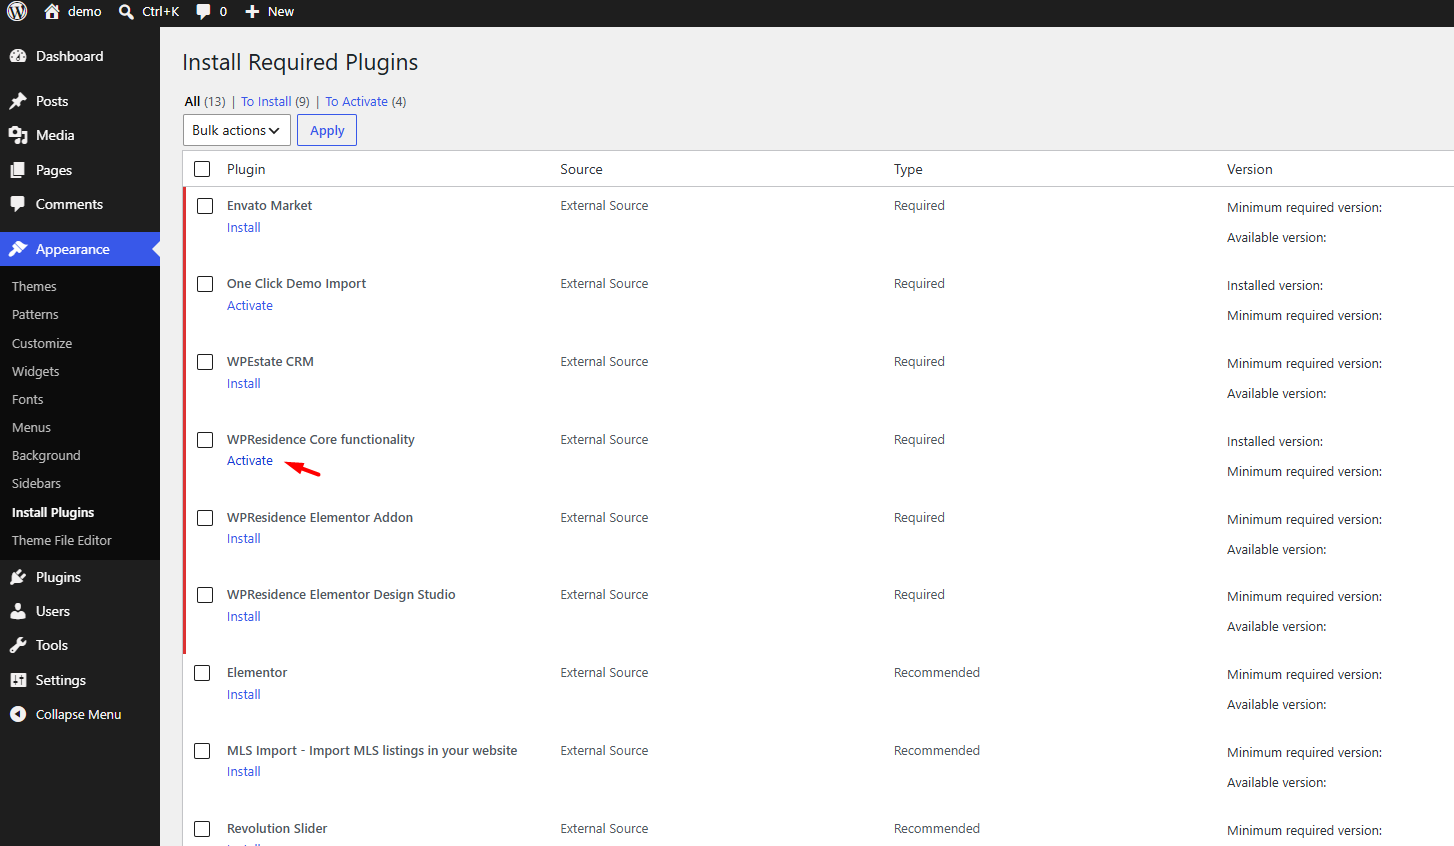
Go to Appearance → Install Plugins and install and activate:
- WPResidence Core functionality: required for the theme and the demos.
- One Click Demo Import: runs the import. You can delete it after the import.
- Elementor, WPResidence Elementor Addon and WPResidence Elementor Design Studio: the demos need them to display correctly.
- SVG Support for Demo Import: see Allow SVG icons.
Register the theme license
The import needs a registered license. Register it on the license panel that appears in wp-admin:
- Bought on wpresidence.net: your license key.
- Bought on ThemeForest: your ThemeForest username and purchase code.
Where to find them: Get your license code and register it.
Allow SVG icons
WordPress blocks SVG files, and some demos use SVG icons. Before the import, install SVG Support for Demo Import from Appearance → Install Plugins, then allow SVG uploads for administrators only in its settings.
Import the demo
Before you start, turn off cache and optimization plugins.
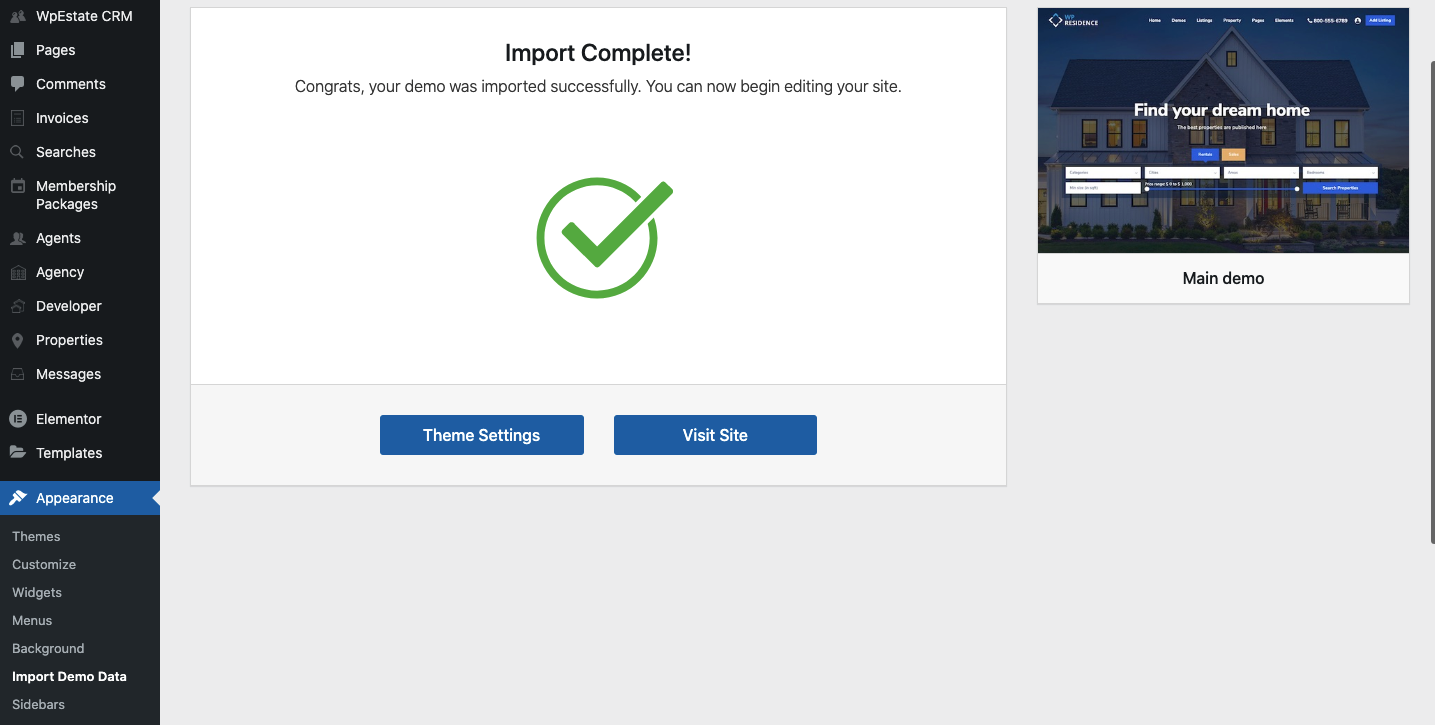
- Go to Appearance → Import Demo Data.
- Pick a demo and click Import Demo.
- Wait until the import finishes. Do not refresh the page or close the tab.

If the demos are not listed
If Import Demo Data shows no demos, check:
- WPResidence is active and was installed from wpresidence.zip, not from the full ThemeForest package.
- The theme license is registered.
- WPResidence Core functionality and One Click Demo Import are active.
- Cache, optimization, firewall and security plugins are turned off. Then refresh the page.
- The server meets the server requirements.
If the demos are still missing, open a ticket on care.wpestate.org with your site URL, temporary wp-admin access and a screenshot of the Import Demo Data page.
After the import
- Delete the One Click Demo Import plugin.
- Check the homepage, menus and widgets.
- Open a few Elementor pages and check that they display correctly.
- Replace the demo images and text with your own.
- Clear the cache.
Import Revolution Slider demos
If the demo uses Revolution Slider, import its slider by hand:
- Unzip the full WPResidence package: Download WP Residence package on care.wpestate.org, or the full package from ThemeForest.
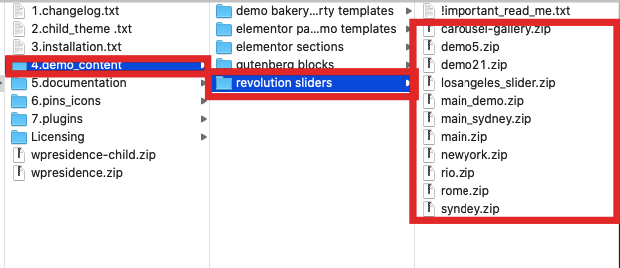
- Open the demo_content/revolution sliders folder.
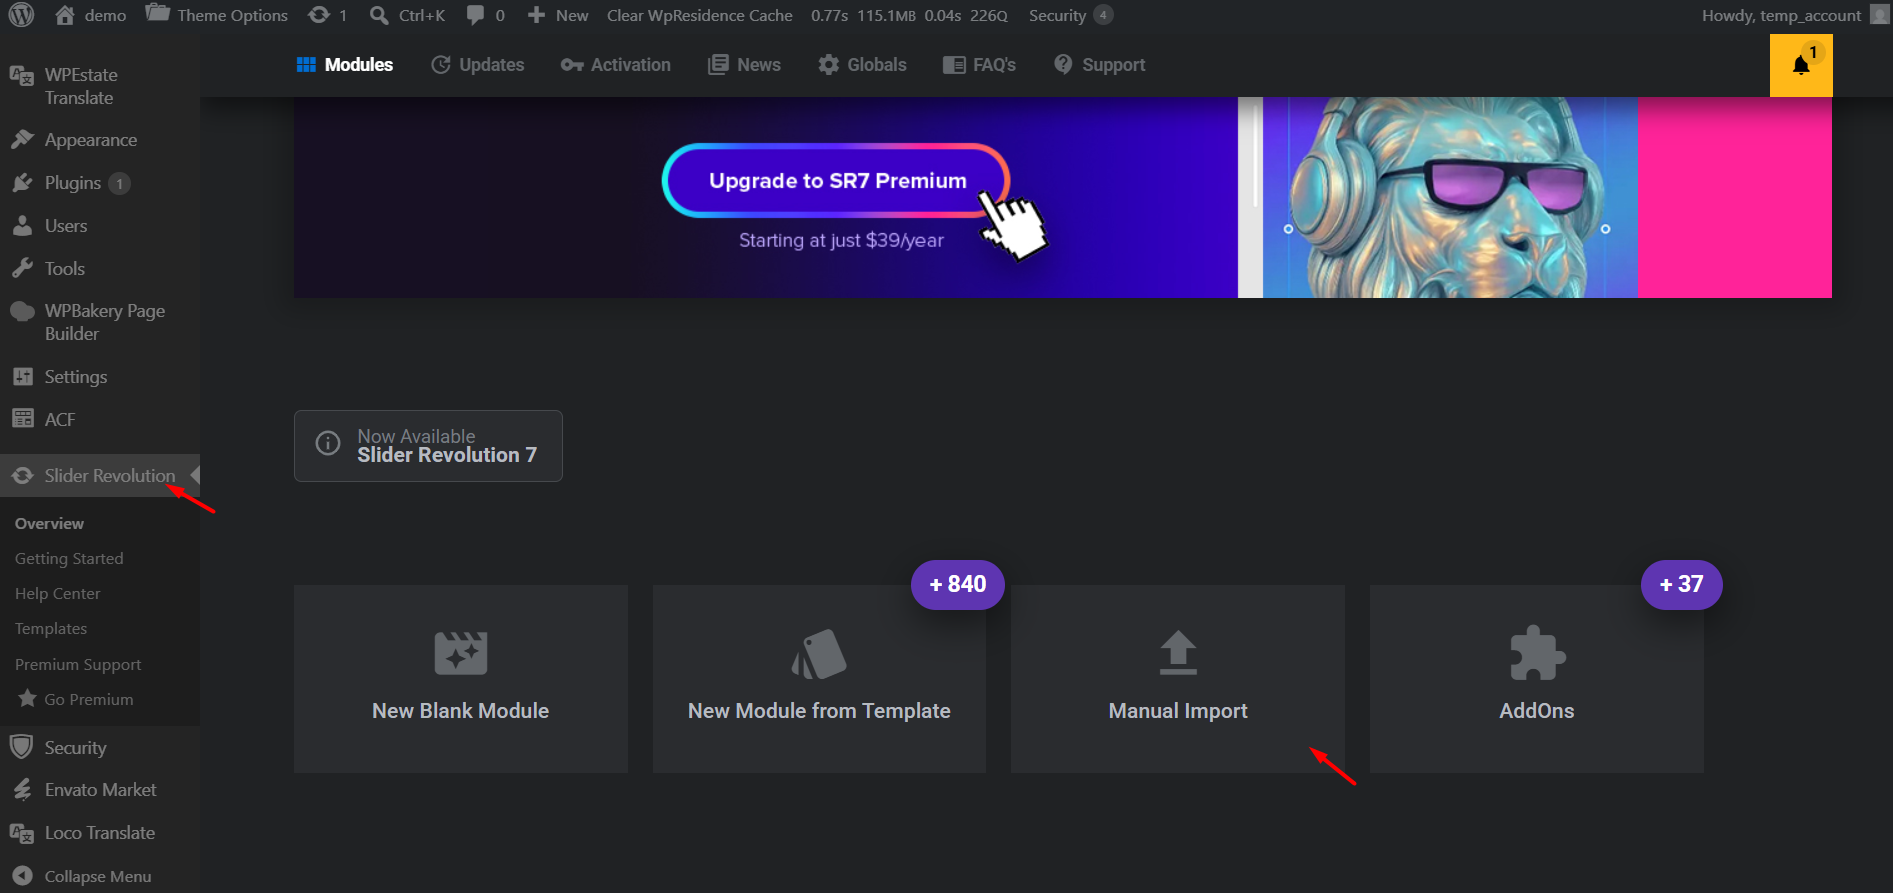
- Go to Revolution Slider → Import, select the slider ZIP and click Import.
If Elementor does not load
If Edit with Elementor opens a Page Not Found page, shows a critical error or does not load:
- Go to Elementor → Settings → Advanced and enable Switch Editor Loader Method. Save, then try again.
- If it still fails: update Elementor and WPResidence Elementor Addon, save Settings → Permalinks again, clear all caches, and ask your host to check ModSecurity and firewall rules for blocked Elementor requests.
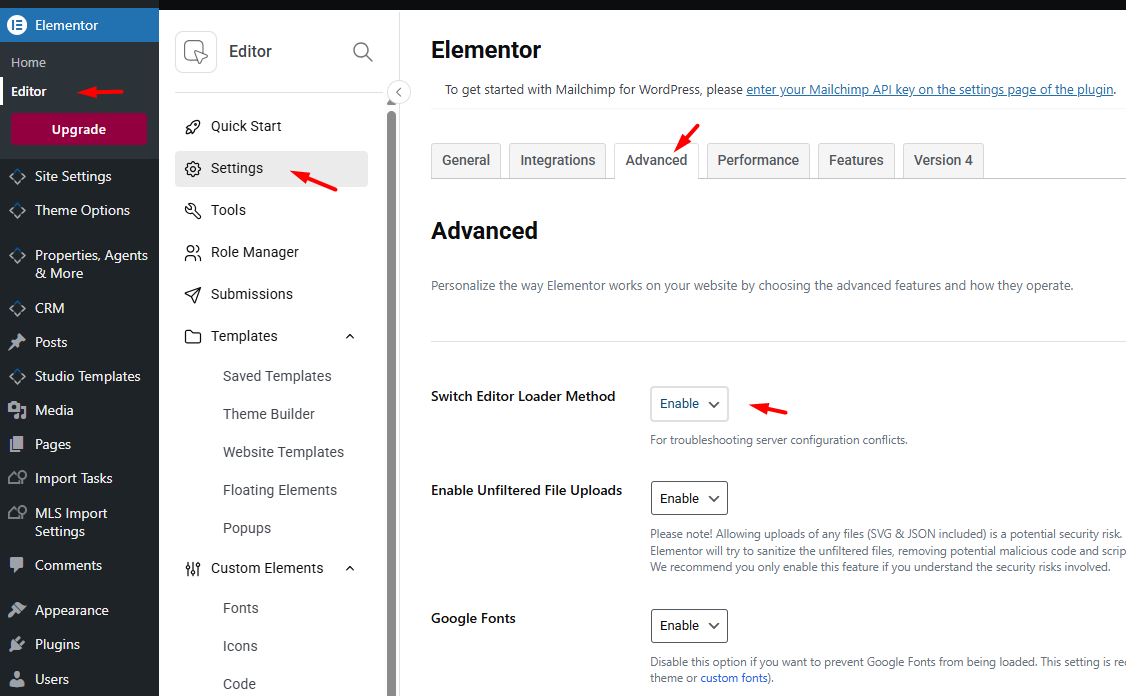
If Elementor loads after step 1, you do not need to import the demo again.
If the demo import fails
Errors such as Import Failed, Whoops, there was a problem importing your content, 500 or 503 usually come from server limits, cache or blocked requests. The checks and fixes are in If demo content import fails.