
Search labels, buttons, dashboard messages, emails and notices come from the theme and plugin code. You translate them in two places: .po files, and the Theme & Plugins Strings screen of WPEstate Translate. This article shows how to use both.
Two Ways to Translate Strings
| Where | Best for |
|---|---|
| .po files, edited with Loco Translate | The default language, and complete translations of the theme and plugins in other languages. The WPResidence child theme already ships .po files for many languages. |
| WPEstate Translate > Theme & Plugins Strings | The other languages of a multilingual site: see what the .po files already translate, fill in the gaps, change single texts, or let a translation service fill a whole group. |
A text translated in Theme & Plugins Strings replaces the same text from the .po file. A text you leave empty there keeps the .po translation.
Start with the .po Files
Activate the WPResidence child theme. Its languages folder holds ready translations, and updates do not overwrite it. At the top of Theme & Plugins Strings, a message tells you whether a child theme with translation files was found, and the box Where are translation files loaded from? lists the .po files in use.
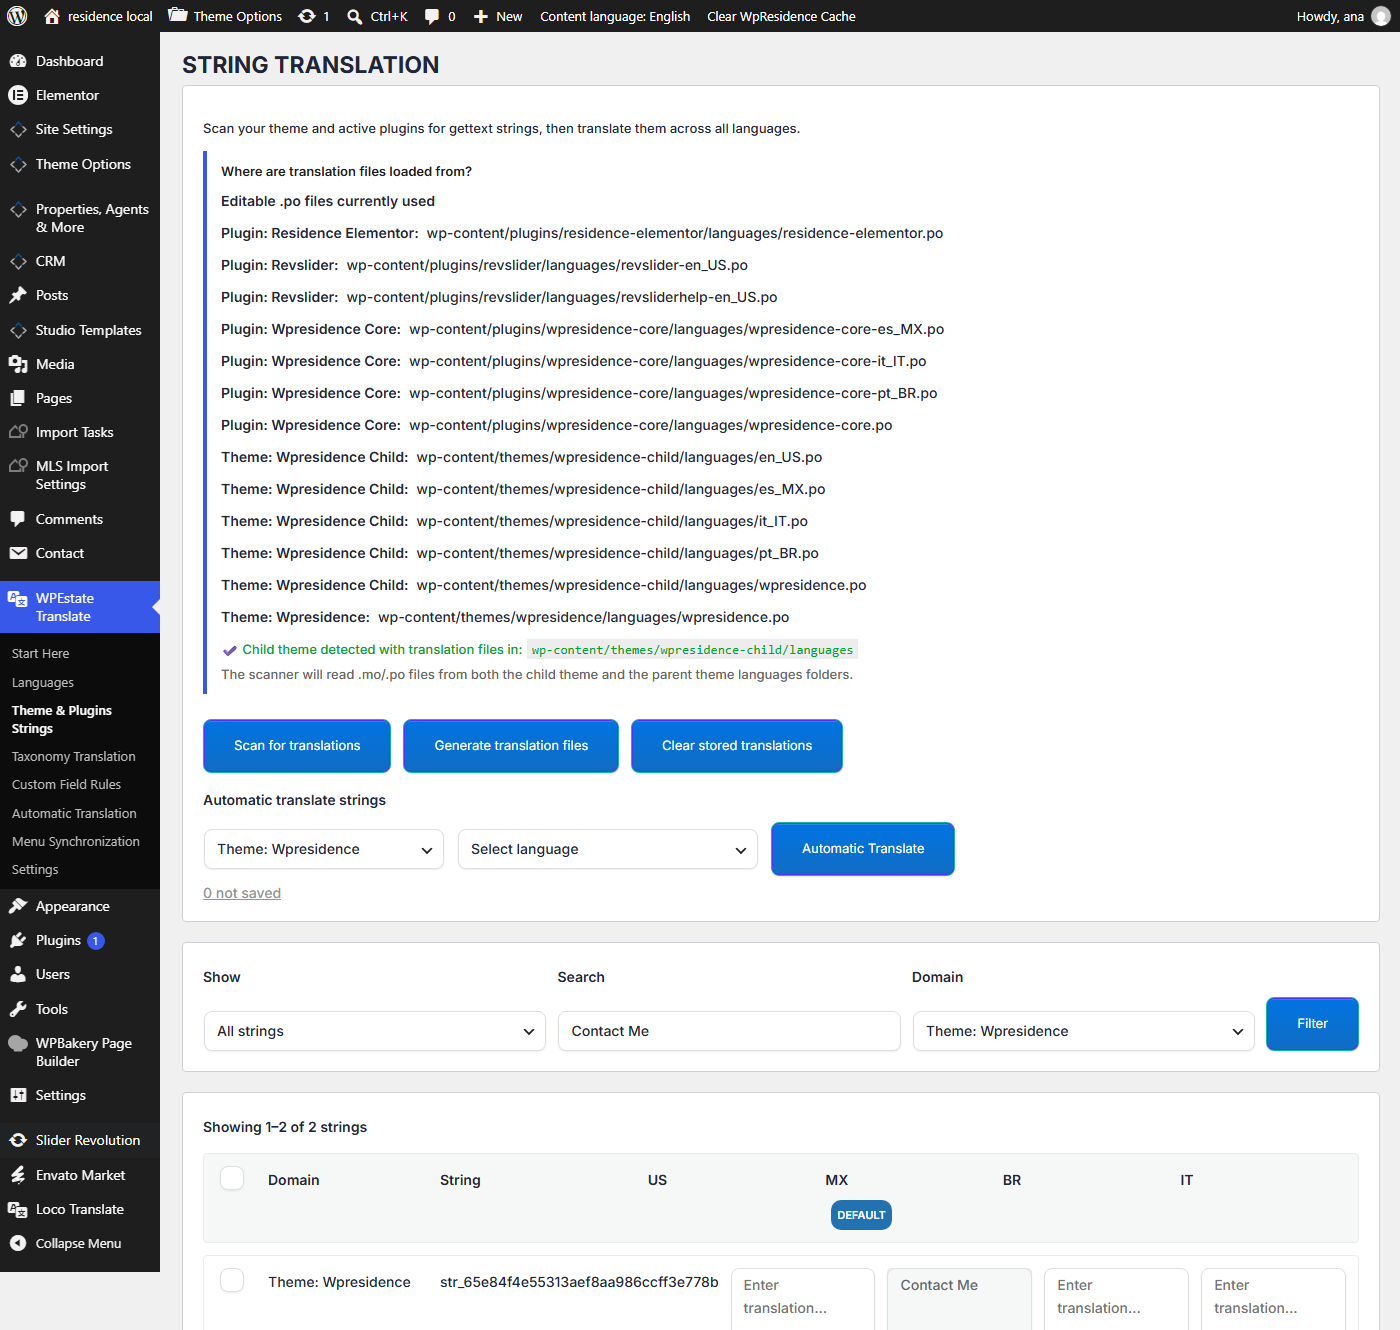
To edit a .po file with Loco Translate, see How to translate WPResidence. For how the files load, see Gettext and MO Files.
Scan the Strings
- Go to WPEstate Translate > Theme & Plugins Strings. The screen is titled String Translation.
- Click Scan for translations. The plugin reads the theme, the child theme and the active plugins, and fills each language column with the translations already in their .po files. A notice tells you how many new strings were found.
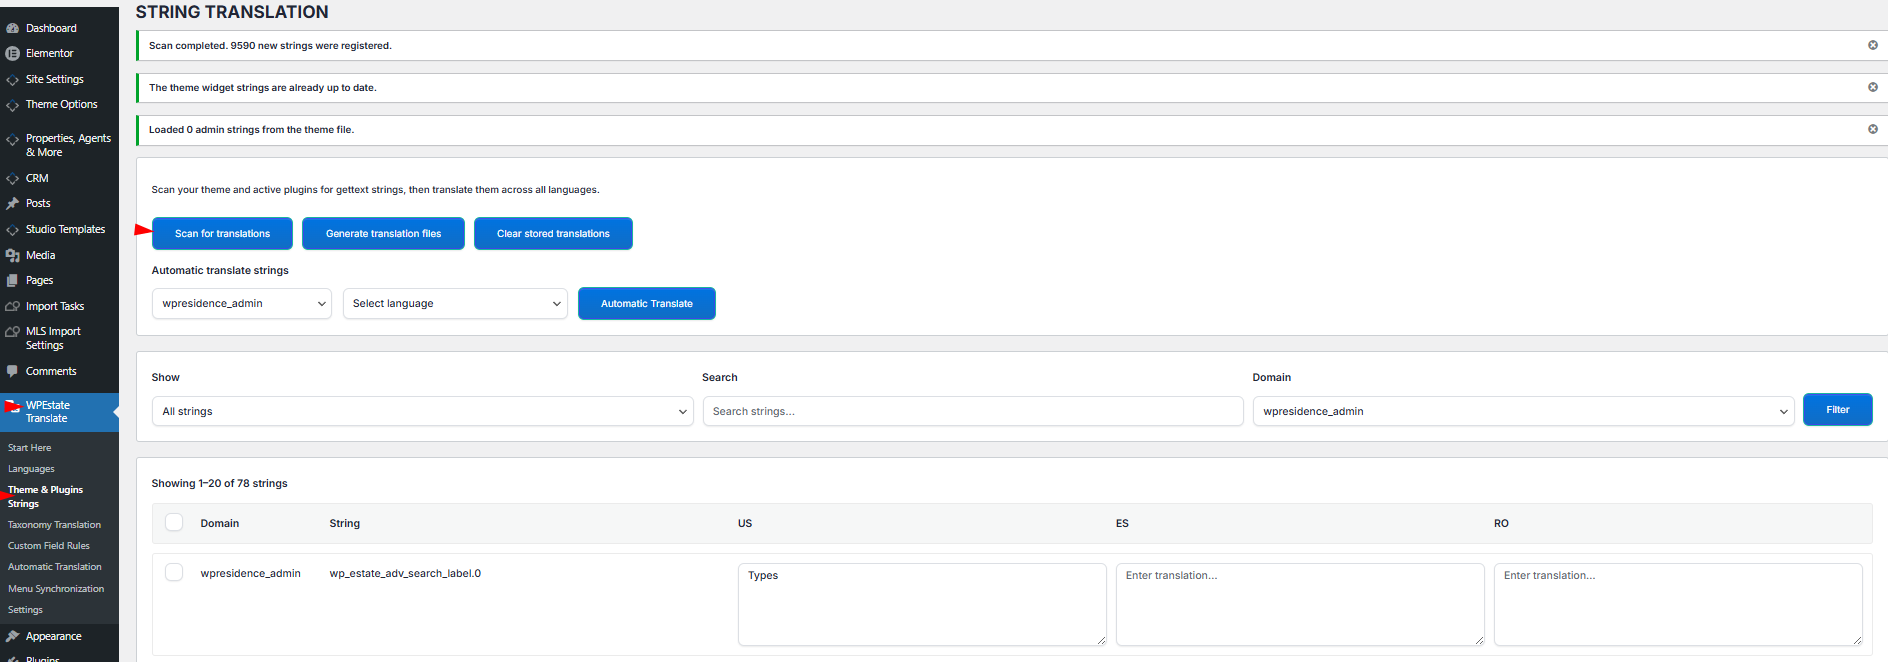
Scan again after you install a plugin, update the theme or add a language.
Translate by Hand
- Find the text. Use Show (All strings, Not translated strings or Translated strings), Search and Domain, then click Filter. The domain is the group the text belongs to, for example the theme, WPResidence Core or wpresidence_admin for the texts typed in Theme Options.
- Type the translation in the column of the language. It saves when you click outside the box. The Default column is the original text and cannot be edited here.
- Repeat for the other texts, then generate the translation files.
Translate Automatically
- Connect a translation service first: see Automatic Translation with OpenAI, Google, DeepL and Azure.
- Under Automatic translate strings, choose a domain (or All domains) and a language.
- Click Automatic Translate. The empty boxes are filled in. Read the result and correct what you need.
- Generate the translation files.
Generate the Translation Files
Click Generate translation files after each round of changes. Visitors see your new texts only after this step. A notice confirms how many files and translations were created.
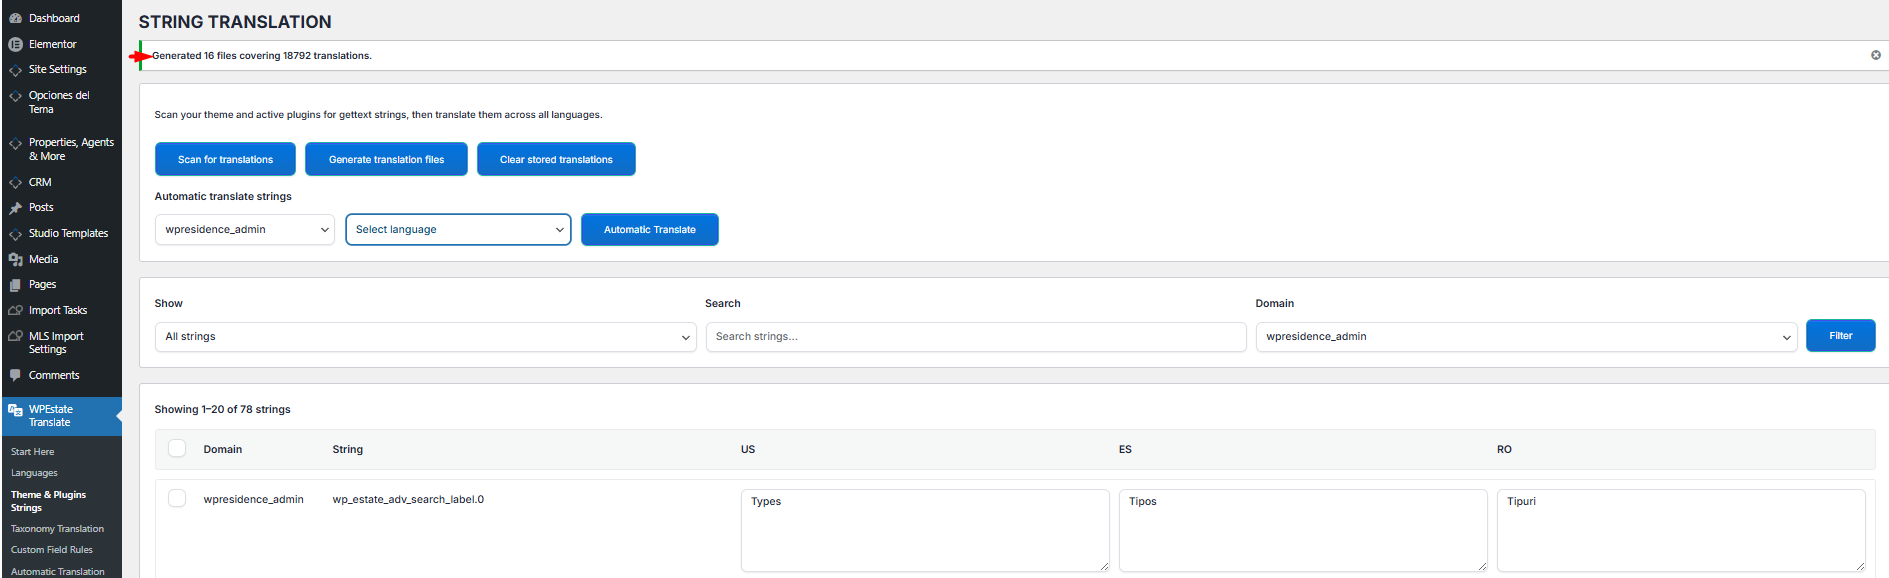
No file is created for the default language. Change default-language texts in Theme Options or in the default .po file.
Delete and Clear Translations
- Delete selected translations: tick the rows, then click the button under the list. Those texts go back to the .po translation.
- Clear stored translations: empties the whole list. Use it only to start over, then click Scan for translations again.
After either action, click Generate translation files.