How to use Stripe as a payment method
Stripe allows users to pay online for paid listings, featured listings, upgrades, or membership packages, depending on the paid submission mode you use in WPResidence.
Before using Stripe, make sure Stripe is available in your country.
See the countries supported by Stripe here:
https://stripe.com/global
Before you start
Before configuring Stripe in WPResidence, you need:
- An active Stripe account.
- Stripe API keys from your Stripe dashboard.
- A Stripe webhook created for your website.
- The Stripe Charge Page created in WordPress.
- Paid Submission enabled in WPResidence.
- A payment currency supported by the Stripe account owner account.
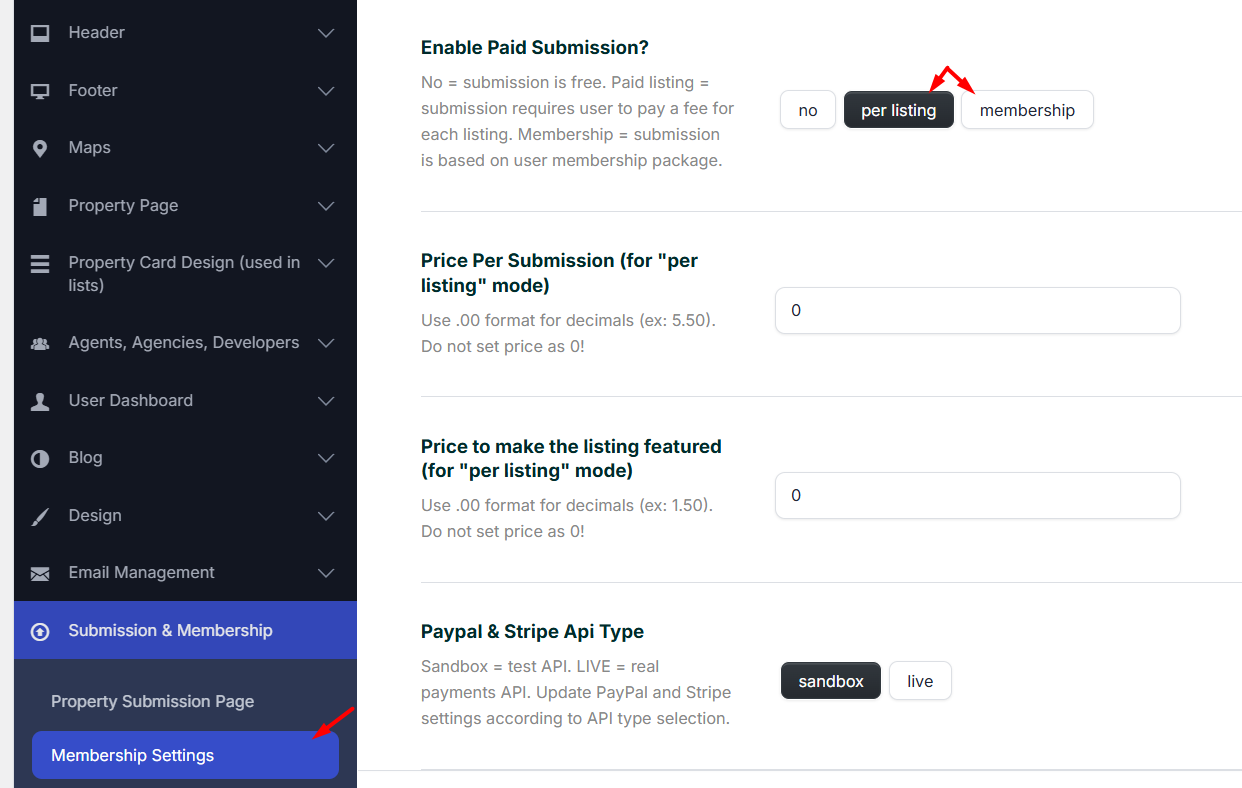
To enable Paid Submission, go to:
Theme Options > Membership > Membership Settings
Select one of the paid submission options:
- Per Listing, if users pay for each submitted listing.
- Membership, if users buy membership packages.
If you want to use Stripe in live mode, you must complete the Stripe account activation/onboarding process in your Stripe account.
Stripe onboarding starts here:
https://dashboard.stripe.com/account/onboarding/business-structure
Stripe settings in WPResidence
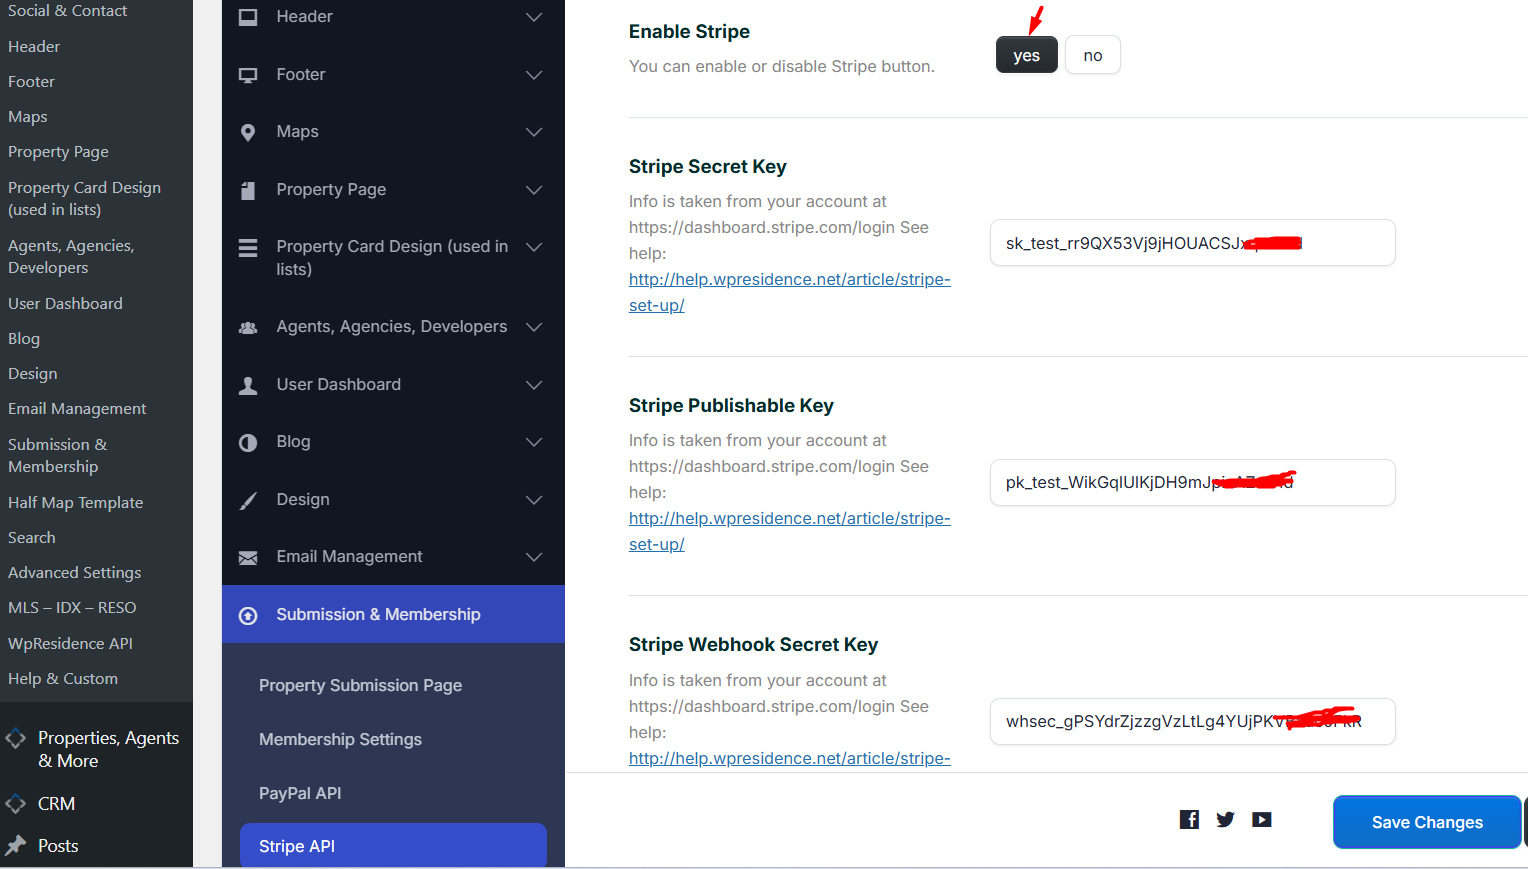
The Stripe settings are managed from:
Theme Options > Membership > Stripe Settings
Enable Stripe and then add the Stripe API keys and webhook signing secret.
To choose between Sandbox and Live mode, go to:
Theme Options > Membership > Membership Settings
Select the mode you want to use:
- Sandbox for test payments.
- Live for real payments.
If you switch from Sandbox to Live, or from Live to Sandbox, make sure you also update the API keys with the correct keys for that mode.

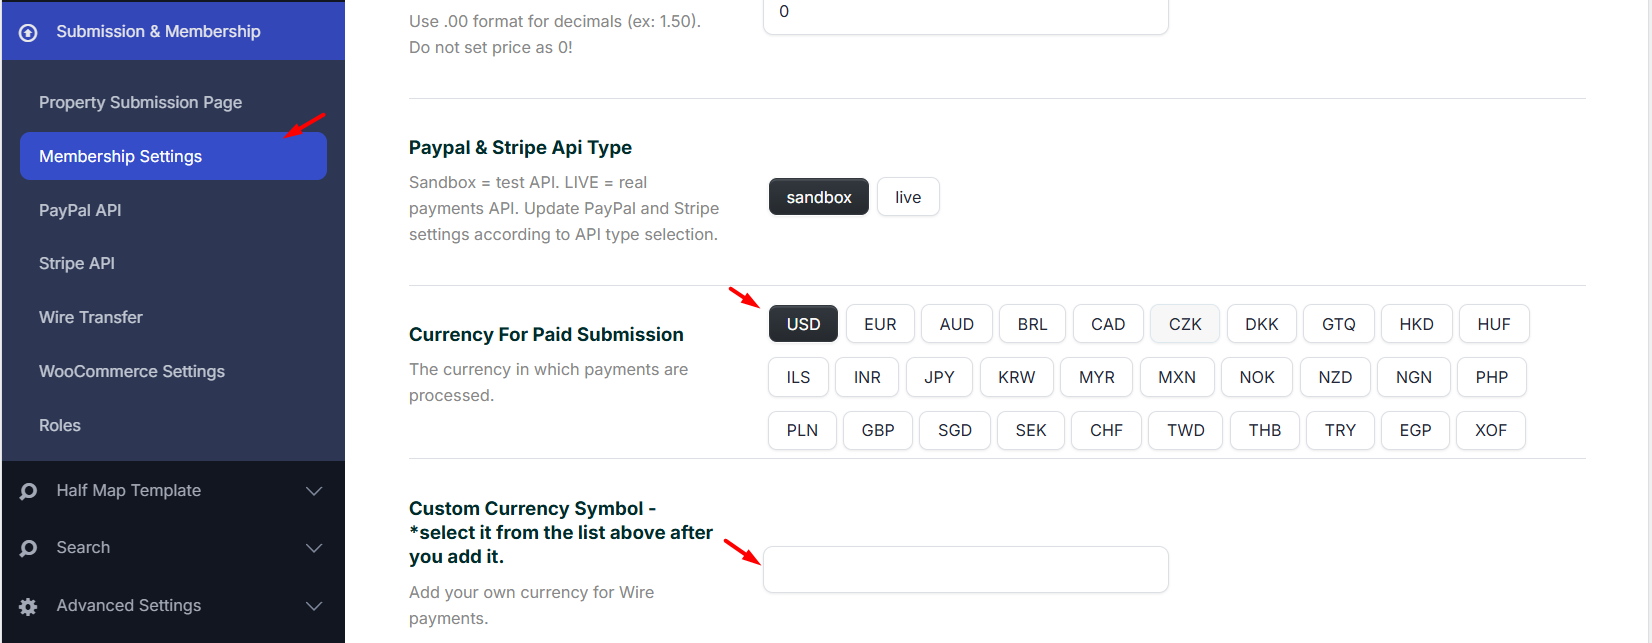
How to set the Stripe payment currency
Stripe uses the currency selected for paid submissions or membership payments.
Go to:
Theme Options > Membership > Membership Settings
In the currency section, select the currency you want to use for paid submissions.
If the currency you want to use is not already available in the Currency For Paid Submission list, follow these steps:
- Add the new currency.
- Save the options.
- Refresh the page.
- Select the new currency from the list of currencies for paid submission.
- Save the options again.
The currency selected in WPResidence must also be supported by the Stripe account owner account. If the currency is not supported by the Stripe account, country, payment method, or payout setup, Stripe may reject the payment or the payment may not work as expected.
You can check Stripe supported currencies here:
https://docs.stripe.com/currencies
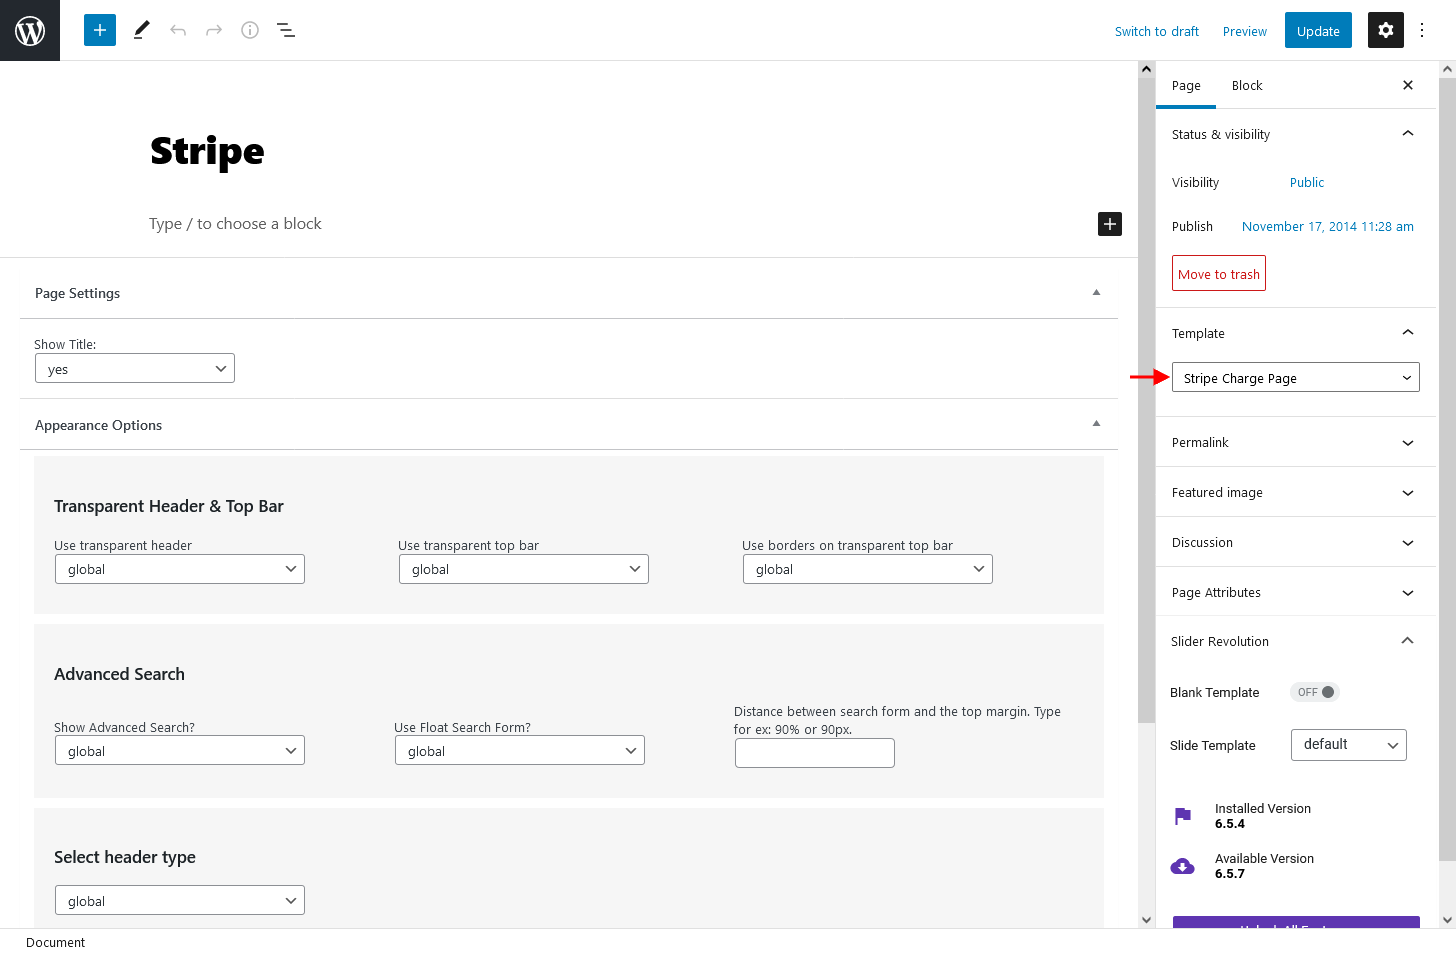
Stripe Charge Page
Make sure you have a page created in WordPress with the Stripe Charge Page template.
Go to:
Pages > Add New
Create a page and assign the Stripe Charge Page template.
If you imported a WPResidence demo, this page is usually created automatically during demo import. If you use a clean theme installation without demo content, you must create this page manually.
How to create Stripe keys
Step 1: Create and activate your Stripe account
Create your Stripe account here:
https://stripe.com/
For live payments, the Stripe account must be activated and approved by Stripe.
Step 2: Copy the API credentials
In your Stripe dashboard, go to:
Developers > API keys
Copy the following keys:
- Publishable key
- Secret key

Step 3: Add the keys in WPResidence
Go to:
Theme Options > Membership > Stripe Settings
Paste the keys in the corresponding fields and save the settings.
For Stripe sandbox tests, you can use card number 4242 4242 4242 4242, any future expiration date, and any CVC.
How to create the Stripe webhook
The webhook allows Stripe to send payment updates back to your website.
In Stripe, go to:
Developers > Webhooks
Then follow these steps:
- Click Add endpoint.
- Add the URL of your website page that uses the Stripe Charge Page template.
- Select the events required for your setup, or choose to receive all events if you want Stripe to send all webhook events.
- Click Add endpoint.
The endpoint URL must be copied from your own website. You can find the Stripe Charge Page URL in WordPress Admin > Pages.
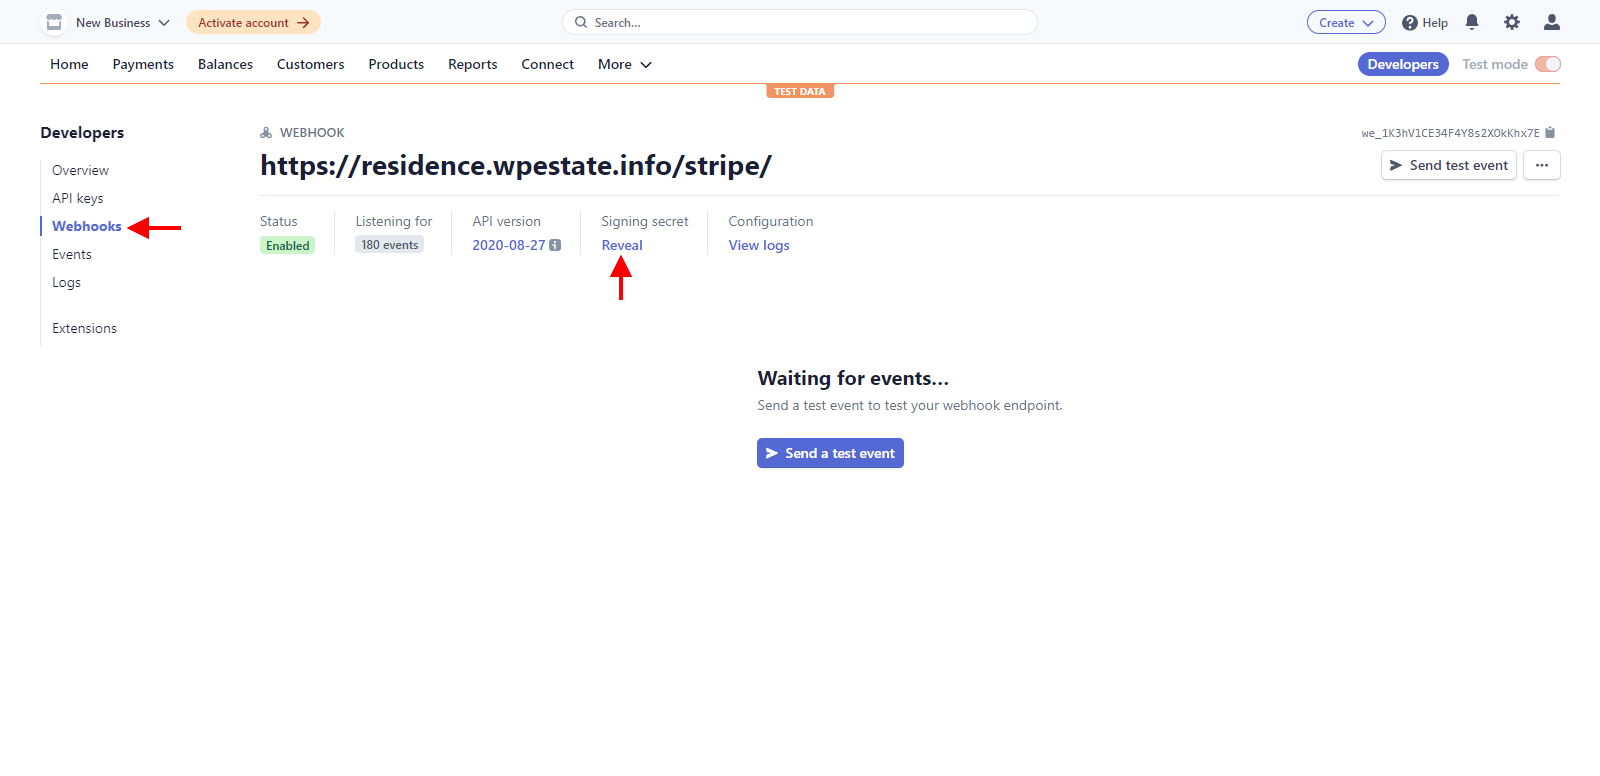
After creating the webhook, open the webhook created for your domain and copy the Signing Secret.
Go to:
Developers > Webhooks > Select your domain webhook
Copy the Signing Secret and add it in:
Theme Options > Membership > Stripe Settings
Stripe and membership submission
If you use Stripe with Membership Submission, you must create the matching product and price in Stripe.
This step is required when you use Stripe with membership packages, especially for recurring payments.
The Stripe product/package settings must match the membership package settings from WPResidence.
Make sure the following values match:
- Currency
- Price per package
- Billing interval
- Unit time and billing period from the theme package settings
The currency used for the Stripe Product must match the currency selected in WPResidence. That currency must also be supported by the Stripe account owner account.
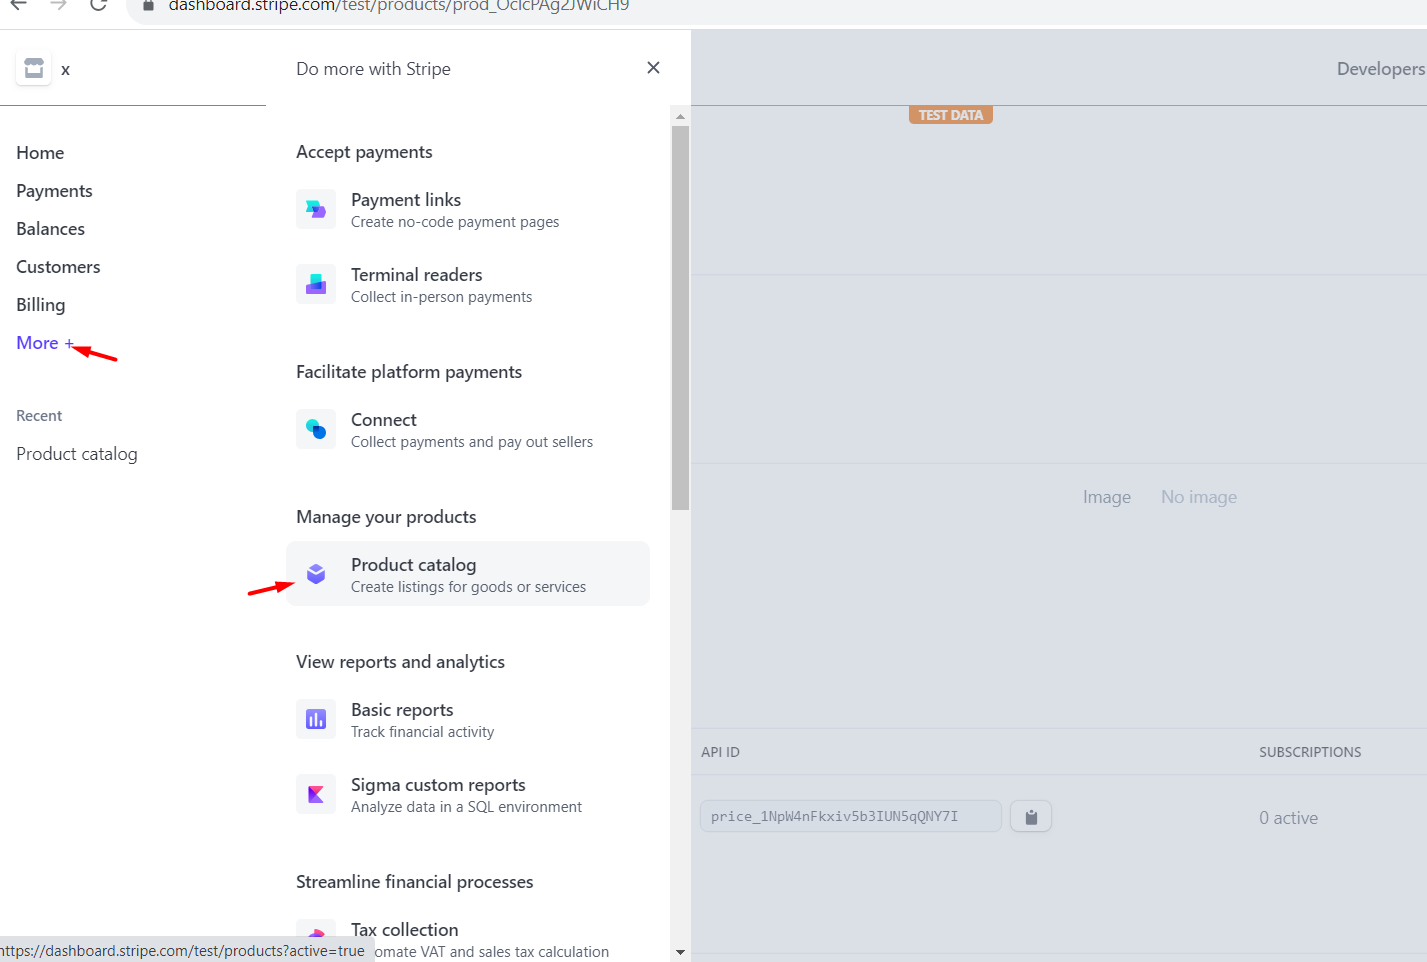
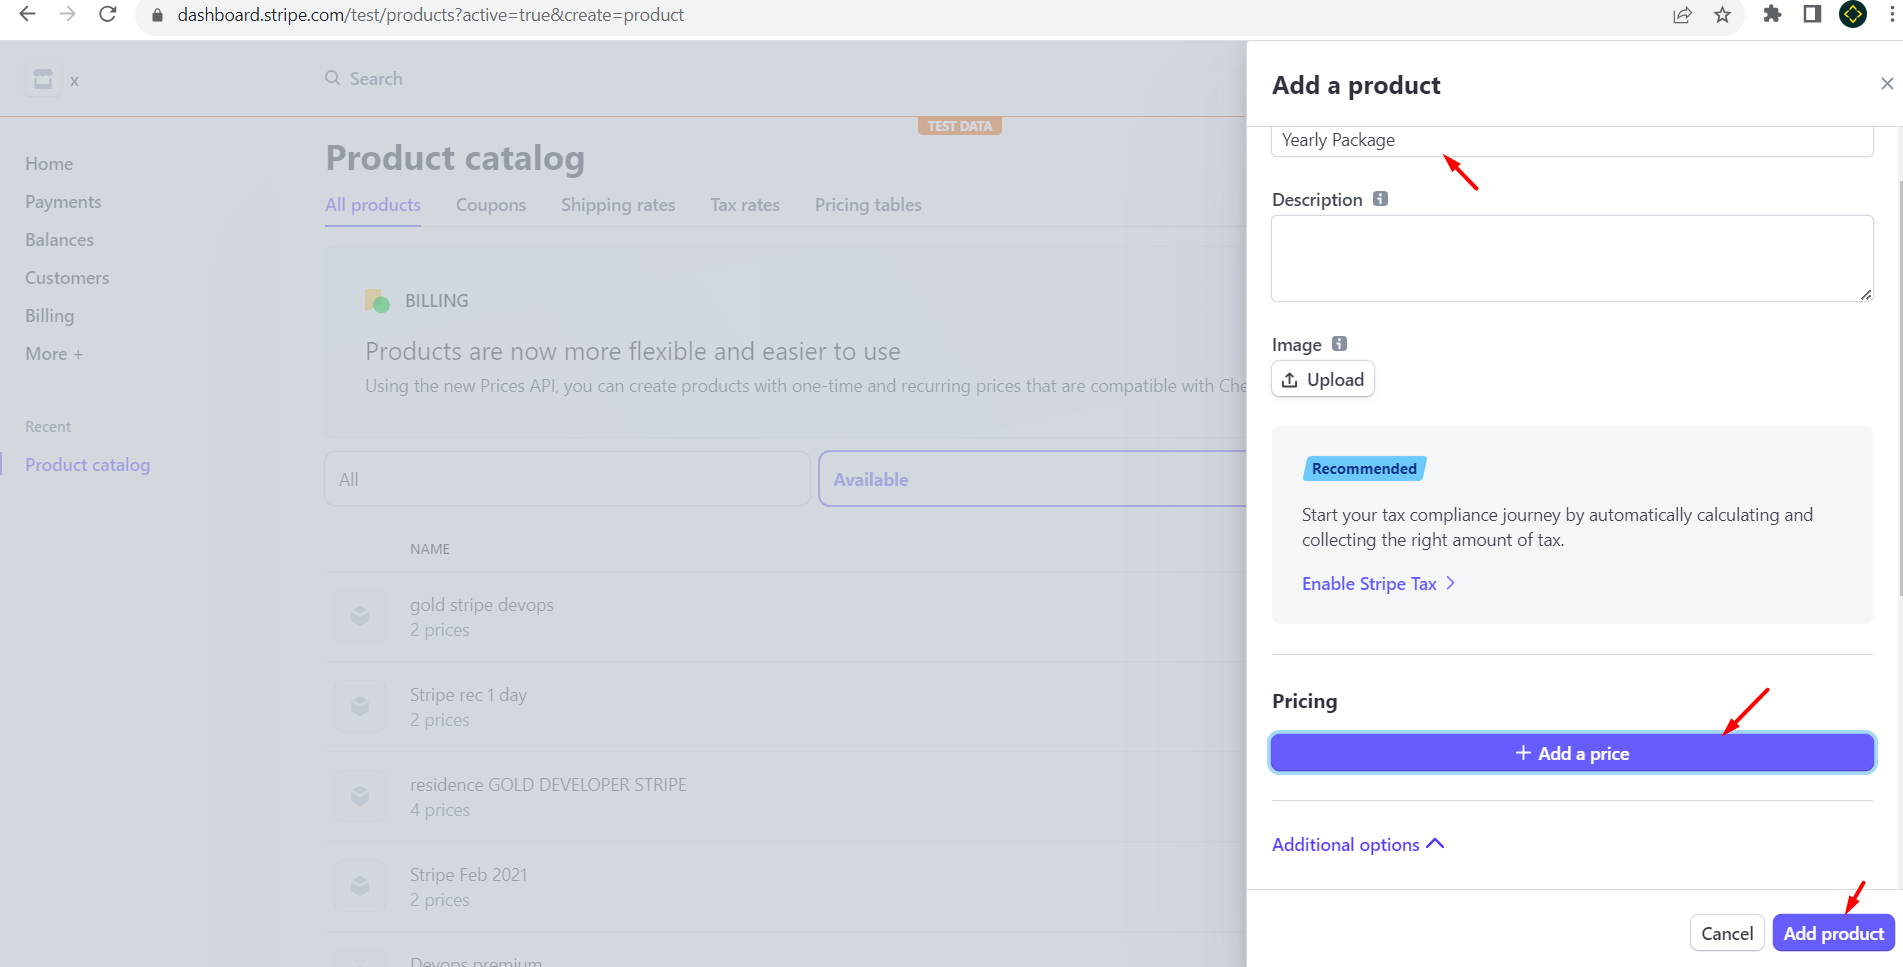
In Stripe, go to:
Products
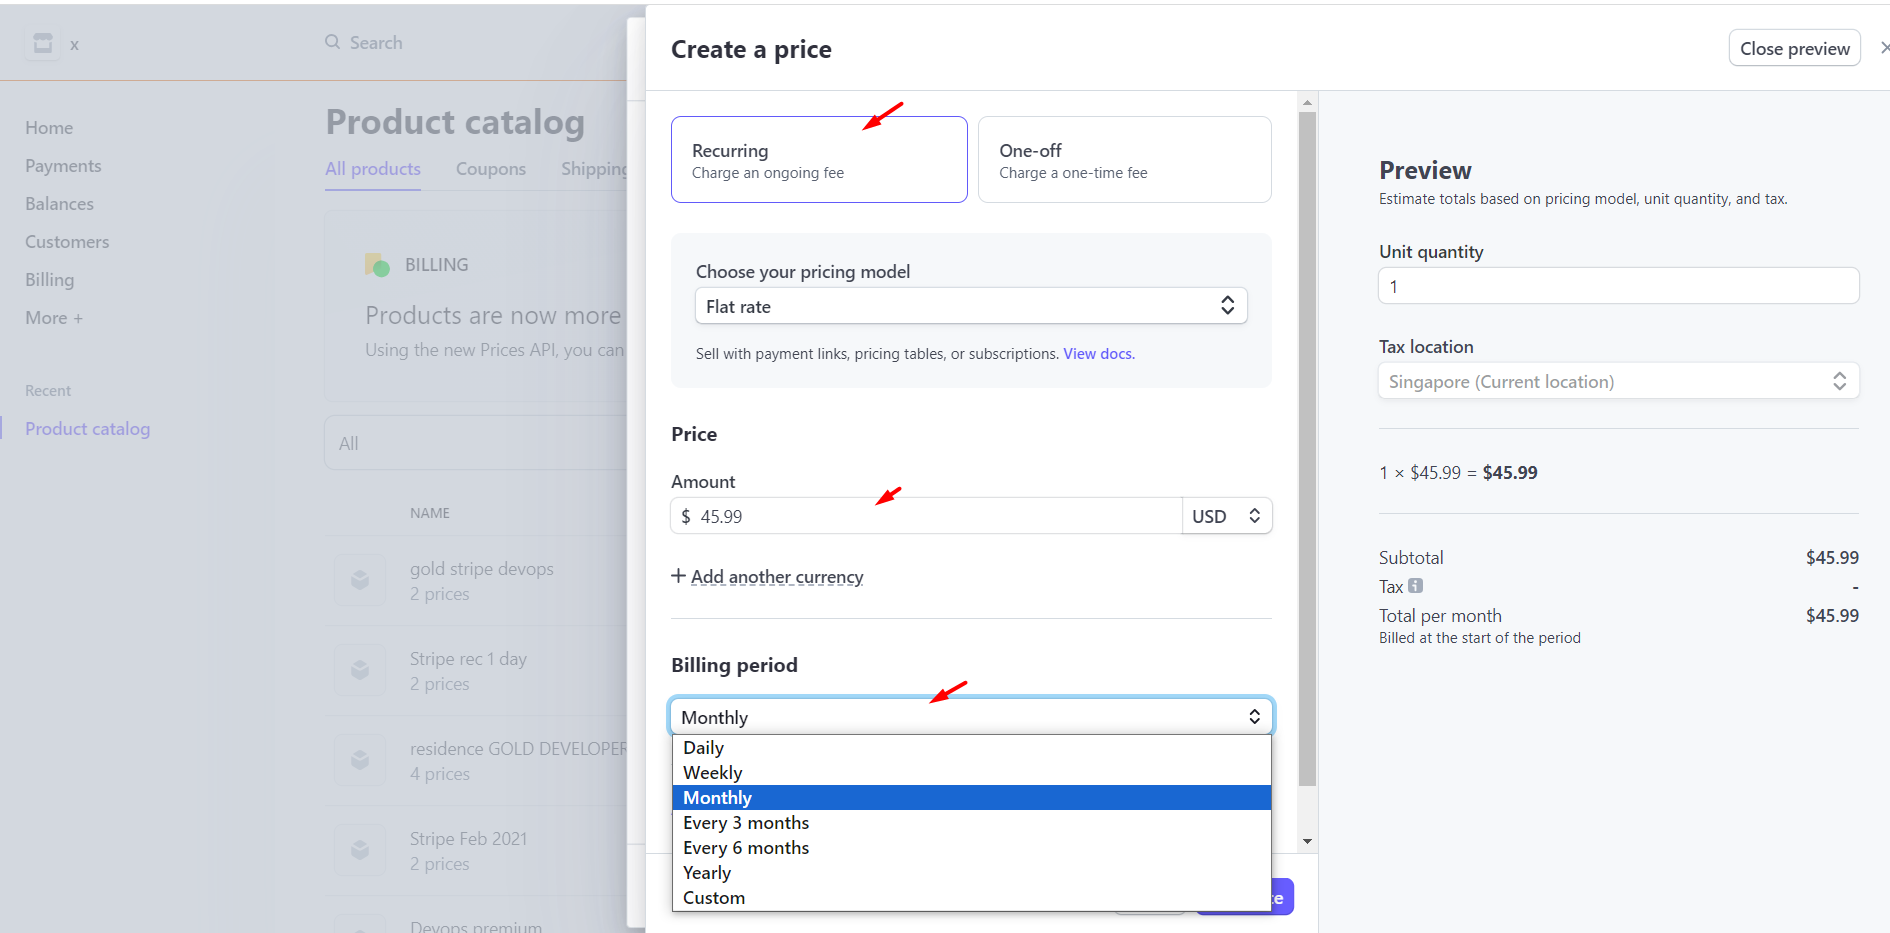
Create the product and add the correct price and billing interval.
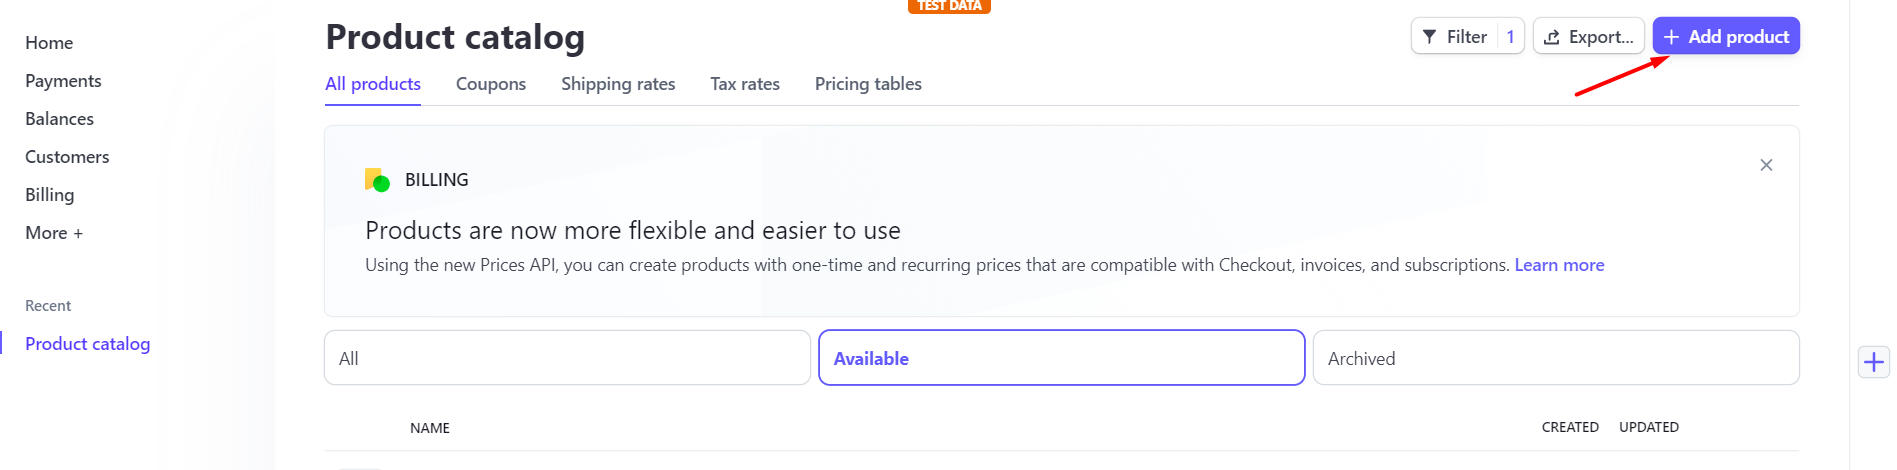
Set the package name and price. In the price settings, select the currency, the package price, and the billing interval that matches the membership package from WPResidence.
After the Stripe product is created, copy the Stripe Product ID and add it to the corresponding membership package in WPResidence.
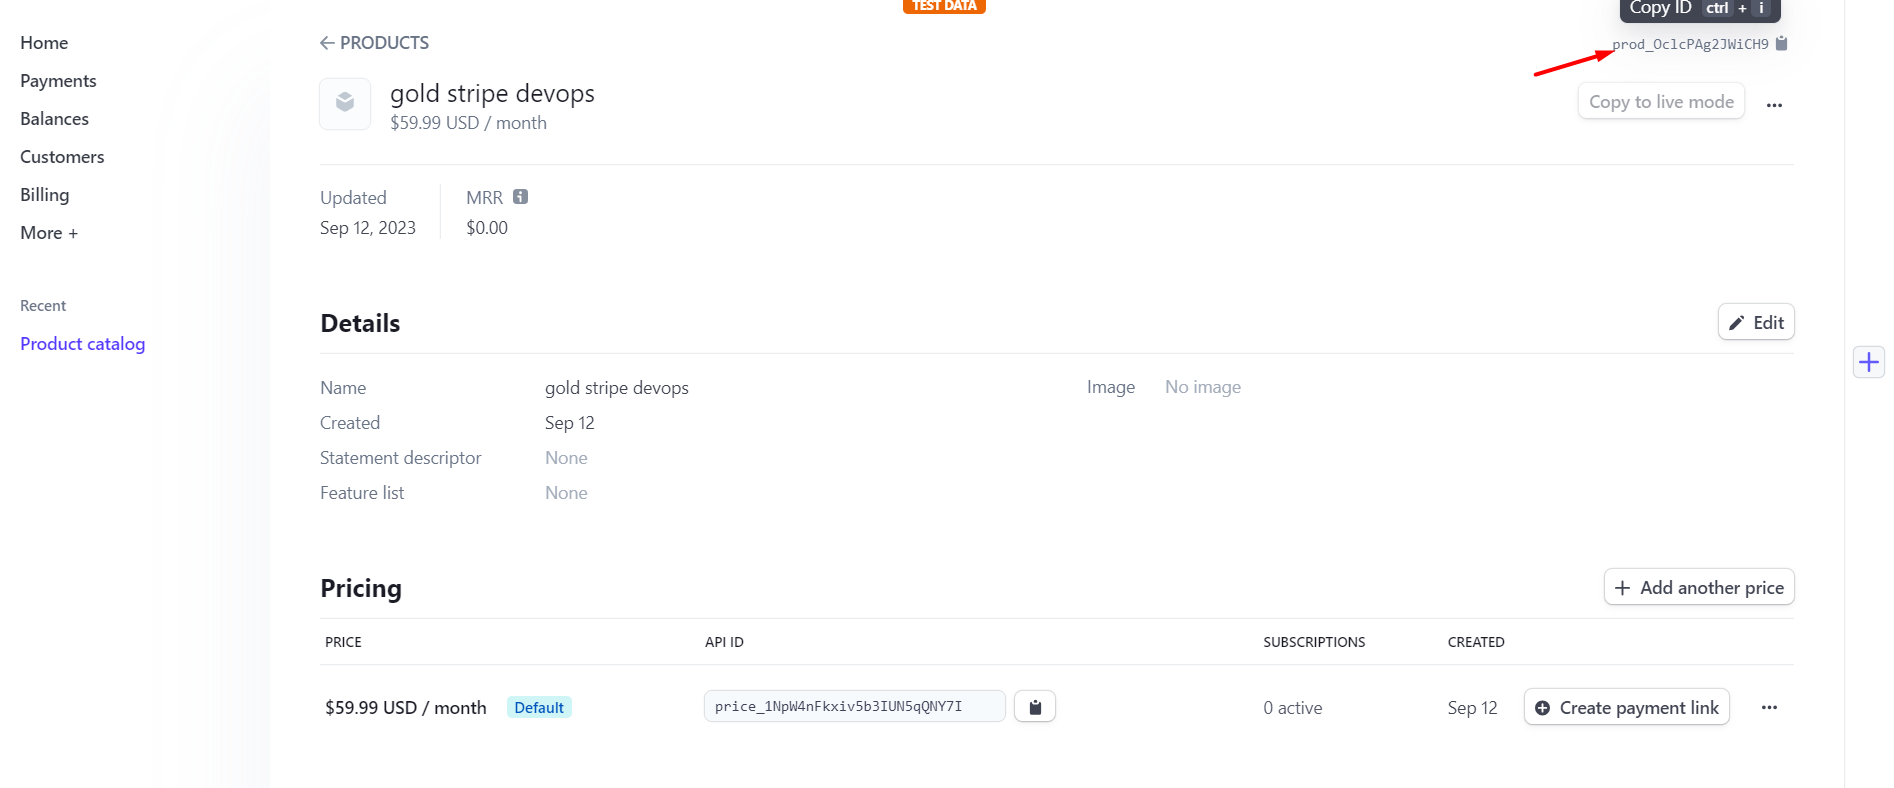
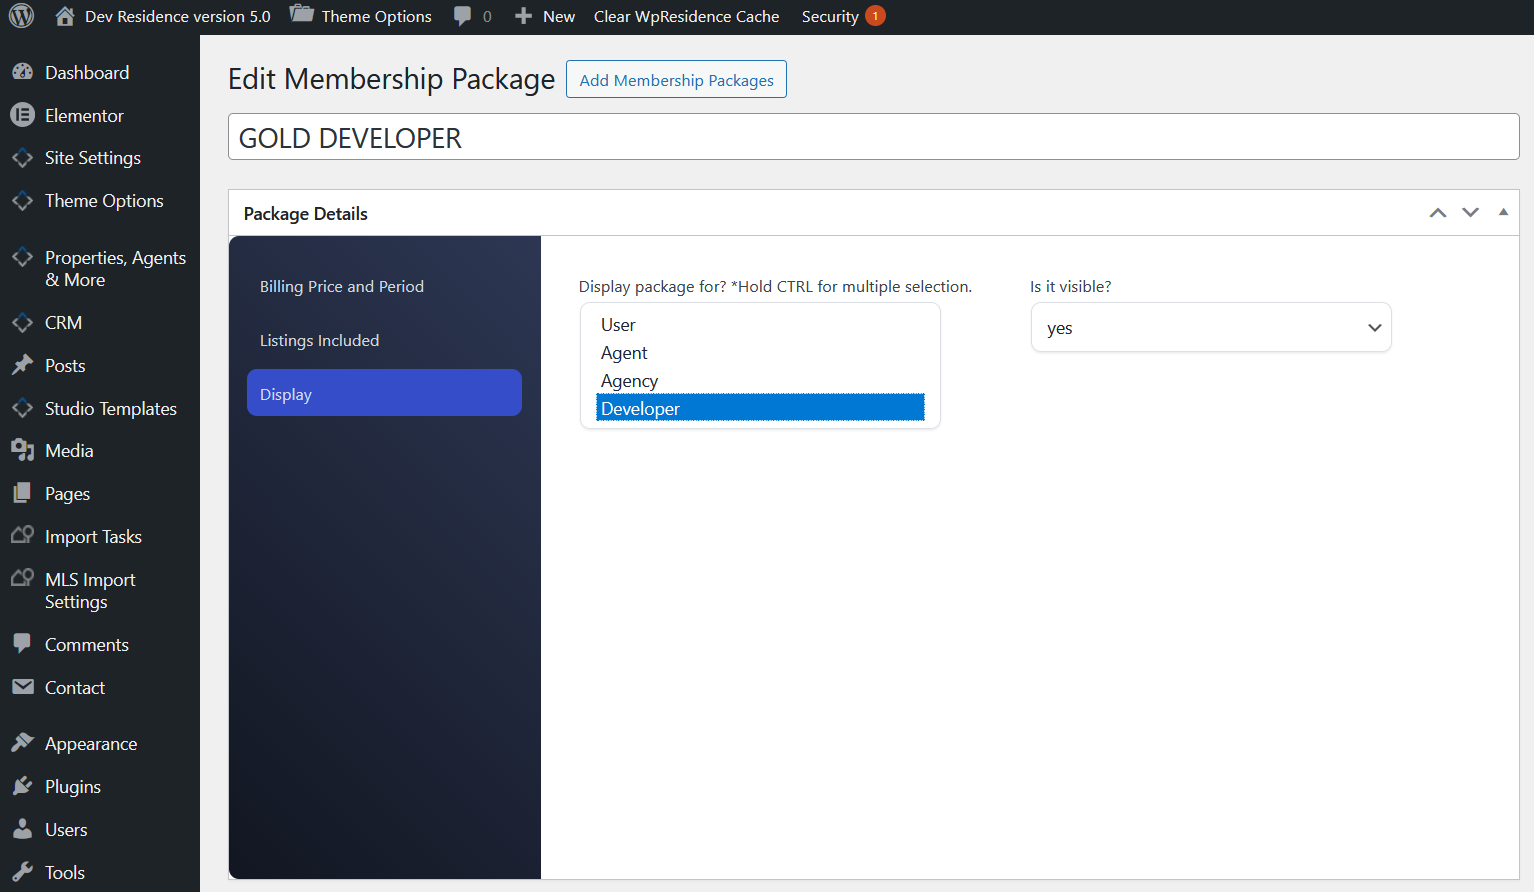
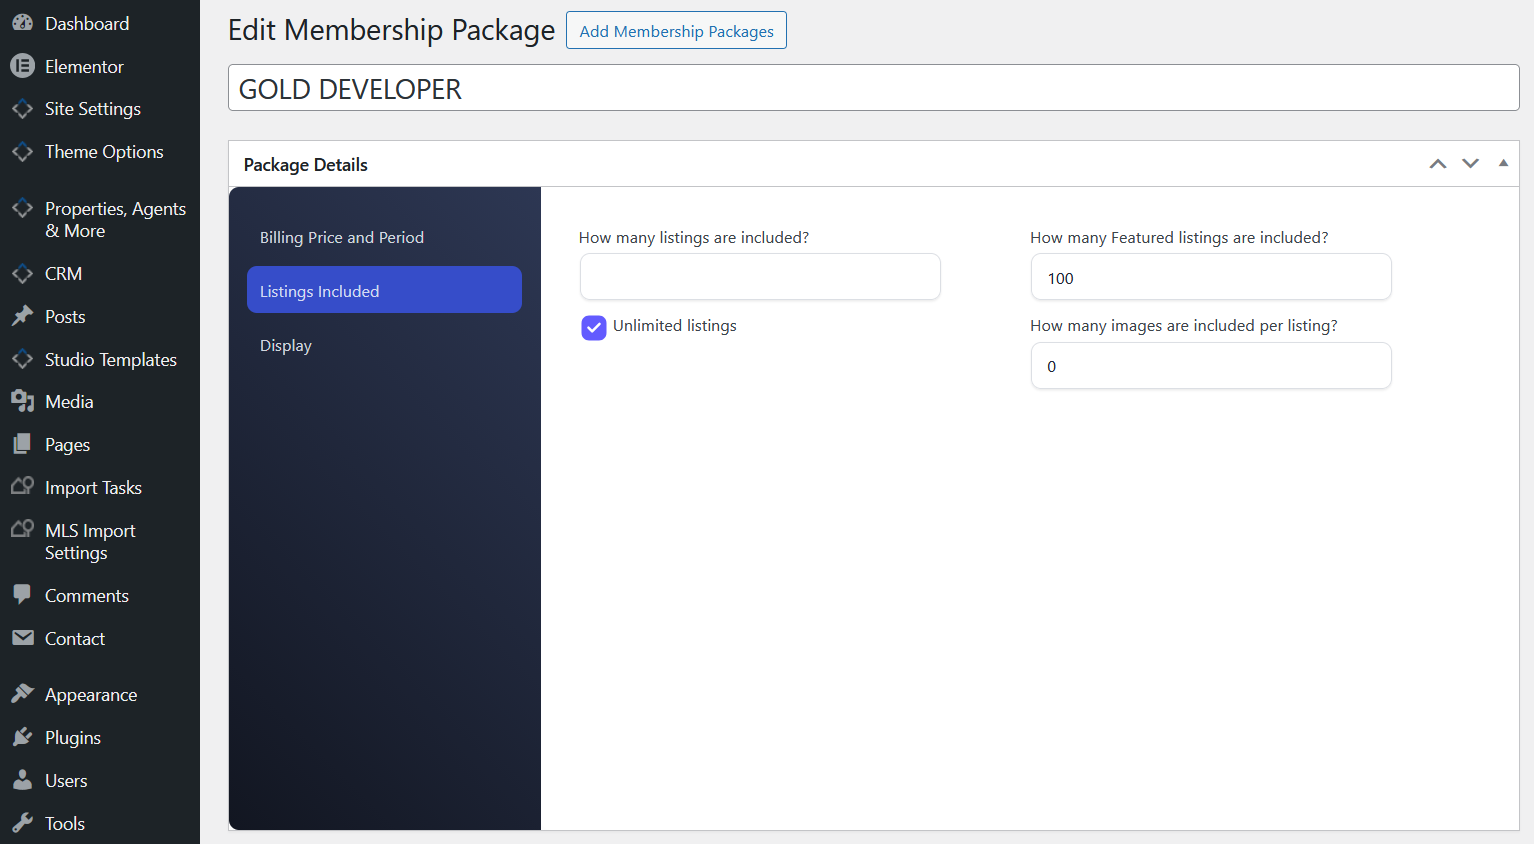
Then edit the membership package in WordPress and add the Stripe Product ID.
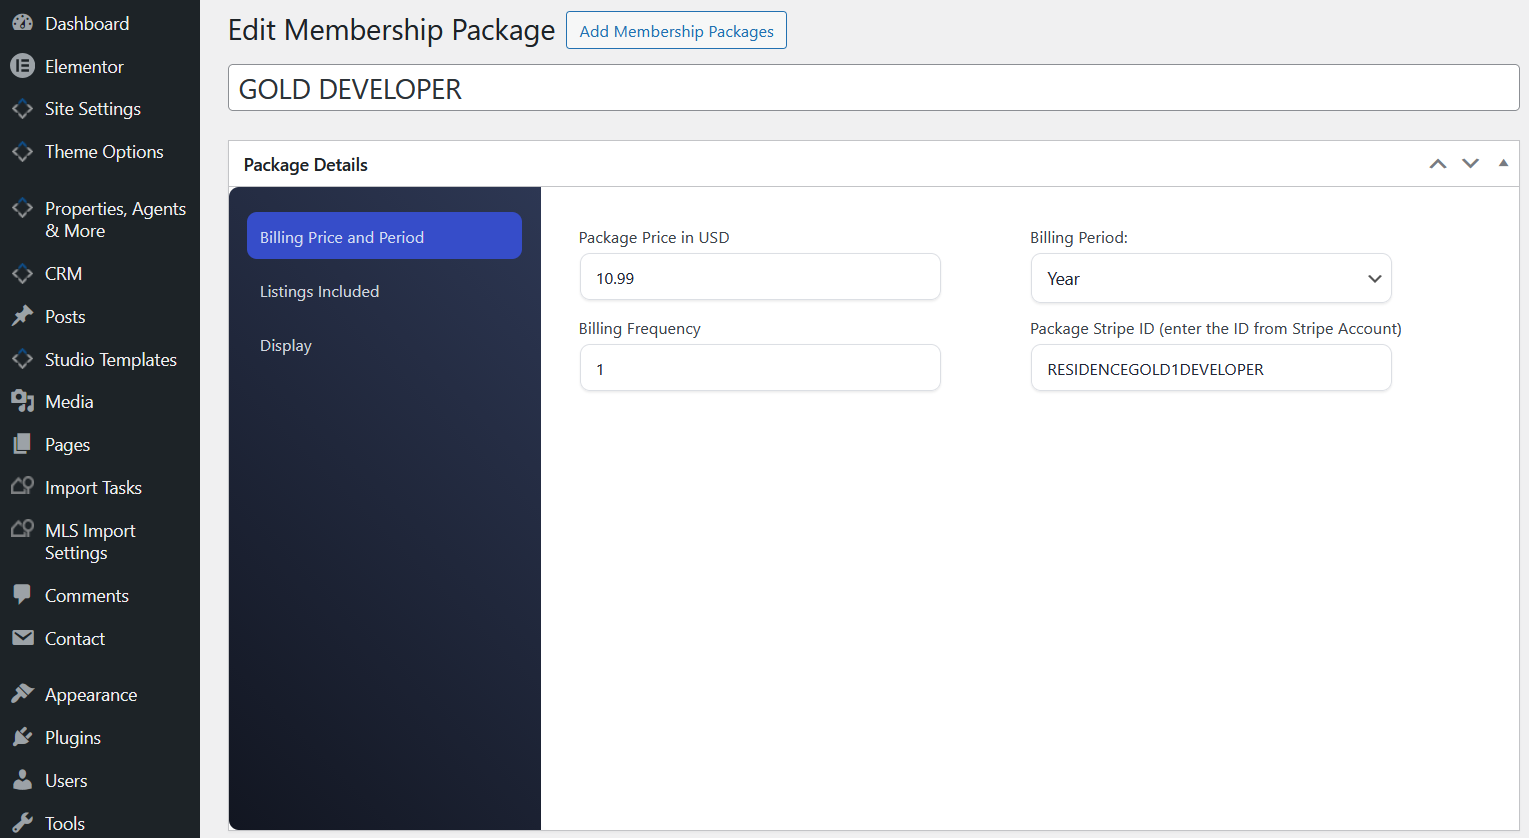
You can also select who can see the package and complete the other membership package details.
How users pay with Stripe
On the frontend, users can choose Stripe when buying a membership package or paying for a listing, depending on the paid submission mode you enabled.
This is how the payment option appears on the frontend:

How users cancel a Stripe subscription
The cancel subscription option is available only when the user purchased a recurring Stripe membership package.
If recurring payment is enabled for the purchased package, users can cancel the Stripe subscription from their account area.

How to change Stripe language
There is no Theme Options setting for changing the Stripe form language.
Changing the Stripe form language requires a code customization.
According to Stripe documentation, the locale can be controlled with:
data-locale="es"
This must be added in the theme code where the Stripe forms are generated.
Relevant functions:
- help_functions.php function wpestate_show_stripe_form_membership()
- help_functions.php function wpestate_show_stripe_form_per_listing()
- help_functions.php function wpestate_show_stripe_form_upgrade()
- ajax_functions.php function wpestate_cancel_stripe()
This is a developer-level customization. Please make this change in a child theme or with the help of a developer.
Stripe fatal error: mbstring PHP extension
If you see an error similar to this:
It means the required PHP extension mbstring is not enabled on your server.
Solution:
Contact your hosting provider and ask them to enable the PHP Multibyte String extension.
More information:
http://php.net/manual/en/book.mbstring.php
Without this PHP module, Stripe will not work correctly.