Enquiries are the front door of your real estate CRM. Every time a prospect phones in, walks into your office, emails you, or fills in a form on your website, you have an enquiry. The Enquiries section of the WPResidence CRM is where you log, review, and manage that flow.
This guide covers everything you can do from the Enquiries inbox: adding an enquiry manually, editing one, changing its status, filtering the list, and understanding how enquiries automatically connect to your contact database.
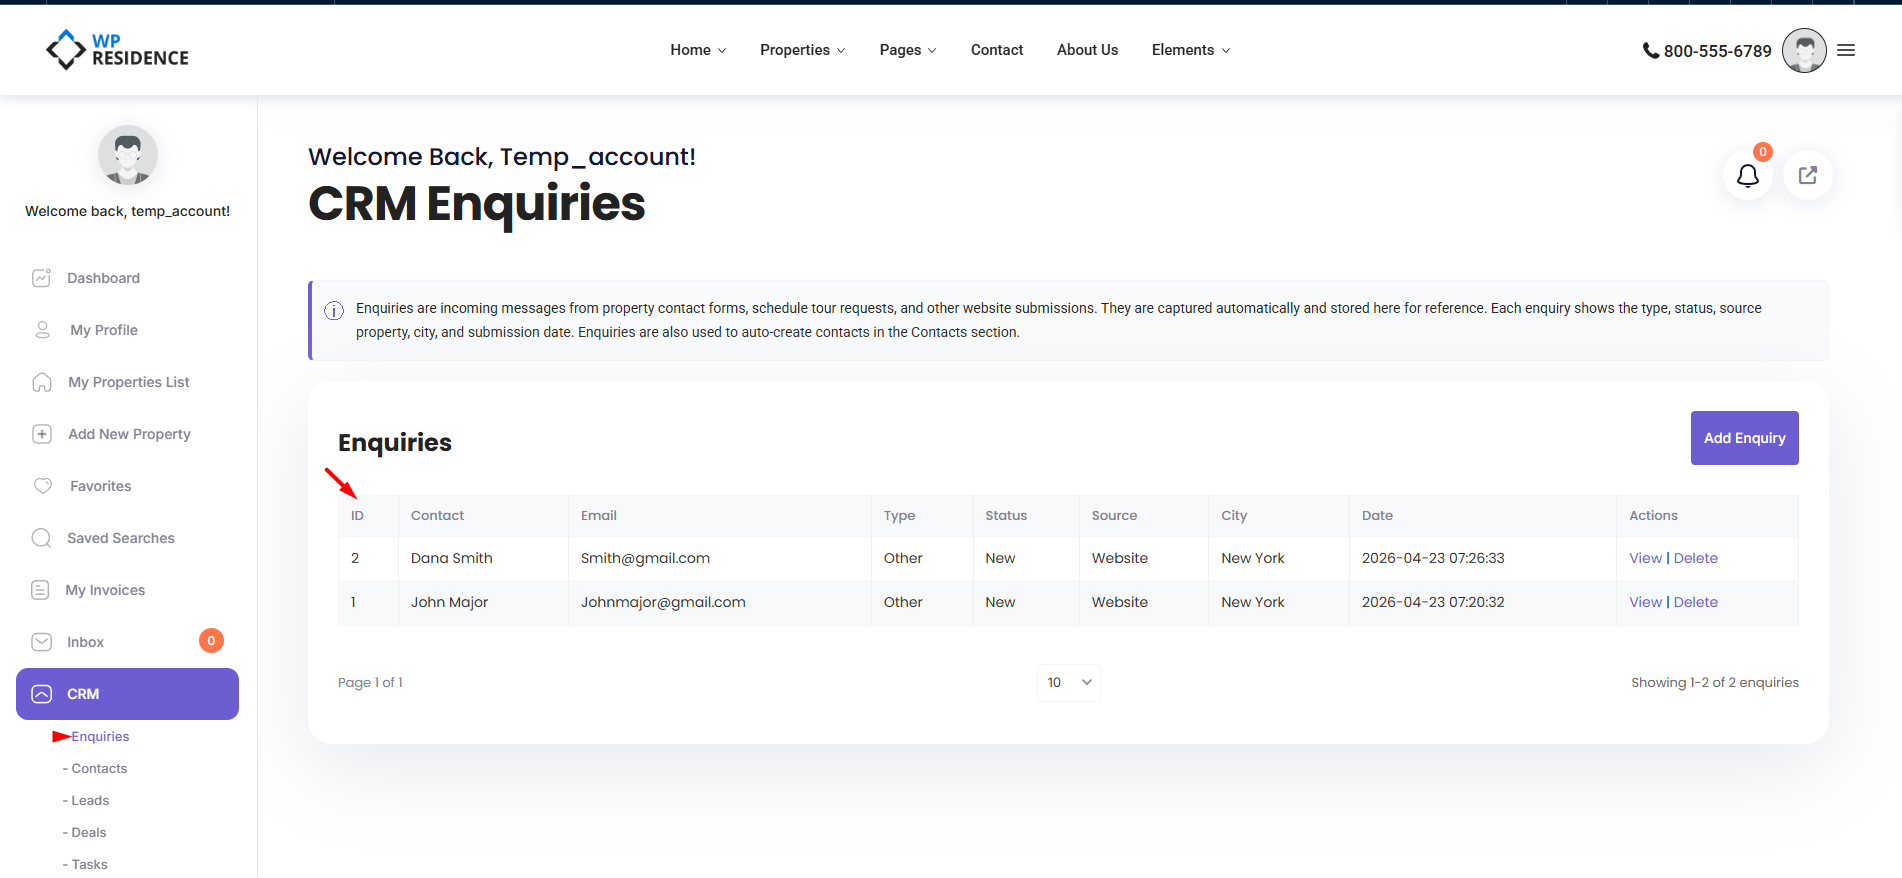
Opening the Enquiries Inbox
From the main dashboard sidebar, click CRM, then Enquiries. You will see a paginated list of enquiries, 20 per page.
Which enquiries you see depends on your role:
- Agent: you see only enquiries that belong to you.
- Administrator: you see every enquiry in the system.
Adding an Enquiry Manually
Most enquiries will be created automatically when a prospect submits a form on your website (covered in the Auto-Create from Forms article). But you can also log an enquiry by hand — for phone calls, walk-ins, or anything that arrives outside your website.
- Click the Add Enquiry button at the top of the Enquiries page.
- The Add Enquiry form opens with four sections: Enquiry Details, Contact Info, Property Details, and Message.
- Fill in the fields (described below).
- Click Save.
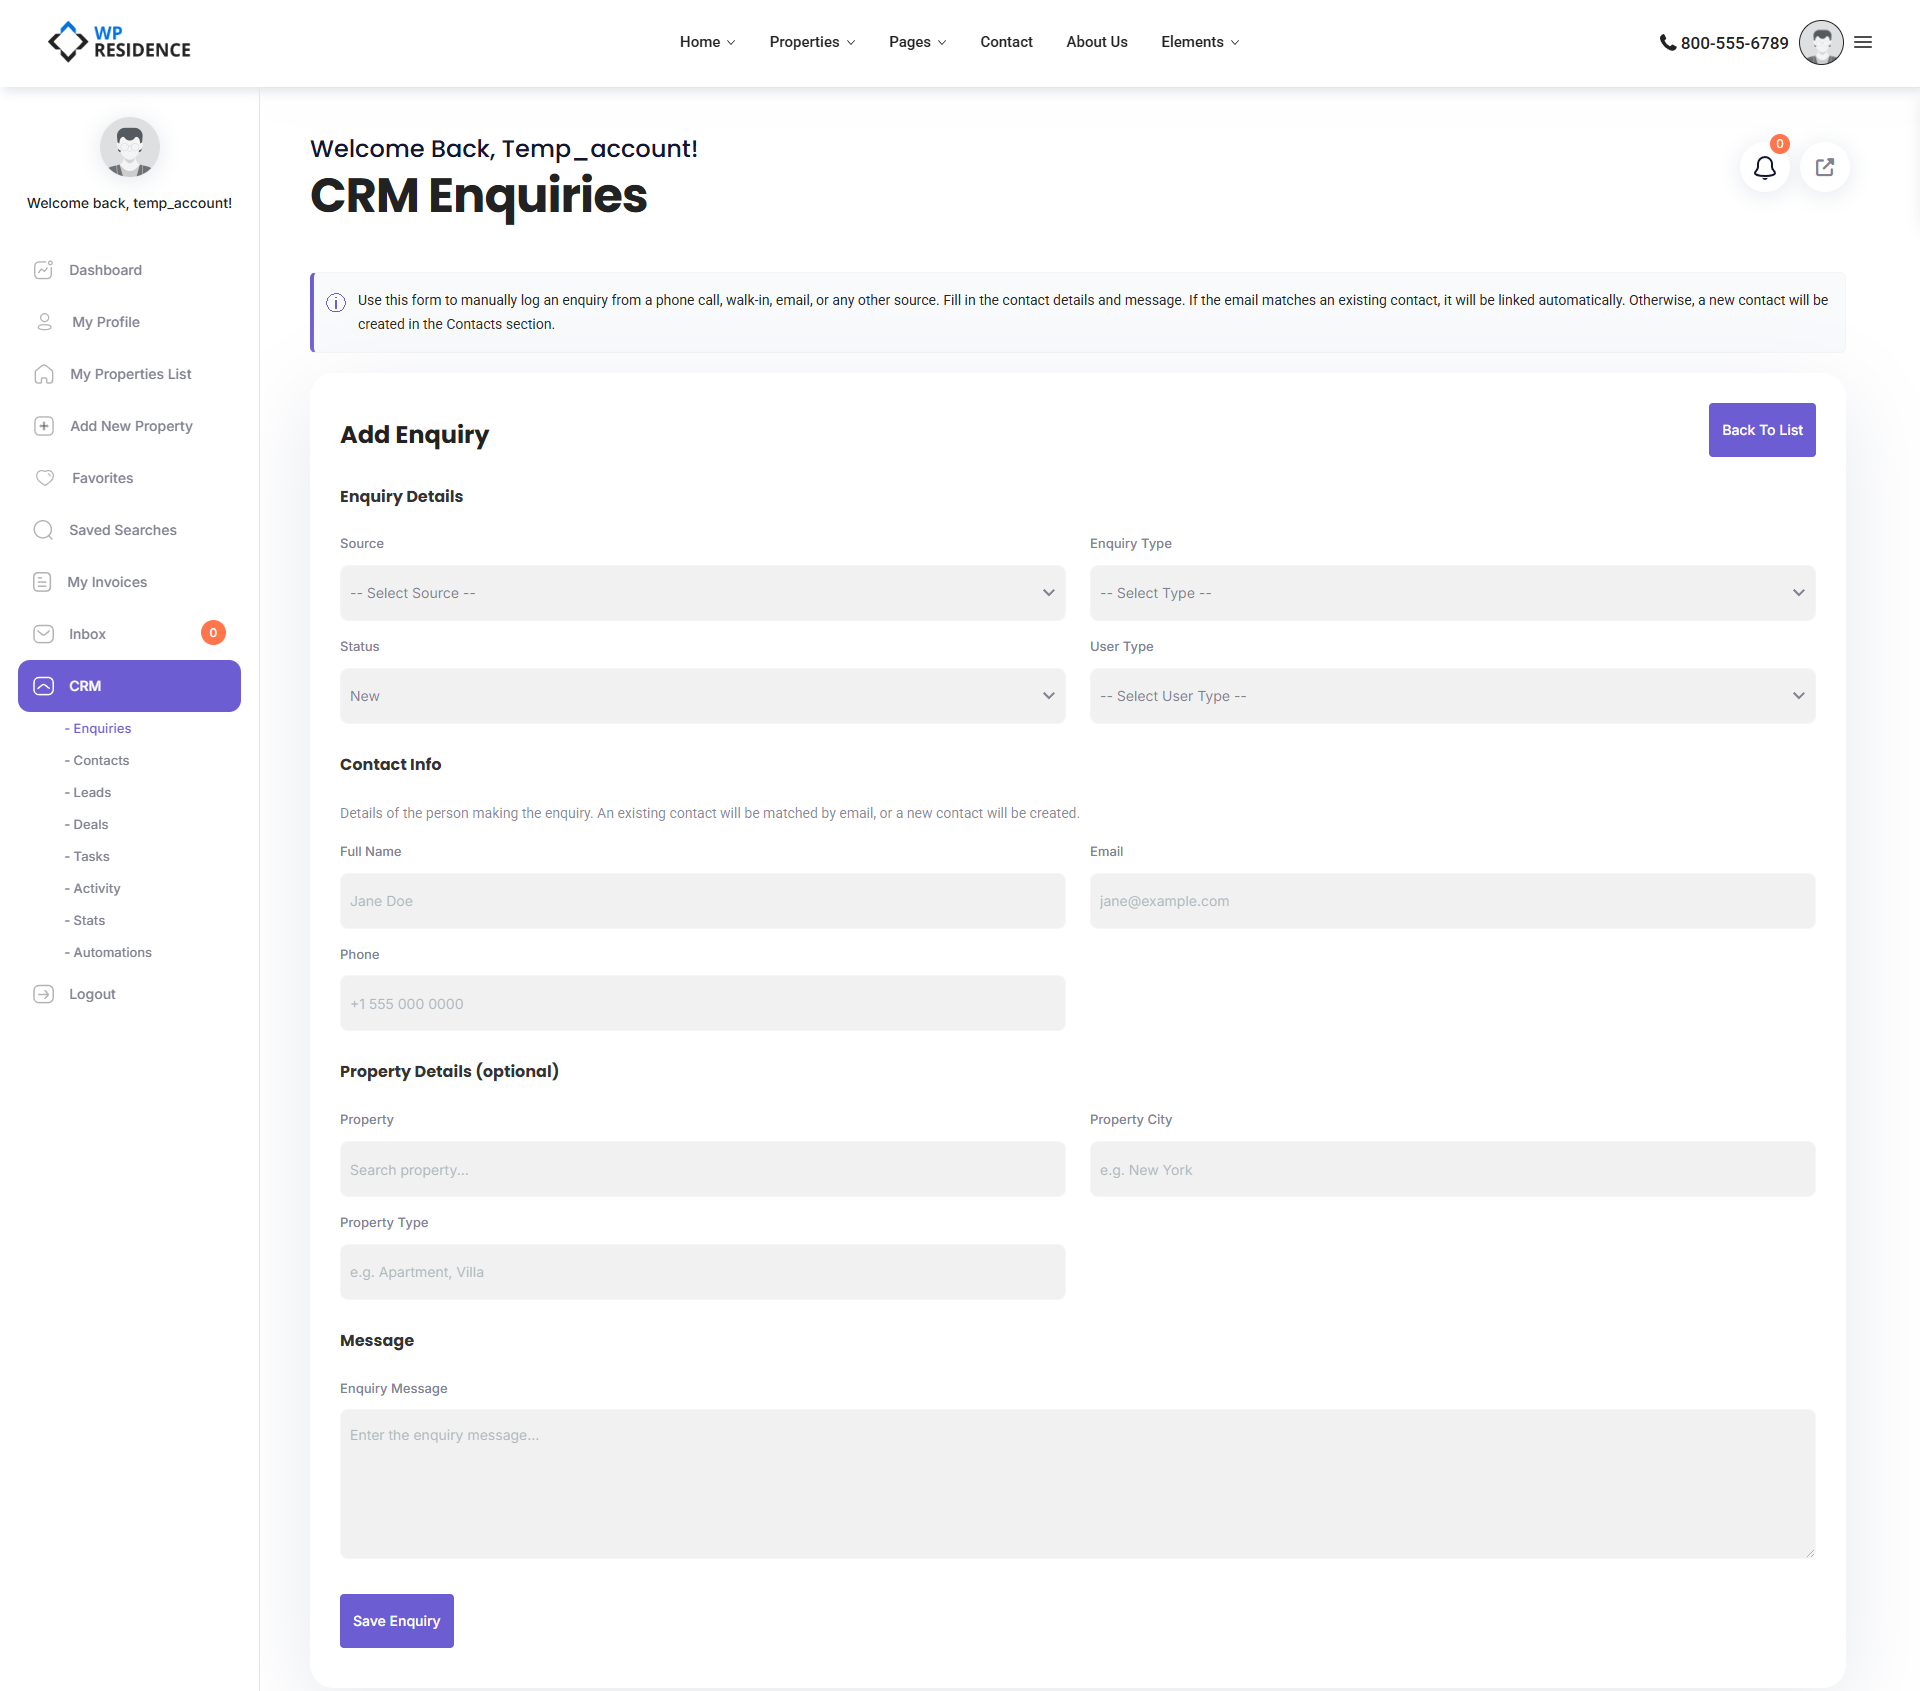
Enquiry Details
| Field | Options |
|---|---|
| Source | Phone, Walk-in, Email, Social Media, Referral, Other |
| Type | Property Enquiry, General Enquiry, Valuation Request, Viewing Request |
| Status | New, Open, Responded, Closed |
| User Type | Buyer, Seller, Tenant, Landlord, Investor, Other |
The picklists for Type and Status are editable by your administrator in the CRM Settings page, so your site may show a slightly different list.
Contact Info
Three fields: Name, Email, and Phone. This is the most important part of the form — see the next section on why.
Property Details
Optional. Use the property title autocomplete to link the enquiry to a specific listing, or just enter a city and property type for general interest.
Message
A free-text area where you paste the email they sent, summarize the phone call, or note whatever the prospect told you.
How Enquiries Link to Contacts Automatically
Every enquiry is automatically linked to a record in your Contacts database. The system uses the email address to decide what to do:
- If the email matches an existing contact, the enquiry is attached to that contact. Their contact history gets richer with every new enquiry.
- If the email is new, a brand-new contact is created for you on the fly. The name is split into first and last name on the first space, the phone is saved, the source is copied across, and the lifecycle stage is set to new_lead.
You never have to create a contact manually for an enquiry — the CRM does it for you.
Always Enter the Email
Because the email is the matching key, entering a consistent, correct email is critical. Same prospect, different email = two contacts in your database.
Editing an Enquiry
Click the edit icon on any row in the list, or click the enquiry title to open it. You land on the same form used for adding, pre-filled with the enquiry data. Make your changes and save.
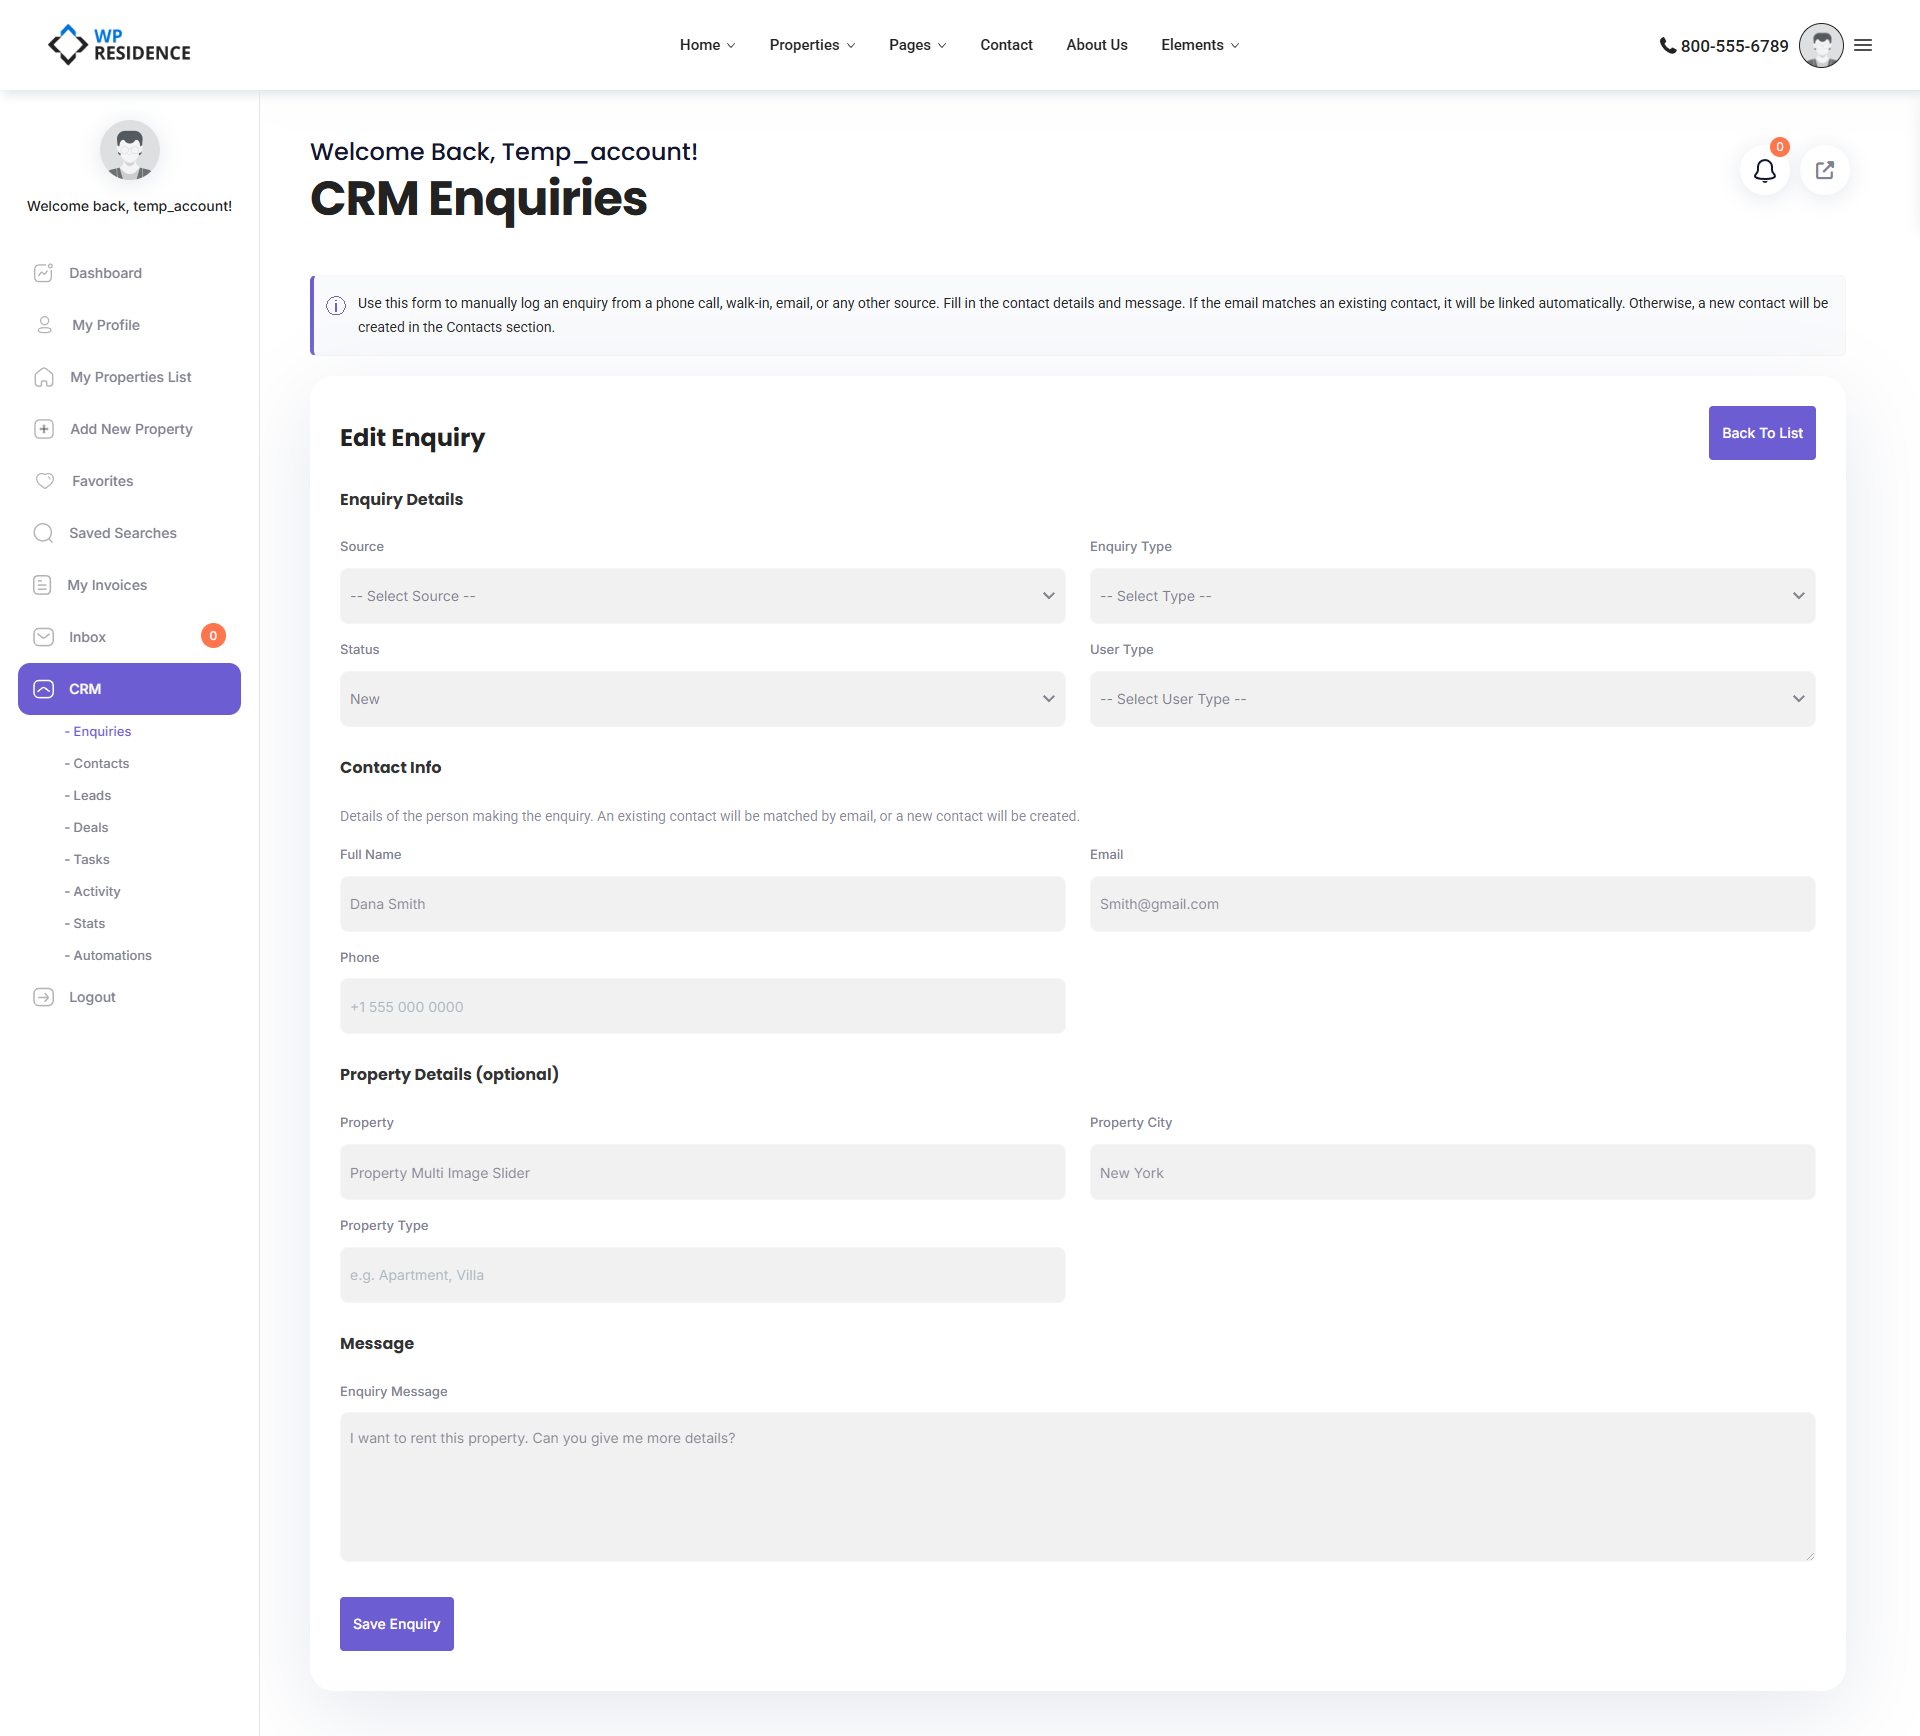
Changing the Status
The four default statuses move an enquiry through its lifecycle:
- New — just arrived, nobody has looked at it yet.
- Open — someone is actively working it.
- Responded — you have replied to the prospect and are awaiting their next move.
- Closed — the enquiry is finished (converted, dismissed, or no response).
Open the enquiry, change the Status field, and save. Your administrator can customize these values in CRM Settings.
Deleting Enquiries
Open an enquiry and use the delete action, or delete directly from the list if you have the appropriate permission. Deletion is permanent — the row is removed from the Enquiries table. The contact the enquiry was linked to is not deleted.
From Enquiry to Lead or Deal
Enquiries do not have a single “Convert” button. The flow is simpler than that:
- Every enquiry already has a Contact (auto-created or matched).
- When that contact becomes a serious prospect, open the Contacts section and create a Lead for them.
- When the lead commits to a property, promote them to a Deal.
Think of Enquiries as the raw inbox — Leads and Deals are where you record active work.
Working With the Inbox Efficiently
- Triage daily. Keep “New” enquiries at zero by the end of each working day.
- Fill in the property link. Even for phone enquiries, use the property title autocomplete if the prospect asked about a specific listing. It makes your matching and reporting much better later.
- Be honest about Source. “Phone” and “Walk-in” matter for stats — they show which channels actually bring you business.
- Use descriptive messages. Paraphrase what the prospect actually said. Future you will thank present you.
International Use
The enquiry form accepts non-Latin characters in every text field. You can log names, cities, and messages in Cyrillic, Arabic, Chinese, Greek, and any other script. Search and filtering work correctly across languages.
What Happens After You Save
Depending on your administrator’s settings, saving an enquiry can trigger automatic follow-up:
- An email notification to the agent the enquiry is assigned to.
- An SMS notification if Twilio is enabled.
- A push to HubSpot if the HubSpot integration is active (see HubSpot CRM integration for WPResidence).
- A new entry in the Activity timeline so everyone can see what just happened.
Summary
The Enquiries inbox is where your new business enters the CRM. Every enquiry is either attached to an existing contact or creates a new one automatically. Status values move each enquiry through its lifecycle from New to Closed. Once a contact shows real intent, you create a Lead or a Deal for them in the relevant section.
For a full view of how enquiries fit into the pipeline, read the CRM Overview article. For the technical side — database schema, hooks, AJAX endpoints — see the developer version of this article.