Contacts are the heart of your real estate CRM. Every buyer, seller, tenant, landlord, and investor you work with lives in this one master database — complete with lifecycle stage, lead source, assigned agent, preferences, and a full history of every interaction.
This guide walks through everything you can do from the Contacts section: adding a contact, understanding the fields, filtering the list, working with the contact detail page, and using tags to organize your database.
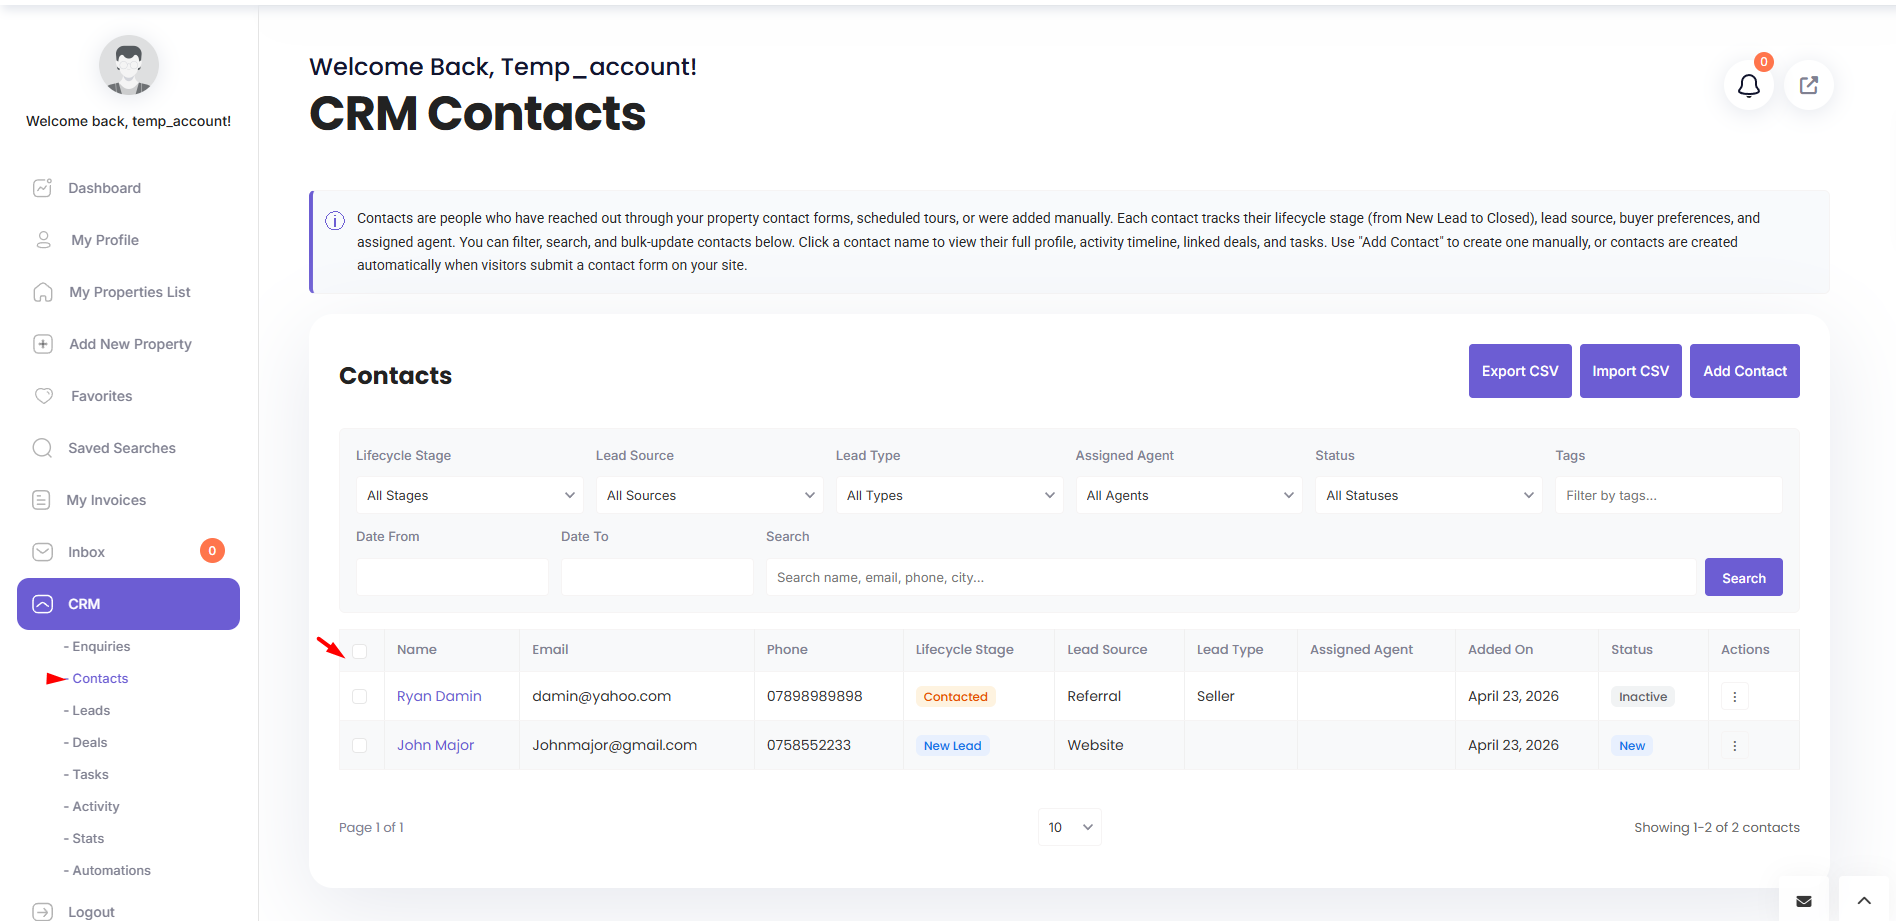
Opening the Contacts Section
From the dashboard sidebar, click CRM, then Contacts. What you see depends on your role:
- Administrators see every contact in the system.
- Agents see contacts they own or are assigned to.
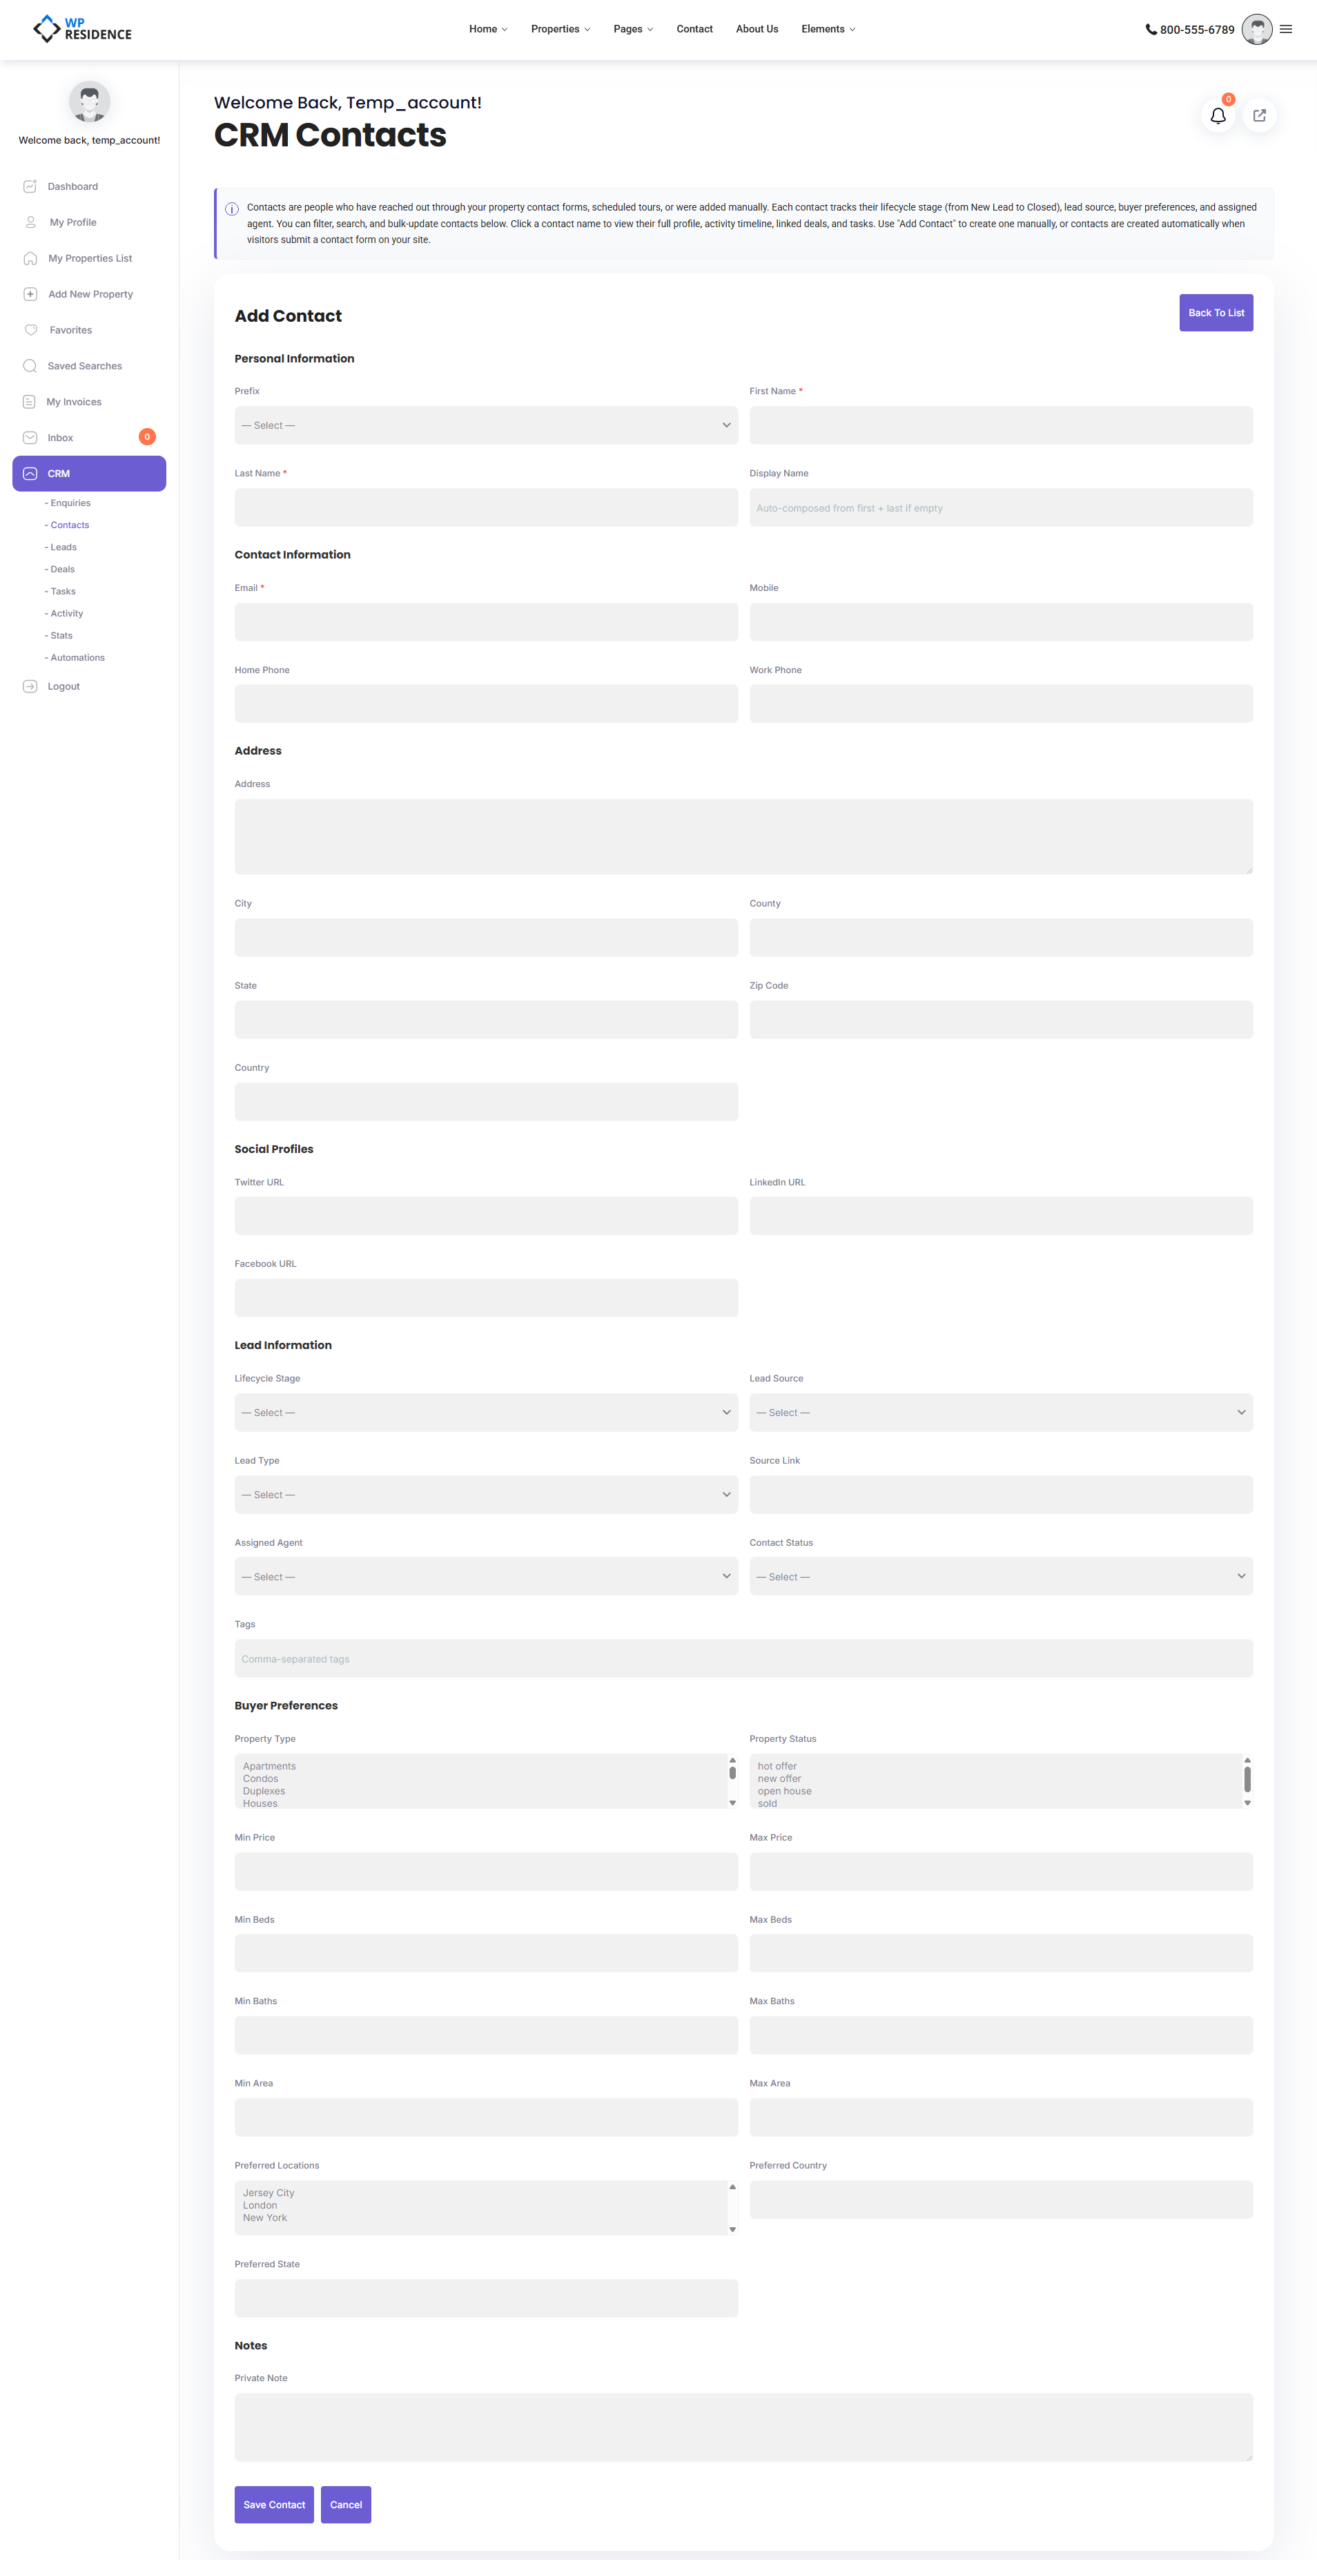
Adding a Contact
Click Add Contact at the top of the list. The form has seven sections, grouping all 31+ fields in a sensible order.
Personal Info
Prefix (Mr, Mrs, Ms, Dr, Prof), first name, last name, date of birth.
Contact Info
Email, mobile, phone, home phone. Email is the most important field because the CRM uses it to detect duplicates.
Address
Street address, city, county, state, zipcode, country.
Social Profiles
Twitter, LinkedIn, and Facebook URLs.
Lead Info
- Lifecycle stage — default values: New Lead, Contacted, Appointment Set, Active Client, Under Contract, Closed.
- Lead source — default values: Website, Referral, Social Media, Portal, Zillow, Realtor.com, Walk-in, Phone, Email, Other.
- Lead type — Buyer, Seller, Tenant, Landlord, Investor, Other.
- Status — Active, Inactive, VIP, Blocked.
- Assigned agent — which agent is responsible for this contact.
- Tags — free-text, comma-separated labels for anything your administrator has not turned into a formal field.
Buyer Preferences
Minimum/maximum price, minimum/maximum bedrooms, minimum/maximum bathrooms, minimum/maximum area, preferred locations. The CRM uses these to auto-match new listings.
Private Note
An internal note, visible only to users who can see the contact.
The Contact Detail Page
Click any contact name to open their detail page. It is the control center for that relationship.
From the detail page you can:
- See the full activity timeline — every form, note, email, call, deal move, and task completion.
- Attach notes, tasks, and deals.
- See what properties the contact has viewed.
- Send matching listings by email (if they have buyer preferences).
- Change the lifecycle stage directly.
- Reassign the contact to a different agent.
Filtering the List
The Contacts list has nine filters to narrow the database down:
- Lifecycle stage
- Lead source
- Lead type
- Assigned agent
- Status
- Tags
- Date range
- Free-text search
- Pagination controls
Lifecycle Stages Explained
Lifecycle stages describe where the contact is in their journey with you:
| Stage | Meaning |
|---|---|
| New Lead | Just entered the CRM. |
| Contacted | You have reached out at least once. |
| Appointment Set | They have agreed to meet. |
| Active Client | Working with you to buy or sell. |
| Under Contract | A deal is in progress. |
| Closed | Done — either won or lost. |
Your administrator can customize these values in CRM Settings.
Using Tags Effectively
Tags are the flexible layer on top of lifecycle stage and lead type. Use them for anything that is useful to filter on later — “VIP-referral”, “luxury”, “cash-buyer”, “weekend-viewing-only”. Tags are comma-separated, and duplicates are automatically prevented.
Duplicate Prevention
When a new contact is created (either by you or automatically by a form submission), the CRM searches by email first. If a contact with that email already exists, the new data is merged into the existing contact instead of creating a duplicate.
International Use
Names, addresses, and notes support non-Latin characters — Cyrillic, Arabic, Chinese, Greek, and other scripts are stored and searched correctly.
Where to Go Next
Once a contact is in your database and actively working with you, create a Lead to capture their search criteria, or a Deal if they are already negotiating on a property. See the Leads and Deals help articles for those workflows.
To push contacts to HubSpot automatically, read the HubSpot CRM integration guide.