How to Create a Newsletter Form With Mailchimp
This help article explains how to create a newsletter subscription form using the MC4WP: Mailchimp for WordPress plugin.
Important: Mailchimp now uses the term Audience instead of the older term List. Some plugin screens or older screenshots may still use the word List, but it refers to the Mailchimp Audience where subscribers are saved.
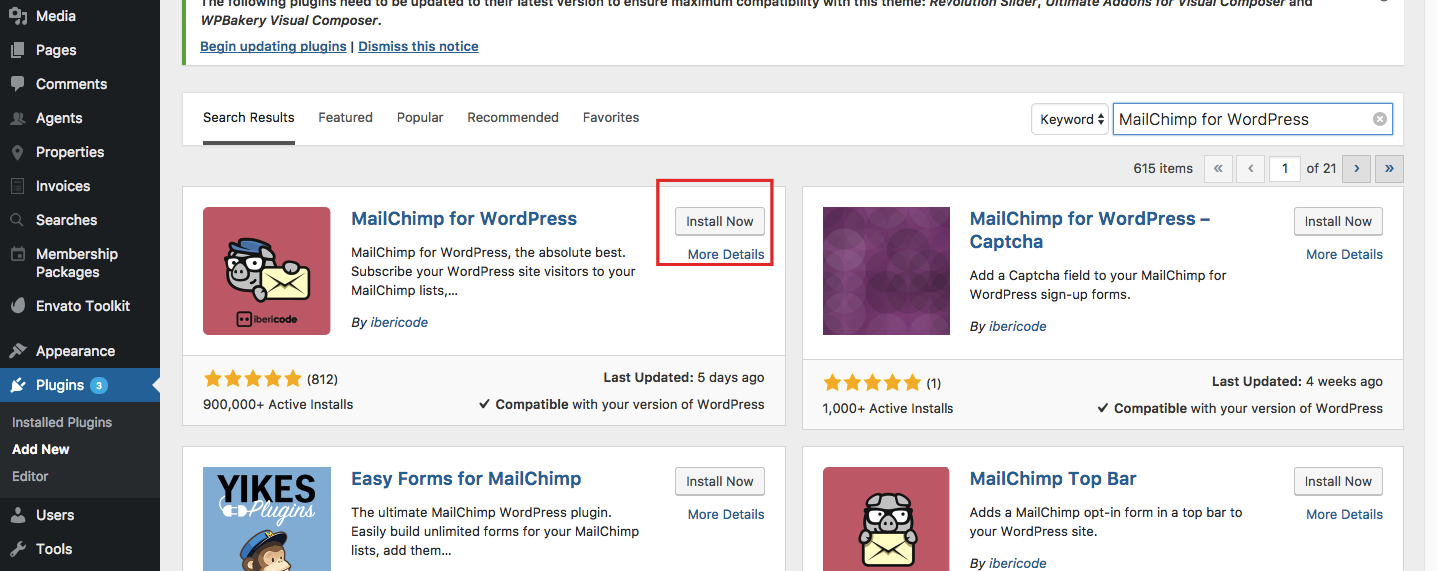
Step 1: Install the Mailchimp for WordPress Plugin
In your WordPress admin panel, go to Plugins > Add New.
Search for MC4WP: Mailchimp for WordPress, then install and activate the plugin.
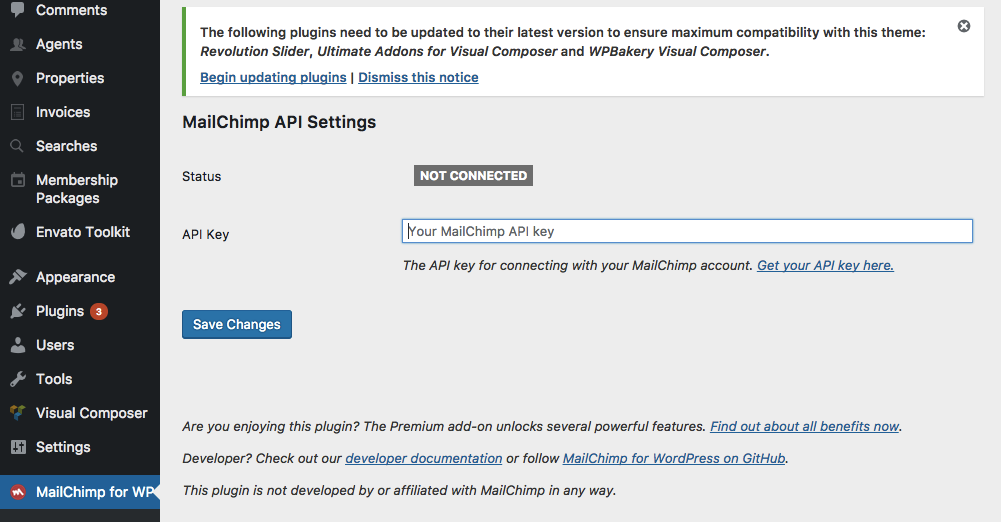
Step 2: Connect the Plugin to Your Mailchimp Account
Log in to your Mailchimp account:
https://login.mailchimp.com/
In Mailchimp, generate or copy your API key. Then go back to your WordPress admin panel and open MC4WP > Mailchimp.
Paste the API key in the plugin settings and save the changes.
Step 3: Create or Select Your Mailchimp Audience
In your Mailchimp account, create or select the Audience where you want to save newsletter subscribers.
Older documentation and some plugin areas may refer to this as a List. In Mailchimp, this is now called an Audience.
https://login.mailchimp.com/

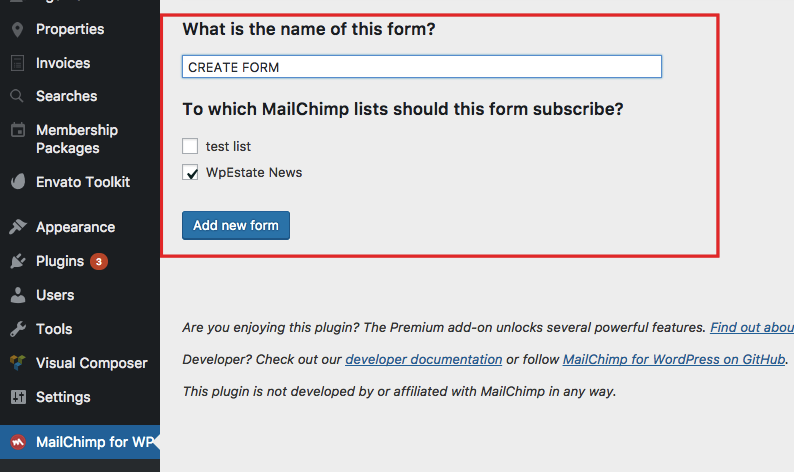
Step 4: Create the Newsletter Form
In your WordPress admin panel, go to MC4WP > Forms.
Create a new form or edit the existing form. Select the Mailchimp Audience/List where subscribers should be added.
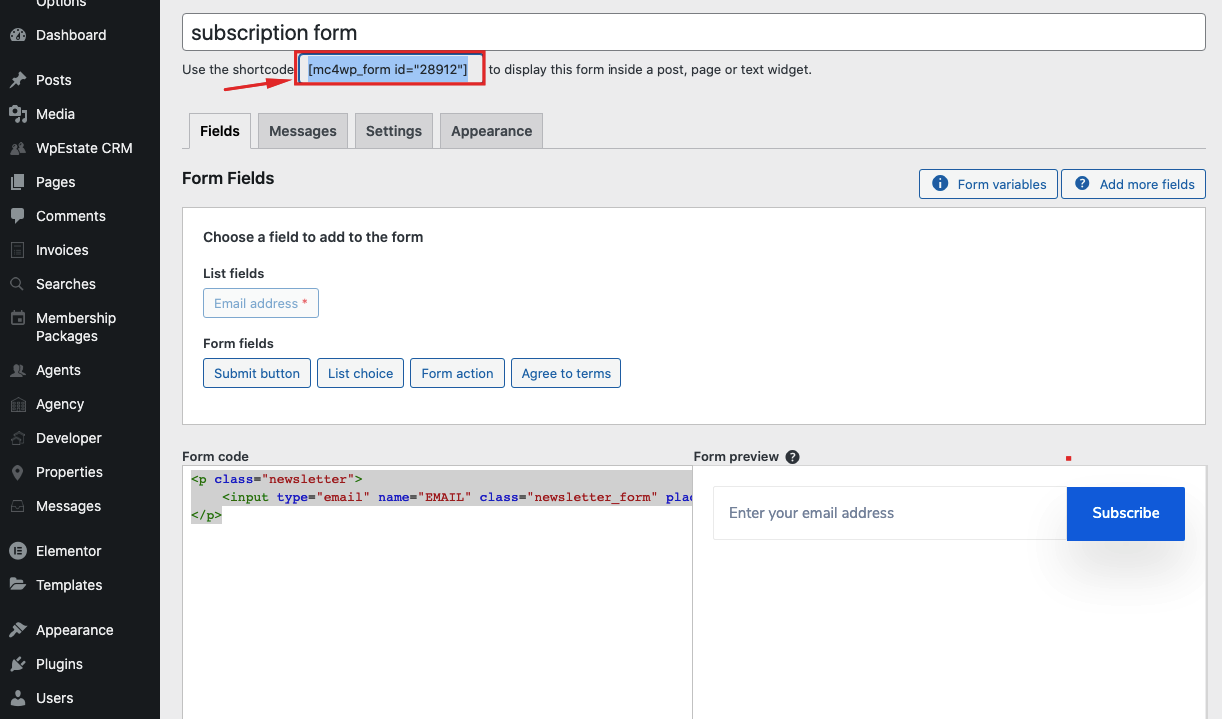
Step 5: Add the Form HTML
You can edit the form markup to match the newsletter form design used in the demo.

Use this form HTML inside the MC4WP form editor:
<p class="newsletter">
  <input class="newsletter_form" name="EMAIL" required type="email" placeholder="Enter your email address" />
  <input class="newsletter_input" type="submit" value="Subscribe" />
</p>
You can change the placeholder text or the submit button text if needed.
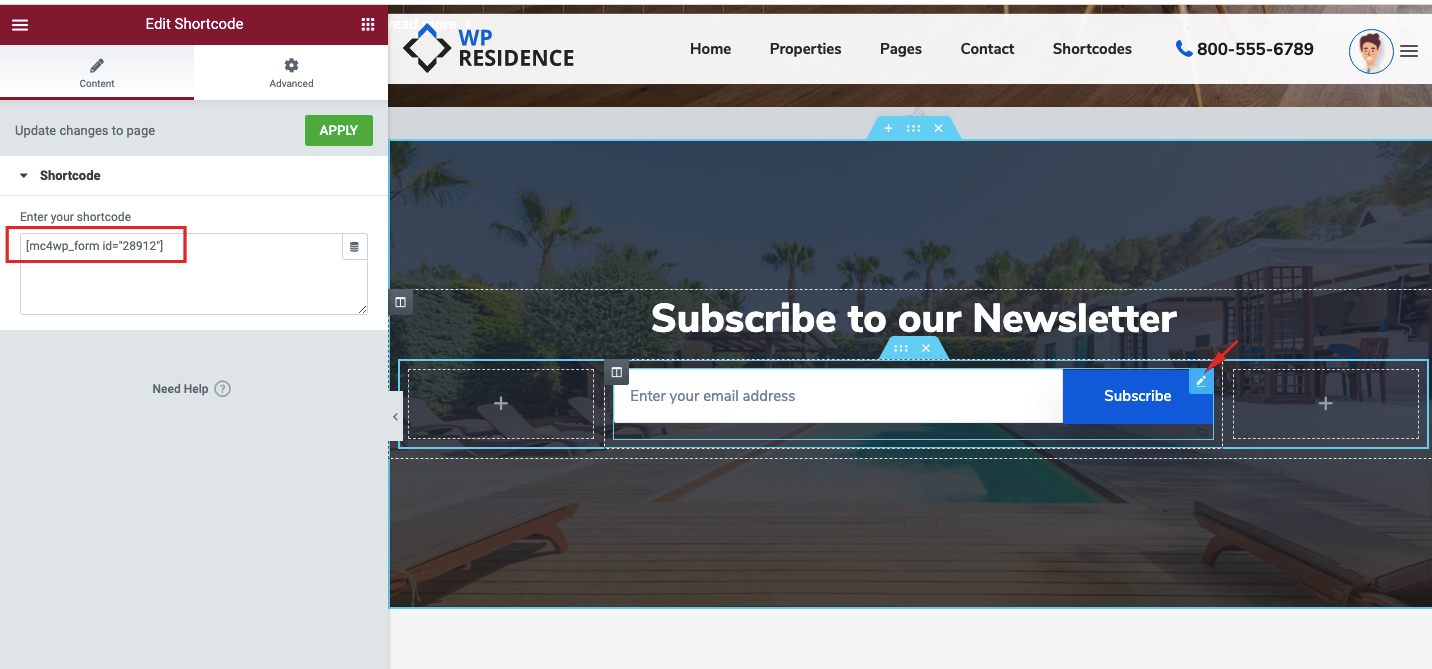
Step 6: Copy the Form Shortcode
After saving the form, copy the shortcode generated by the plugin.
The shortcode usually looks like this:
[mc4wp_form id="123"]The ID number will be different on your website.
Step 7: Add the Shortcode to the Demo Section
Replace the existing demo newsletter shortcode with your own Mailchimp form shortcode.
You can also use the shortcode in any other page section, Elementor widget, text block, shortcode widget, or content area where you want the newsletter form to appear.
Important Notes
After creating the form, test it with a real email address to make sure subscribers are added correctly to your Mailchimp Audience.
If the form does not save subscribers, check the API key, the selected Audience/List, and the MC4WP plugin messages or logs.
If you use a cache plugin, clear the website cache after replacing the shortcode or editing the form design.
Related Help
Help article about how to install the theme
Help article about how to import demo content
Help article about how to edit demo content homepage