If you use this option, the theme default contact will be replaced with a contact form 7 contact form – but the emails will still be sent to agent email address.
Install Contact Form 7
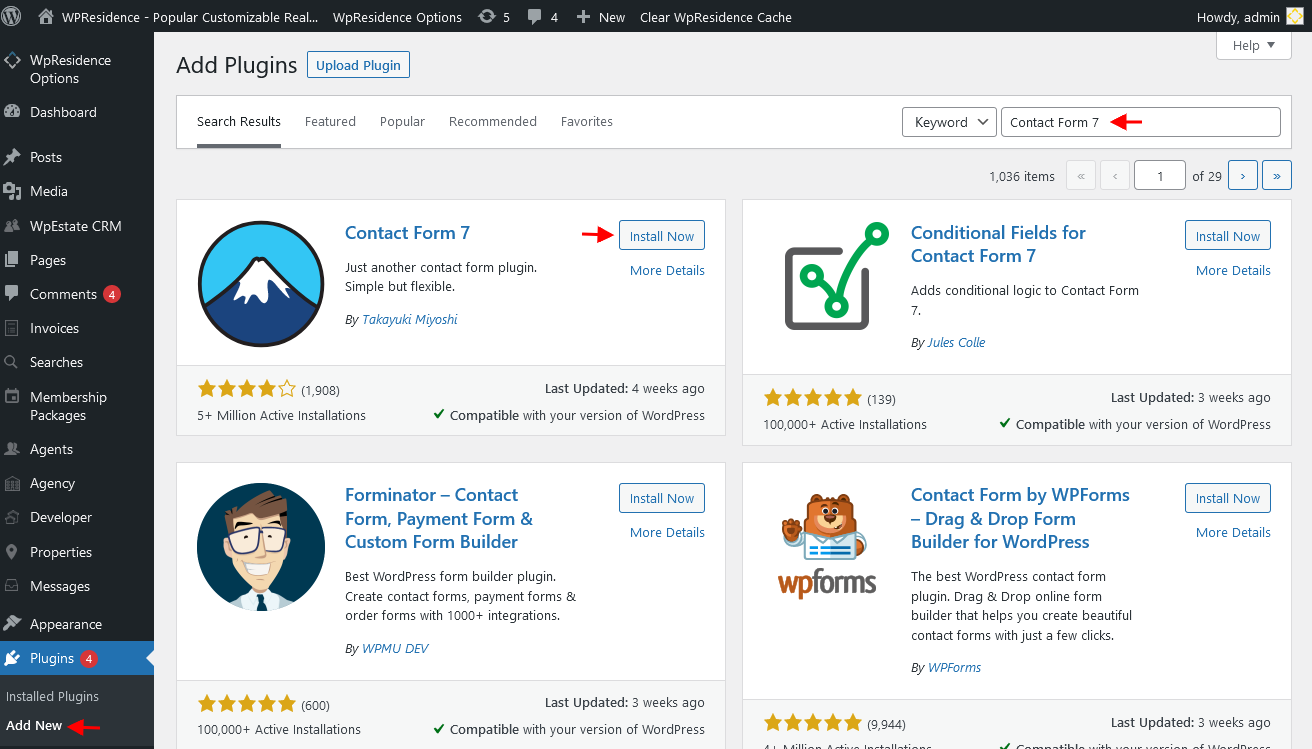
Step1: First, install the Contact 7 plugin – https://wordpress.org/plugins/contact-form-7/
Step2: Go to Admin – Plugins – look for the plugin, install and activate.
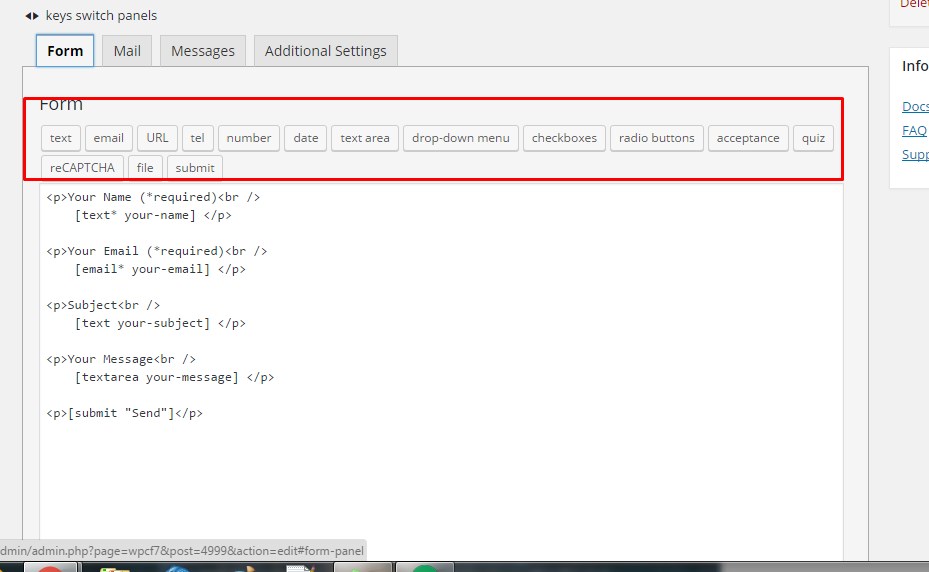
Step3: Create a contact form and then set-up the contact form you wish and the fields you wish in the plugin settings. You have a lot of options.
Help article for contact 7 setup
Step4: Make sure you add this id to the first field id:agent_contact_name – as in below example, for the mobile footer agent bar to link the envelope icon to the agent form
[text* your-name id:agent_contact_name]
Setup Contact Form 7 in the theme
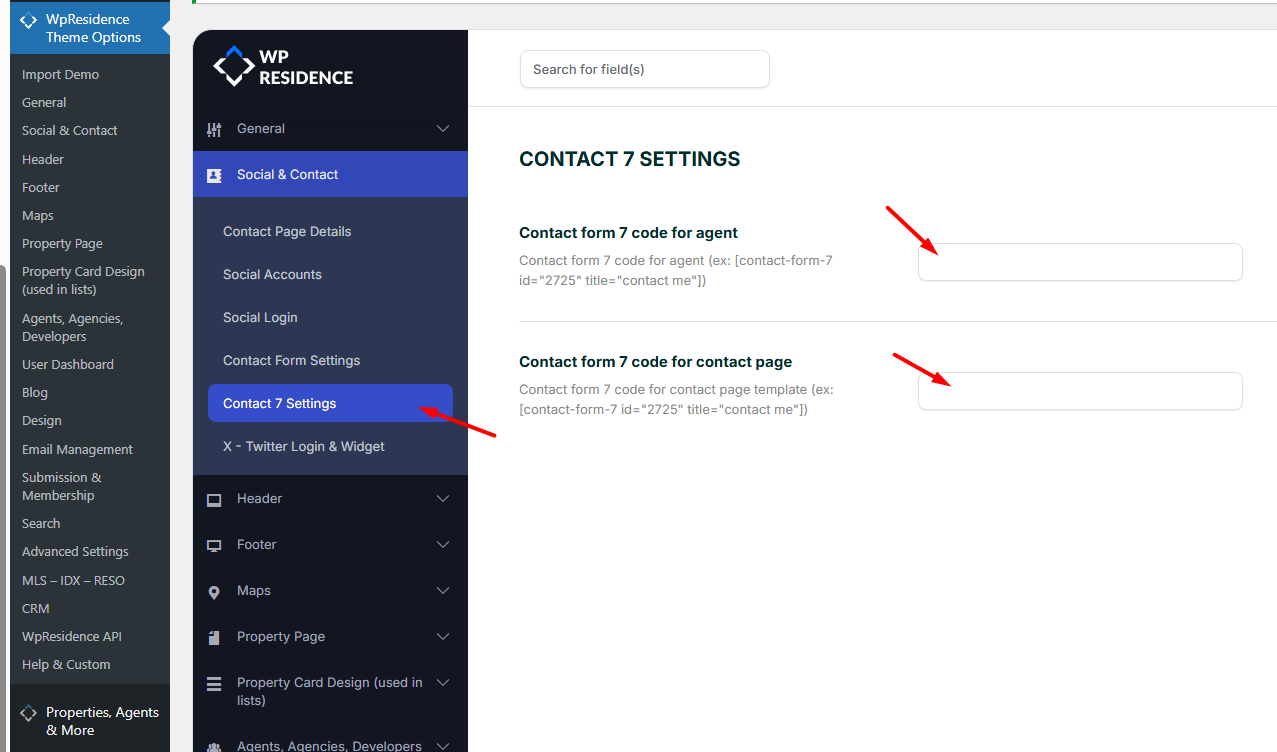
Copy the Contact 7 contact form shortcode in Admin > Theme Options > Social & Contact > Contact 7 Settings:
Note:
Make sure the property has an agent/agency/developer attached
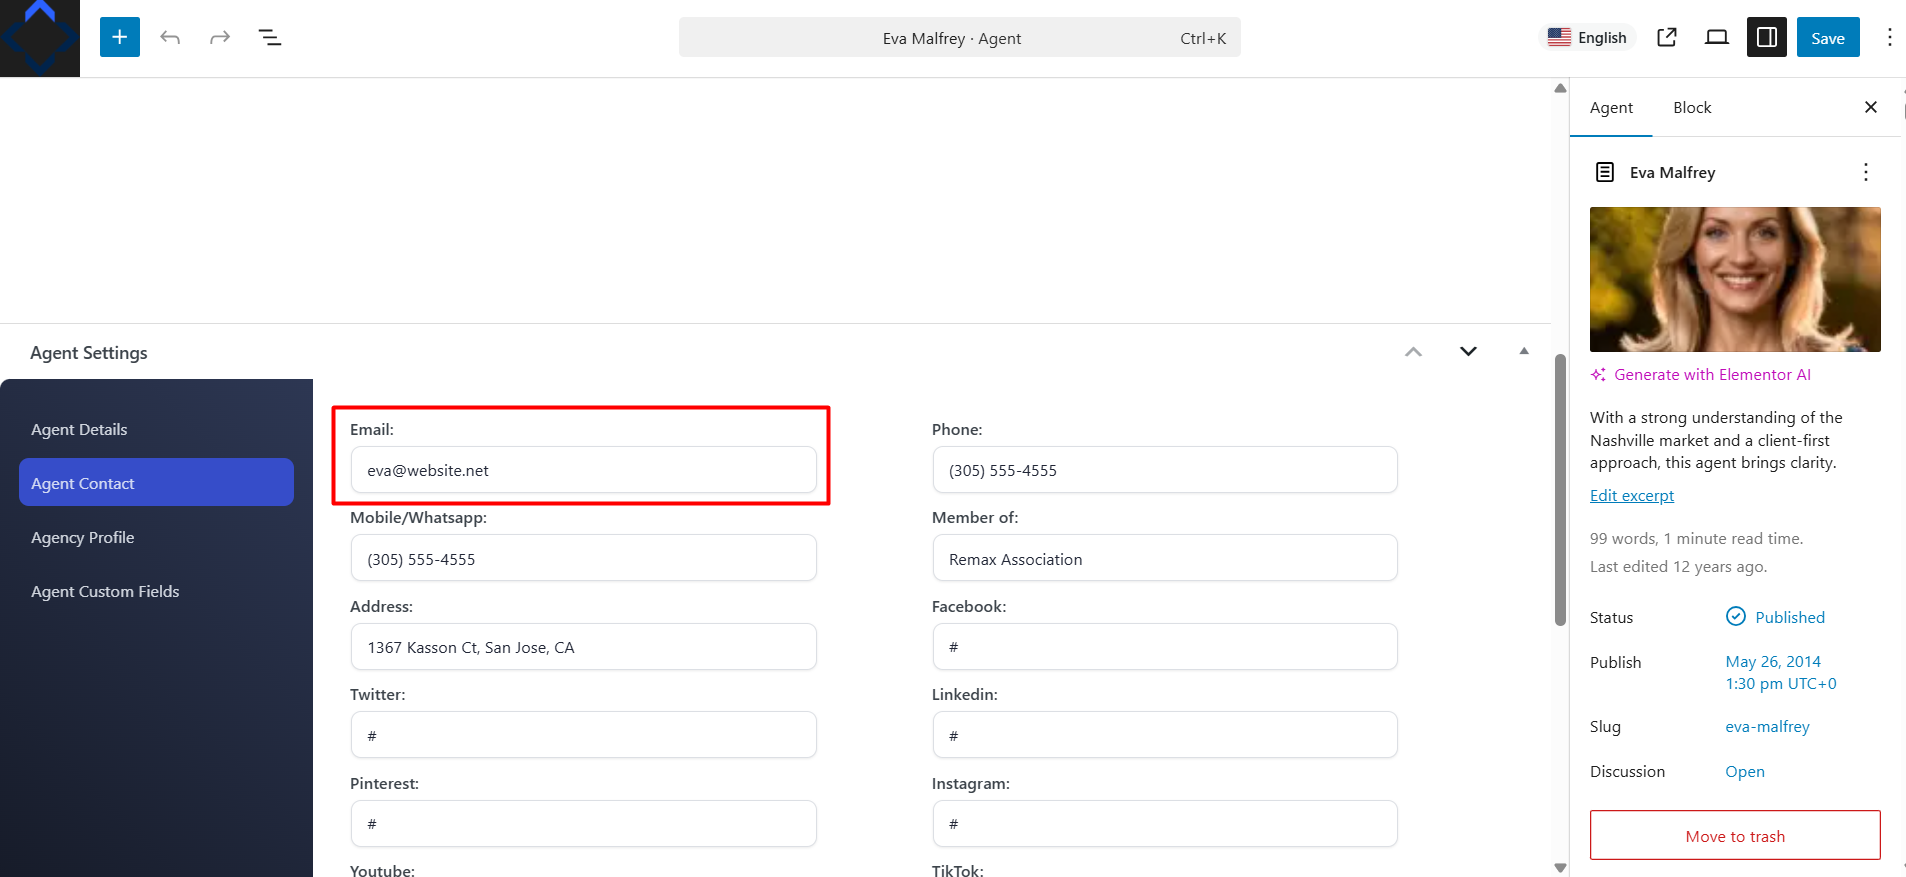
Go to Properties > Edit Property > Property Details > Agent and check there is a profile attached

Make sure the agent has an email set for his profile. Check in Agents > Edit Agent > Agent Settings > Email
Contact Form 7 Functionality
Emails are sent to the email address of the agent, agency, or developer assigned to the property.
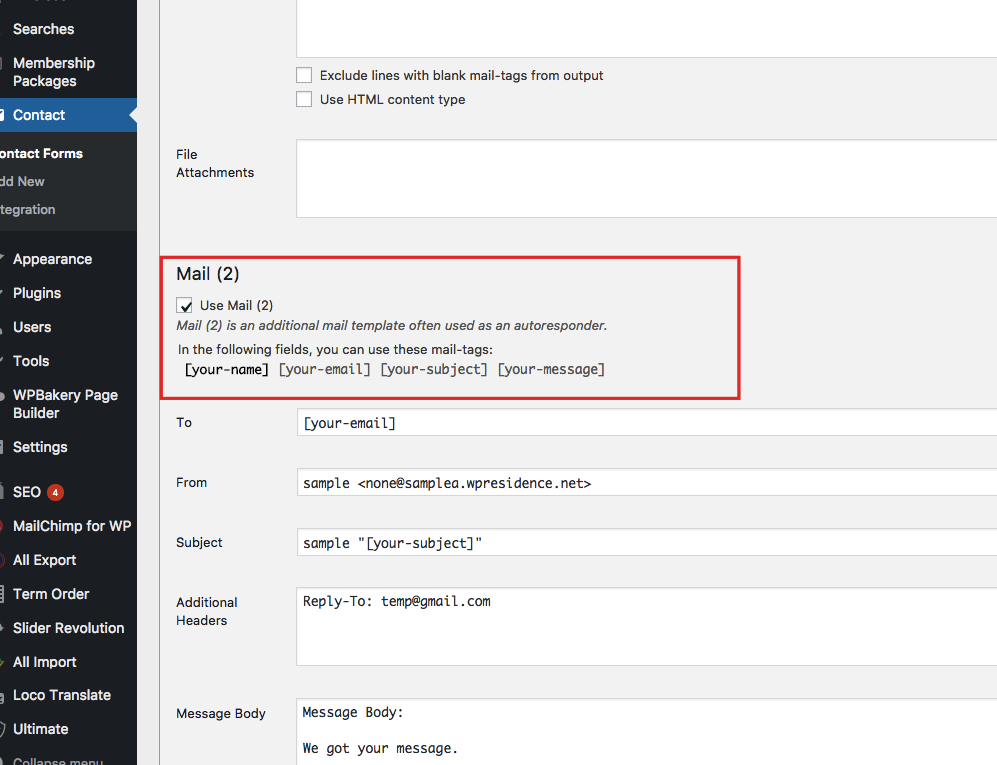
Contact 7 plugins can support these extra features:
Reply to email is the email of the user sending the form:
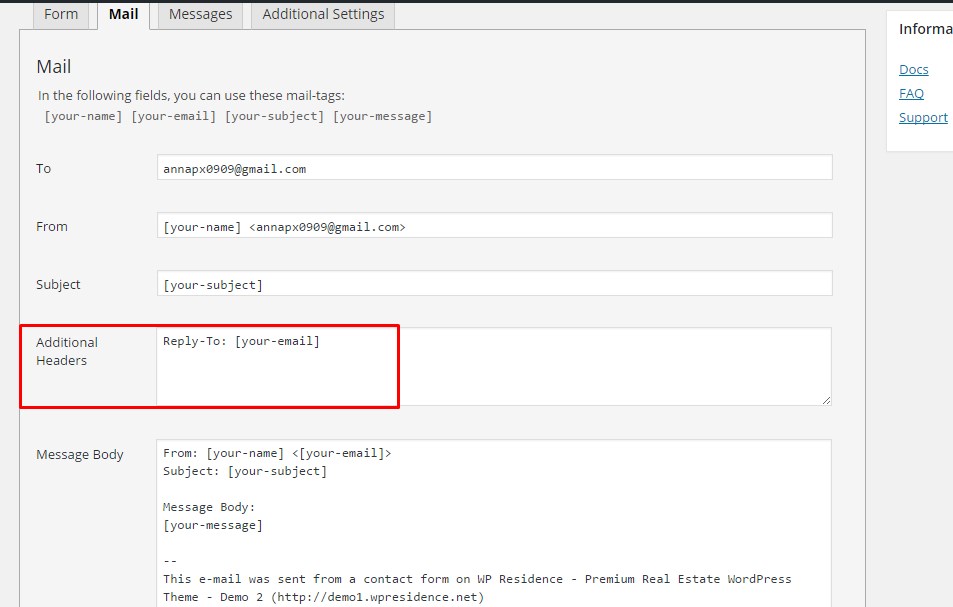
The sender email address is set in the contact form
You can add more fields
You can add re-captcha**** NOTE 3
Email is sent to the agent email address
Email contact includes automatically the page from where the email was sent
You can add an auto-responder
Contact 7 plugin forms cannot support these options:
- Contact 7 plugin contact forms DO NOT replace the contact form in the theme footer.
- Contact form 7 cannot sync with Hubspot CRM as the theme default forms.
- ReCaptcha option from contact form doesn’t work if theme ReCaptcha option is enabled: https://help.wpresidence.net/article/recaptcha-settings-in-theme-options/ as ReCaptcha codes can be used only once.
How to style Contact Form 7
Styling of the forms is different as the CSS set by plugin developers cannot be overwritten completely. Here is a help to make the form as closest to our design as possible
To get contact form design as displayed in this screenshot
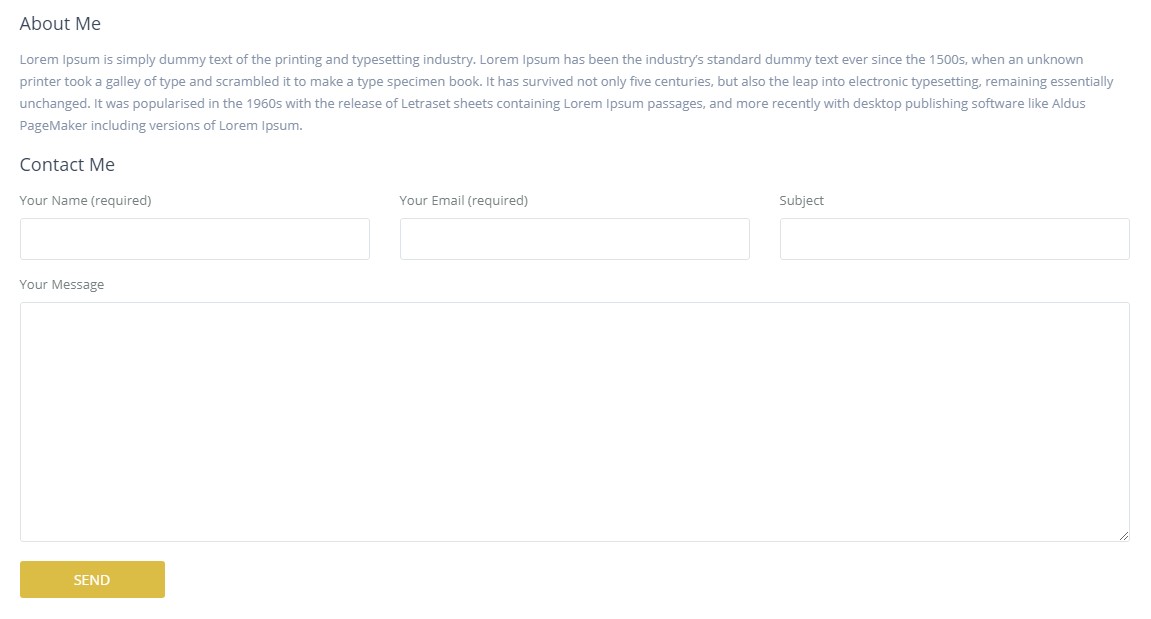
Add this code in Form setup – Contact Form 7 – Form Example

Using this classes will allow the theme style.css to apply for the contact form elements and style them the same as the theme contact form that is included by default in the theme setup.
NOTES
You will need to add this custom css too for the form margins to apply:
Help article for how to add custom CSS
#content_container_cf7 {
    margin: 0px -15px;
}

.wpcf7 label{
	margin-bottom: 3px;
	color: #8593a9;
}

.agent_contanct_form_sidebar .wpcf7-form-control {
    border: 0px solid #dde4e9;
}

.wpcf7-form-control.wpcf7-acceptance{
	background-color:transparent;
}


.wpcf7-form-control-wrap input[type="checkbox"] {
    width: 15px;
    height: 15PX;
    margin-top: 3px;
	margin-left:-5px
}

.wpcf7-form-control{
	 border: 0px solid #f0f0f0;
}

.wpcf7-form-control wpcf7-acceptance{
	 border: 0px solid #f0f0f0;
}
Contact form 7 + AGILE CRM
These 2 plugins may be used to connect Contact form 7 to CRM. Both are 3rd party plugins.

How to disable the Contact Form Function
To disable Contact form 7 function that sends property contact form to property owner email address you must remove this code
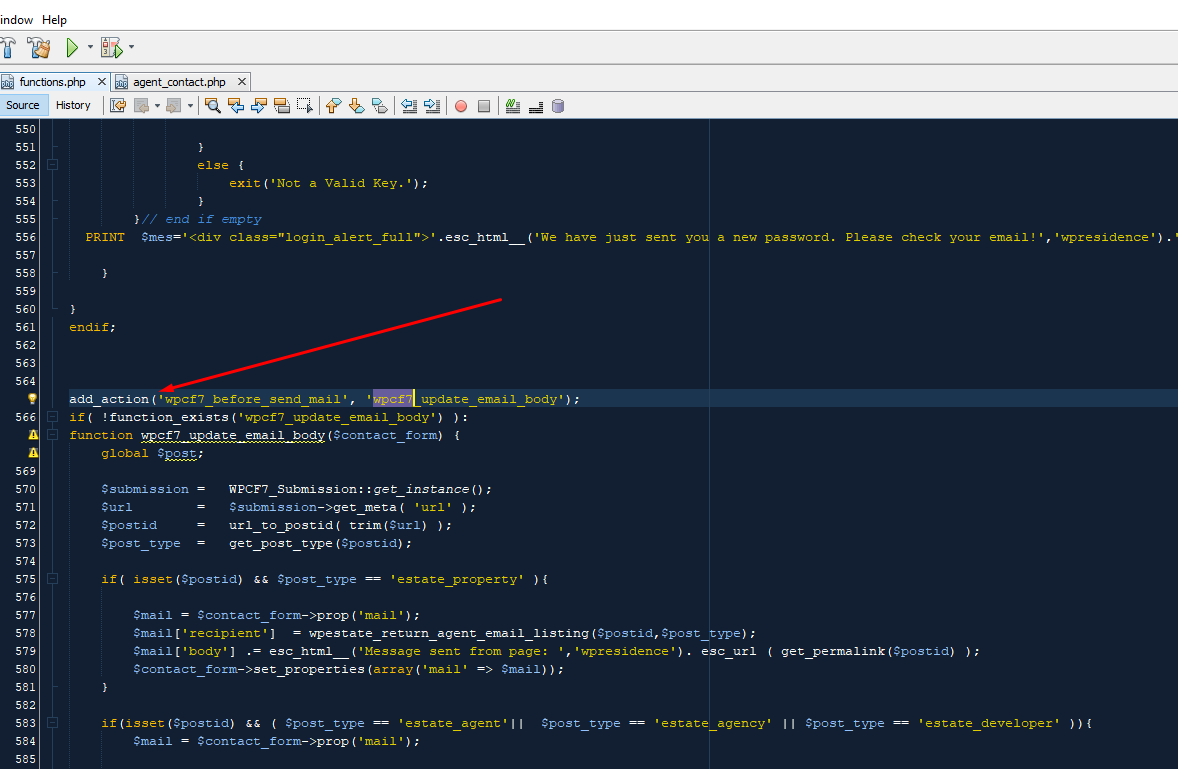
You have to remove the full line from wpresidence/functions.php